
Manage contacts
The ‘Manage Contacts’ module is the central hub where you can create and manage all your contacts (individuals and organisations), groups and vehicles.
To open it:
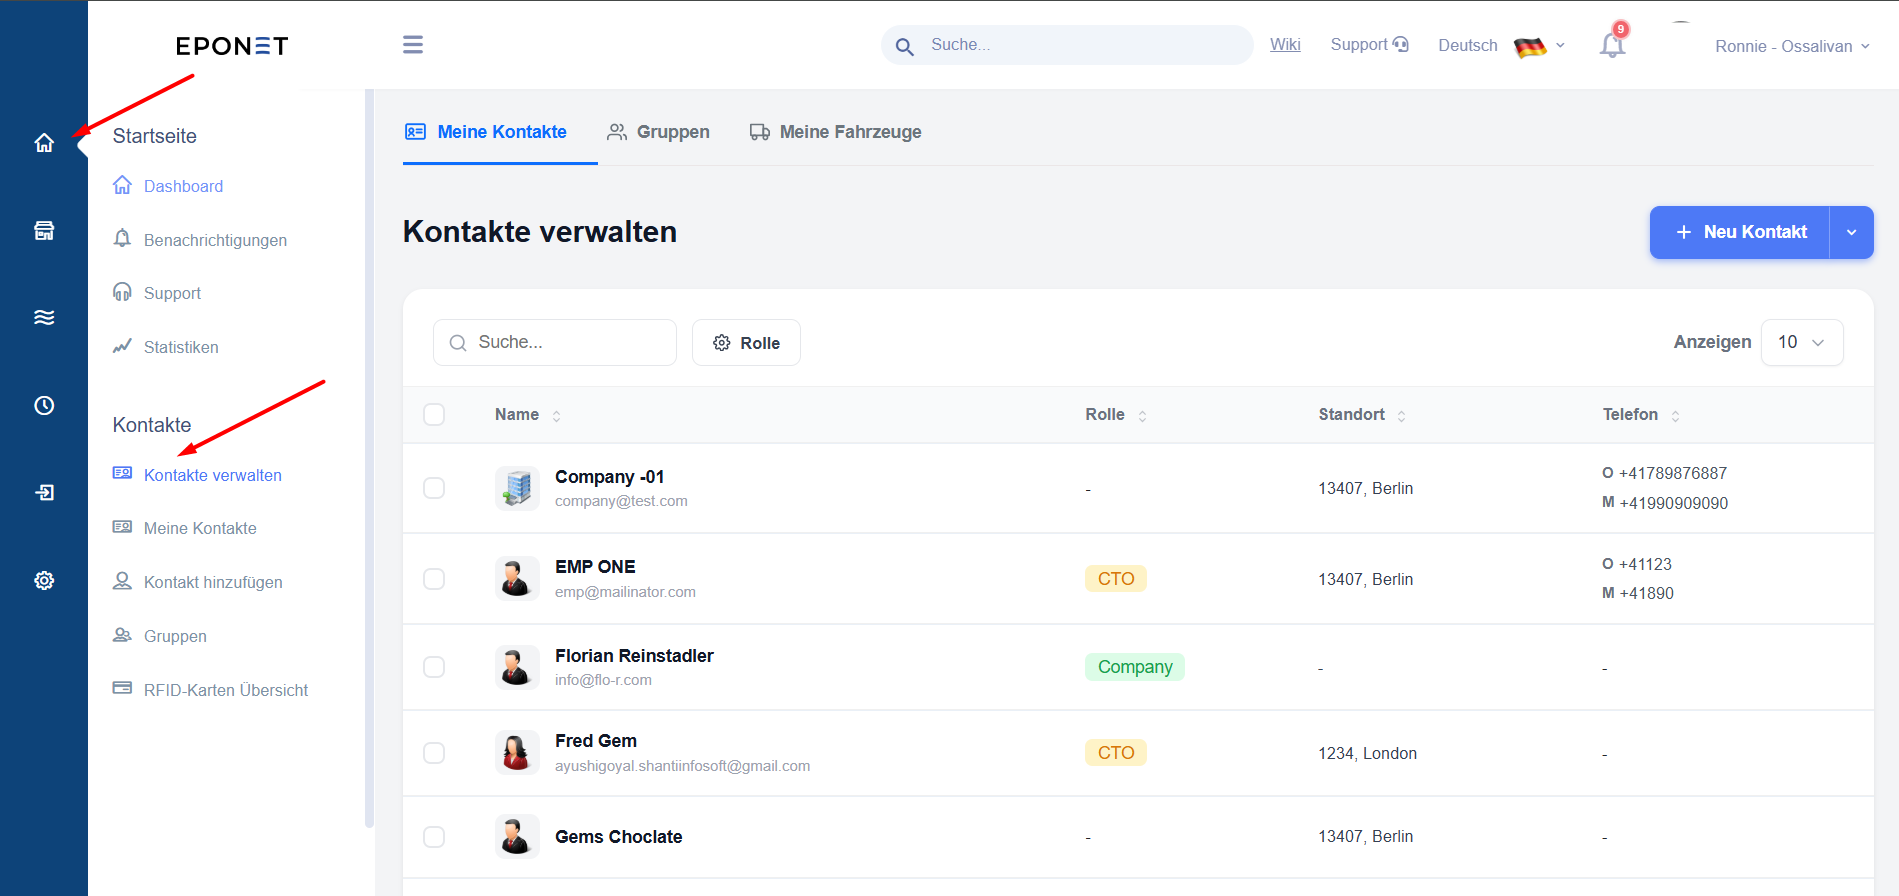
1. Create a new contact
- Click the blue ‘+ New Contact’ button in the top right-hand corner.
- Select ‘New Contact’ from the small drop-down menu.
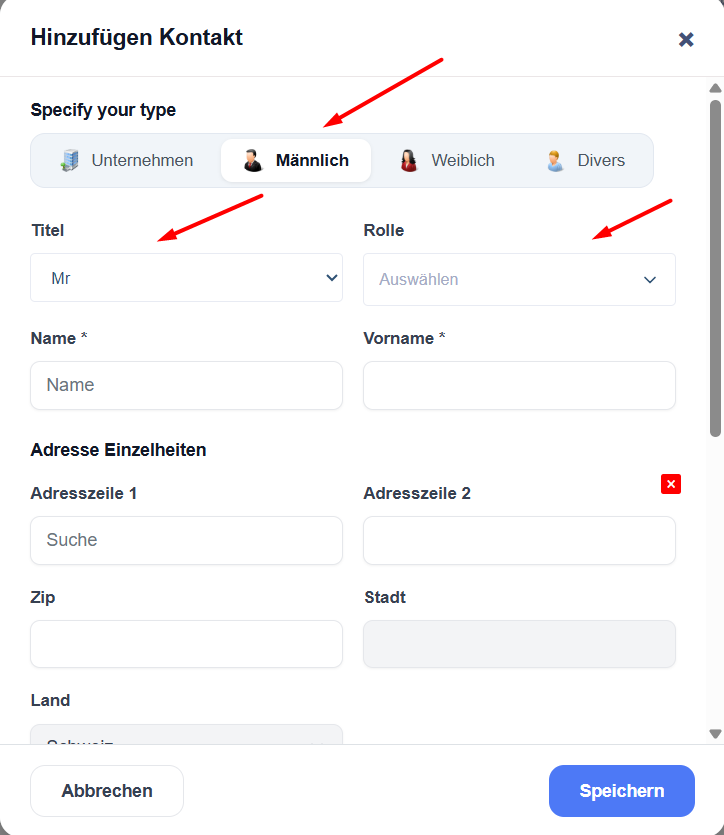
- A pop-up window titled ‘Add contact’ will open.
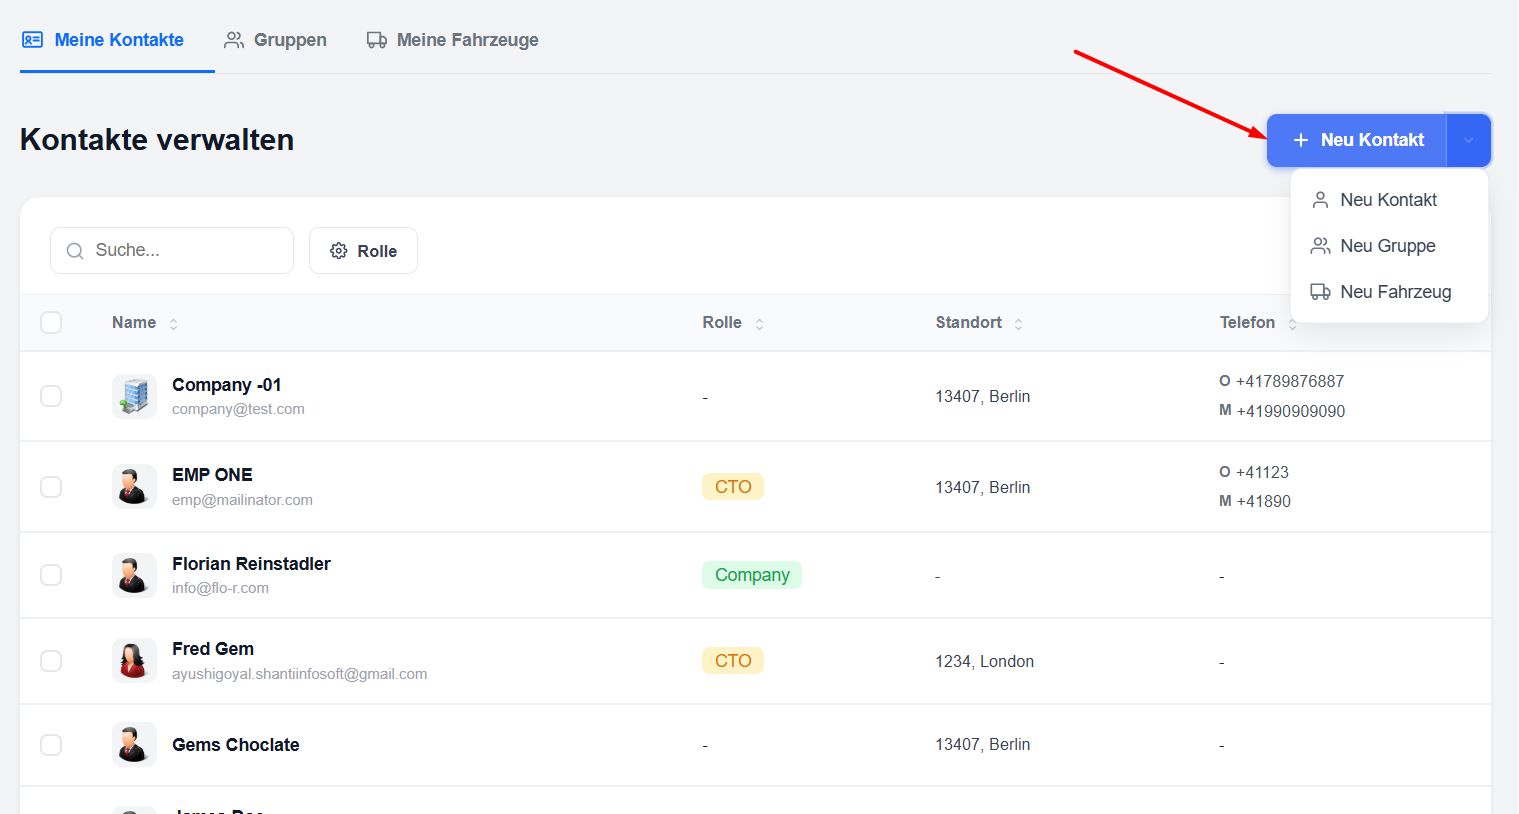
Select the contact type
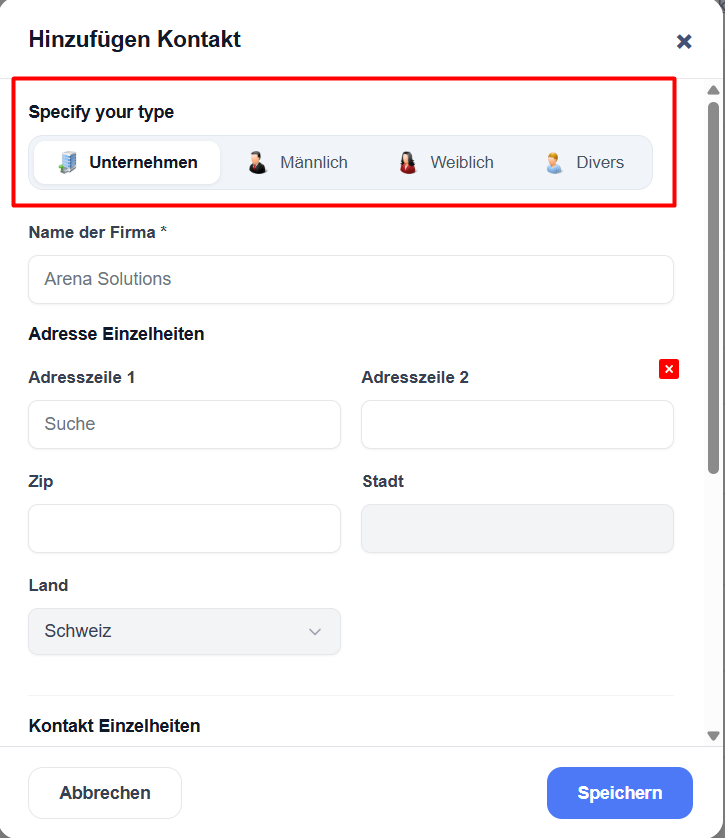
At the top of the pop-up window, you must first select the contact type:
- Company
- Male
- Female
- Other
The form fields will change slightly depending on the type selected.
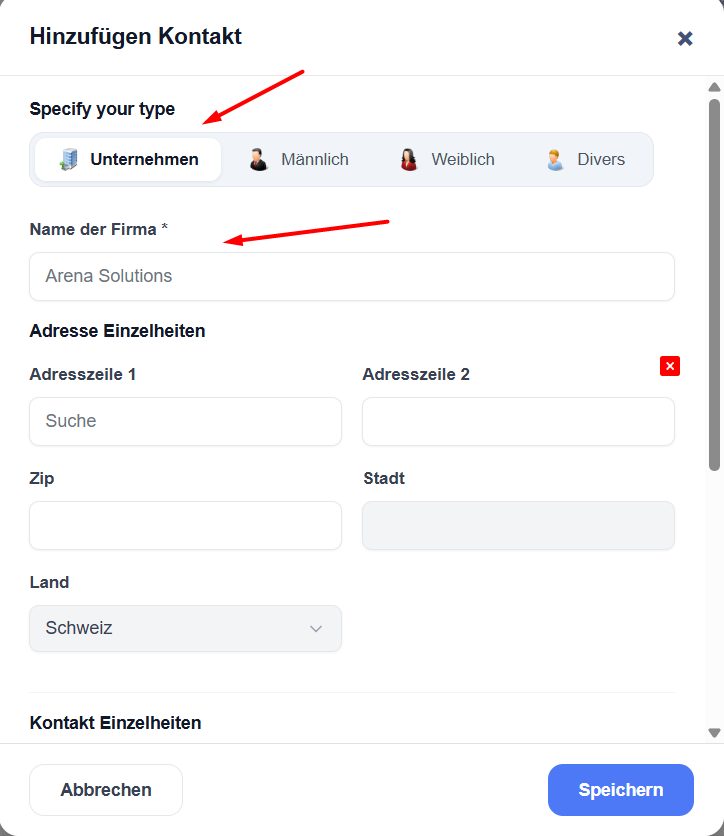
Enter the details
If you select ‘Company’:
- Company name * (Company name – compulsory field)
- Address line 1 and Address line 2
- Postcode
- Town
- Country
- Telephone
- Website
- Skype
- Mobile
If you select ‘Male / Female / Other’:
- Title (e.g. Mr, Mrs, Dr)
- Role (e.g. CTO)
- Surname * (Surname – compulsory field)
- First name * (First name – required field)
- Address line 1 and Address line 2
- Postcode
- Town
- Country
- Telephone
- Mobile
- Website
- Skype
You can also add additional custom fields by clicking on ‘+ Add new field’.
Once all fields have been filled in, click on ‘Save’.
The new contact will be created and will appear immediately in the contact list.
Share contact
- Go to ‘Contacts’ → ‘Manage contacts’ (My contacts).
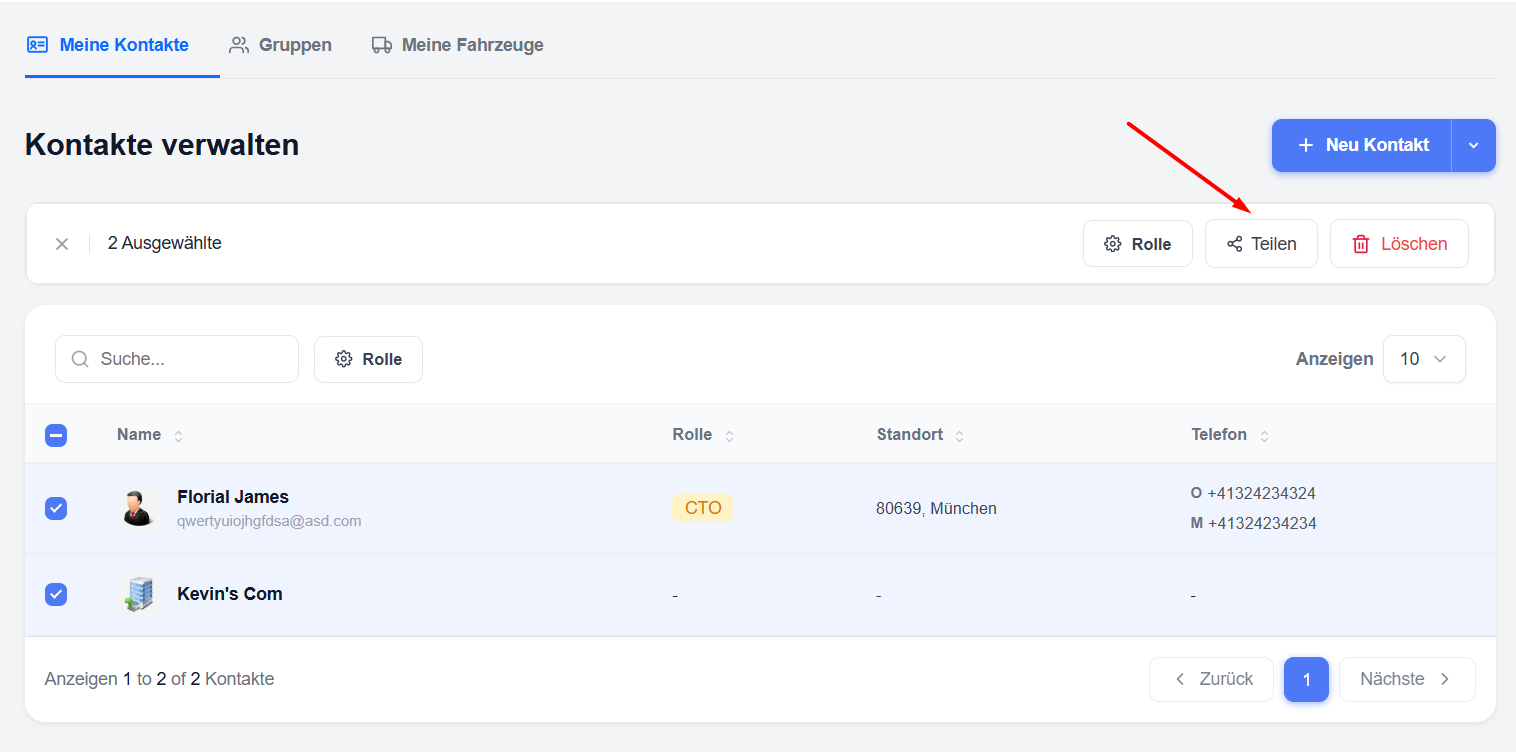
- Select one or more contacts by ticking the box on the left-hand side.
- Click the ‘Share’ button at the top.
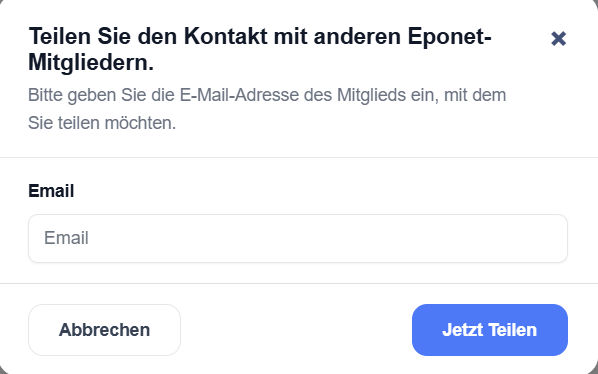
- A pop-up window will open: ‘Share the contact with other Eponet members’.
- Enter the email address of the Eponet member with whom you wish to share the contact.
- Click on ‘Share now’.
The selected contacts will now be sent as a sharing request.
What the other person sees
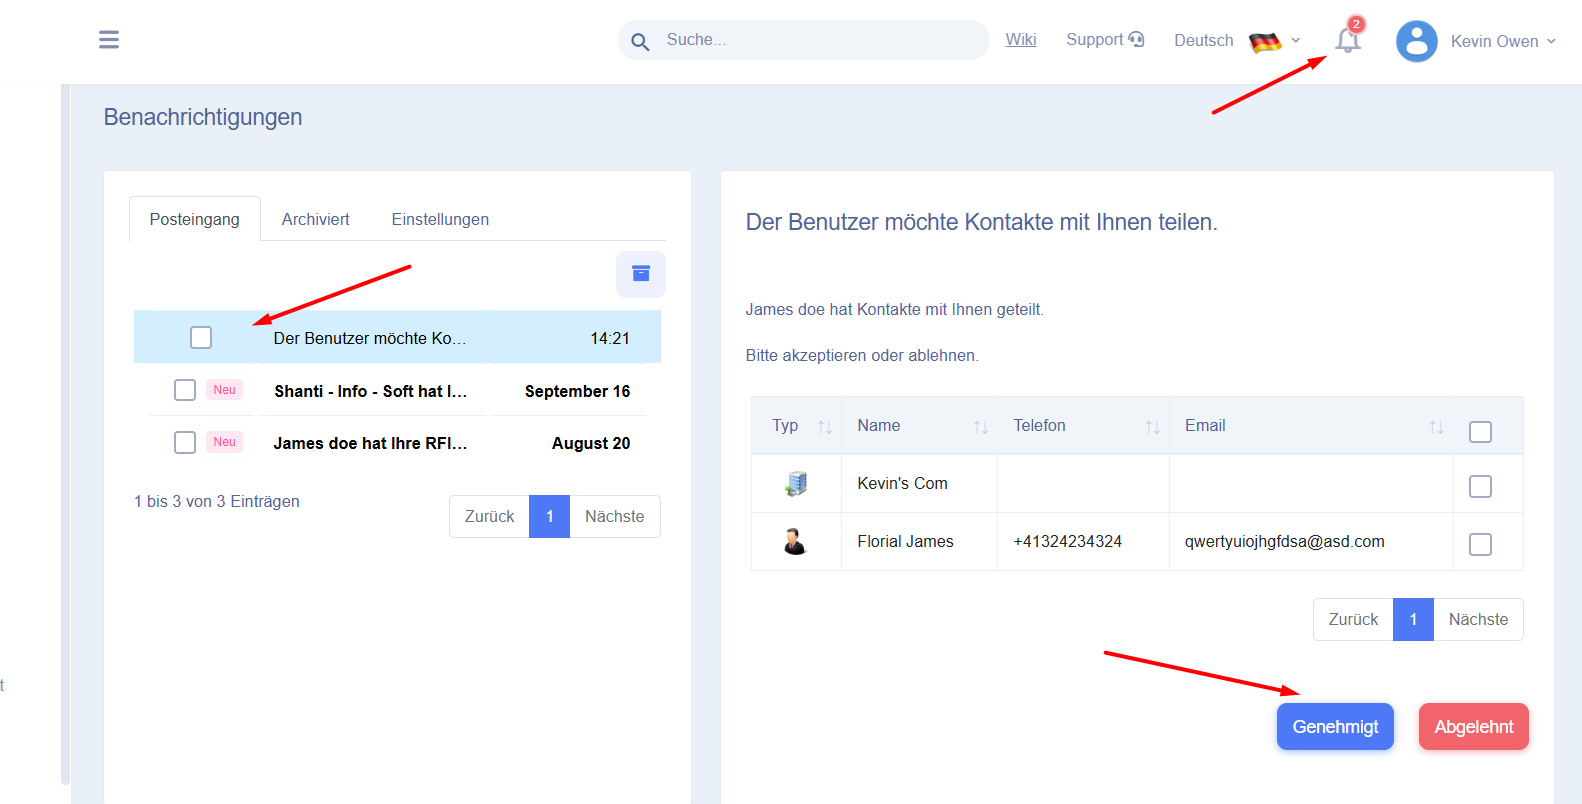
The recipient receives a notification (bell icon in the top right-hand corner).
- They open ‘Notifications’.
- There, they will see a message such as: ‘The
user would like to share contacts with you.’ - The list of shared contacts is displayed.
- They can choose:
- Approved → Accept the shared contacts
- Decline → Decline the shared contacts
Once the request has been accepted
2. Edit or update a contact
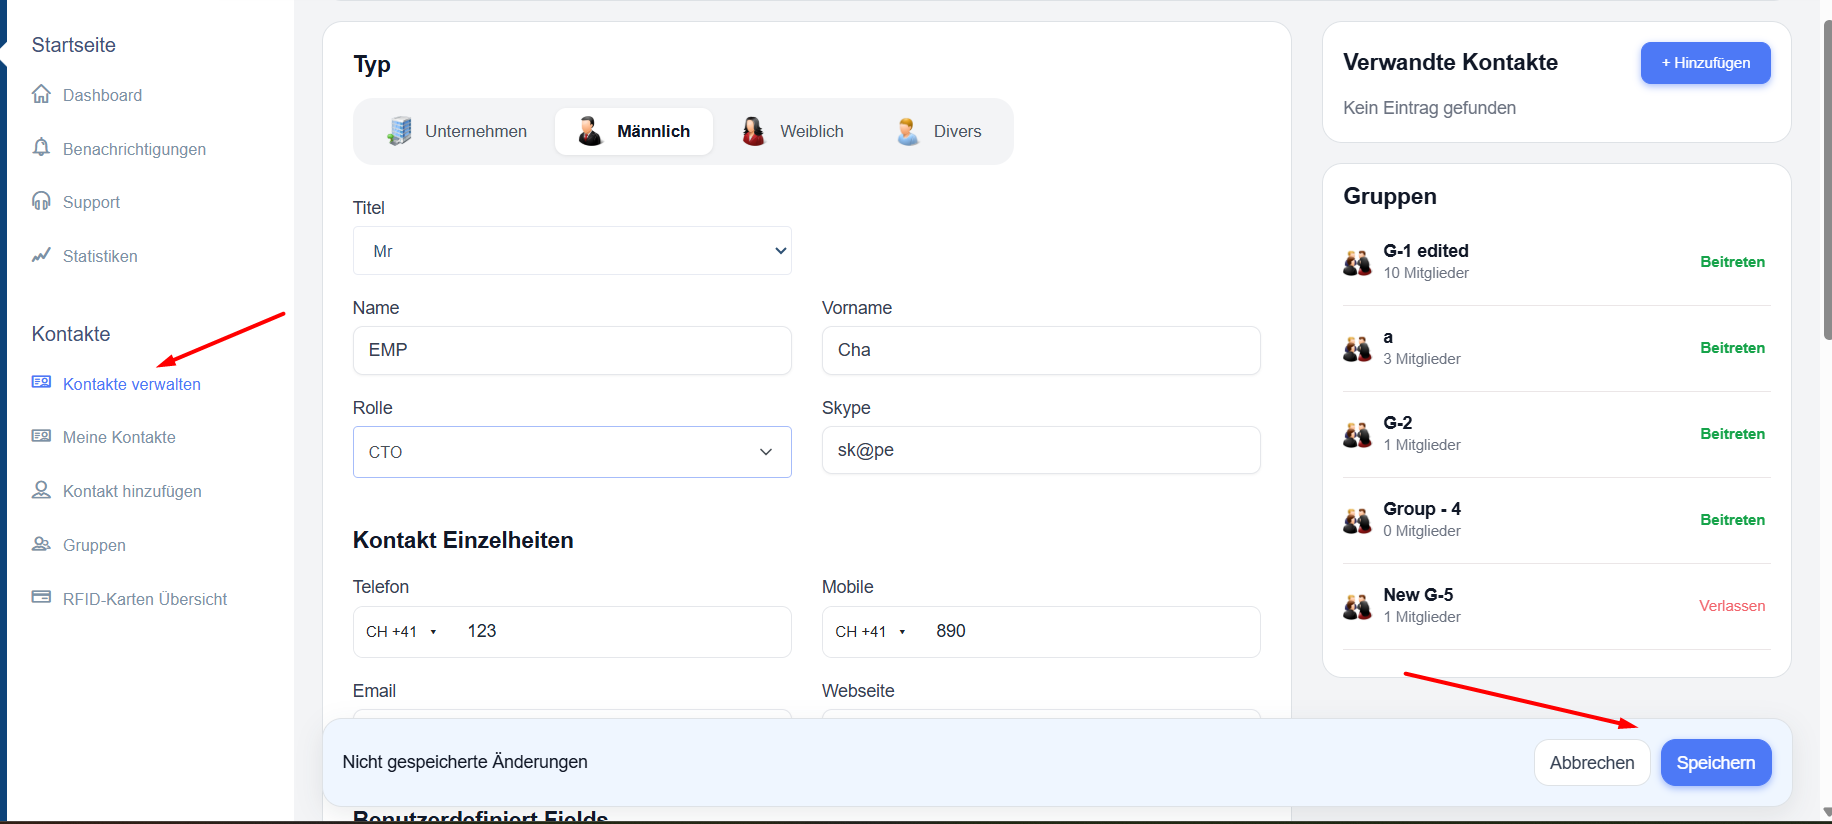
- In the contact list, click on the name of the contact you wish to edit.
- The page containing the full contact details will open.
- Change the relevant information (name, telephone number, email address, role, etc.).
- Two buttons will appear at the bottom of the page: ‘Save’ and ‘Cancel’.
- Click ‘Save’ to save your changes.
3. Additional details
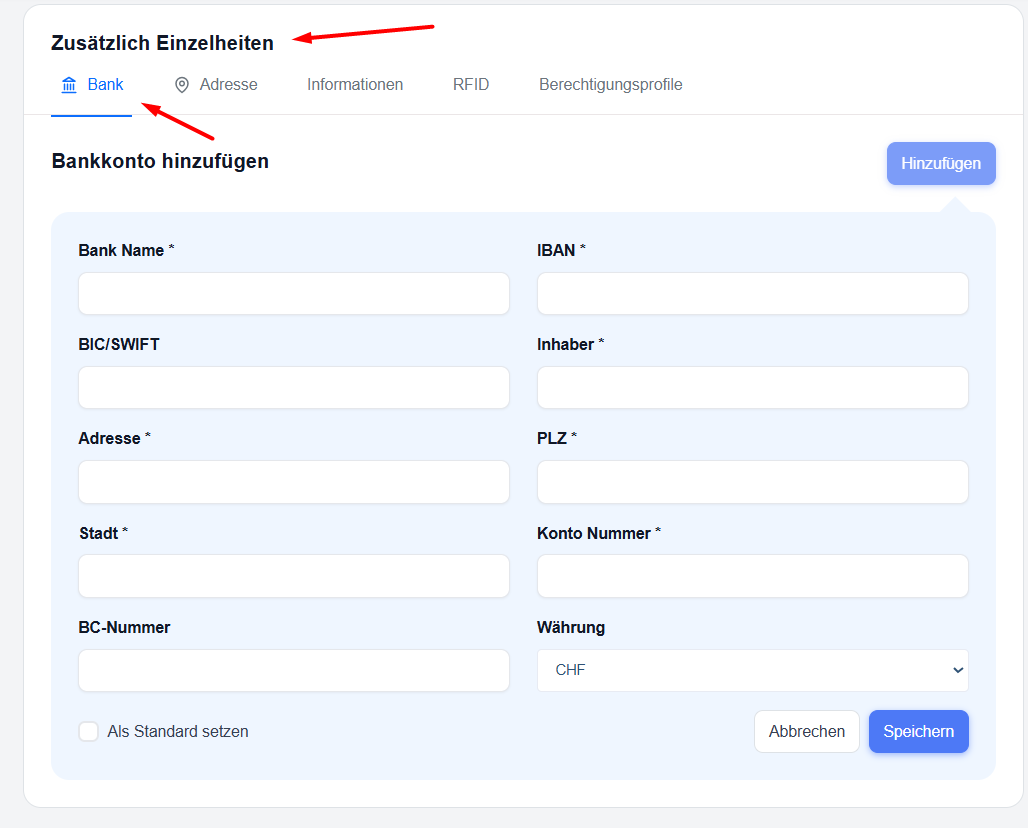
At the bottom of the contact details page, you’ll find five additional tabs. You can use these to add further information about the contact.
Bank
Here you can add one or more bank accounts for the contact and set one of them as the default account.
- Click the ‘Add’ button.
- Enter the bank details:
- Bank name *
- IBAN *
- BIC/SWIFT
- Account holder * (account holder)
- Address *
- Postcode *
- Town *
- Account number *
- BC number
- Currency (default is CHF)
- (Optional) Tick the ‘Set as default’ box if you want this to be your default bank account.
- Click ‘Save’.
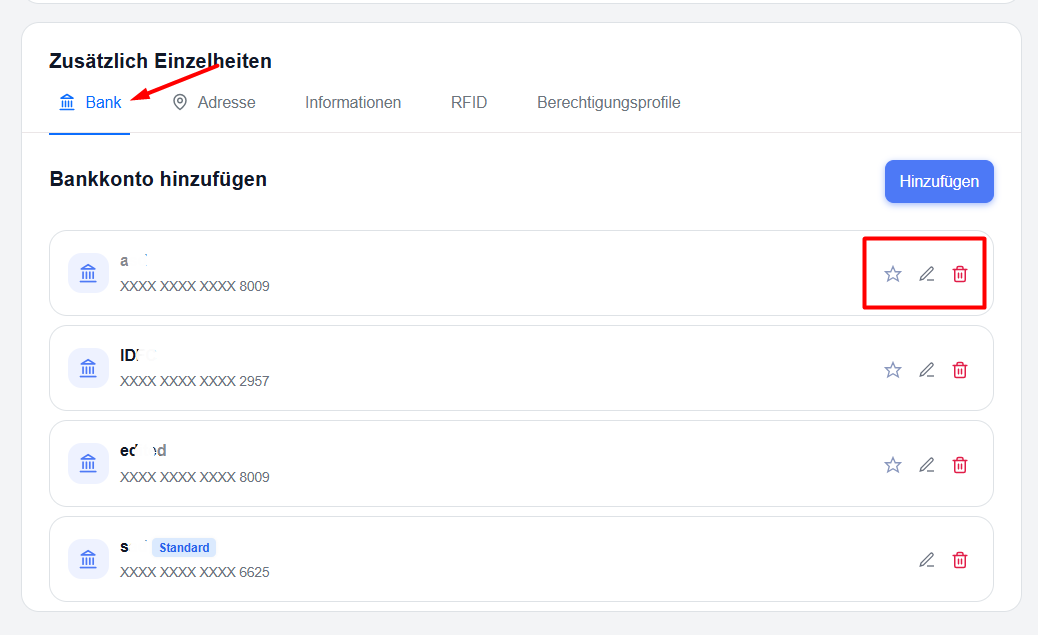
You can edit or delete any bank account later, or set which account should be the default account.
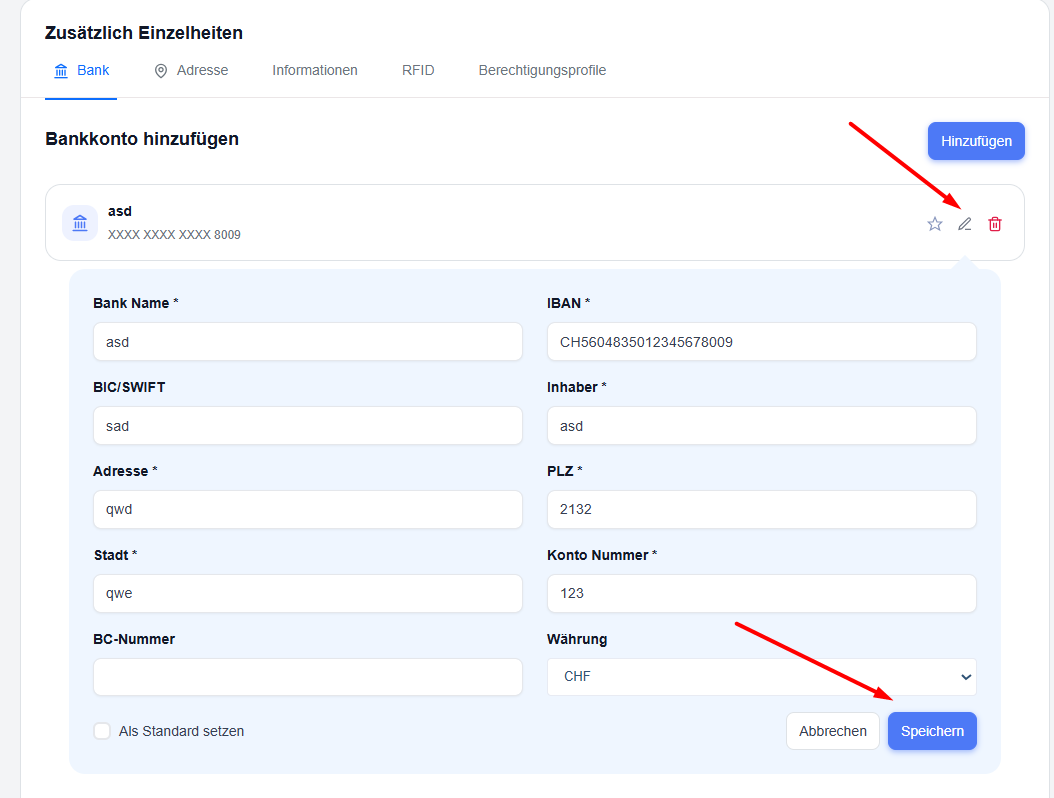
Edit bank details
- To edit the details, simply click on the edit icon.
- The details will open in the editable view.
- Click on ‘Save’ to save the details.
Delete bank details
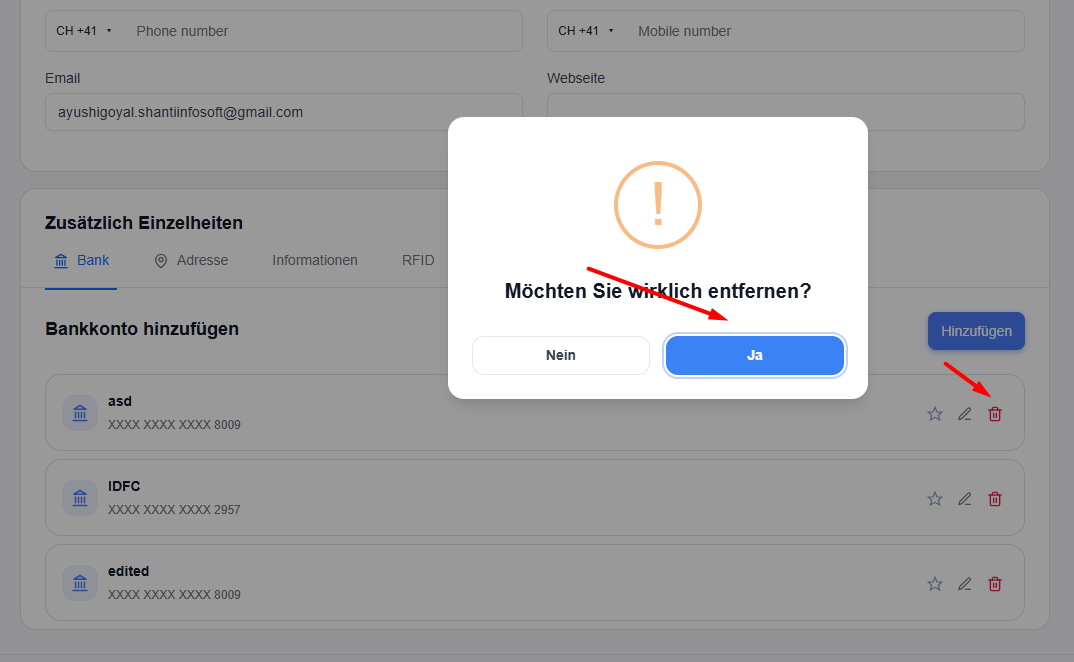
- To delete the details, simply click on the delete icon.
- A confirmation window will appear.
- Click ‘Yes’ to confirm the action.
- The account will be deleted and removed from the list.
Set account as default
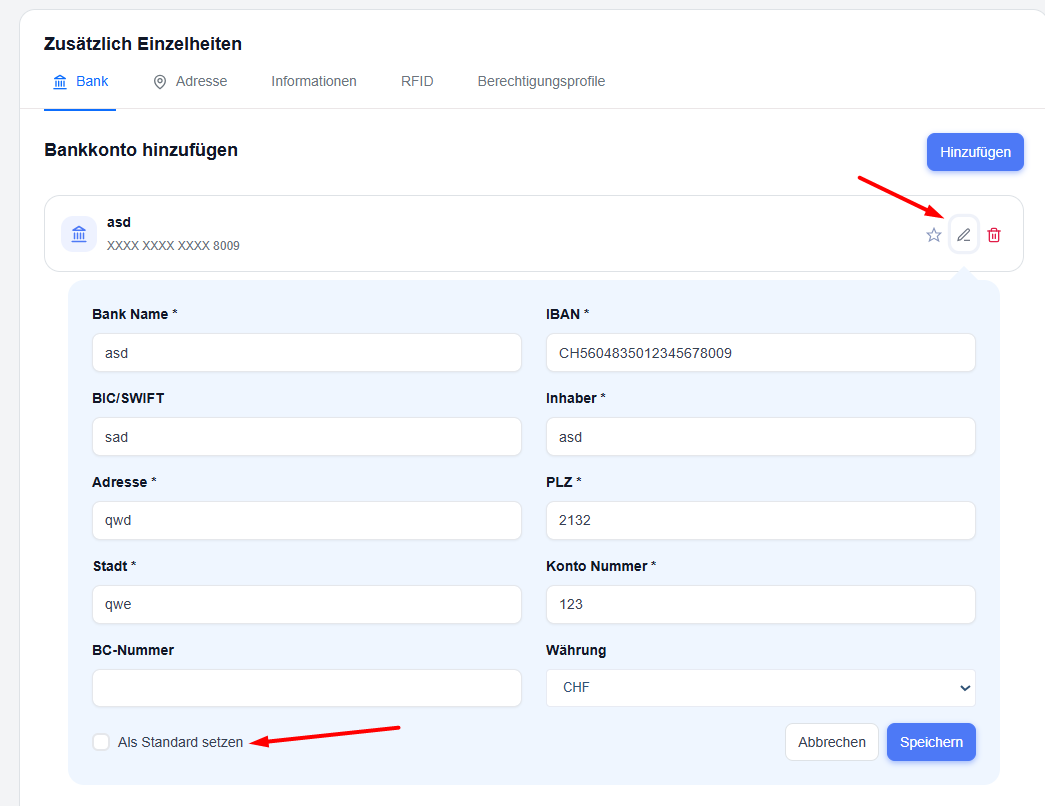
- To set an account as the default, click on the star icon
- You can also set an account as the default via the ‘Edit account’ form by ticking the checkbox.
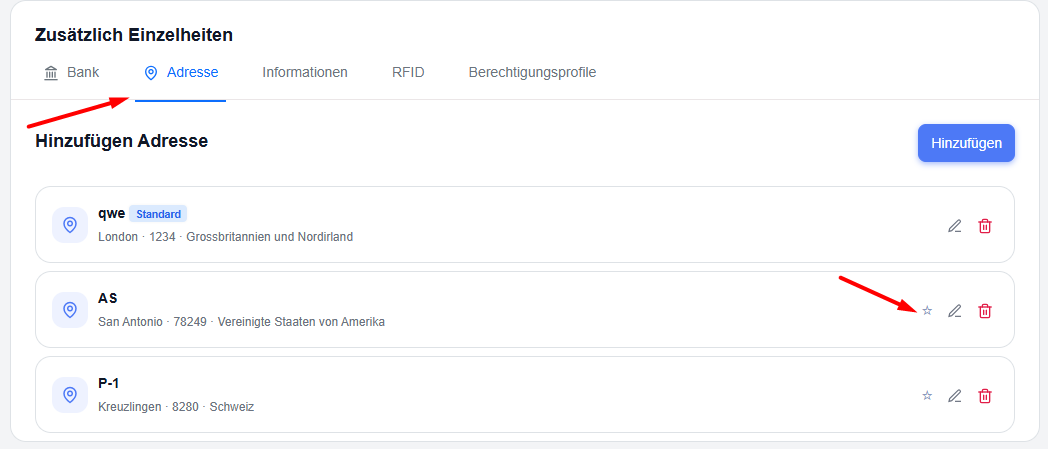
2. Address
You can add multiple addresses and set one of them as the default address.
- Click ‘Add’.
- Fill in the form:
- Type (e.g. Default)
- Company
- Name
- Address line 1 *
- Street line 2
- Postcode *
- Town *
- Country *
- Click ‘Save’.
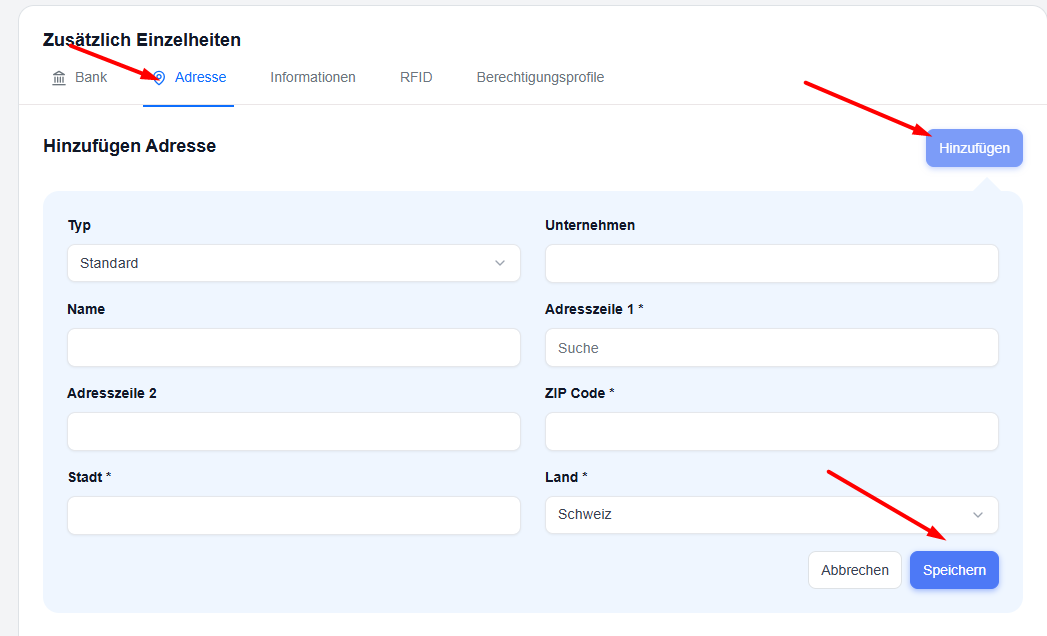
You can set any address as your default address later by clicking on the star icon.
3. Information
This tab is used to enter further personal or company-related information:
- Language (preferred language), select from the drop-down list.
- Date of birth + optional tick box for a reminder
- AHV No. (Swiss social security number)
- Nationality
- Staff number
- Marital status
- Notes (free-text notes)
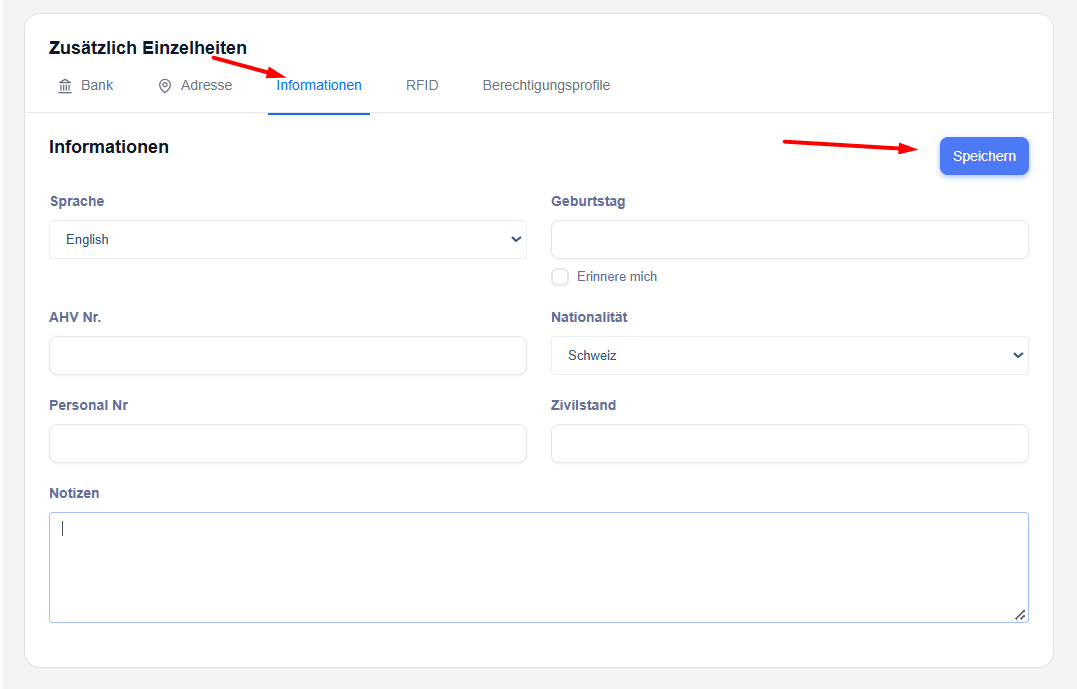
Once you have made any changes, click ‘Save’.
4. RFID
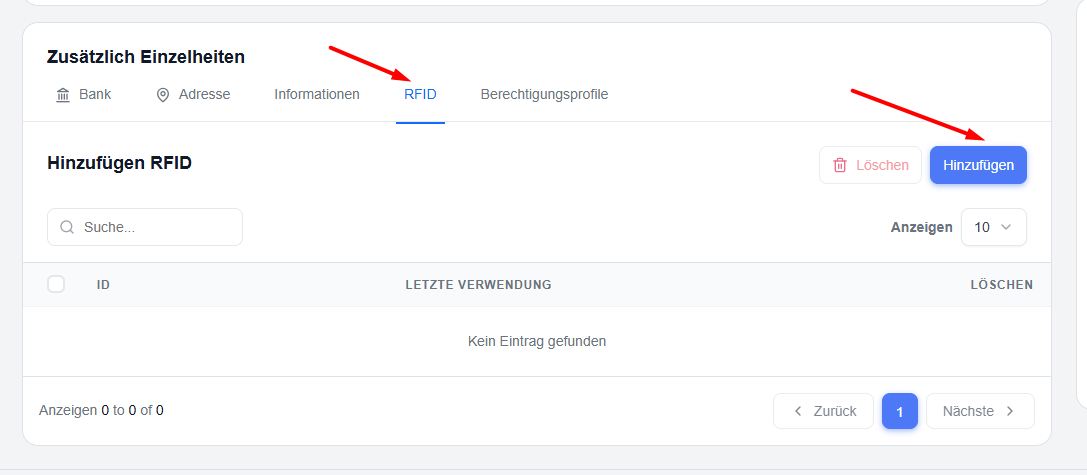
Here you can assign existing RFID cards to this contact.
- Click on ‘Add’.
- A list of available RFID cards will appear.
- Select the card(s) you wish to assign to this contact.
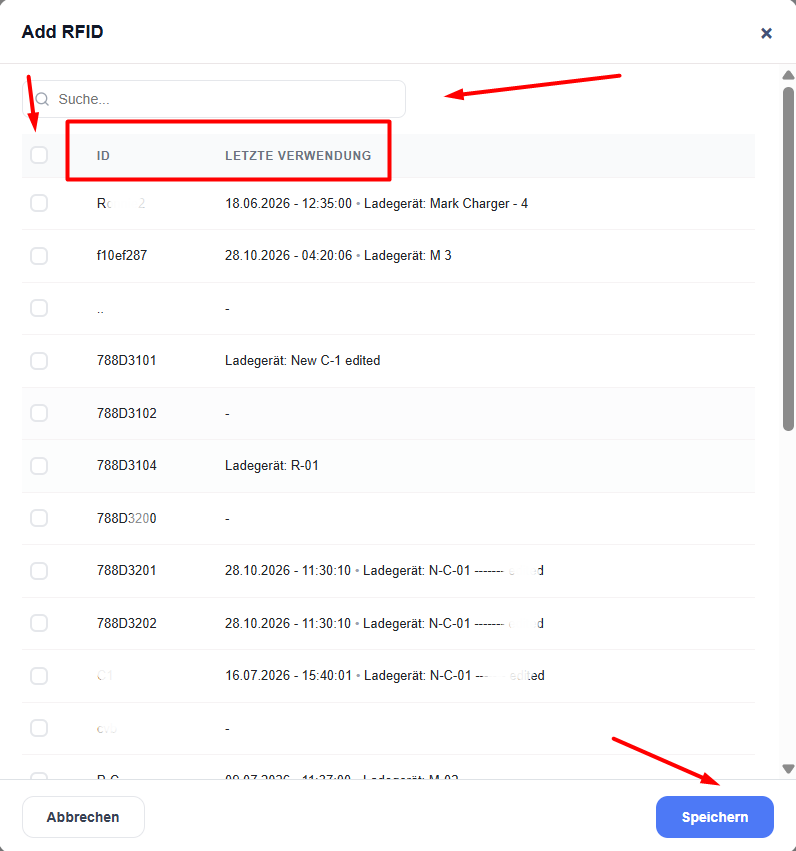
- Click on ‘Save’.
Once the cards have been linked, you can view the last time each card was used.
You can remove a linked RFID card at any time by clicking on the red delete icon.
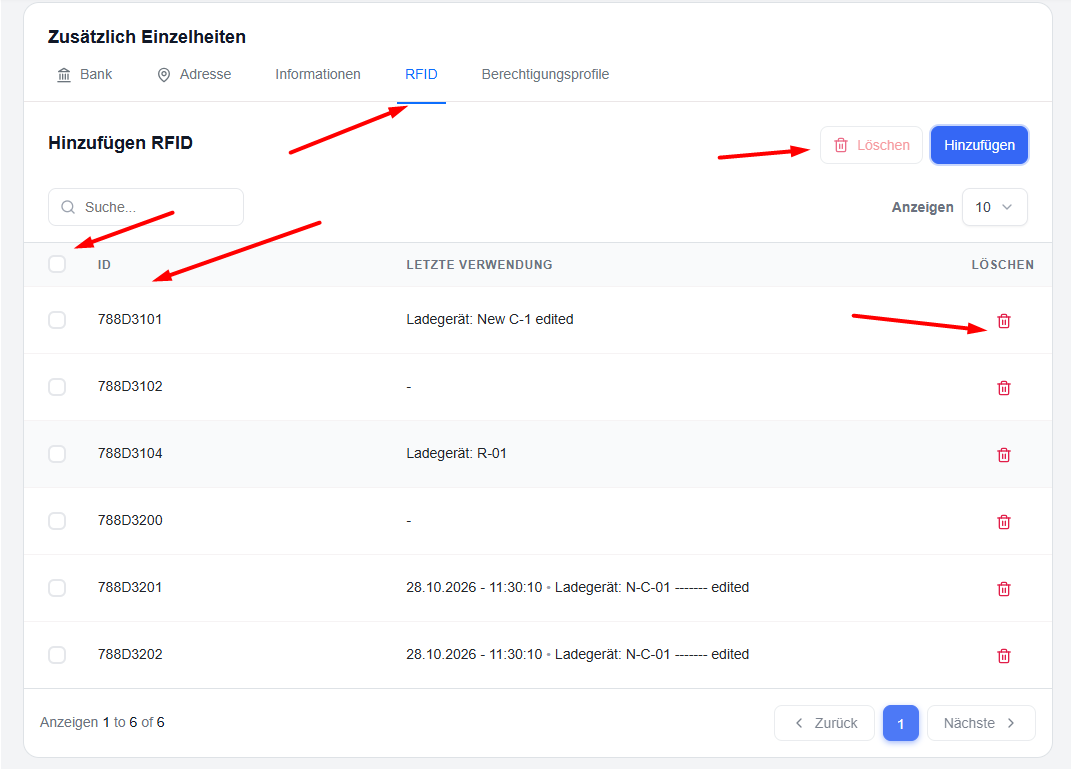
You can remove either individual cards or several cards at once by selecting the cards and clicking the ‘Delete’ button at the top.
5. Access Profiles
On this tab, you can assign authorisation profiles that control which actions the contact is permitted to carry out in the various modules of the system:
- General Account
- Objects
- Meters
- E-mobility
- TimeCatch
- Access
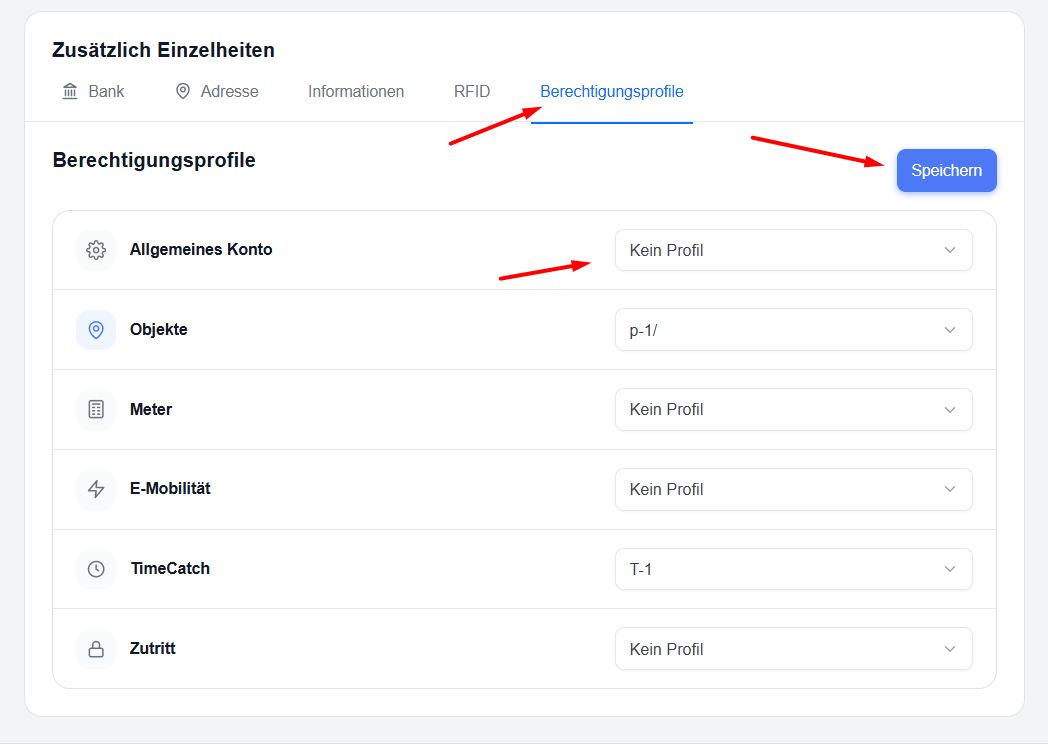
Open the drop-down menu for each module and select the desired profile (or leave the setting as ‘No profile’).
Then click ‘Save’.
Related contacts
On the right-hand side of the contact details page, you can link further contacts to the current one. This is useful for showing relationships such as family members, colleagues, business partners or affiliated companies.
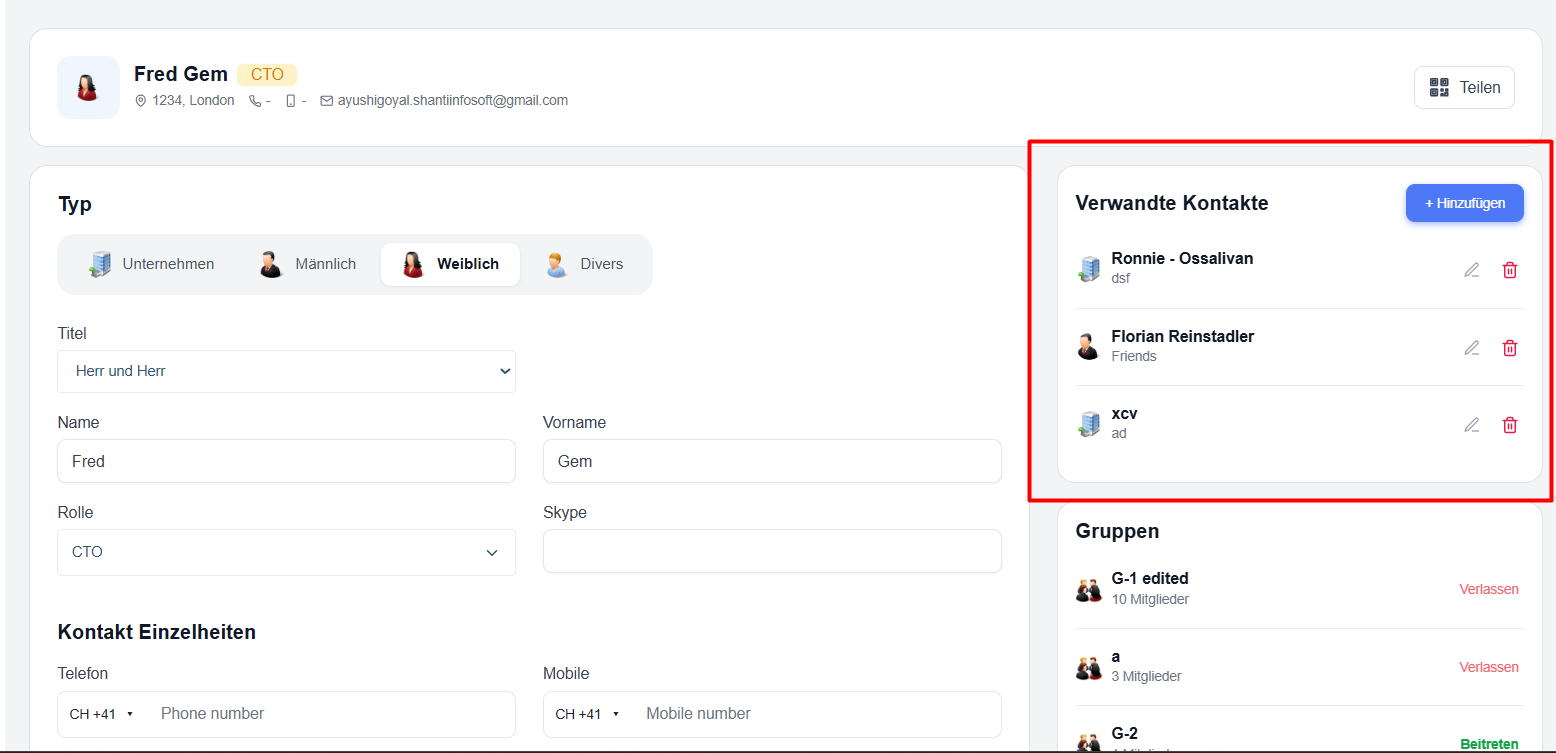
- On the contact details page, locate the ‘Related Contacts’ field on the right-hand side.
- Click the blue ‘+ Add’ button.
- A pop-up window titled ‘Add Related Contact’ will open.
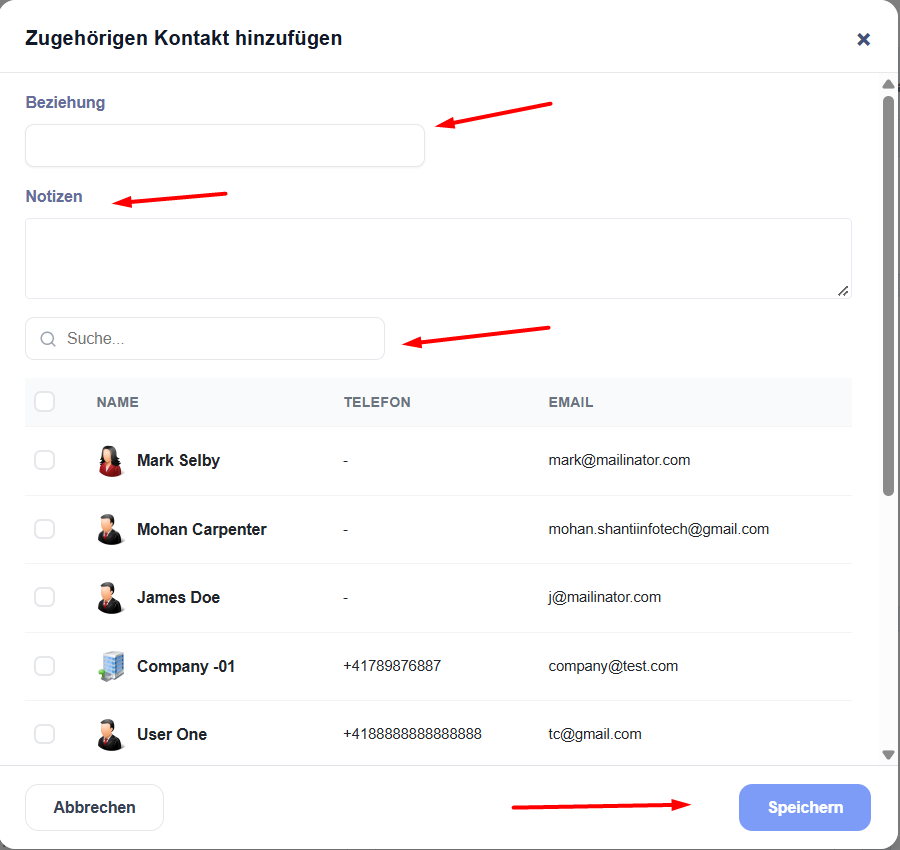
- (Optional) Enter a brief description of the relationship in the ‘Relationship’ field (e.g. ‘Colleague’, ‘Family’, ‘Business partner’).
- (Optional) Add any additional notes in the ‘Notes’ field.
- Use the search box to find the contact you wish to link.
- Tick the box next to the contact(s) you wish to link.
- Click ‘Save’.
The selected contacts will now appear in the ‘Related Contacts’ list on the right-hand side.
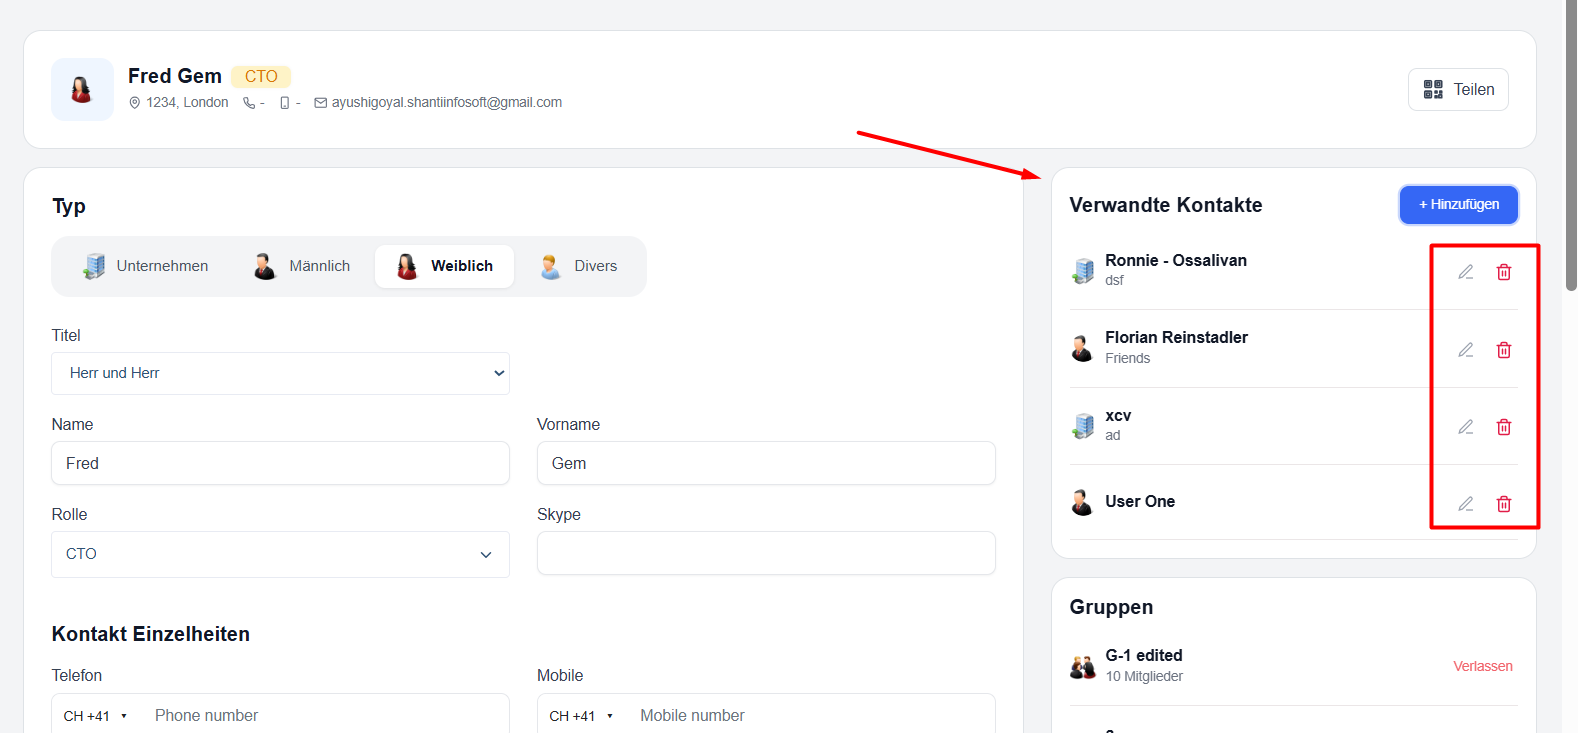
You can remove a linked contact at any time if required.
Groups
On the right-hand side of the contact details page, you’ll also see a section called ‘Groups’.
This shows all the groups in your account, and you can add or remove the current contact from these groups.
Here’s how:
- Joining a group
: Click the green ‘Join’ button next to a group.
The contact will be added to that group immediately. - Leaving a group
: If the contact is already a member of a group, the red ‘Leave’ button will be displayed.
Click on it to remove the contact from that group.
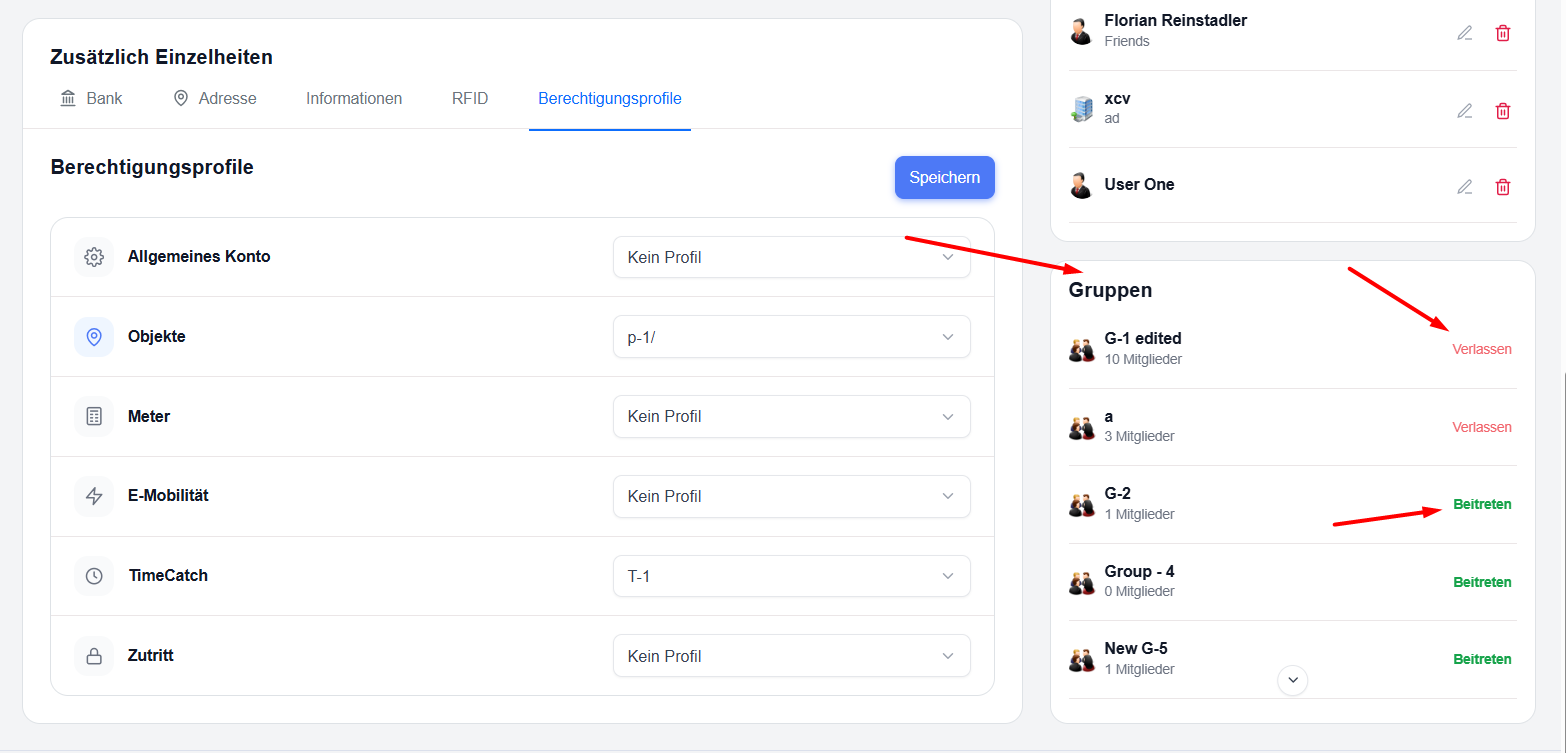
Groups are useful for organising contacts by teams, departments, customer categories or any other structure you require.