
purses
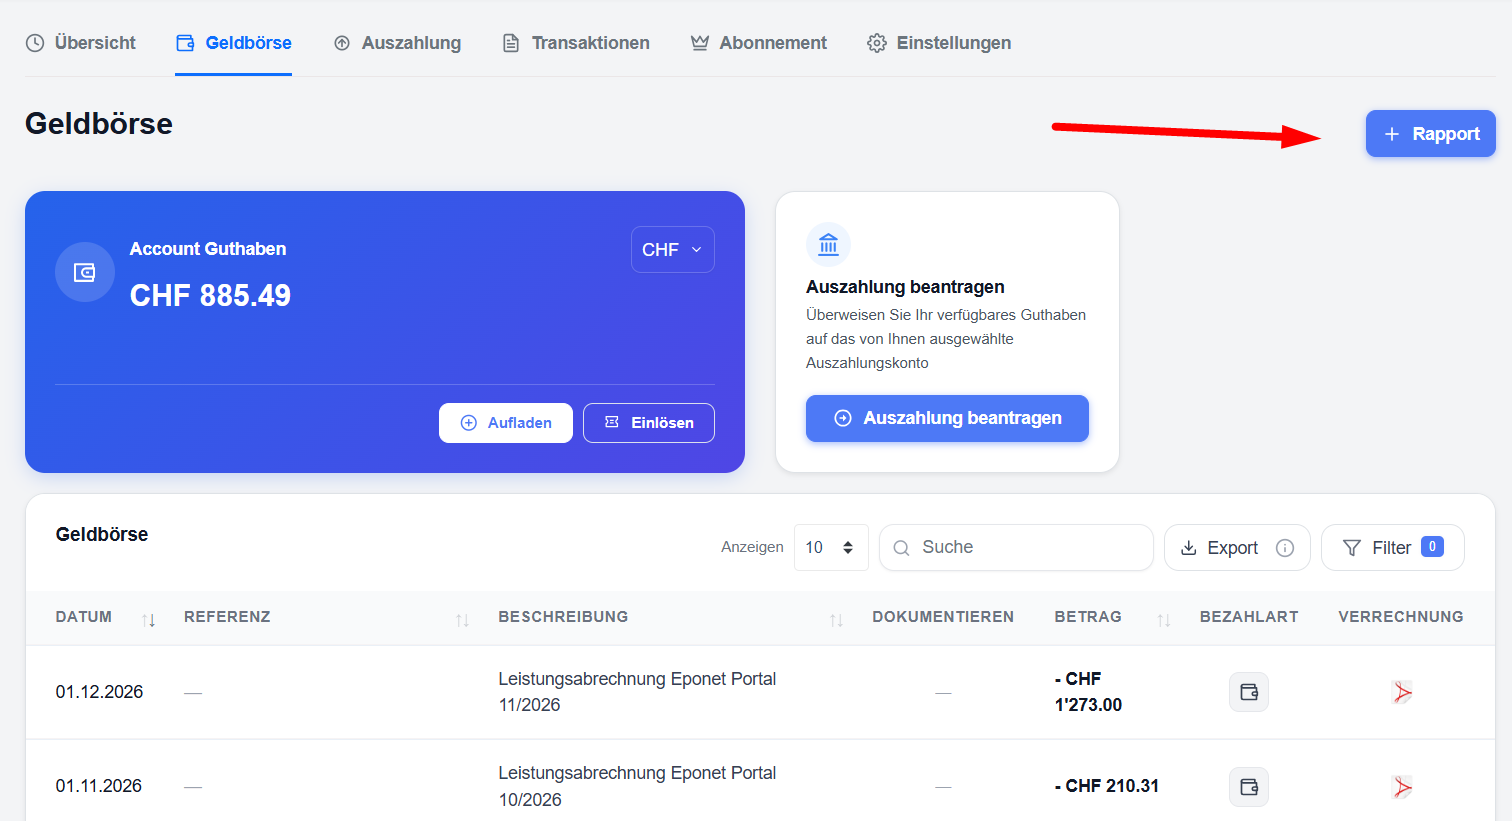
The ‘Wallet’ page provides a detailed overview of your account balance, as well as a complete history of all credits and debits that have affected your wallet.
How to open your wallet

Page layout
‘Balance’ header
- Large blue card showing your current account balance.
- Currency selection (CHF by default).
- Buttons:
- Top up – Start top-up.
- Redeem – Redeem a voucher code.
- On the right-hand side is a card with the ‘Request withdrawal’ button. This button will only become fully active once your email address has been validated by Eponet.

Transaction table
Columns (from left to right):
- Date – Date of the transaction
- Reference – internal reference number (often blank)
- Description – Plain-text description (e.g. ‘Eponet Portal service invoice 12/2025’, ‘Remuneration for public charging sold via Hubject roaming transactions’)
- Document – Download icon for the corresponding PDF invoice or credit note
- Amount – Amount (green = credit, red = debit)
- Payment method – icon for the payment method
- Billing – Arrow that opens the detailed billing view

Table tools
- Select number of pages (Show 10 / 25 / 50 …)
- Free-text search field
- Export button – downloads the currently filtered list
- Filter button – opens advanced filter options
- Pagination controls at the bottom
Create report
On the Geldbörse (Wallet) page you will find the blue + Rapport button in the top-right corner.
1. Ladebericht (Charging Report)
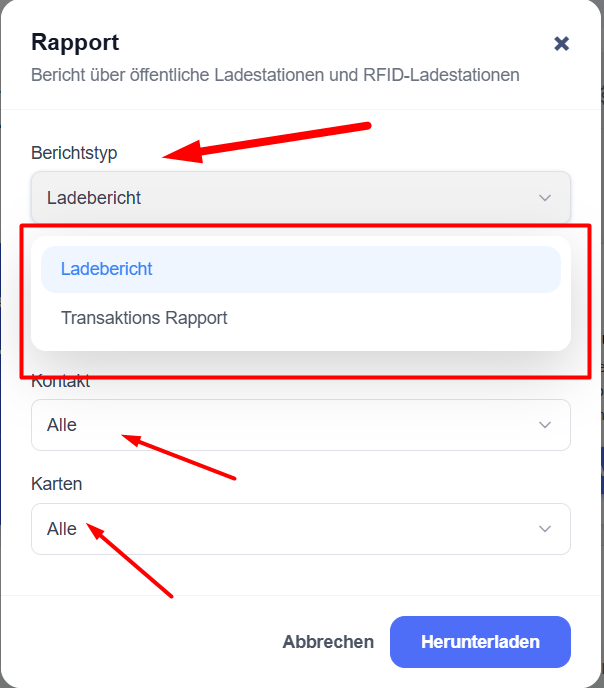
Bericht über öffentliche Ladestationen und RFID-Ladestationen
- Select Berichtstyp → Ladebericht.
- Optionally filter by:
- Kontakt – choose one, several, or All contacts.
- Karten – choose one, several, or All RFID cards.
- Both Contact and Cards filters can be used at the same time.
- Define the desired date range.
- Click Herunterladen.
What the report contains
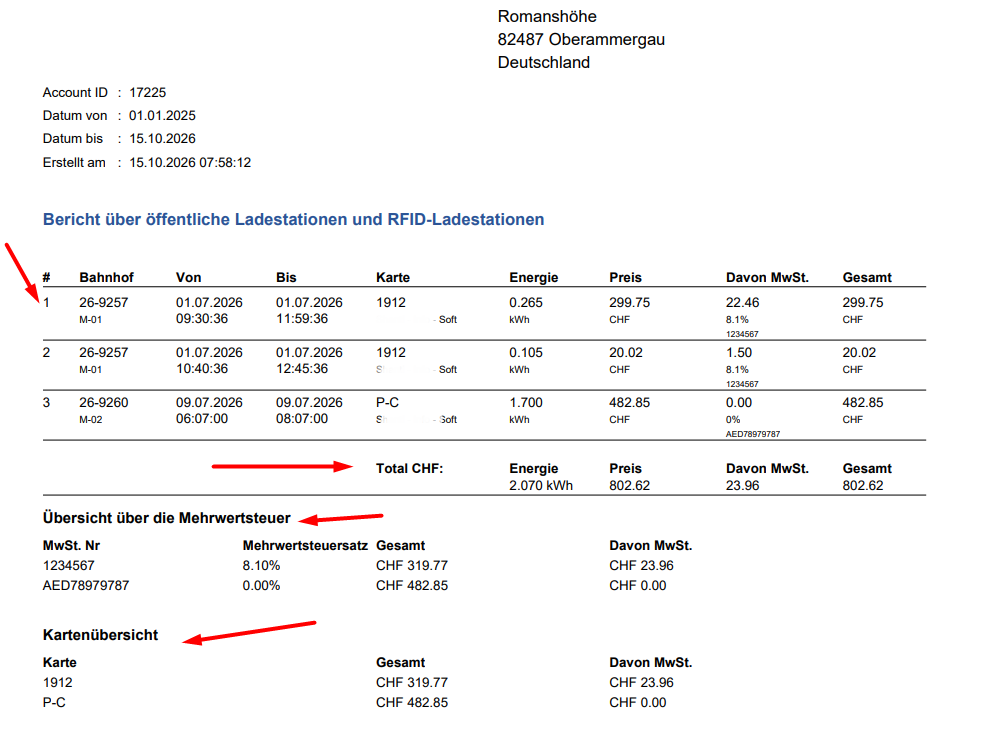
- List of all RFID charging sessions in the selected period (Bahnhof, start/end time, card, energy in kWh, price, VAT, total).
- Summary by tax ID (MwSt.-Nr.) showing total amount and VAT.
- Summary by card (Kartenübersicht) showing total amount and VAT per card.
Sample report:
2. Transaktions Rapport (Transaction Report)
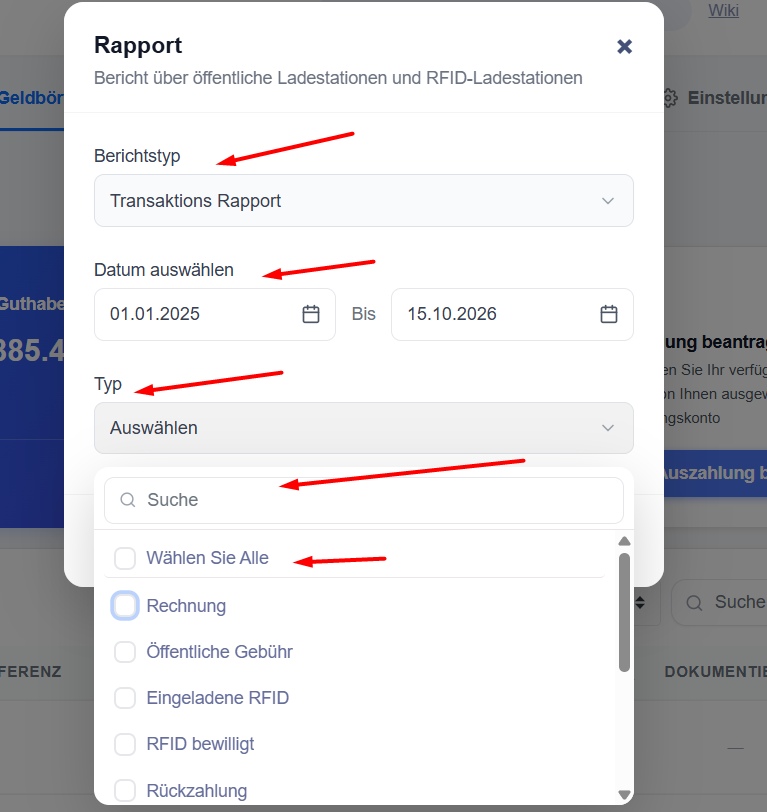
- Select Berichtstyp → Transaktions Rapport.
- Choose the date range (Datum von – Bis).
- Select the Typ (one or more, or All):
- Rechnung
- Öffentliche Gebühr
- Eingeladene RFID
- RFID bewilligt
- Rückzahlung
- (and other available types such as ImmoConnect / Hubject if present)
- Click Herunterladen.
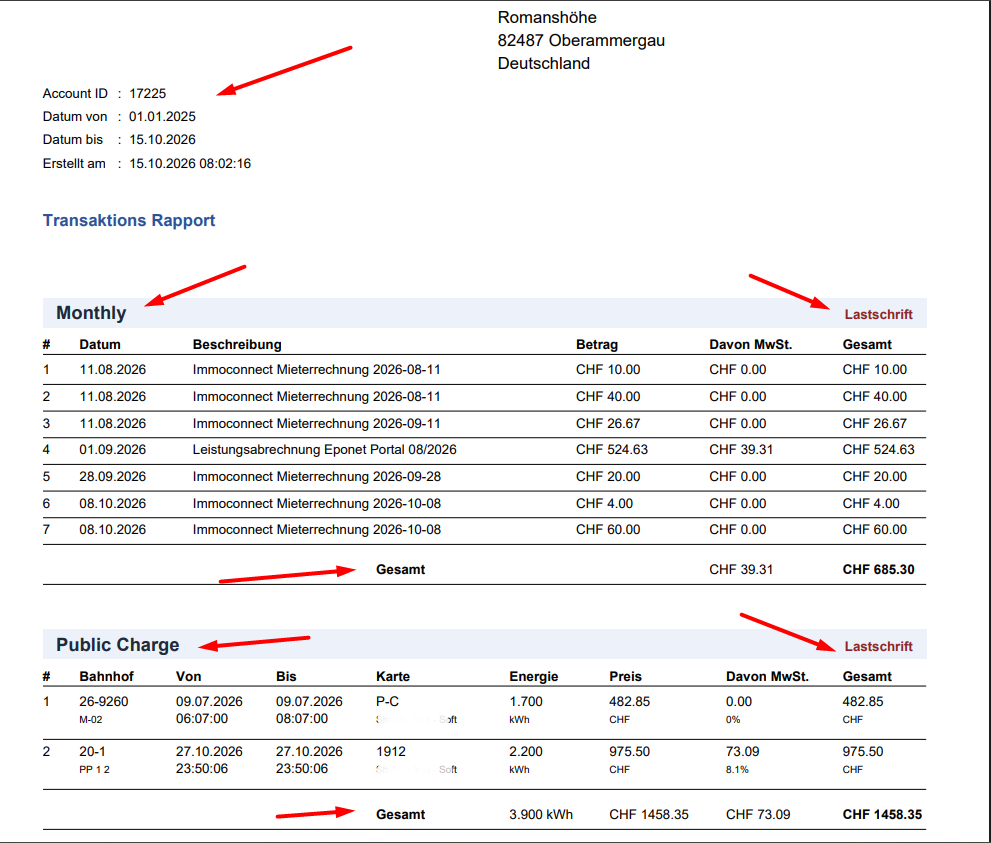
What the report contains
- All transactions of the selected type(s) within the chosen date range.
- Separate sections for each transaction type (e.g. Monthly, Public Charge, …).
- For each section: date, description, amount, VAT, and total.
- Grand totals including energy (where applicable), amount, VAT and overall total.
- Header information: Account ID, date range and creation timestamp.
Sample report:
If a report contains more than 1 000 records, it will not be downloaded directly in the browser. Instead, the report is automatically generated and sent to your registered email address and both reports are generated as downloadable PDF files.
What you can do on this page
- Top up your wallet at any time.
- Redeem a voucher.
- Request a withdrawal (following email confirmation).
- Browse or filter your transaction history.
- Export transaction details
- Open all related PDF documents by clicking on the document icon or the arrow at the end of the row.
- View all transactions on your account
- Generate report.