
User Guide for the ‘Explore Map’ screen
Description:
This guide explains how to use the ‘Discover/Map’ screen in the Eponet Go app to find charging points, apply filters, check availability, view the ports and start a charging session (including at Hubject roaming charging points).
Open ‘Explore’ and ‘Map’
-
-
Open the Eponet Go app.
-
Tap the ‘Explore’ icon in the bottom navigation bar.
-
The map will open with your current location as the centre (provided location permissions are enabled) or with the default address stored in your account.
-
You will see:
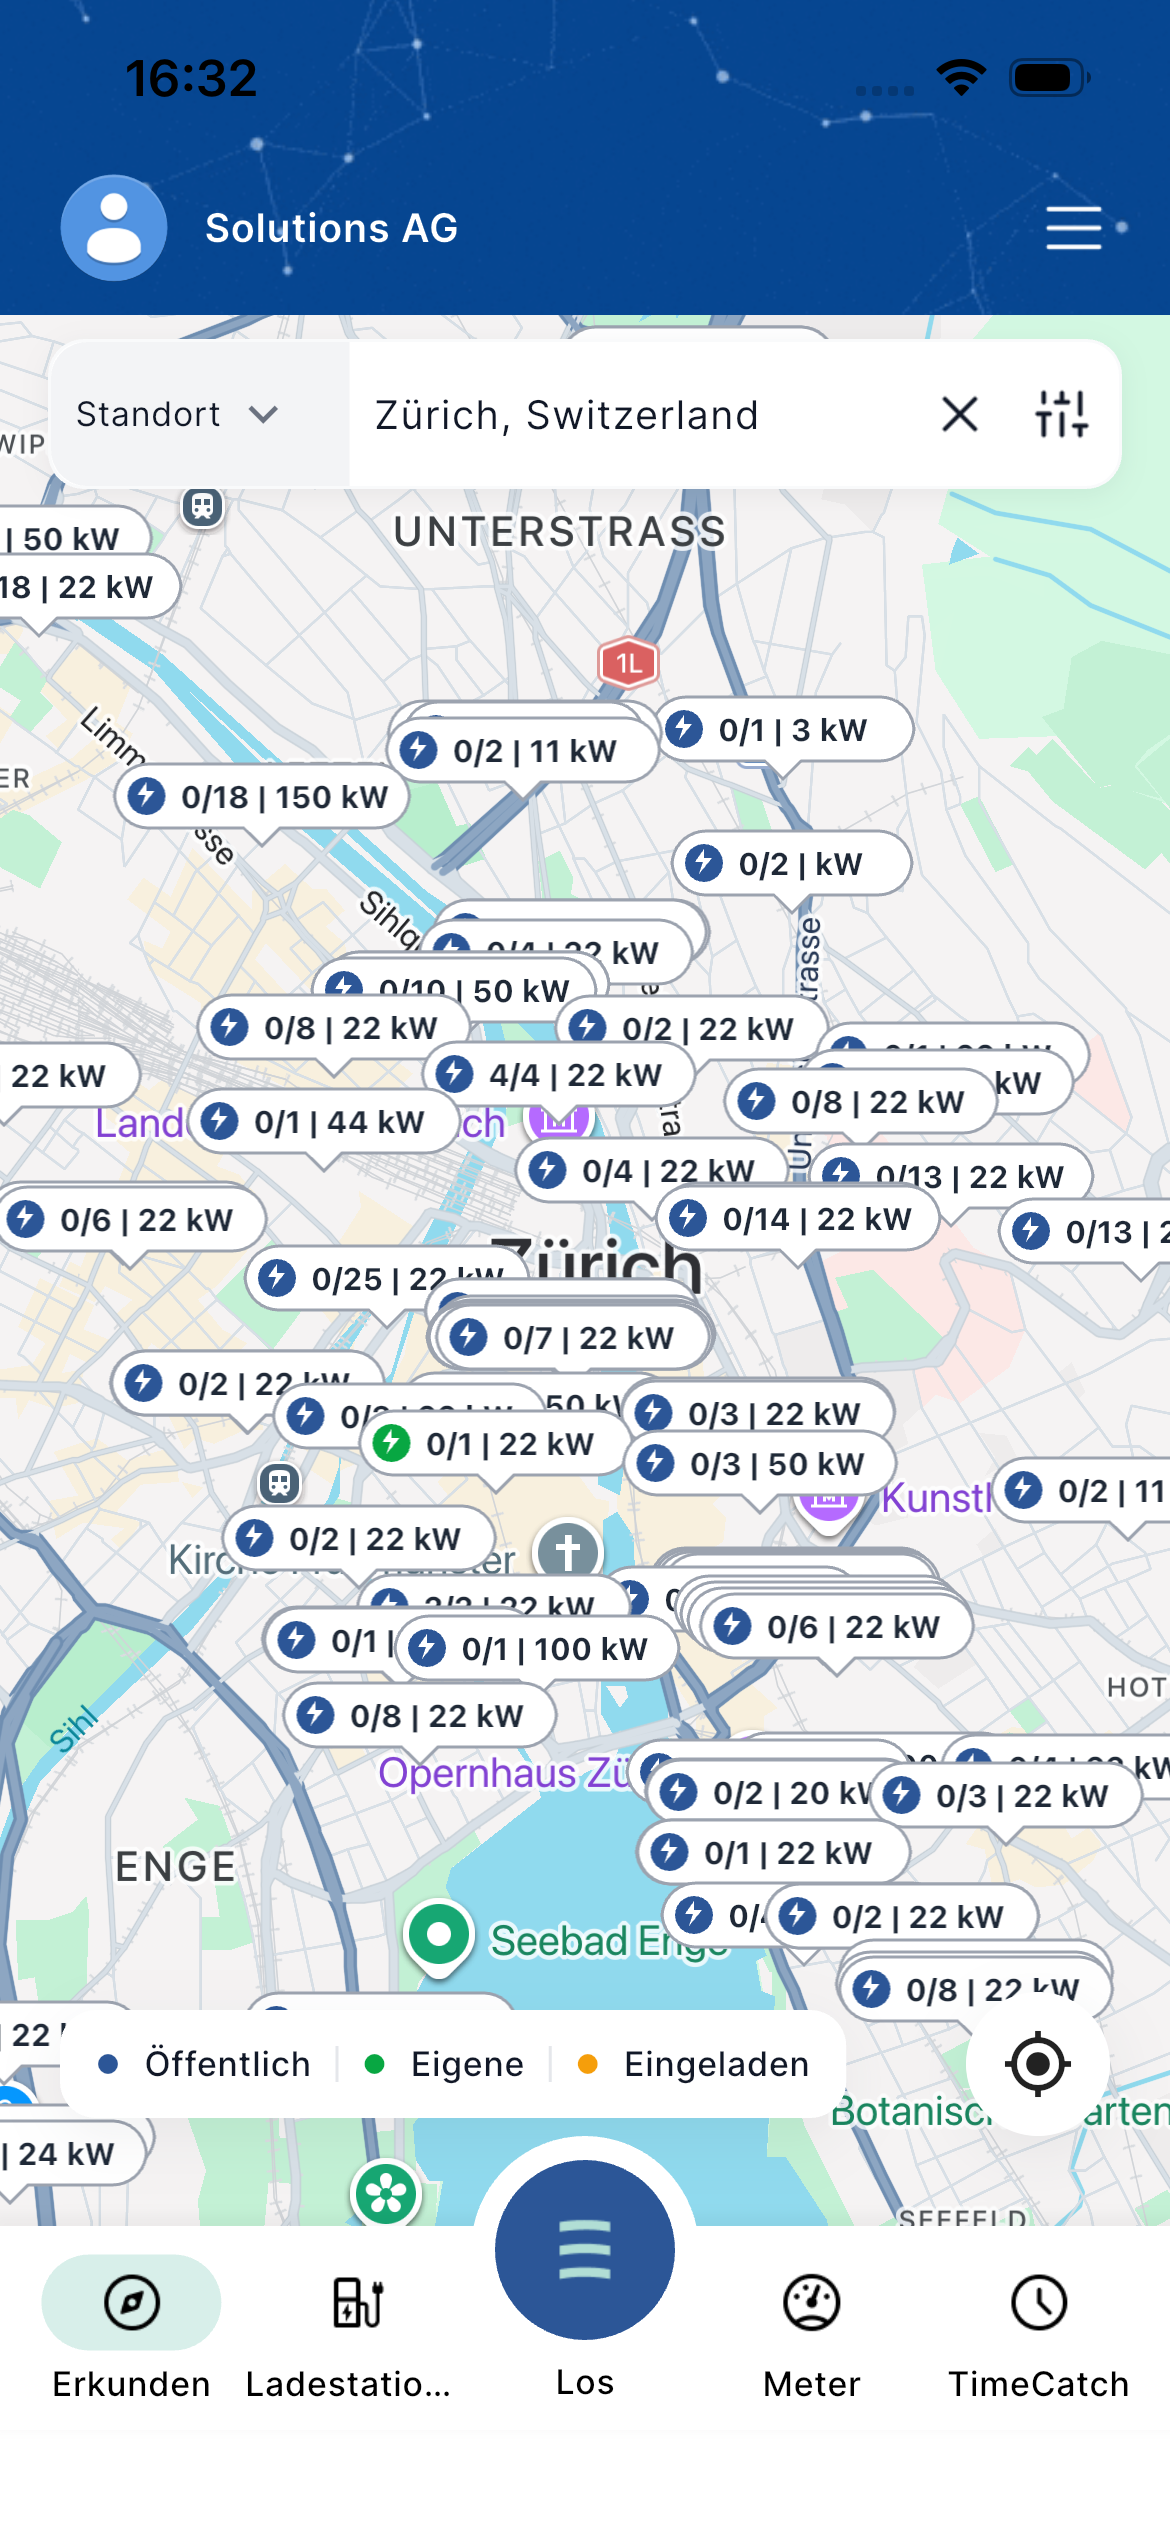
- A search/location bar at the top (‘Location’).
- Map markers showing charging points.
- Navigation bar at the bottom: Explore | Charging points | Go | Meter | TimeCatch.
Search by location
- Tap the location field at the top (e.g. ‘Zurich, Switzerland’).
- Enter a town, street or address.
- Select the result you want from the suggestions.
- The map will re-centre and display nearby charging points.
You can also use the ‘Current location’ button (destination icon) on the map to return to your current position.
Search for a charging point
- Tap the search field at the top and select ‘Charging point’ from the drop-down menu.
- Enter the EVSE ID or the name of a charging station to search
- Select the desired result from the suggestions.
- This will open the screen showing the charging station’s details
Explanation of map markers and availability
Each pin on the map displays real-time information in the following format:
Available / Total | Max. power Examples from the map:
- 4/4 | 22 kW → 4 out of 4 ports available, up to 22 kW
- 0/2 | 11 kW → 0 out of 2 available
- 0/18 | 150 kW
- 0/1 | 22 kW
Colour key (at the bottom of the map):
- Blue = Public
- Green = Private
- Orange = Invited
If several charging points are very close together, the markers may overlap or appear on top of one another. Zoom in or tap on the group to view the individual charging points.
Apply filter
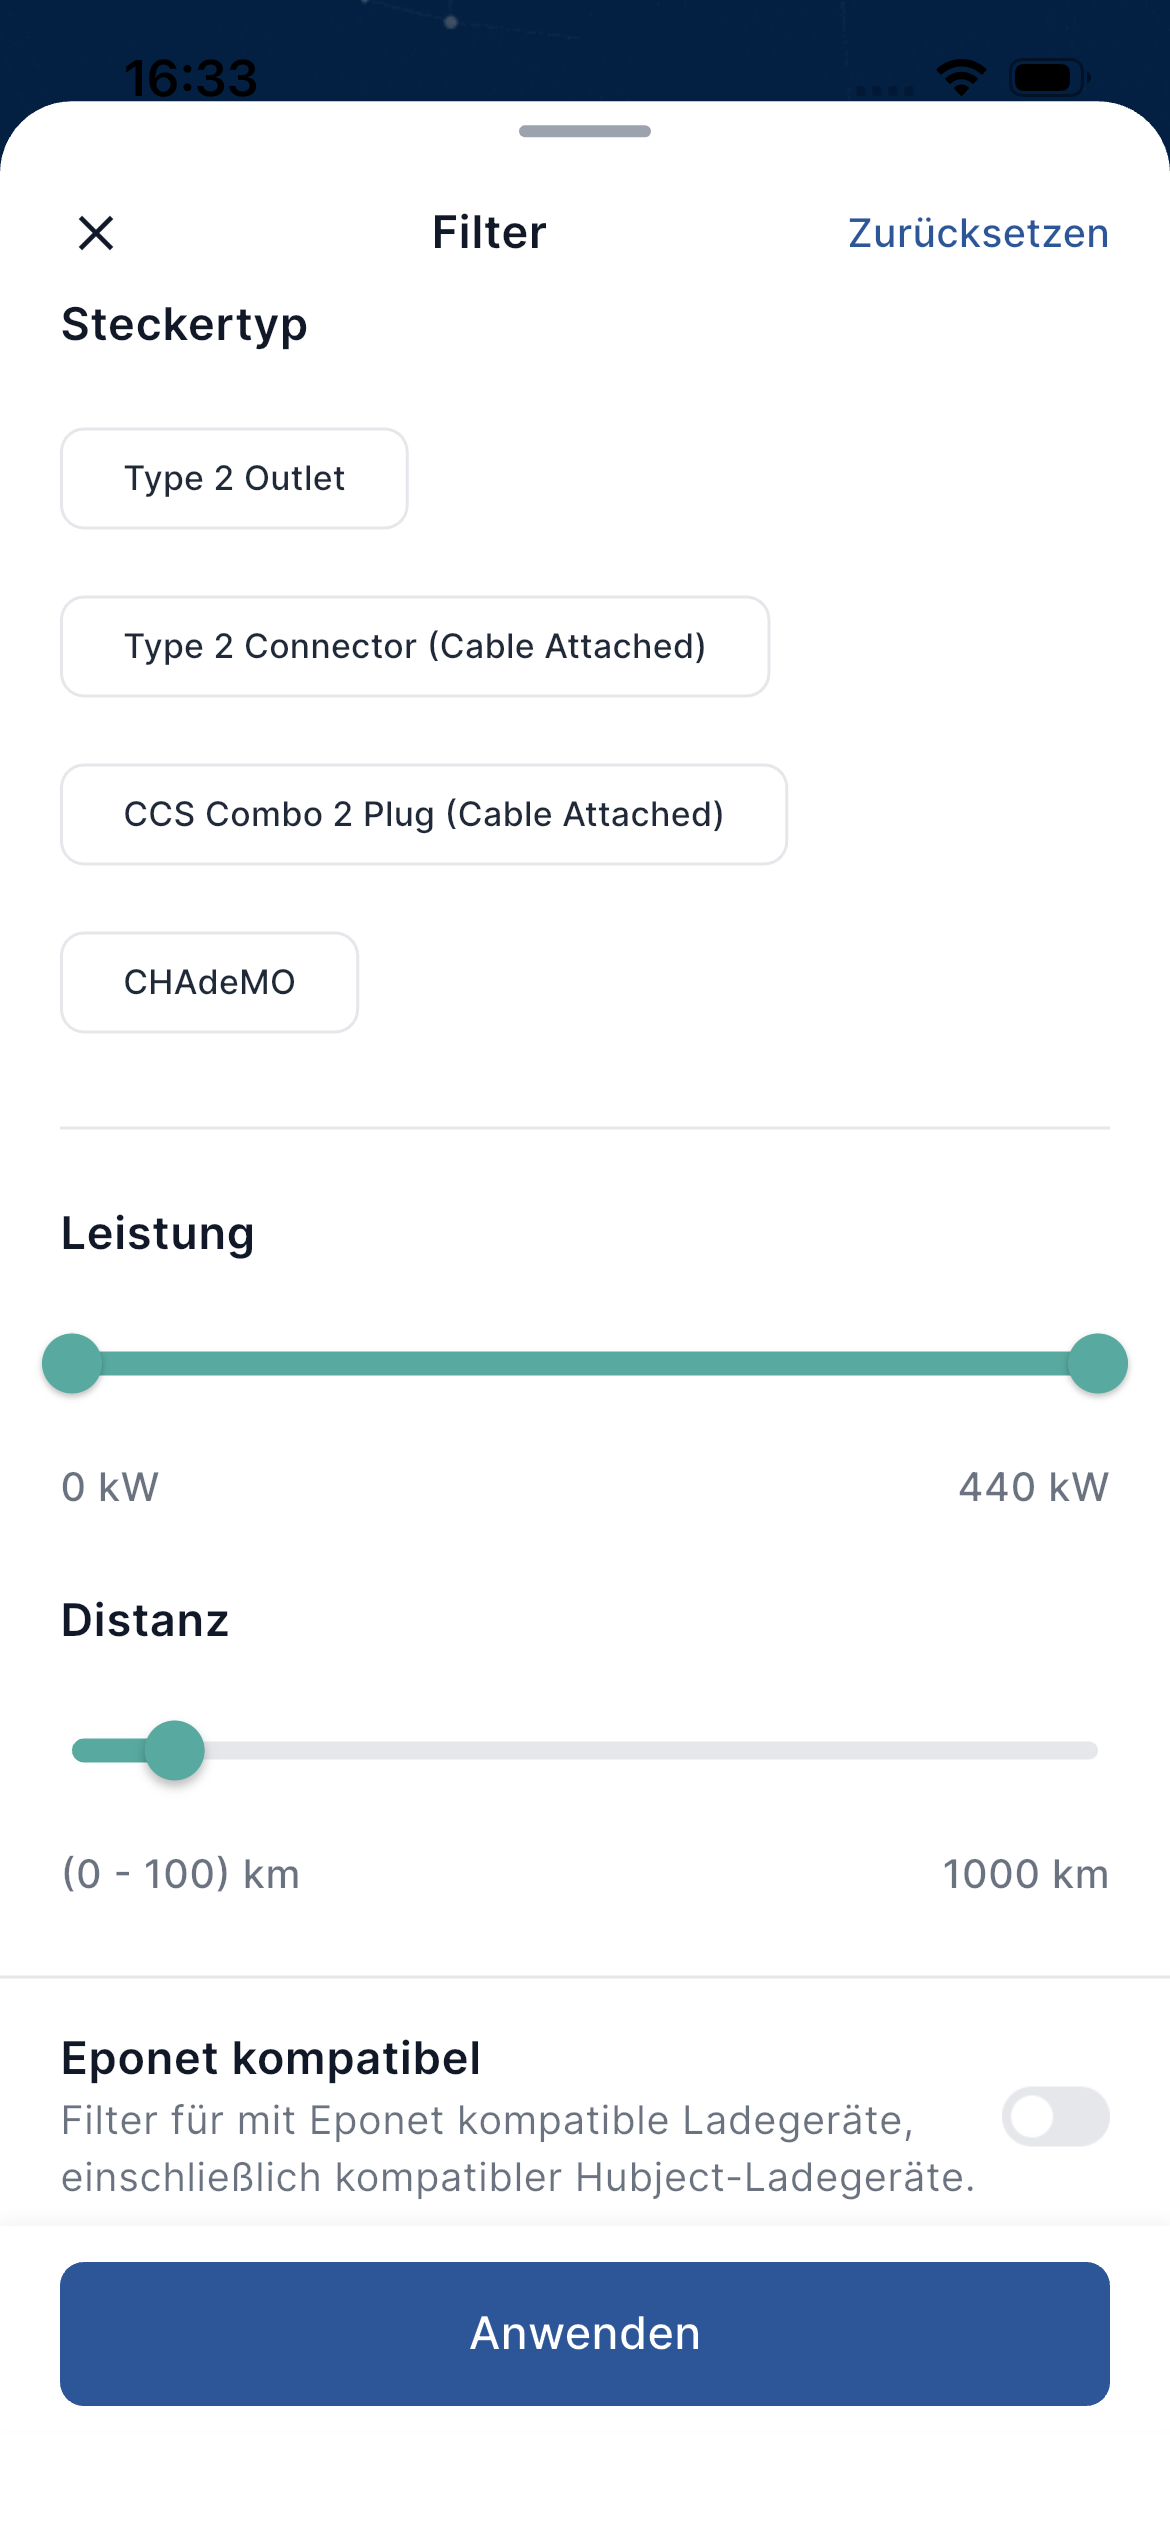
- Tap the filter icon (slider) next to the location field.
- The filter screen will open.
Available filter options
Plug type Select one or more options:
- Type 2 socket
- Type 2 plug (with cable)
- CCS Combo 2 plug (with cable)
- CHAdeMO
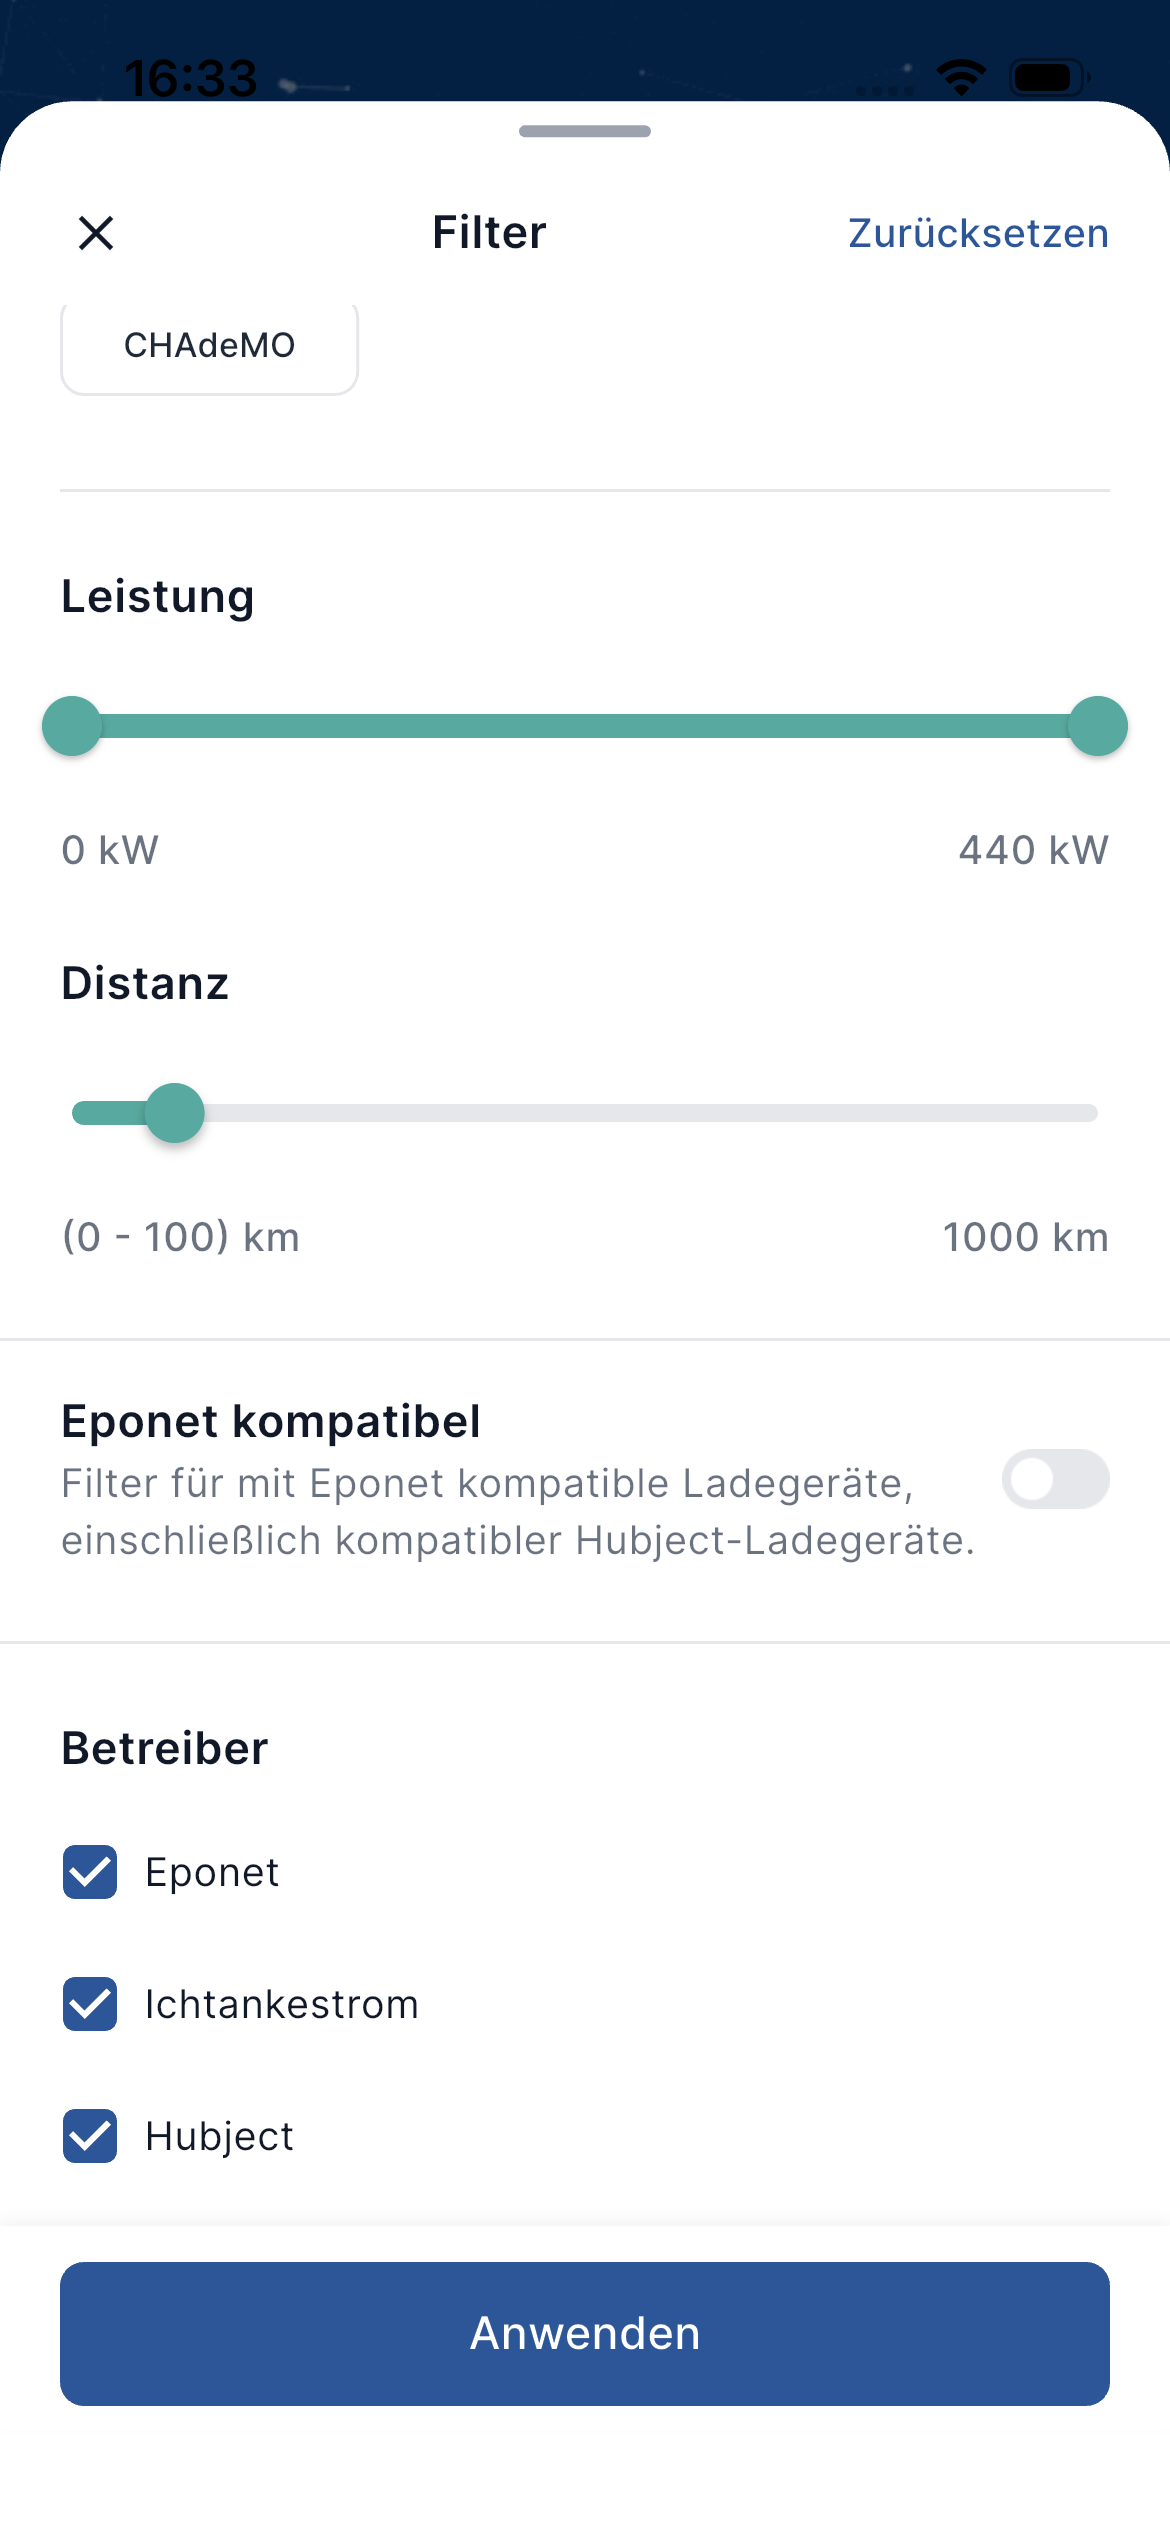
Power Use the slider to set the desired power range (0 kW – 440 kW).
Distance Use the slider to limit the results to a maximum distance (0–100 km up to 1000 km).
Eponet-compatible Tick this option to display only Eponet-compatible charging points (including compatible Hubject charging points).
Operator Select the operators you wish to display:
- Eponet
- Ichtankestrom
- Hubject
- Tap ‘Apply’ to refresh the map.
- Tap ‘Reset’ to clear all filters.
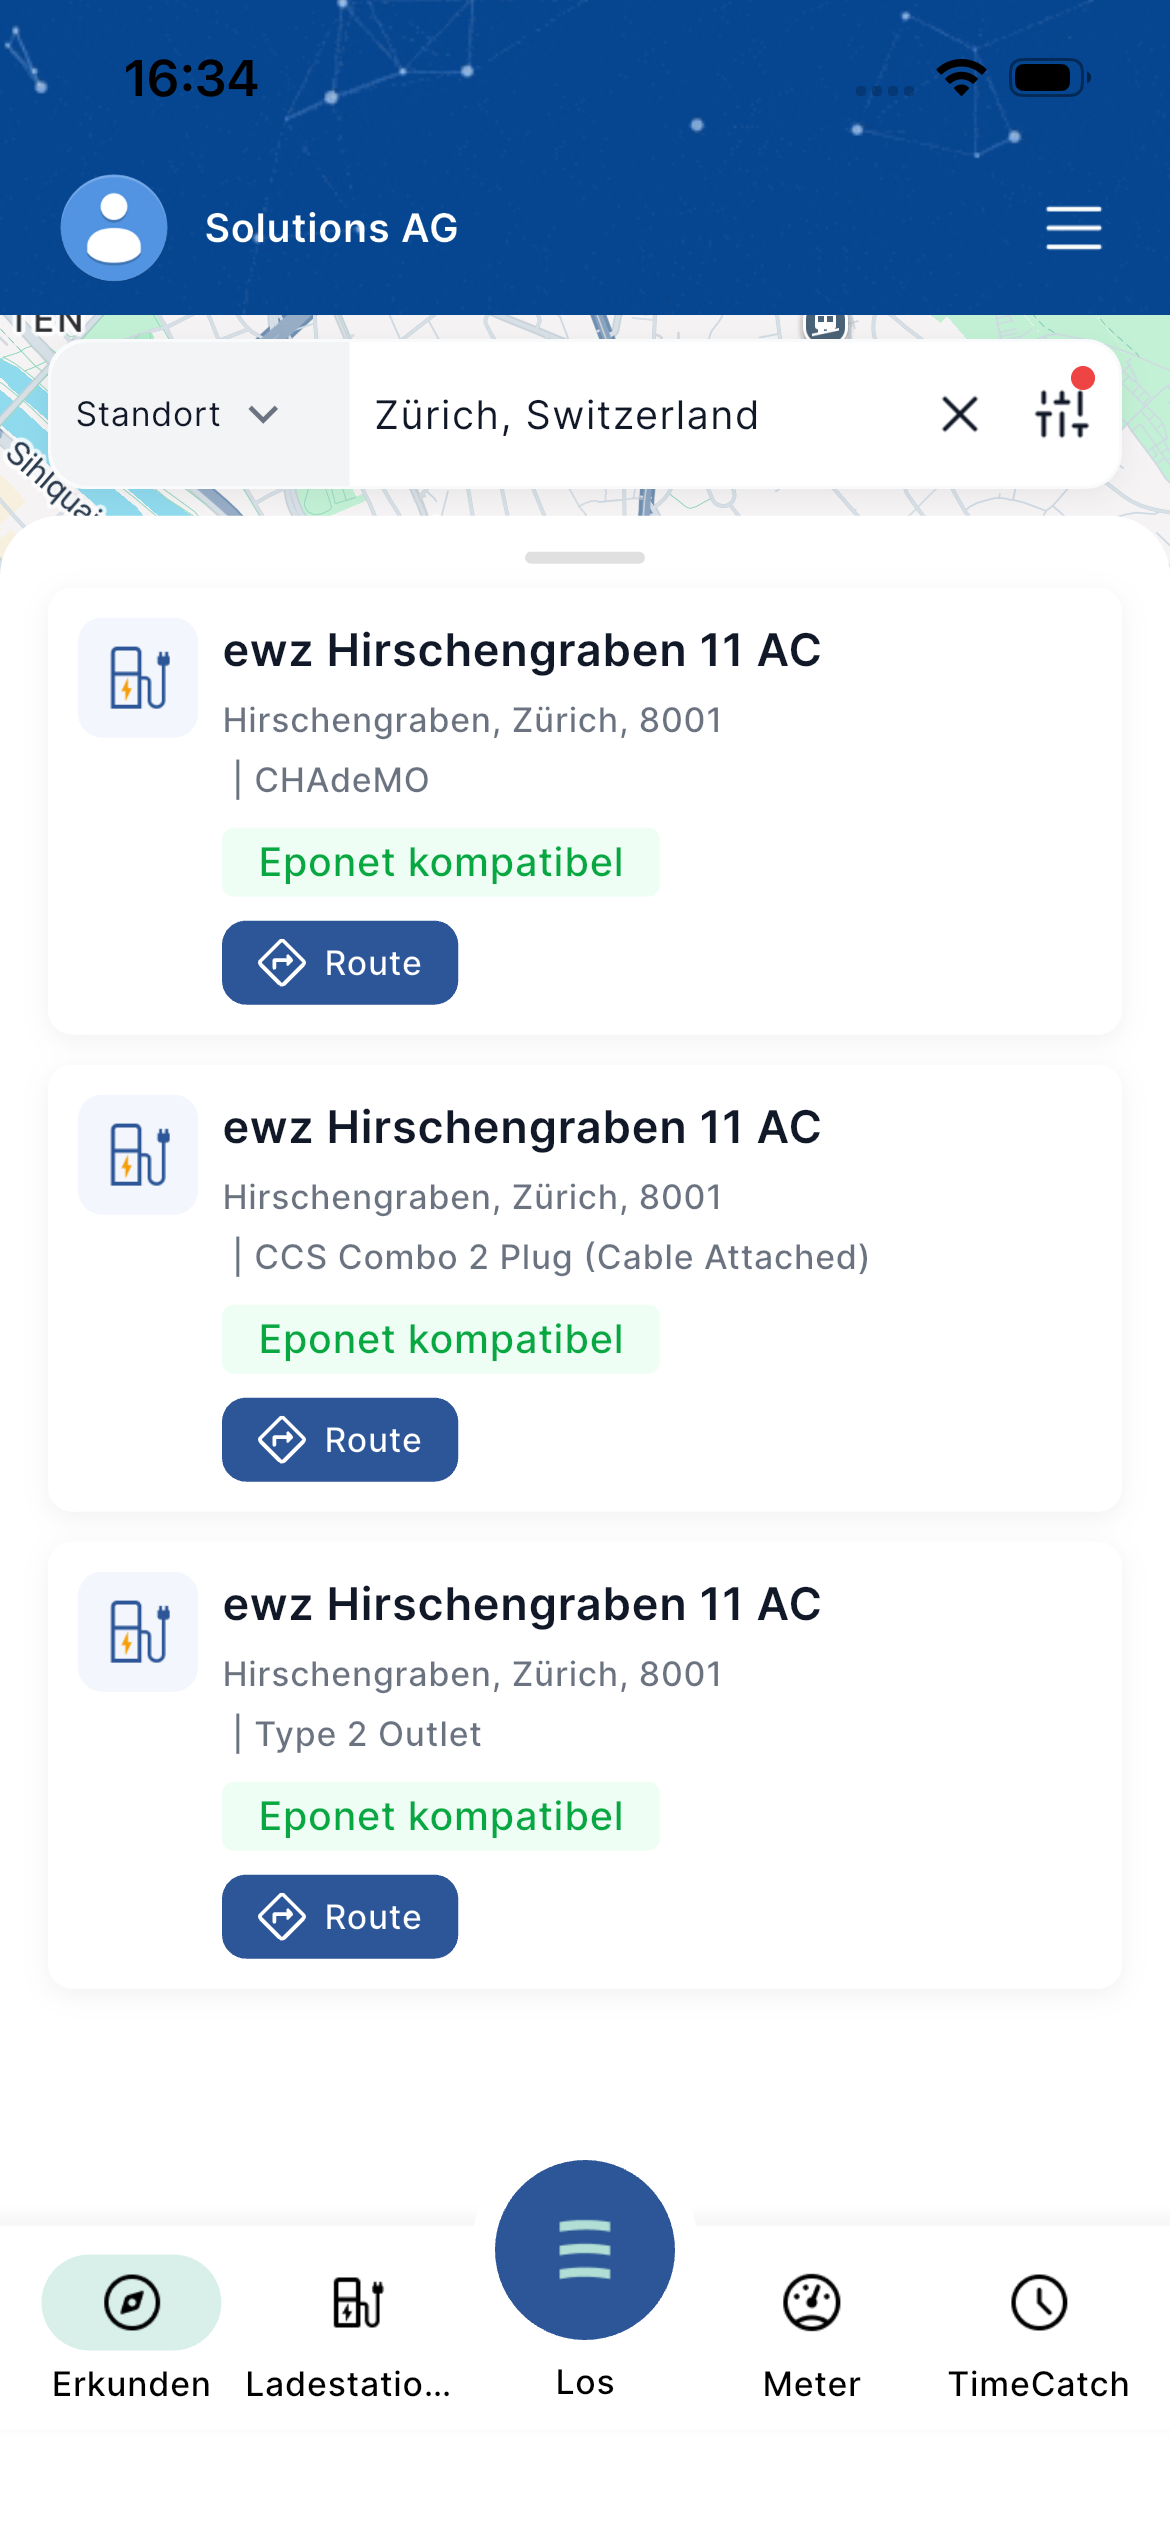
Once the filters have been applied, only the relevant charging stations will be displayed on the map and in the list.
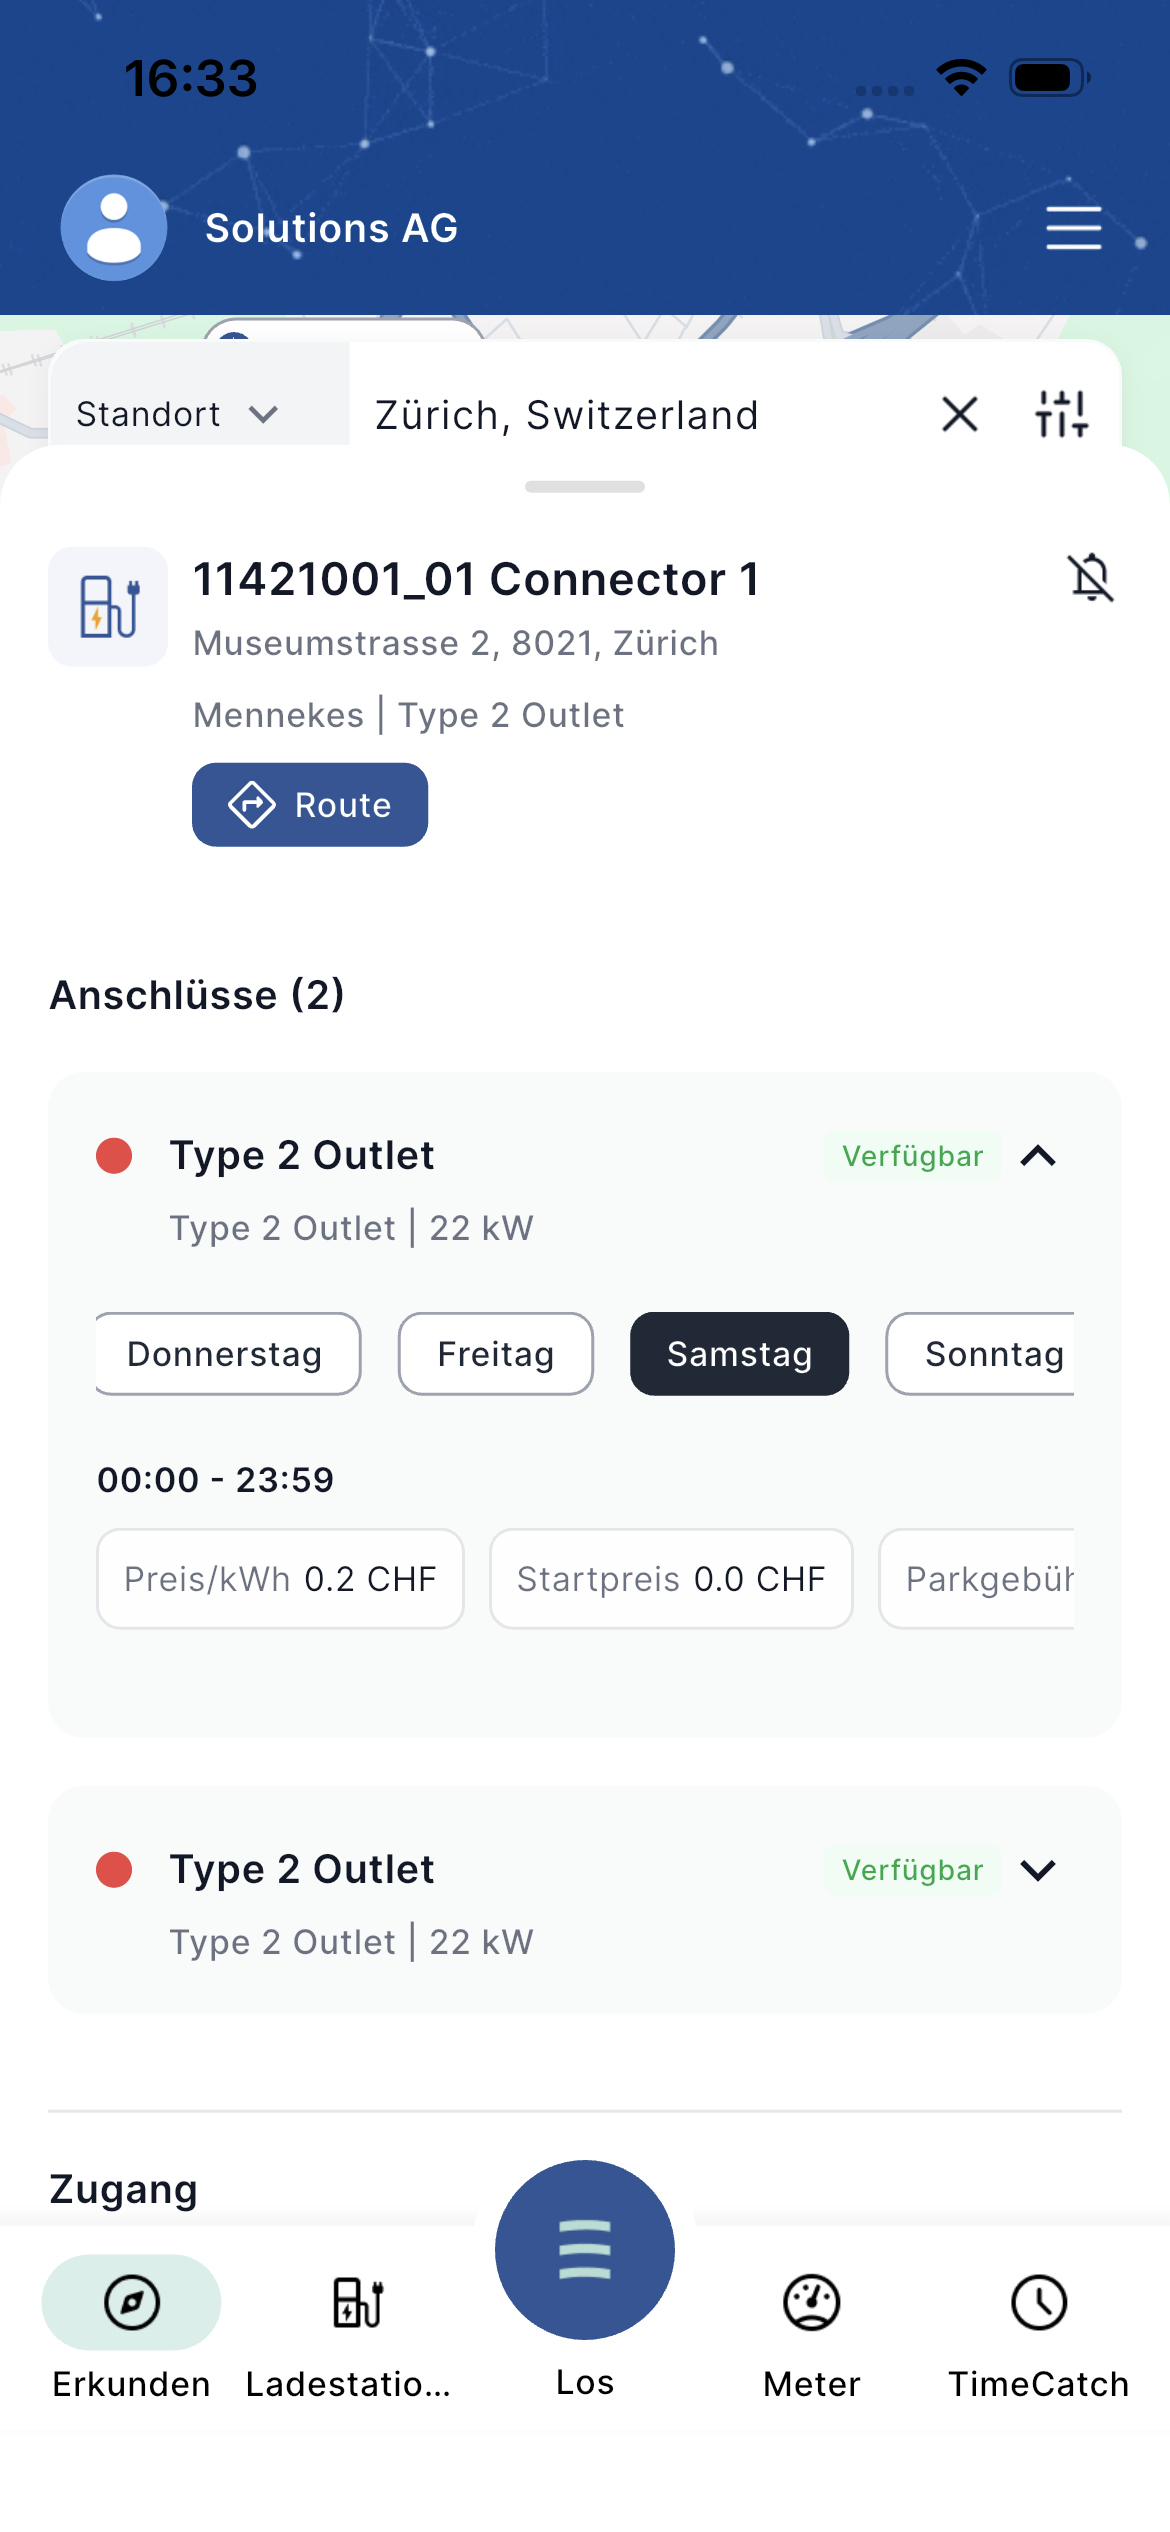
Viewing a charging station / multiple charging stations at the same location
- Tap any marker on the map (or a charging station in the list view).
- A detailed map or the full view of the charging station will open.
If several sockets/chargers share the same address, they are listed under ‘Sockets (X)’.
Example:
- Station name + address
- Port type and power (e.g. Type 2 socket | 22 kW)
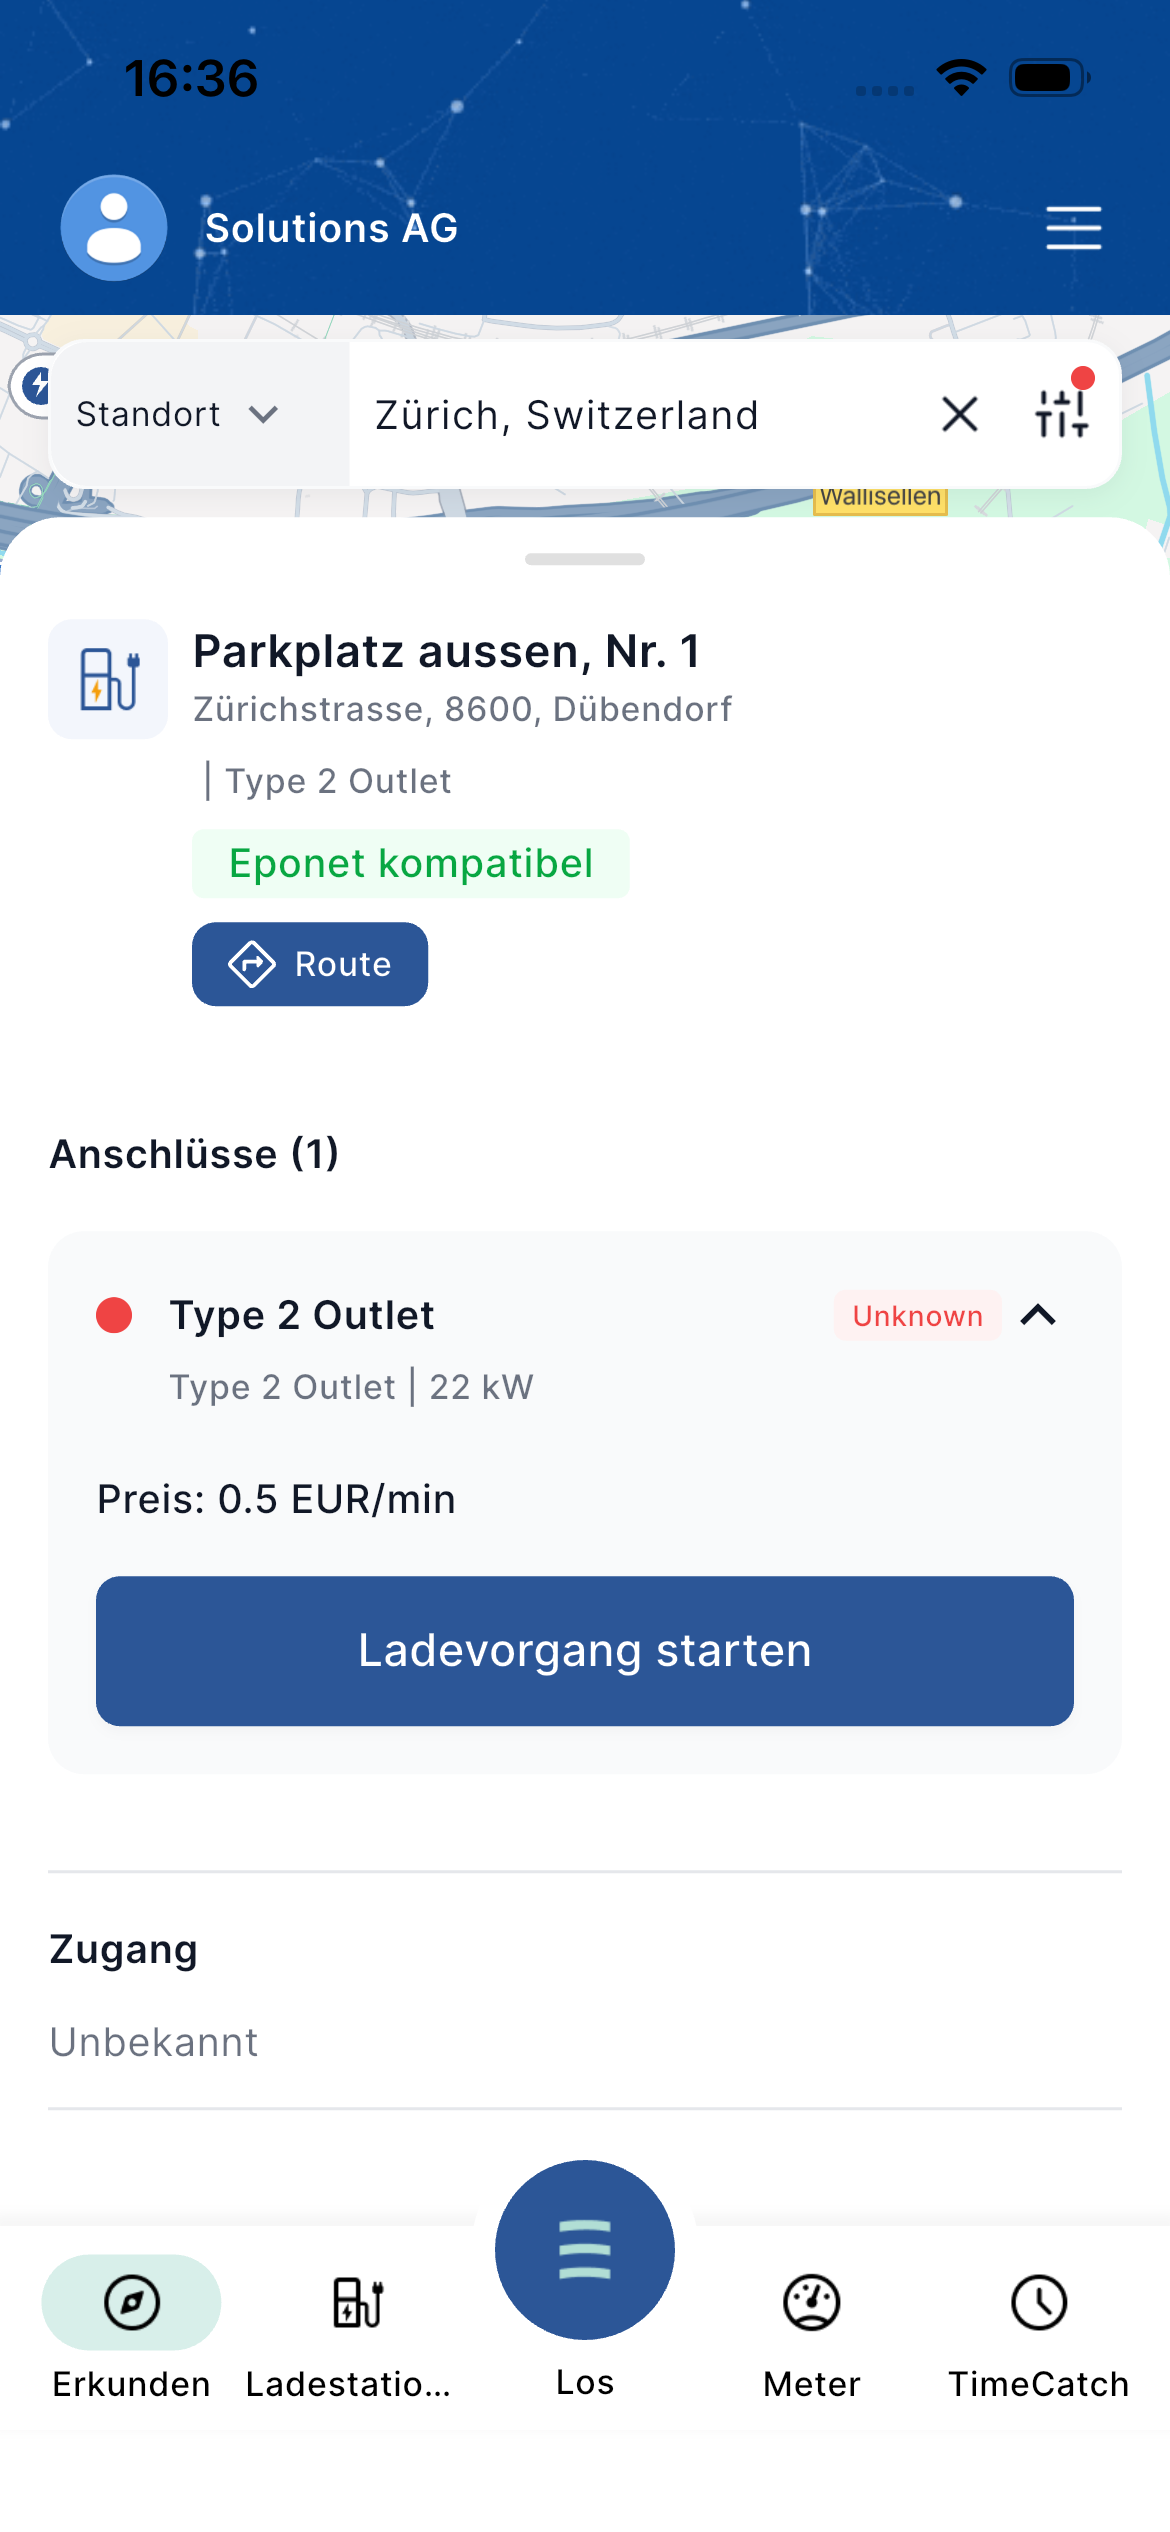
- Status: “Available” (green) or “Unknown / occupied”
- Opening hours / Day selection (Thursday, Friday, Saturday, Sunday…)
- Pricing information (price per kWh, starting price, parking fee)
- ‘Eponet-compatible’ icon (green) if the charging station supports Eponet / roaming
You can show or hide each connection using the arrow.
Start charging (particularly Hubject roaming)
Prerequisite
- You must have at least one roaming-enabled RFID card in your Eponet account or select the option to activate Hubject roaming.
Steps
- Open a compatible charging station (look for the green ‘Eponet compatible’ seal).
- Select the desired port.
- Tap ‘Start charging’.
- The ‘Select RFID card for charging’ screen will appear.
- Select one of the Hubject-enabled cards.
- Confirm your selection.
- Charging begins (provided the charger supports remote start).
Note: Remote start via the app is available at Hubject roaming-enabled stations, provided the selected charger supports this function.
Behaviour may vary slightly between different charging stations.
Other useful features
- Route – Tap the blue ‘Route’ button on any station map to open navigation to the charging station.
- Clock icon – Set up a push notification for status changes to the relevant charger (for the next 2 hours only).
Quick overview – What the numbers mean
| Display on the map / Map | Meaning |
|---|---|
| 2/3 | 22 kW | 2 out of 3 connections available, max. 22 kW |
| Available (green) | Connection is free |
| Unknown / red dot | Status unknown or occupied |
| Eponet-compatible (green symbol) | The station can be used with an Eponet card |
Tips for trouble-free use
- Zoom in on densely populated areas (city centres) to distinguish between overlapping markers.
- Check the ‘Day’ and ‘Opening Hours’ tabs before travelling to a station.
- When using Hubject stations, ensure that at least one roaming-enabled RFID card is registered and selected.