Establishment of a new charging network
Typical workflow
- Set up the network.
- Configure the network settings.
- Add chargers.
- Create pricing profiles.
- Invite members.
- Assign roles.
- Members start charging.
- Monitor analytics.
Step-by-step guide:
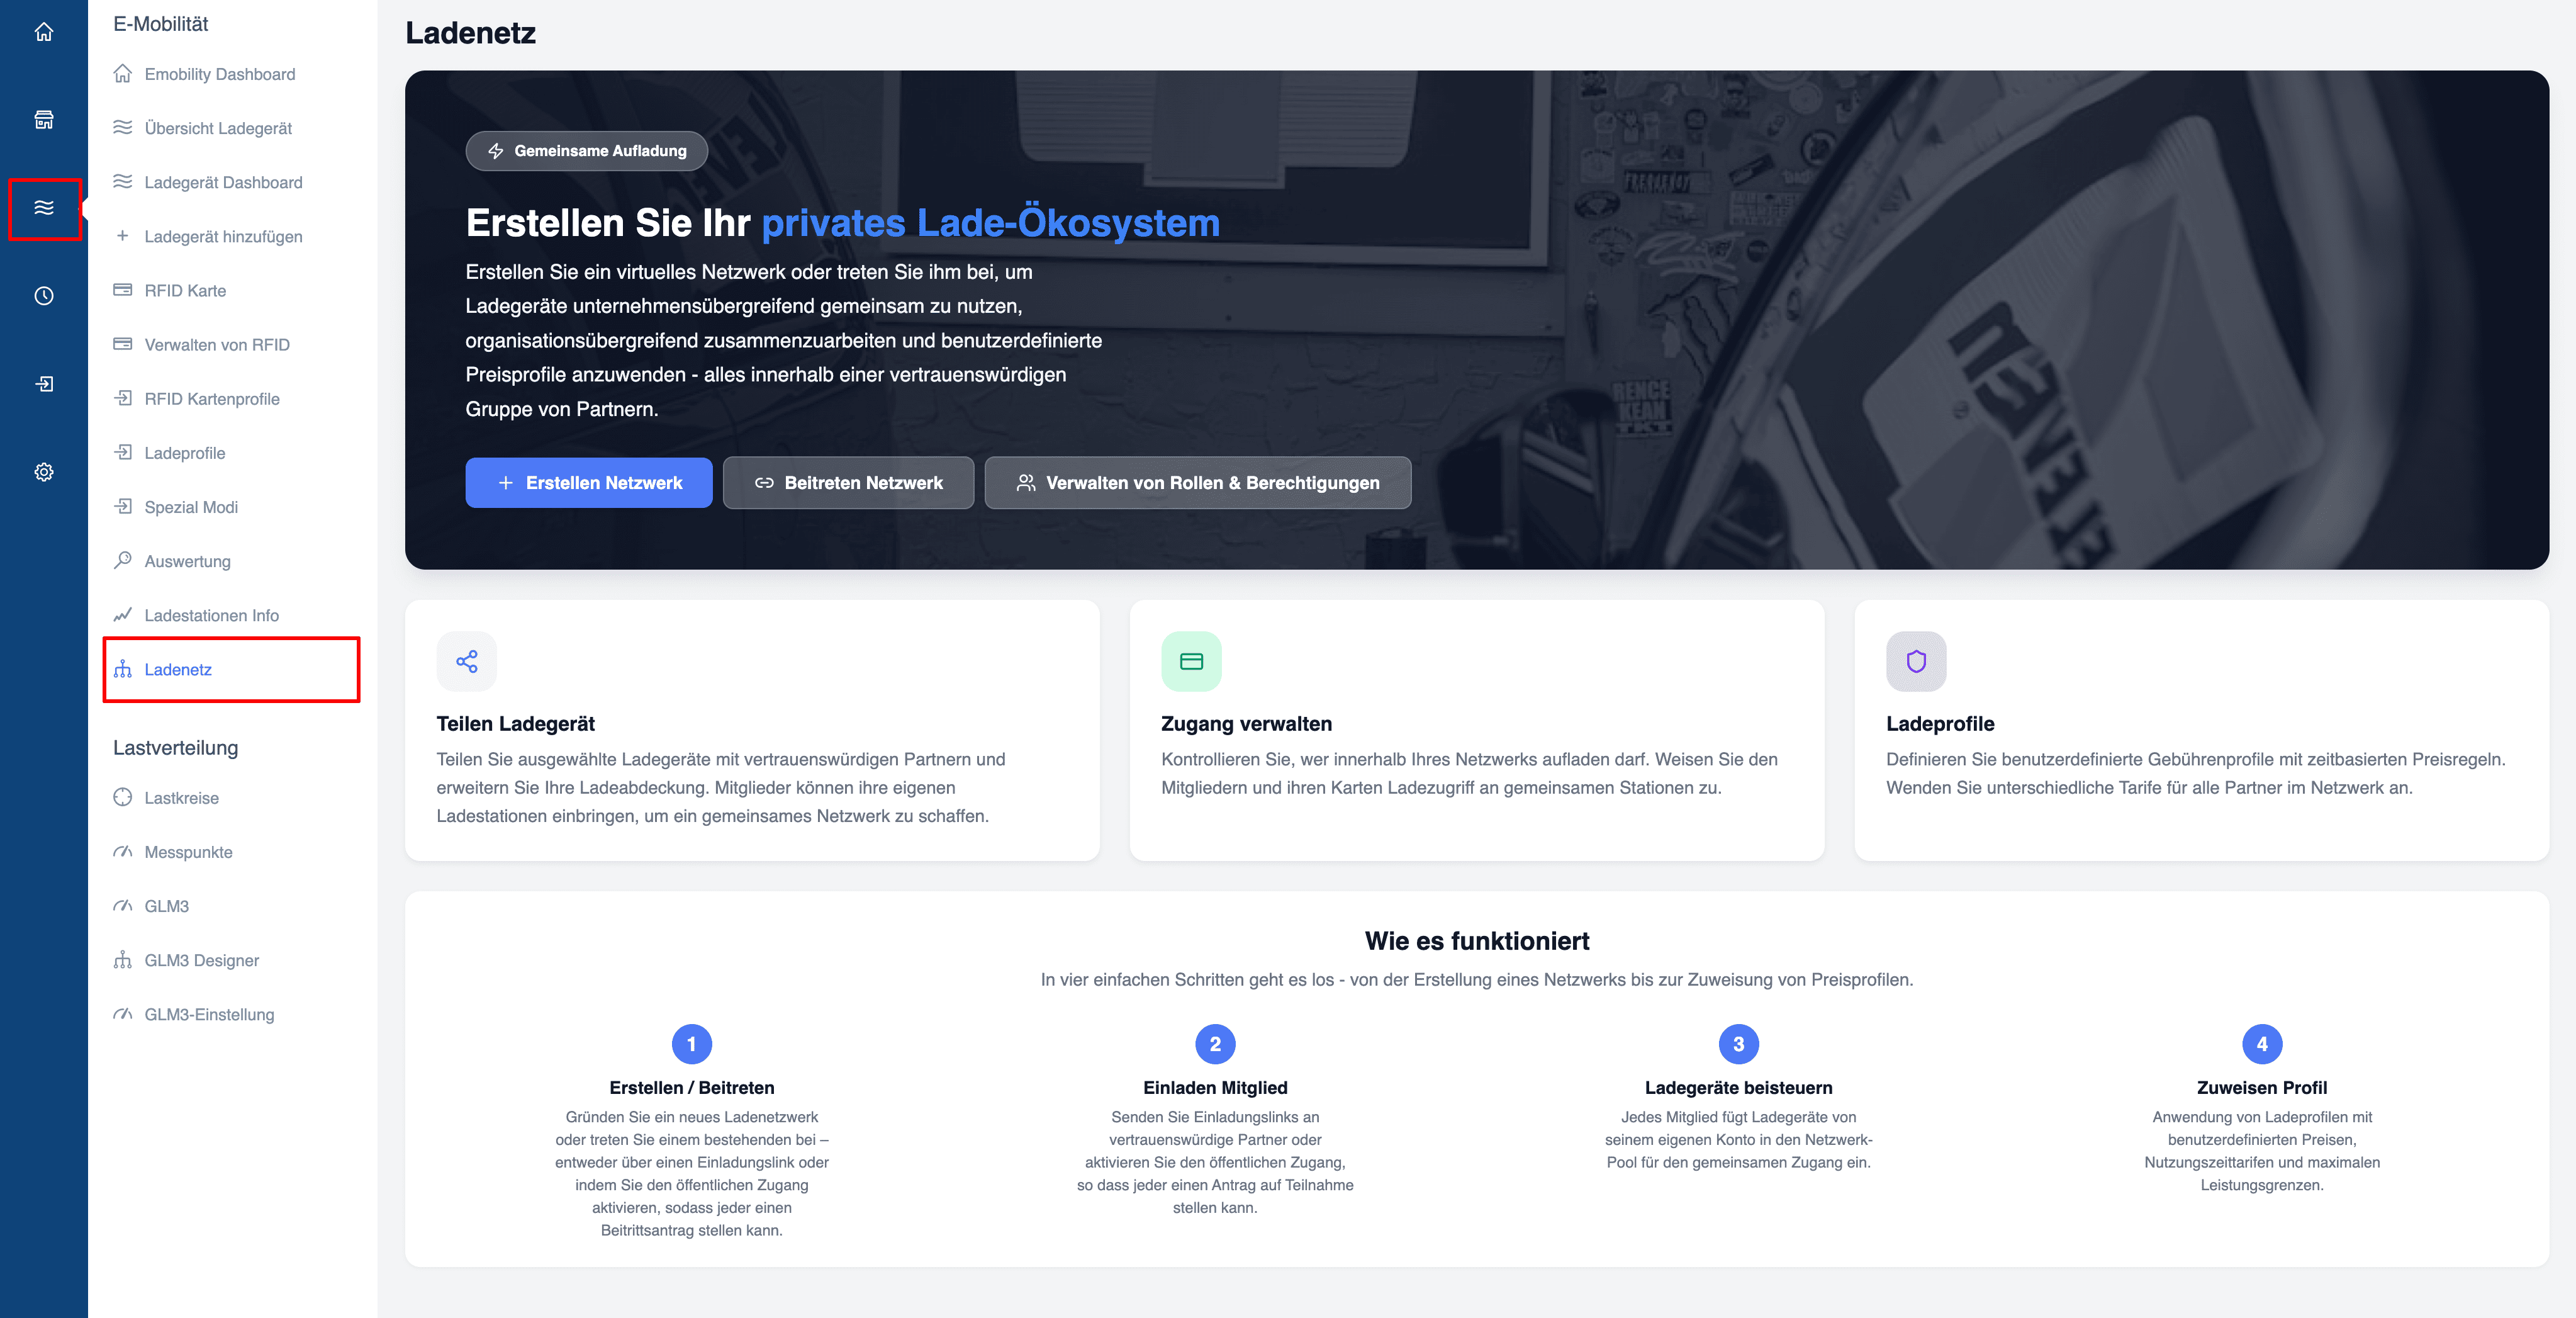
- Click on ‘Charging Network’ in the left-hand sidebar
- Click the blue ‘+ Create network’ button
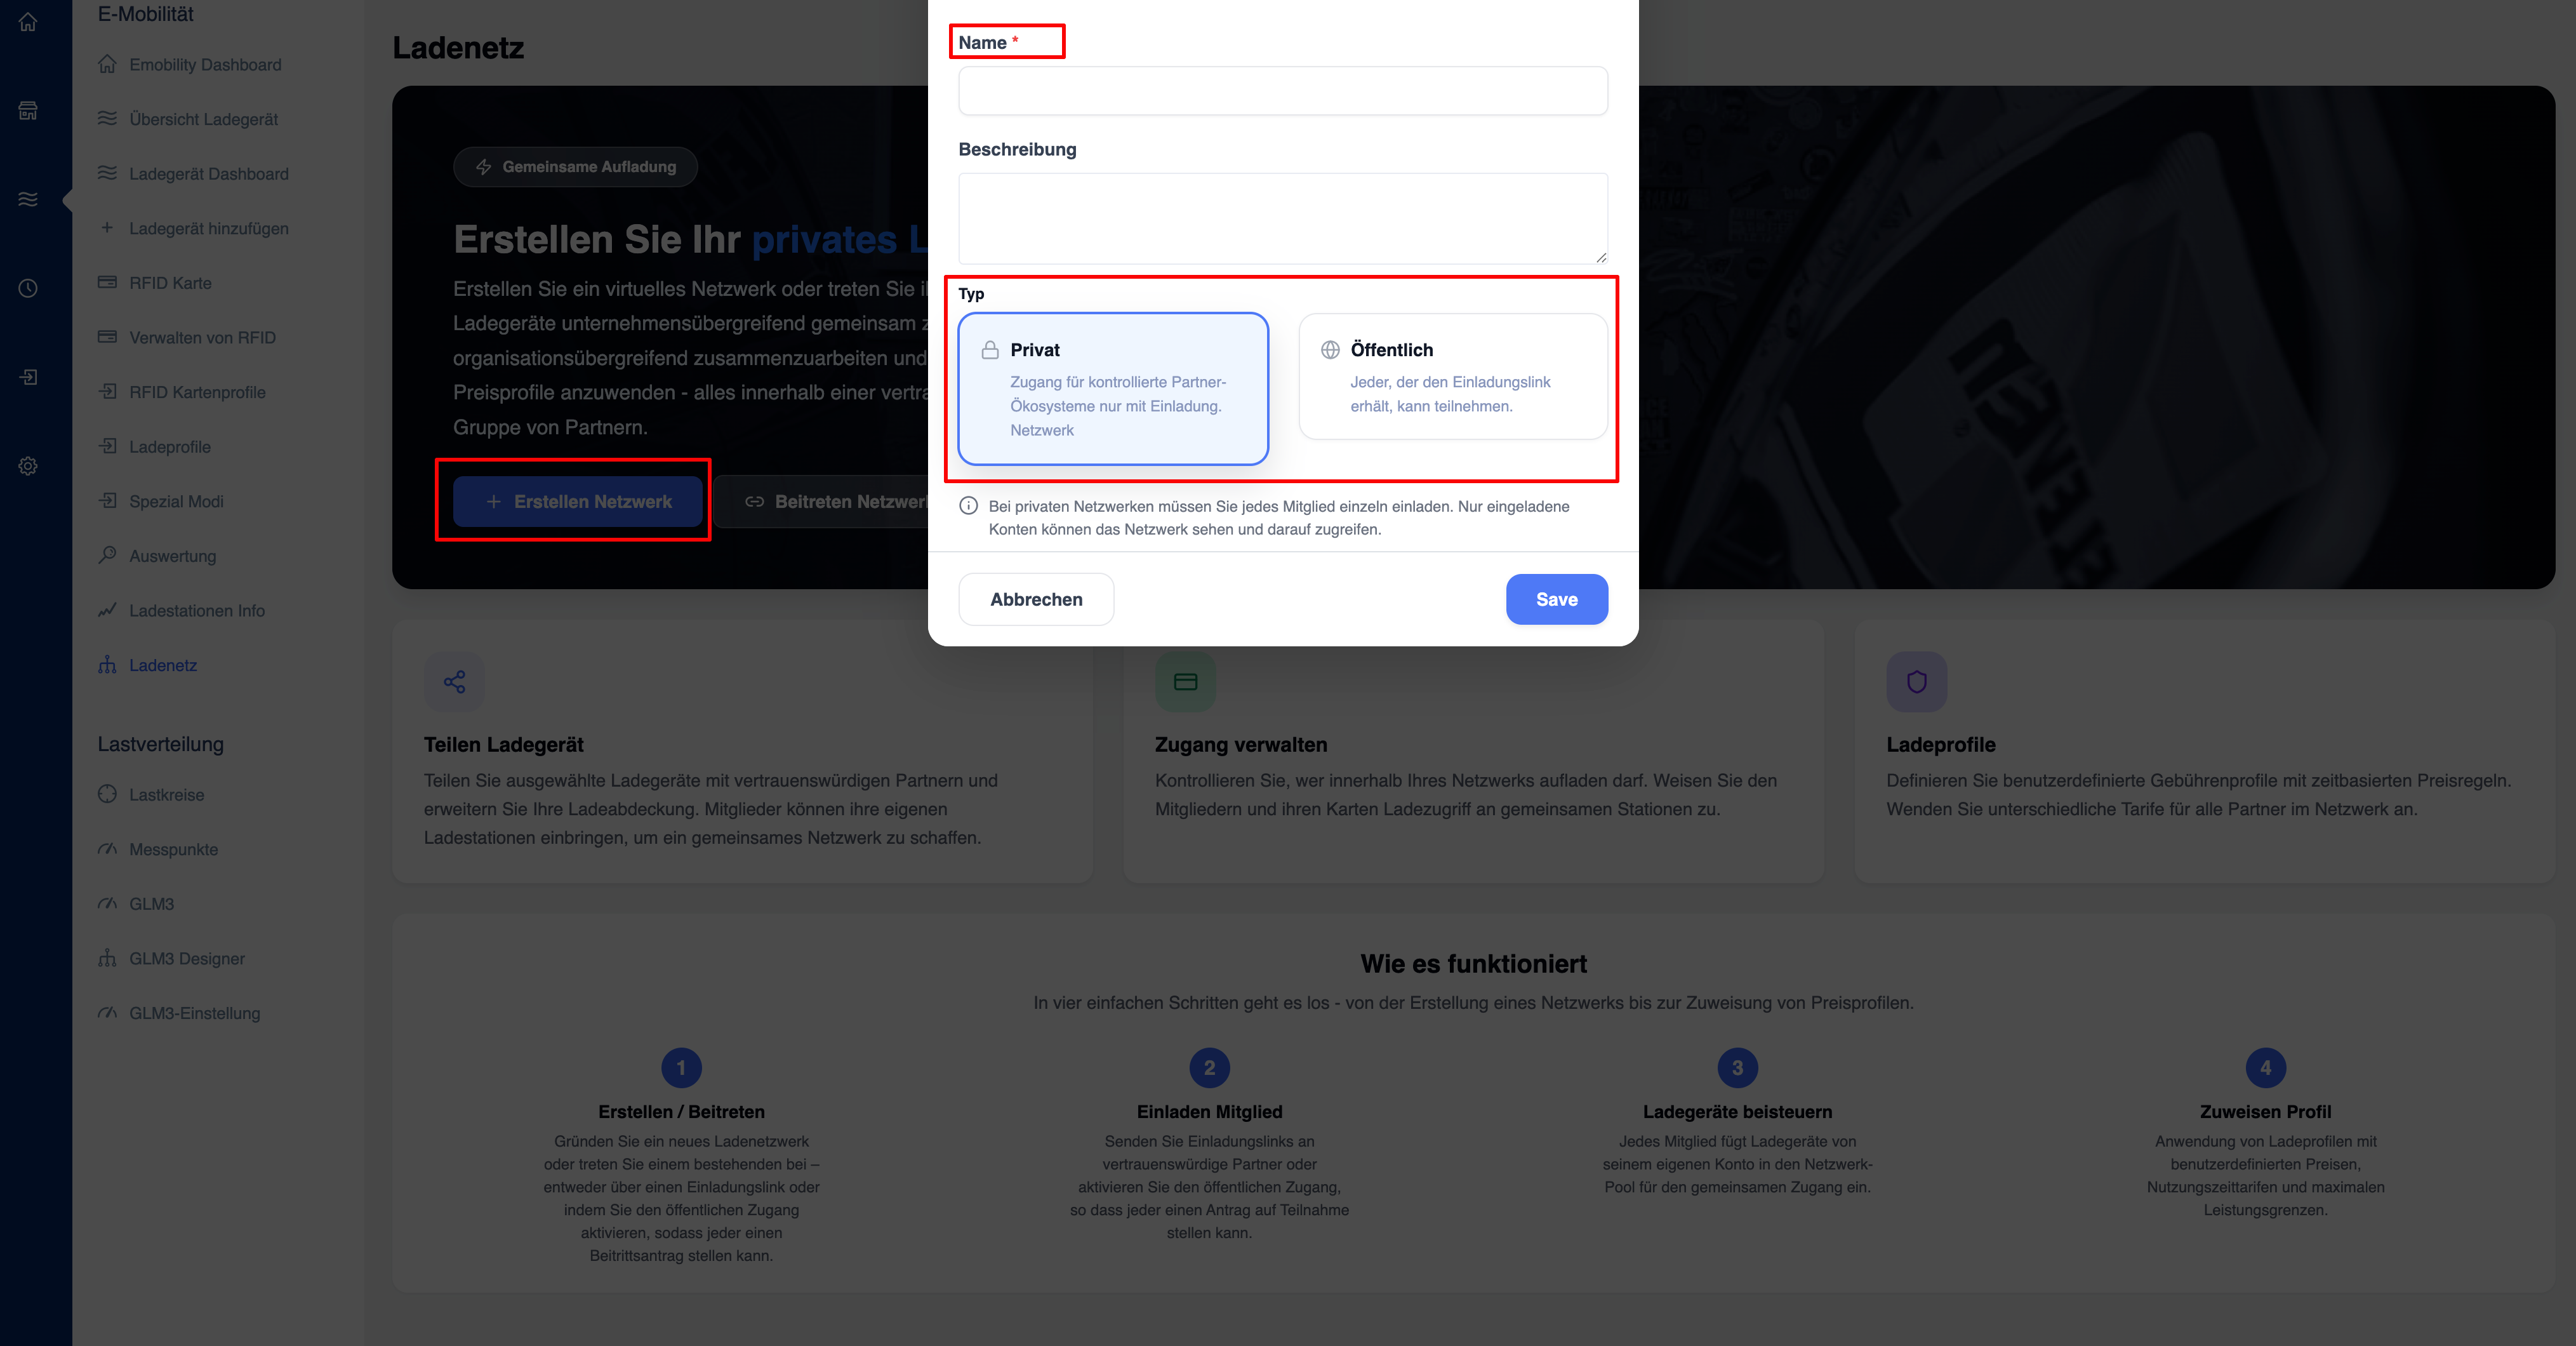
- Enter a name for your network
- Add a description (optional)
- Select the type:
- Private → Only invited members have access
- Public → Anyone can find and join the network
- Click ‘Save’
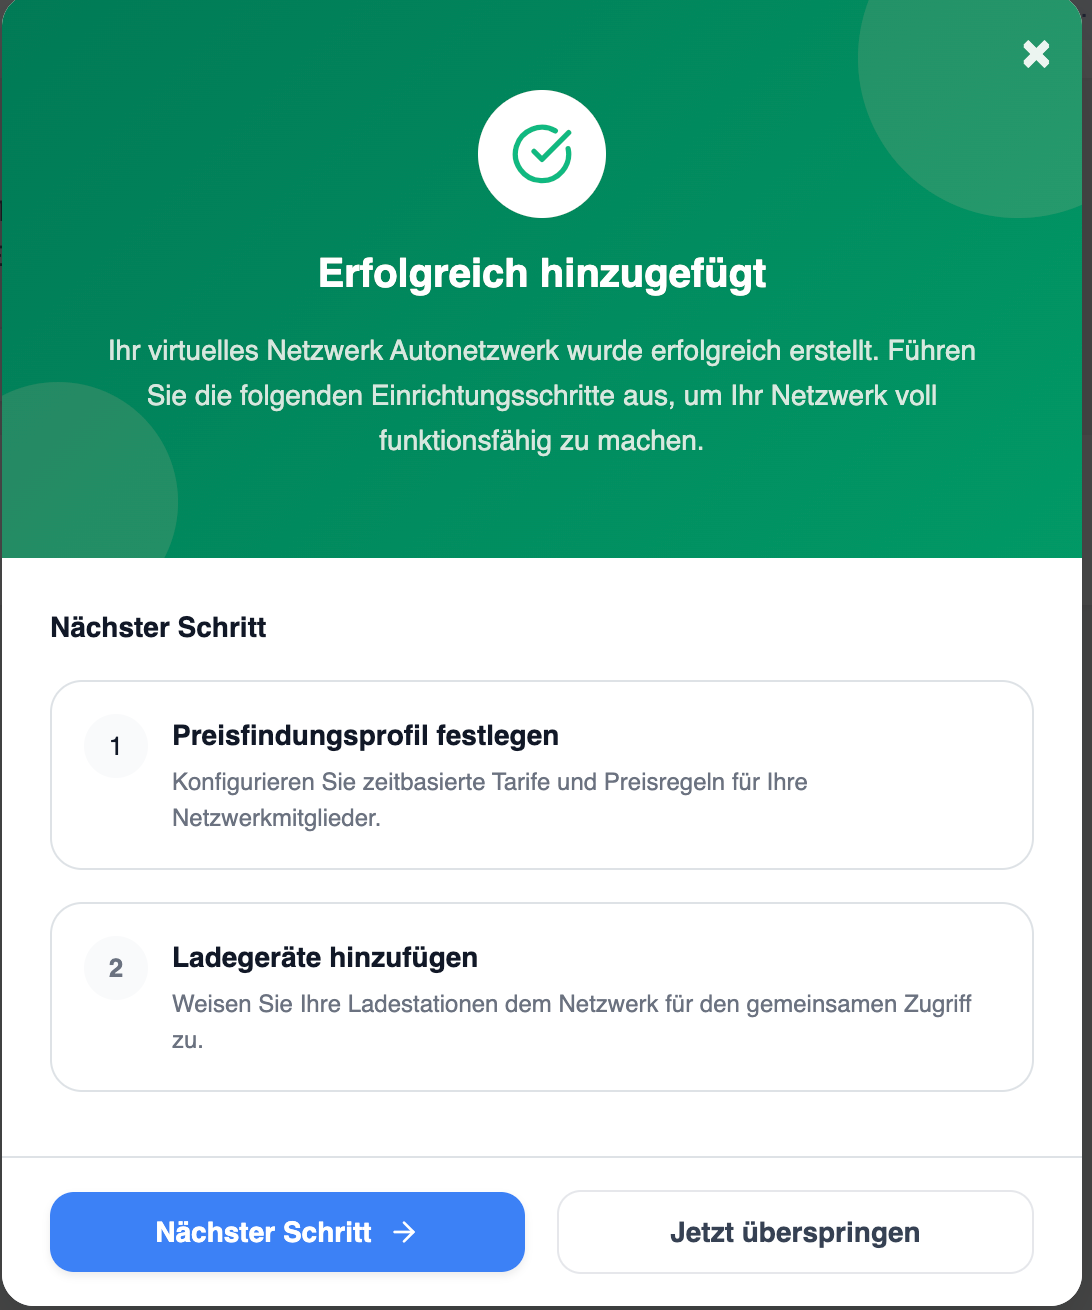
Once created, a success message will appear with recommendations for the next steps: setting up a pricing profile and adding charging points.
Configure prices
Pricing profiles & tariffs
Once the network has been created, the system recommends assigning a pricing profile.
Defining price profiles:
- Energy price (per kWh)
- Parking charges
- Standing charges
- Blocking charges
- Time-based pricing
- Weekly schedules
You can:
- Select an existing network profile
- Create a new profile
- skip this step and configure pricing later
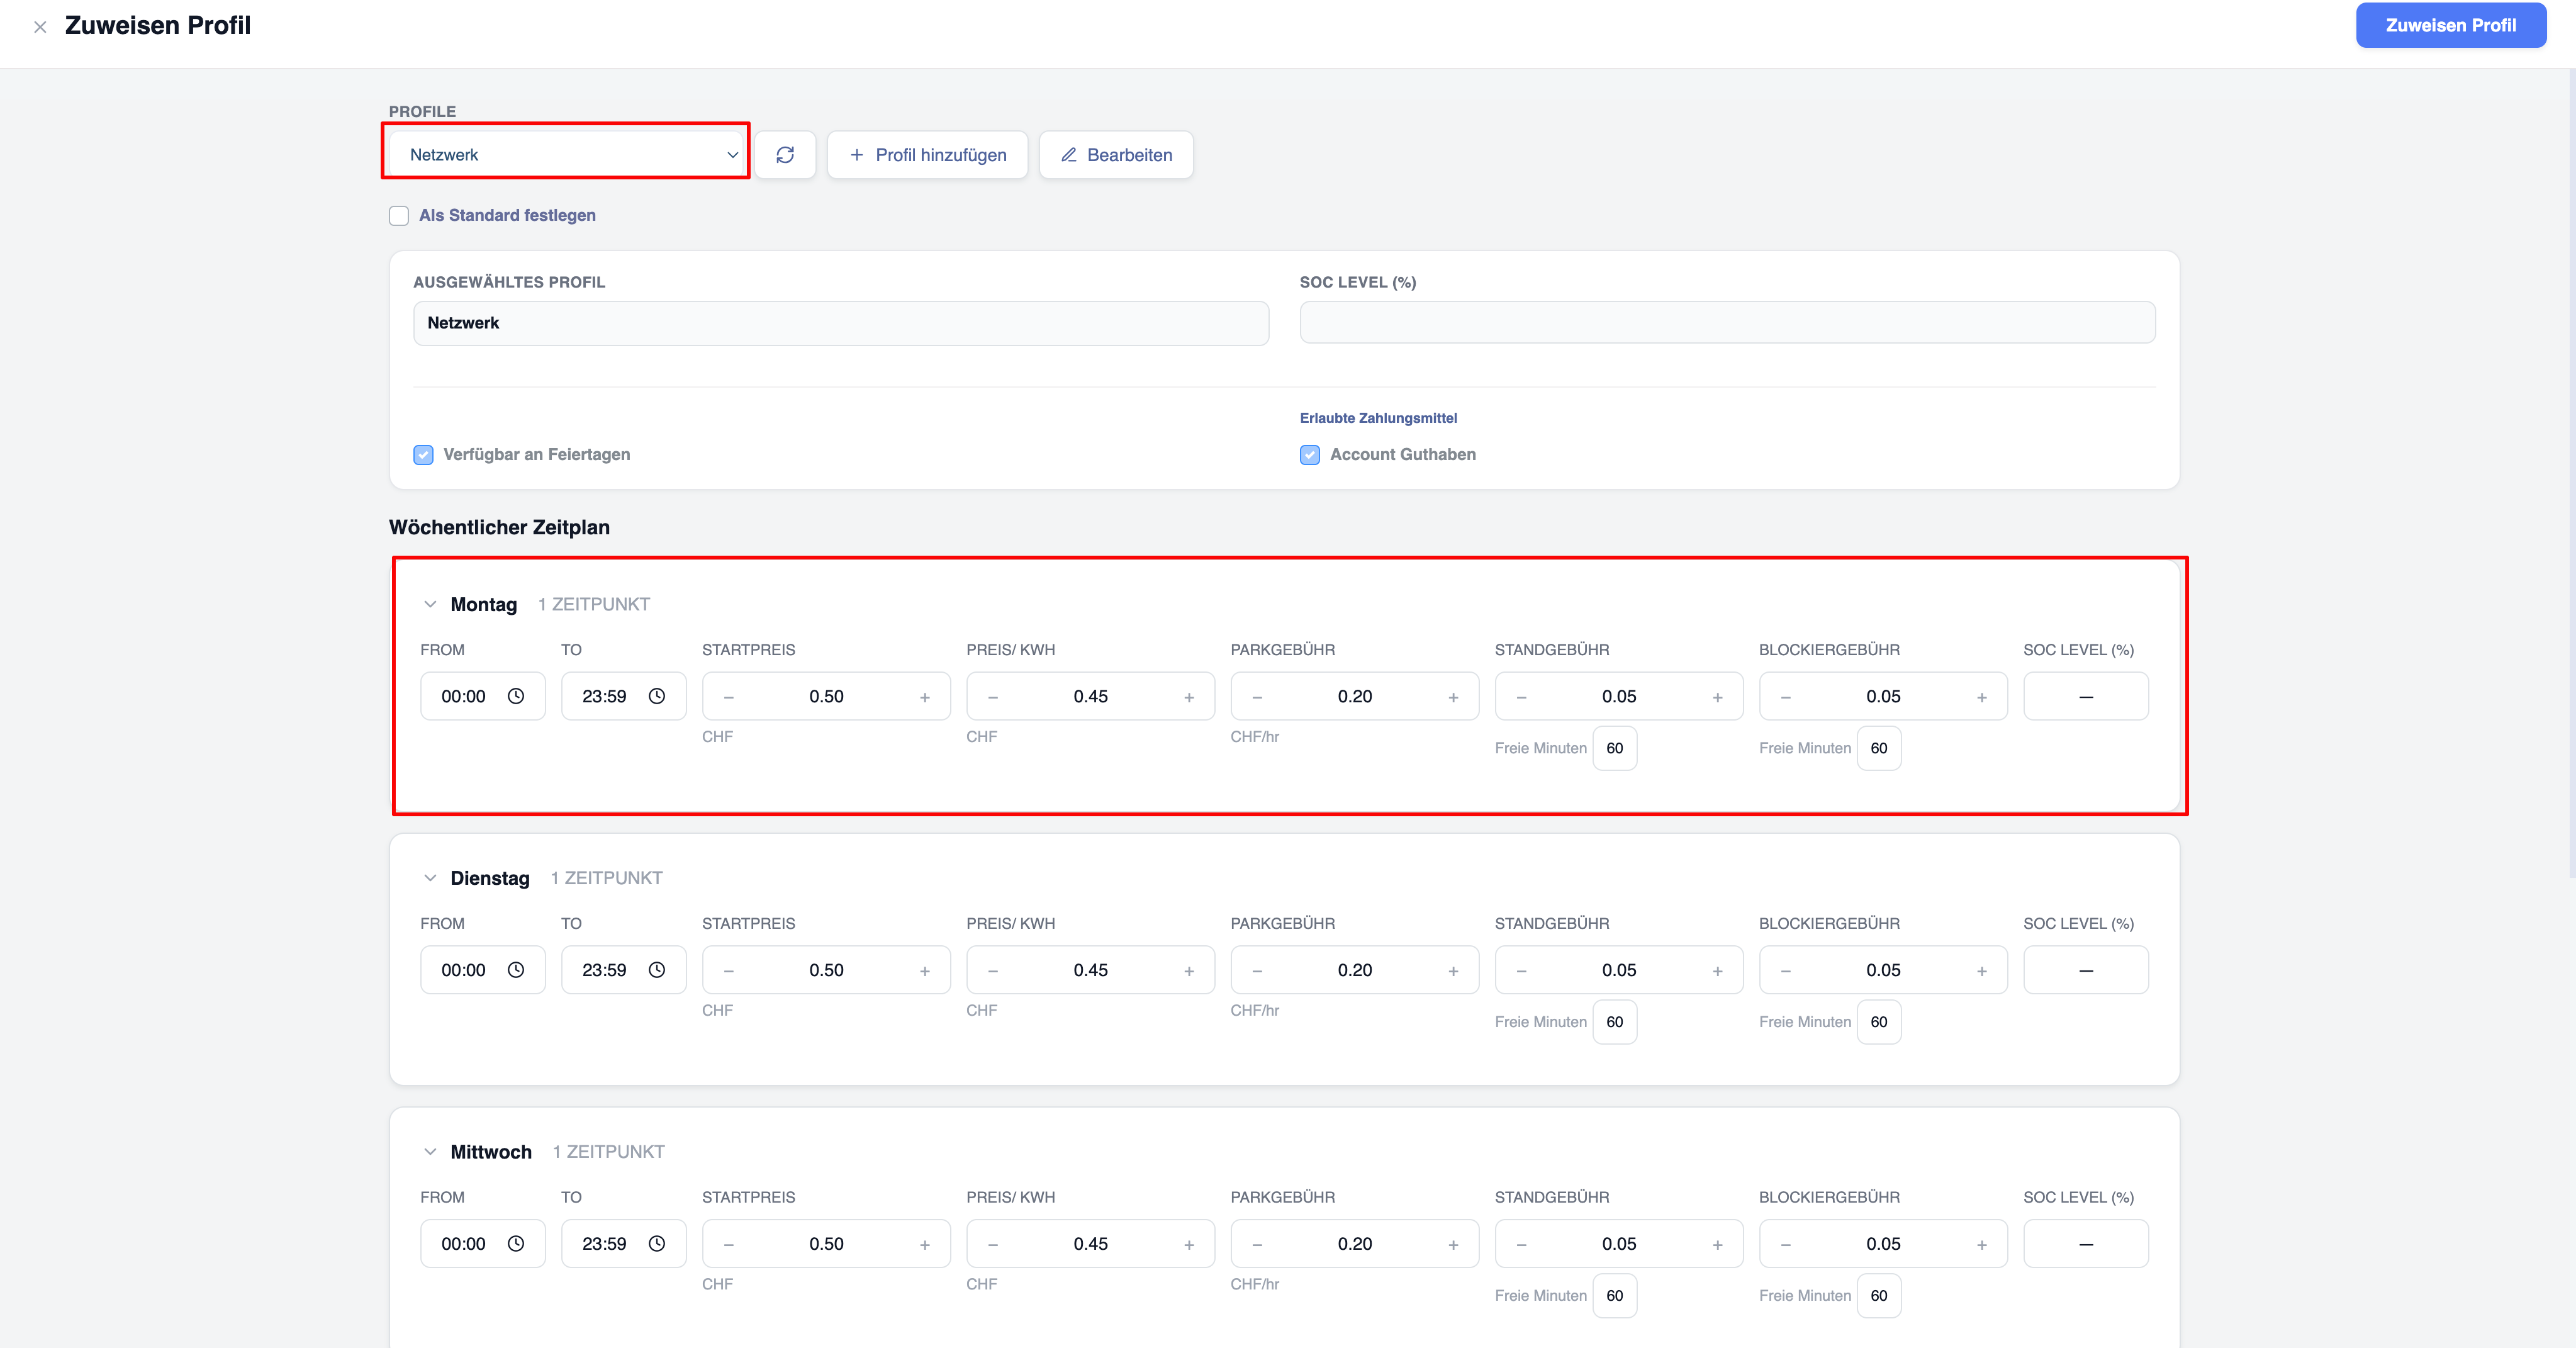
Price profiles allow you to set time-based rates for different days of the week.
Steps:
- Go to the ‘Pricing Profiles’ tab
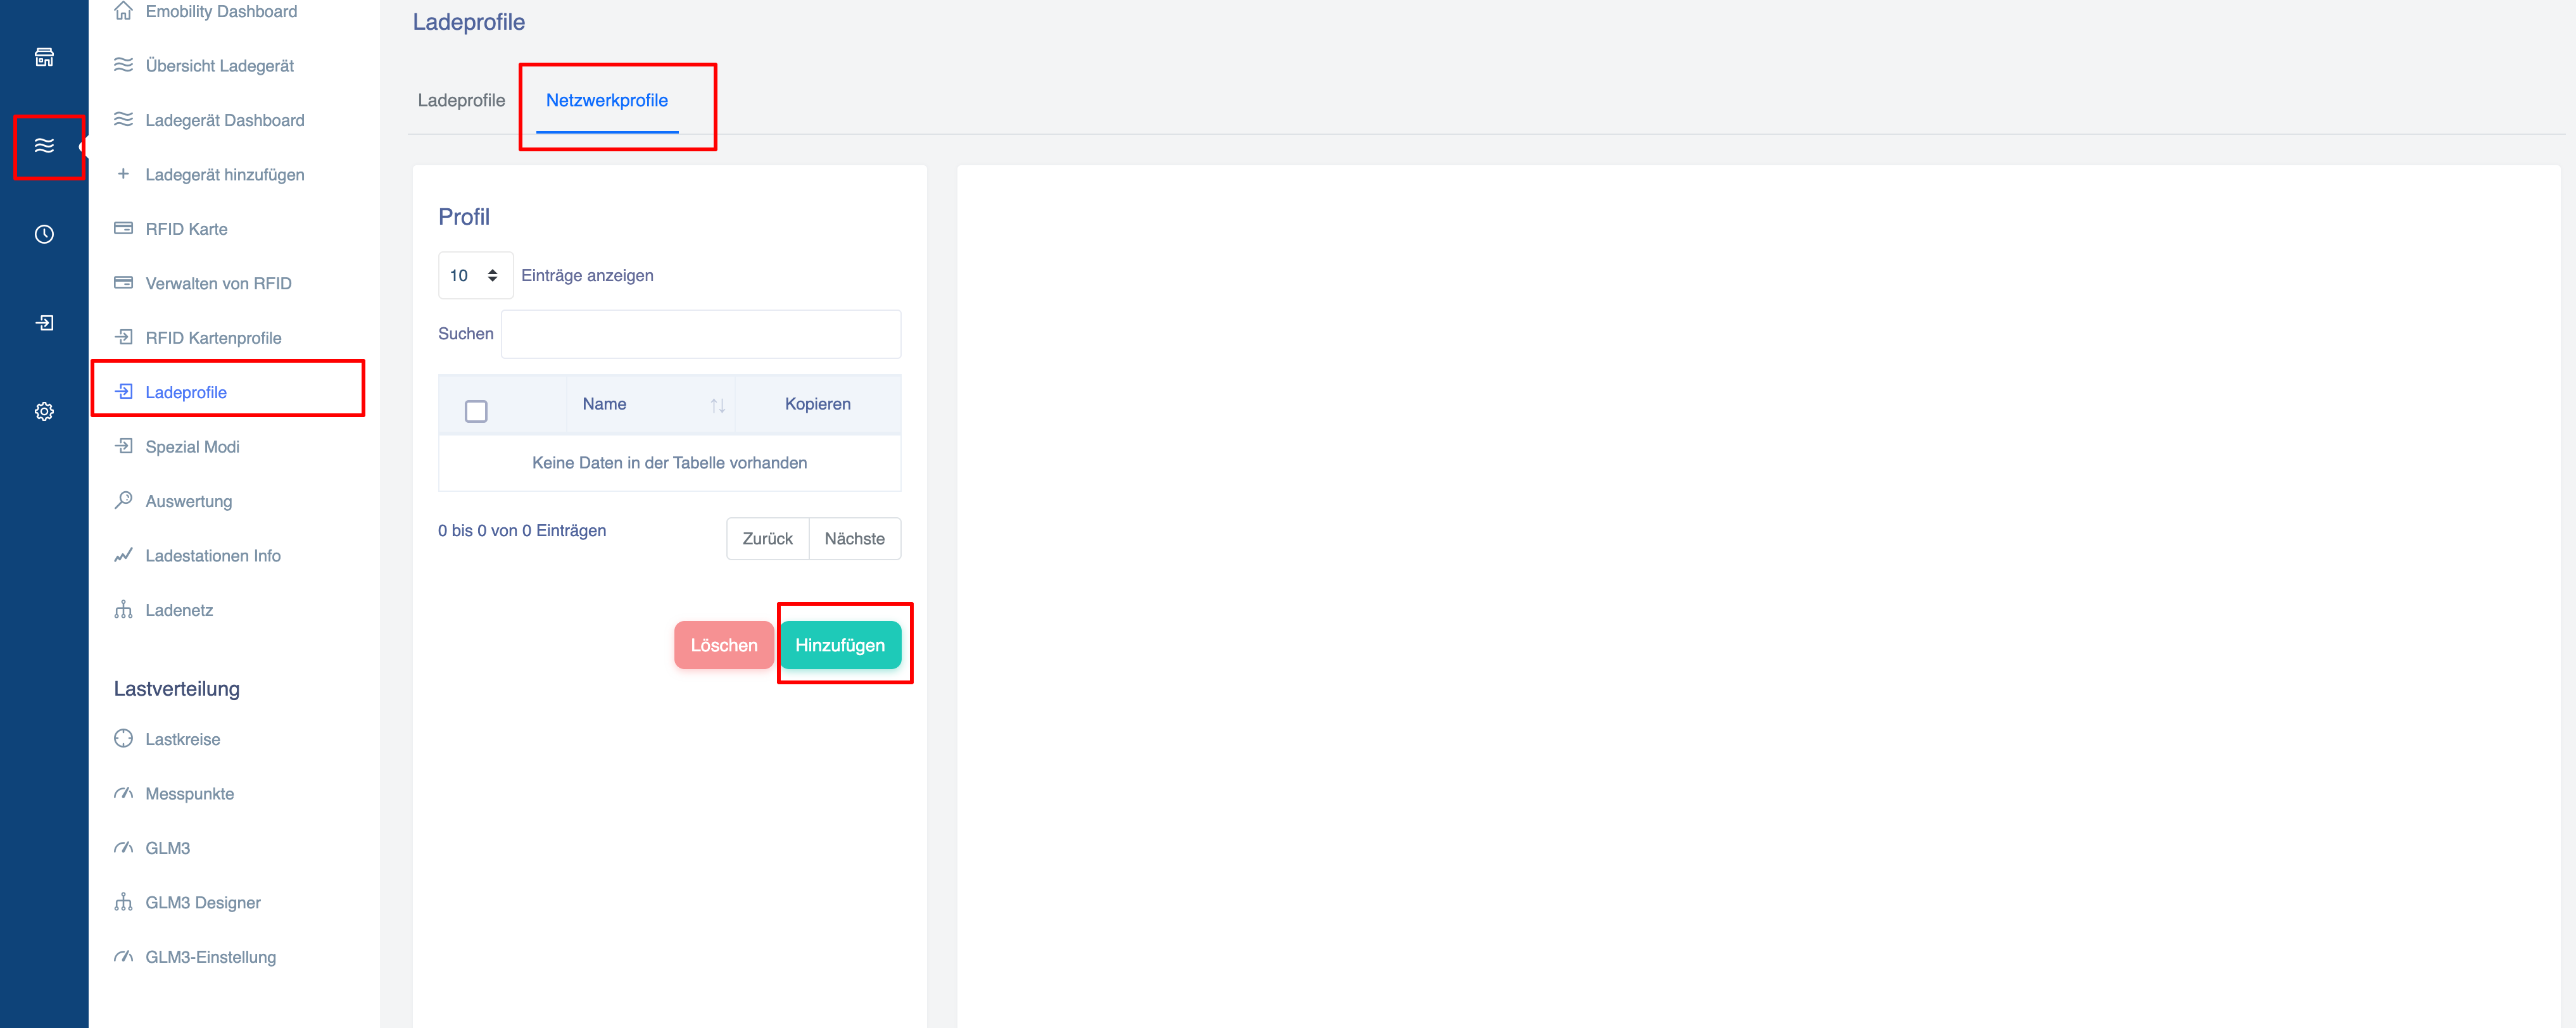
- Create or edit a network profile
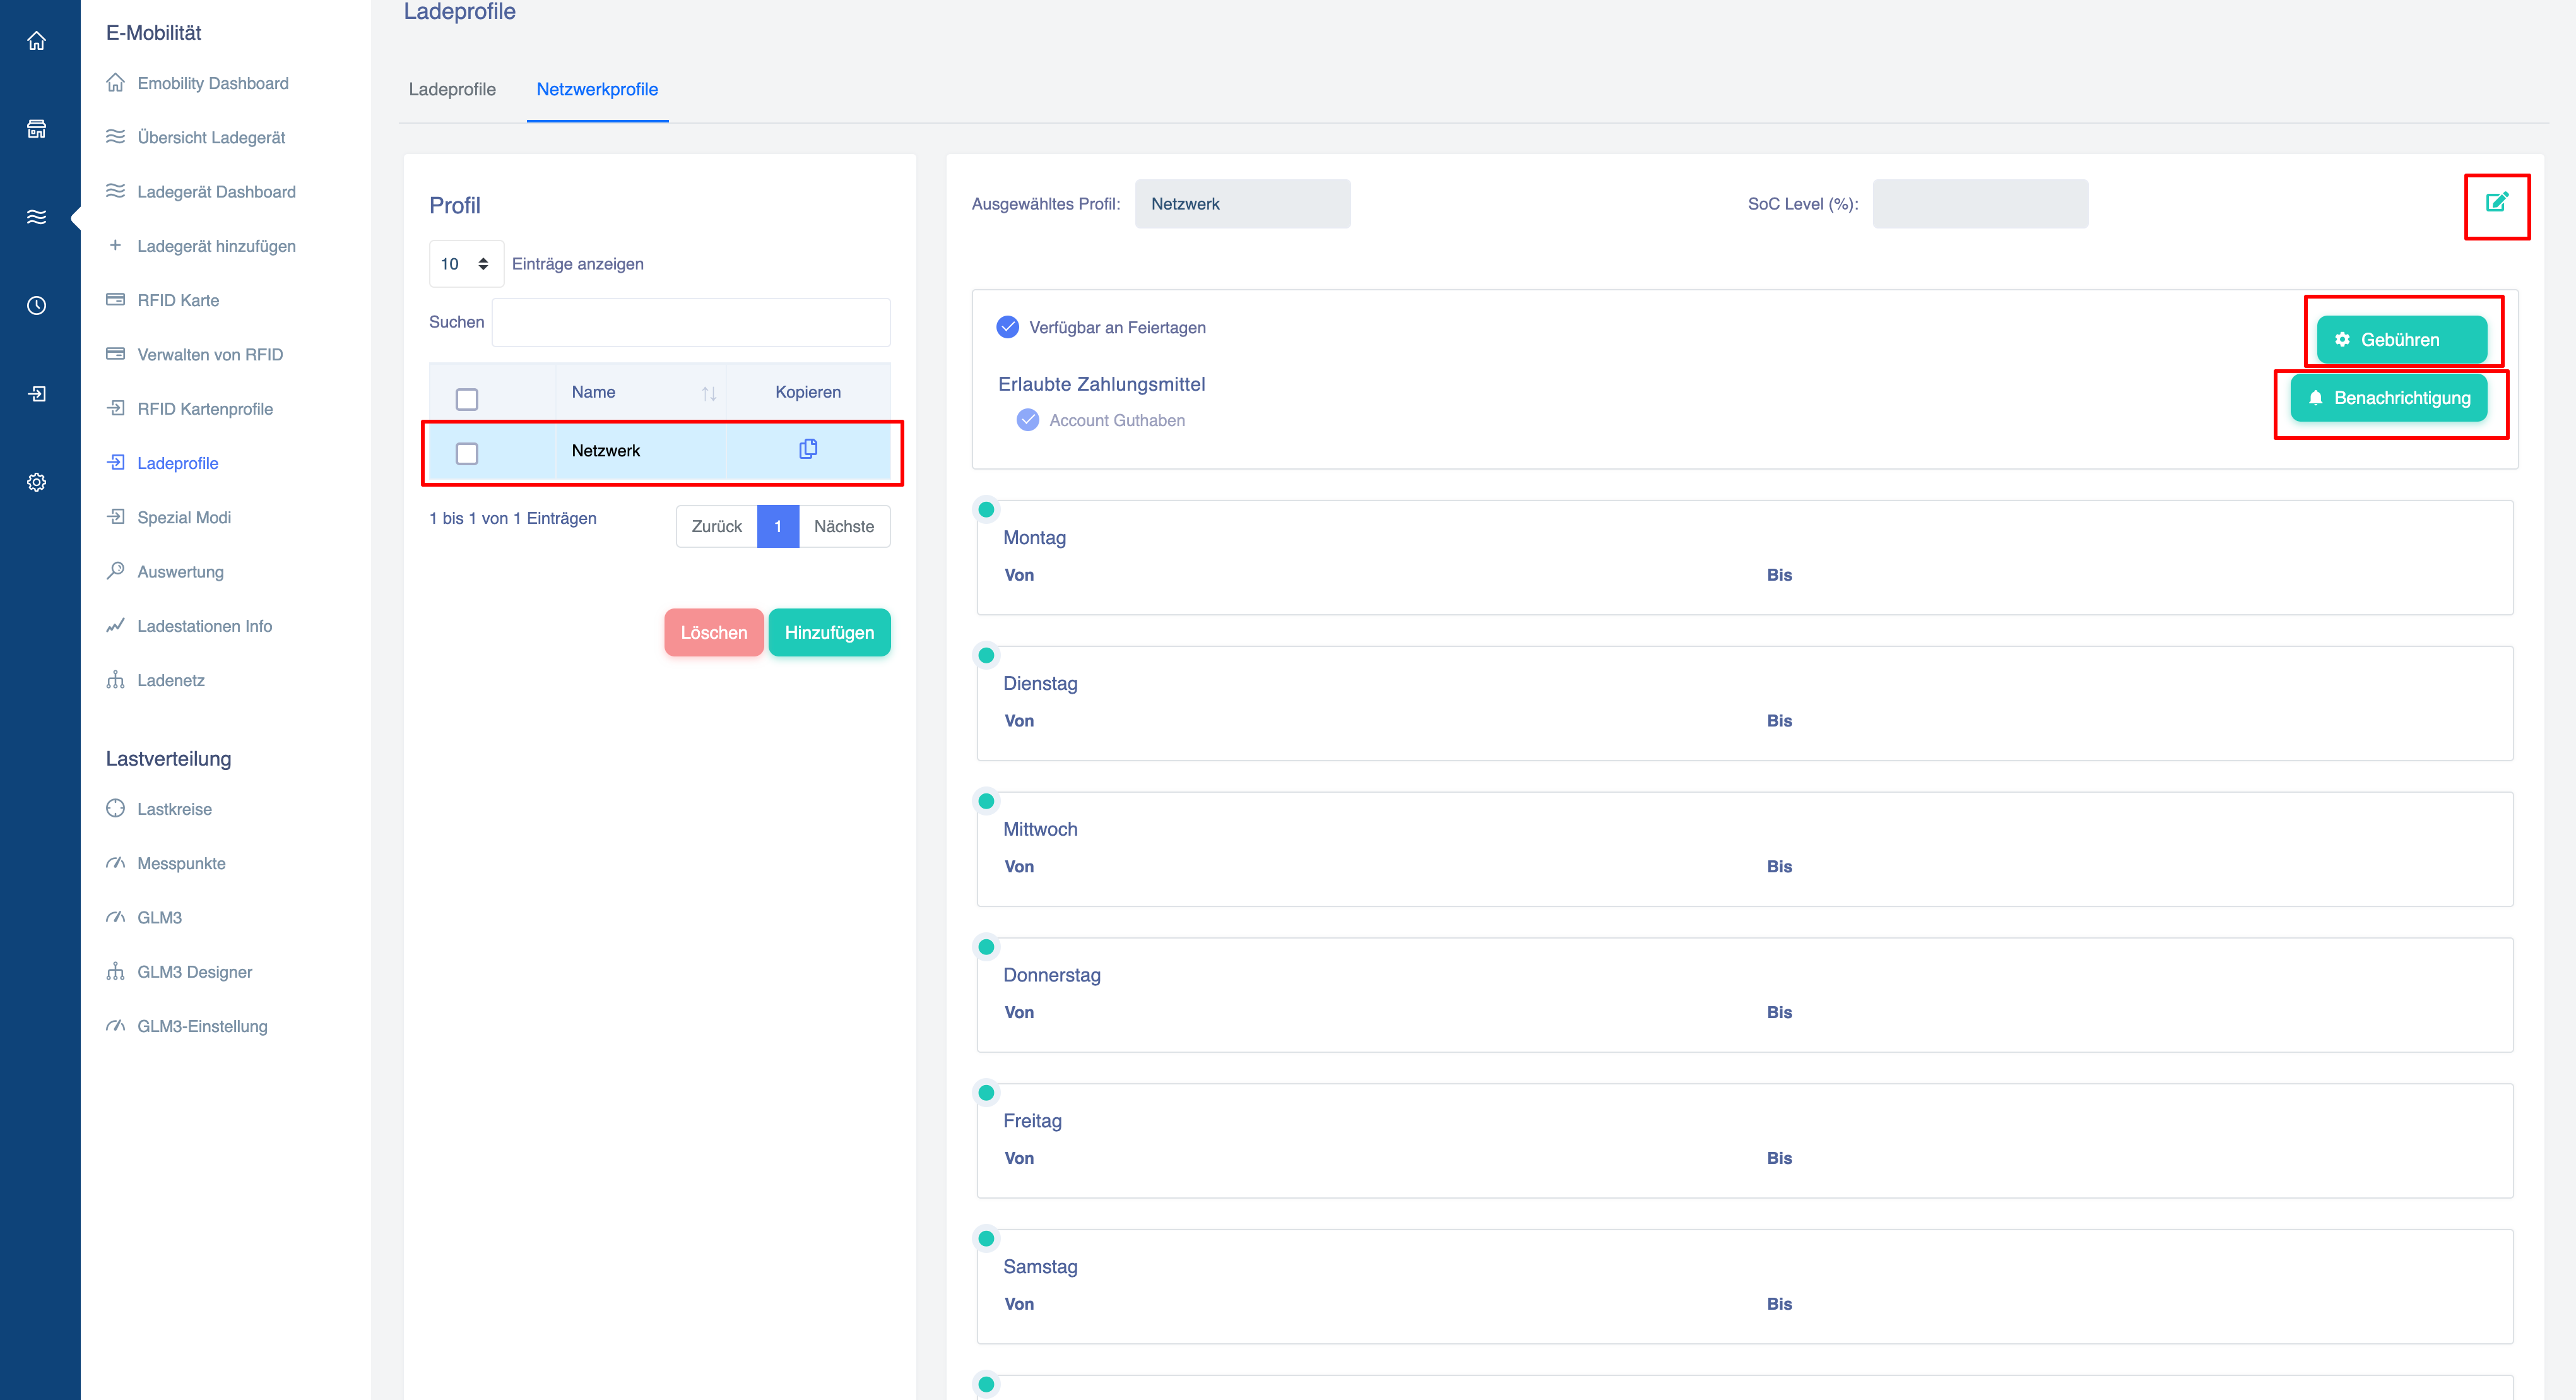
- Set prices per kWh, parking charges, blocking charges, etc.
- Assign the profile to the entire network or to individual members
Add charging points
Add and manage charging stations
To add charging points:
Once the network has been created, you can add your charging stations to the network
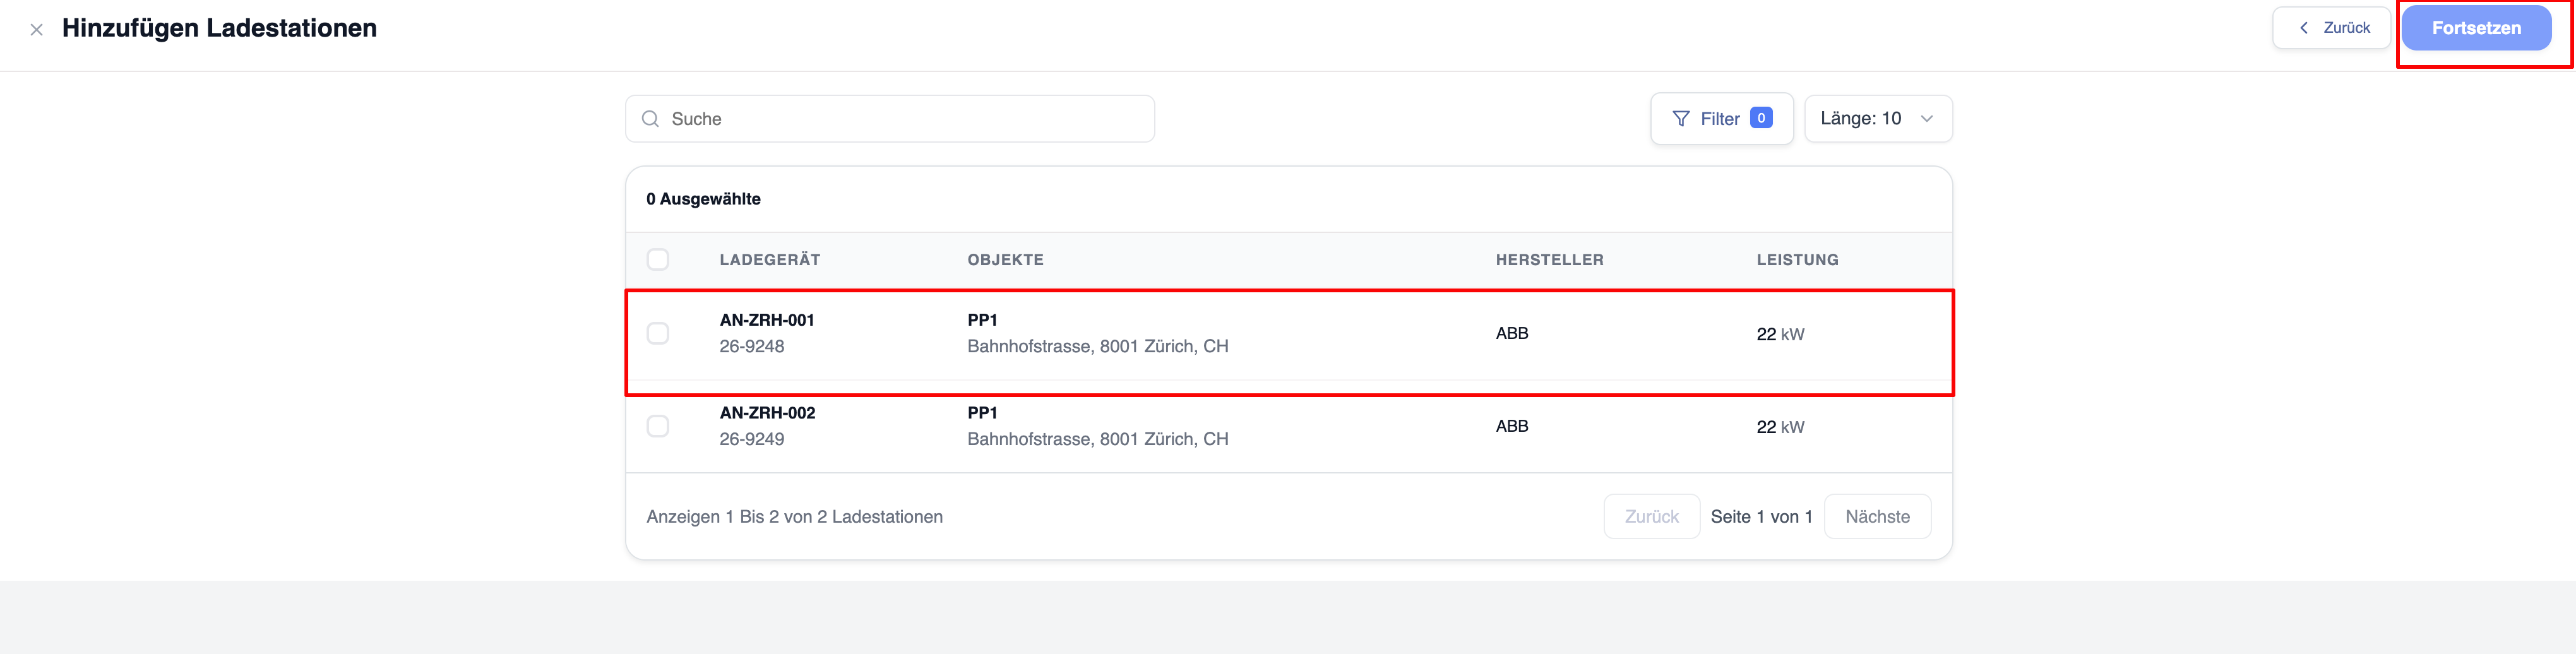
Click on the ‘Add charging stations’ pop-up window
The system displays all the charging stations available in your Eponet account.
You can:
- Search for charging points
- Filter charging points
- Select multiple charging points
- Check your selection before saving
Once confirmed, the charging points will become part of the network.
Note: ImmoConnect, ‘Invited’ and ‘Tenant’ charging points cannot be added to a network.
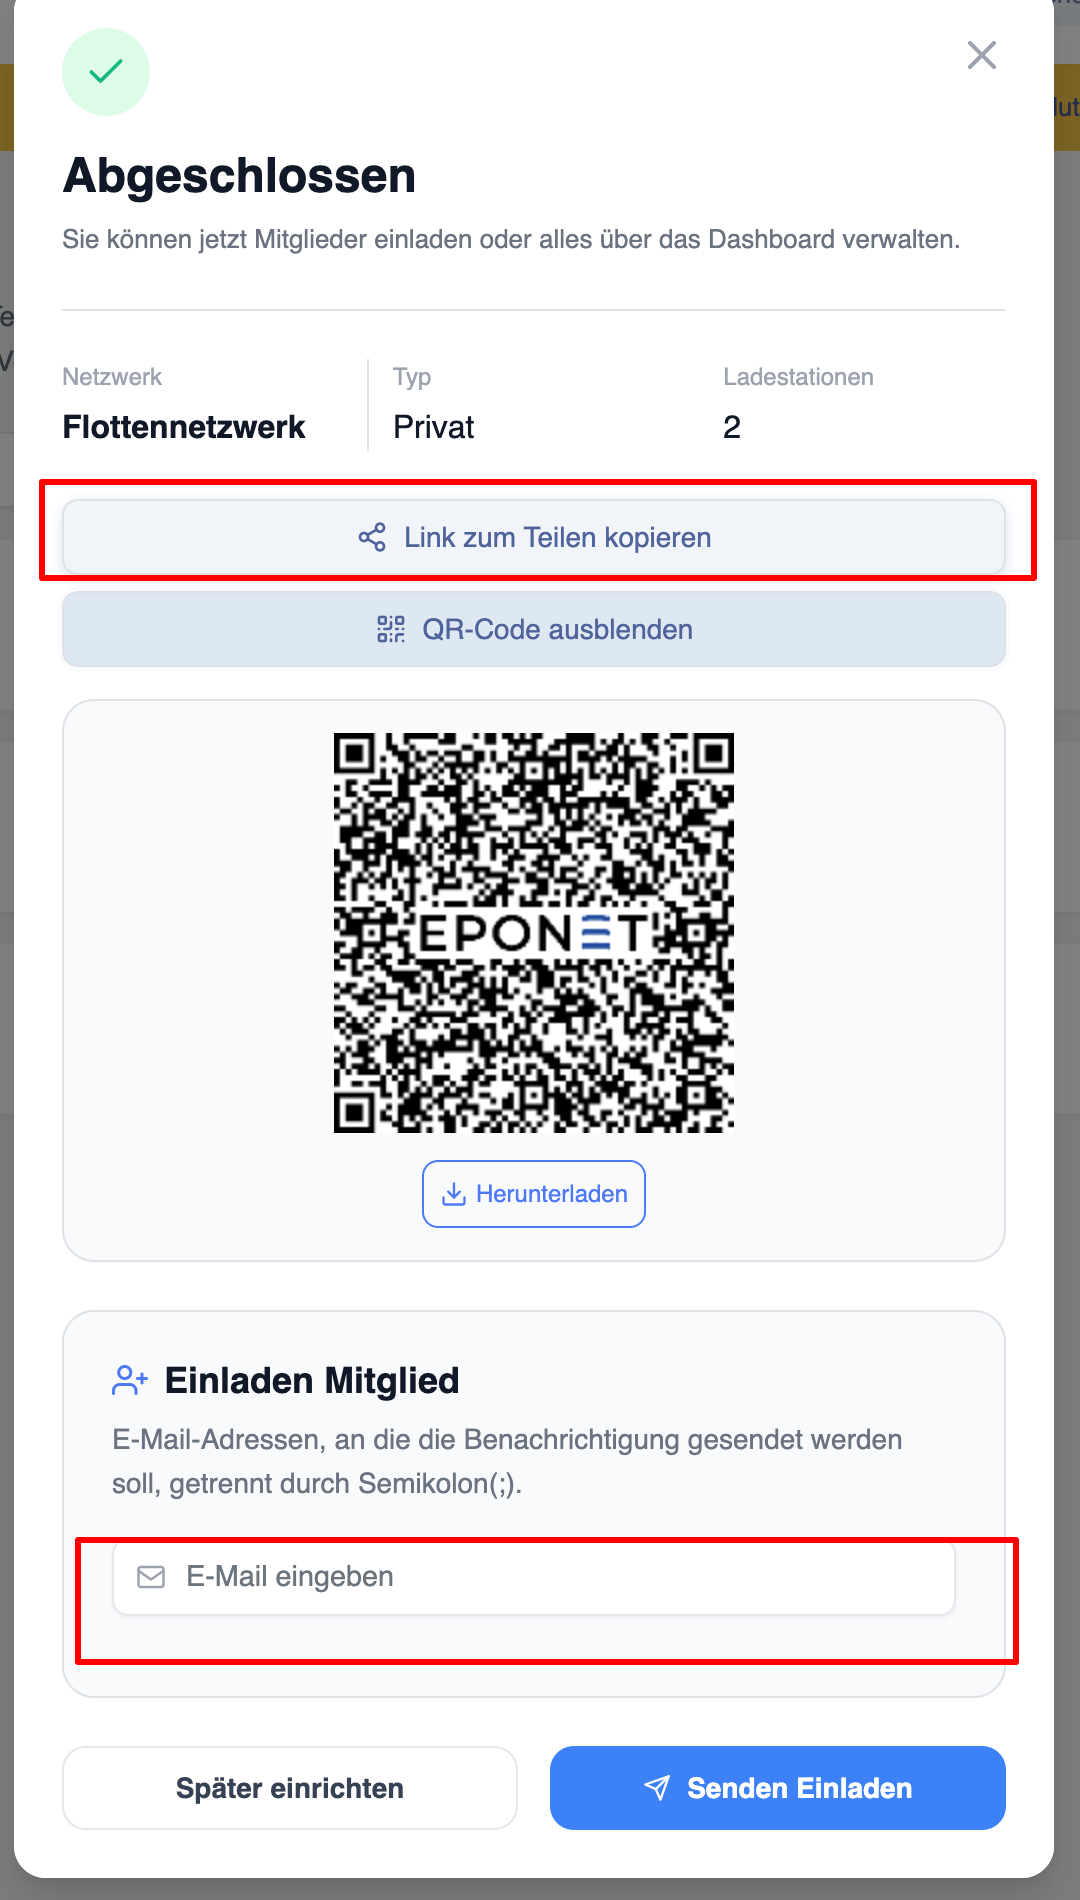
Invite members
Click on ‘Invite members’.
There are three ways to send an invitation:
Invite by email:
Enter one or more email addresses.
The system sends invitations automatically, provided the email address entered is linked to an Eponet account. The invited user can check their Eponet account notifications to see if they have received an invitation.
Share a link or QR code
Generate a secure invitation link or a QR code.
Users who join via the link will be automatically redirected to the network.