
Managing roles and permissions
Management of roles and permissions
Roles and permissions enable charging network operators to control what each member within a network is permitted to view and manage. Rather than granting every member the same level of access, you can create different roles with specific permissions depending on their area of responsibility.
This page explains how to create roles, assign permissions, manage existing roles and apply them to network members.
Basics of Roles and Permissions
A role is a set of permissions that determines what a member is allowed to do within a charging network.
Instead of assigning permissions to each member individually, these are grouped into reusable roles.
Example:
-
Network Operator
-
Network administrator
-
Charging Manager
-
Pricing Manager
-
Support staff
-
Standard member
Once a role has been created, it can be assigned to one or more members.
Whenever the role is updated, all members assigned to that role automatically receive the updated permissions.
This greatly simplifies administration, particularly in large organisations.
Standard roles
Every charging network comprises at least two standard roles.
Owner
The owner has full administrative control over the charging network.
The user who creates the network is assigned the owner role for that network.
Typical permissions for the owner include:
-
Edit network information
-
Delete network
-
Add or remove charging points
-
Manage members
-
Create and edit roles
-
Configure pricing
-
View analytics
-
Invite members
-
Remove members
-
Manage permissions
Member
The ‘Member’ role provides the basic access required to participate in the network.
Typical permissions for members include:
-
Adding and managing your own charging points
-
Start charging sessions at all charging points in the network
-
View personal charging history
-
Viewing basic information about the network
- Viewing their own analytics
Members can only change the network settings if they have been granted additional permissions.
Access to roles and permissions
To manage roles:
-
Open ‘Charging Networks’.
-
Select the ‘Manage roles’ button or navigate to the ‘Roles and permissions’ tab for any network (provided you have the necessary permissions).
-
The page displays all existing roles.
Each role card usually contains the following details:
-
Role name
-
Permission details
On this page, you can:
-
Create a role
-
Edit a role
-
Delete a role
Create a new role
Custom roles allow organisations to create sets of permissions that correspond to their internal responsibilities.
To create a new role:
-
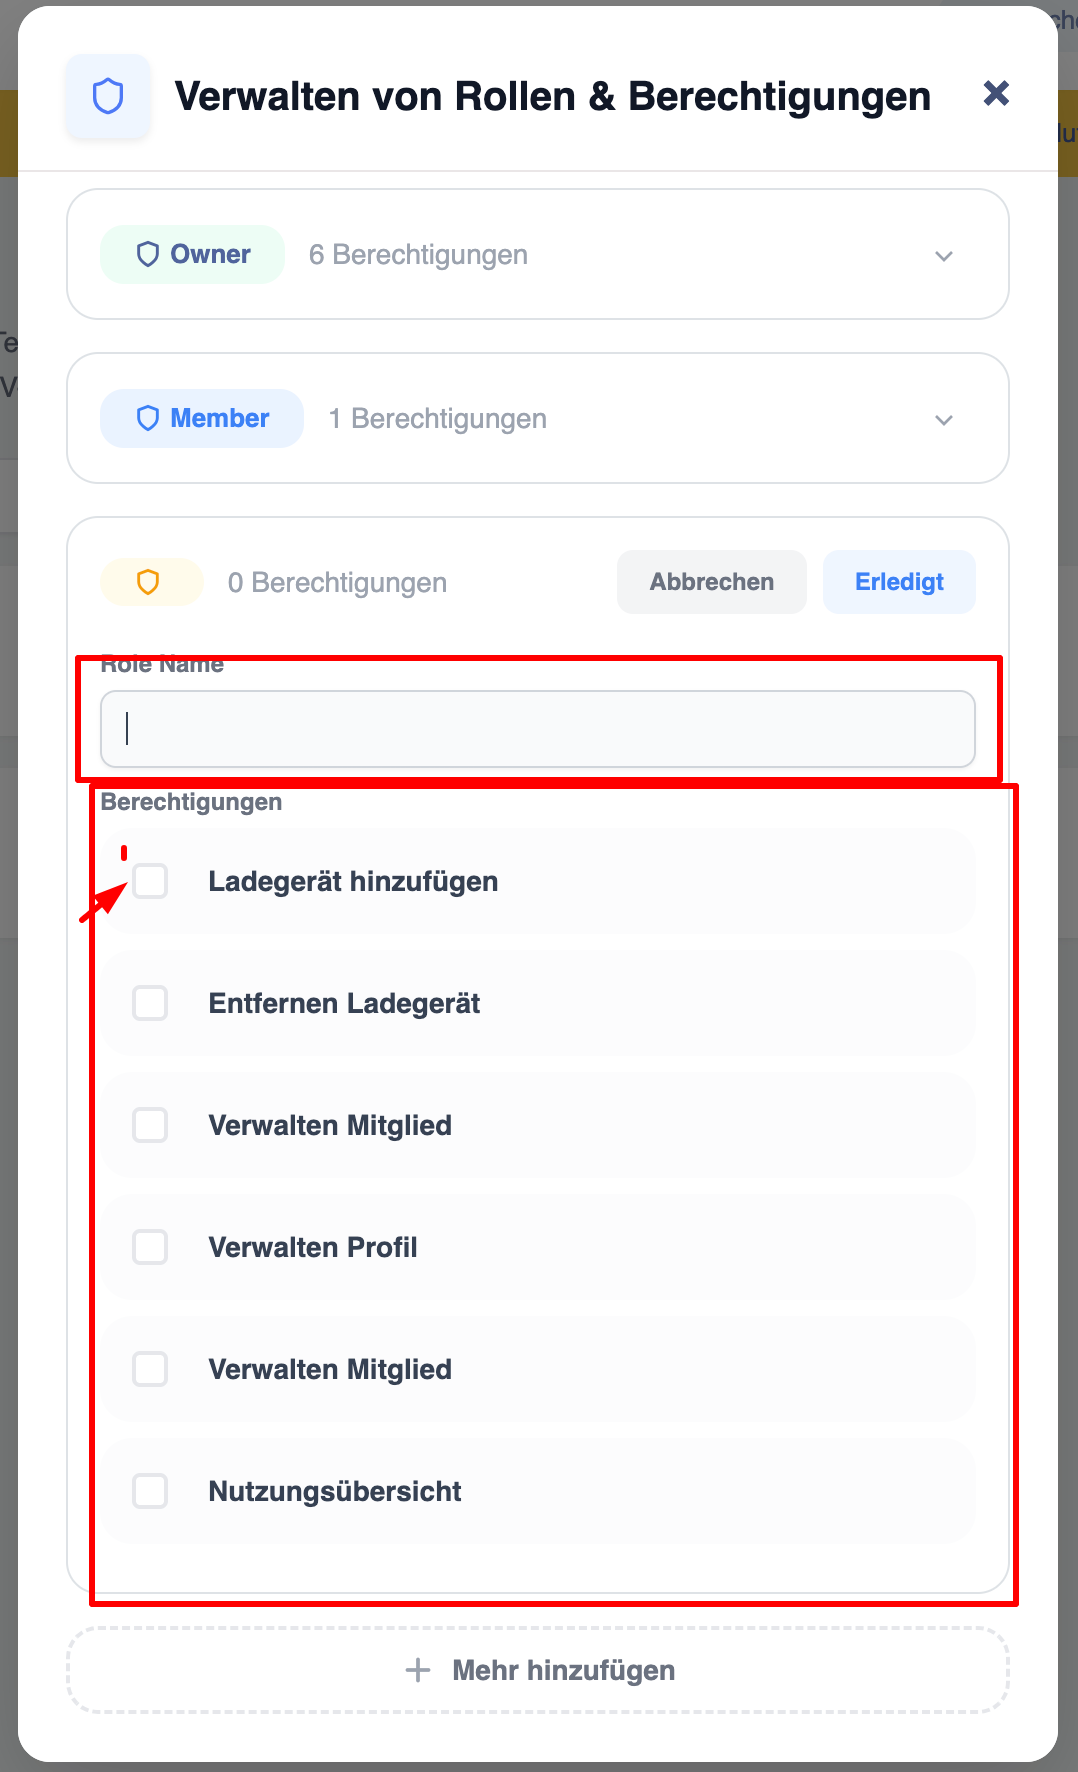
Click ‘Create role’.
-
Enter a role name.
-
Select the required permissions.
-
Click ‘Save’.
The new role is immediately available for assignment.
Permission categories
Permissions are divided into logical categories:
- Add chargers – This permission applies by default to all roles, allowing them to add their own chargers to the network
- Remove chargers – Users with this permission can remove any chargers from the network (even if they do not belong to them)
- Manage members – Users with this authorisation can change other users’ roles and add or remove members
- Manage price profiles – Users with this permission can change the price profiles applicable to other users (and also set a default profile)
- Manage network – Users with this permission can manage settings and edit details for a network
- Usage monitoring – Users with this permission can view data (usage and analytics) for the entire network on the ‘Network Overview’ tab
Any user can add and remove their own charging points from the network (no additional authorisation is required for this)
Each user can also view their own usage analytics and charging sessions on the ‘Network Overview’ tab (no additional authorisation is required for this)
Assigning roles to members
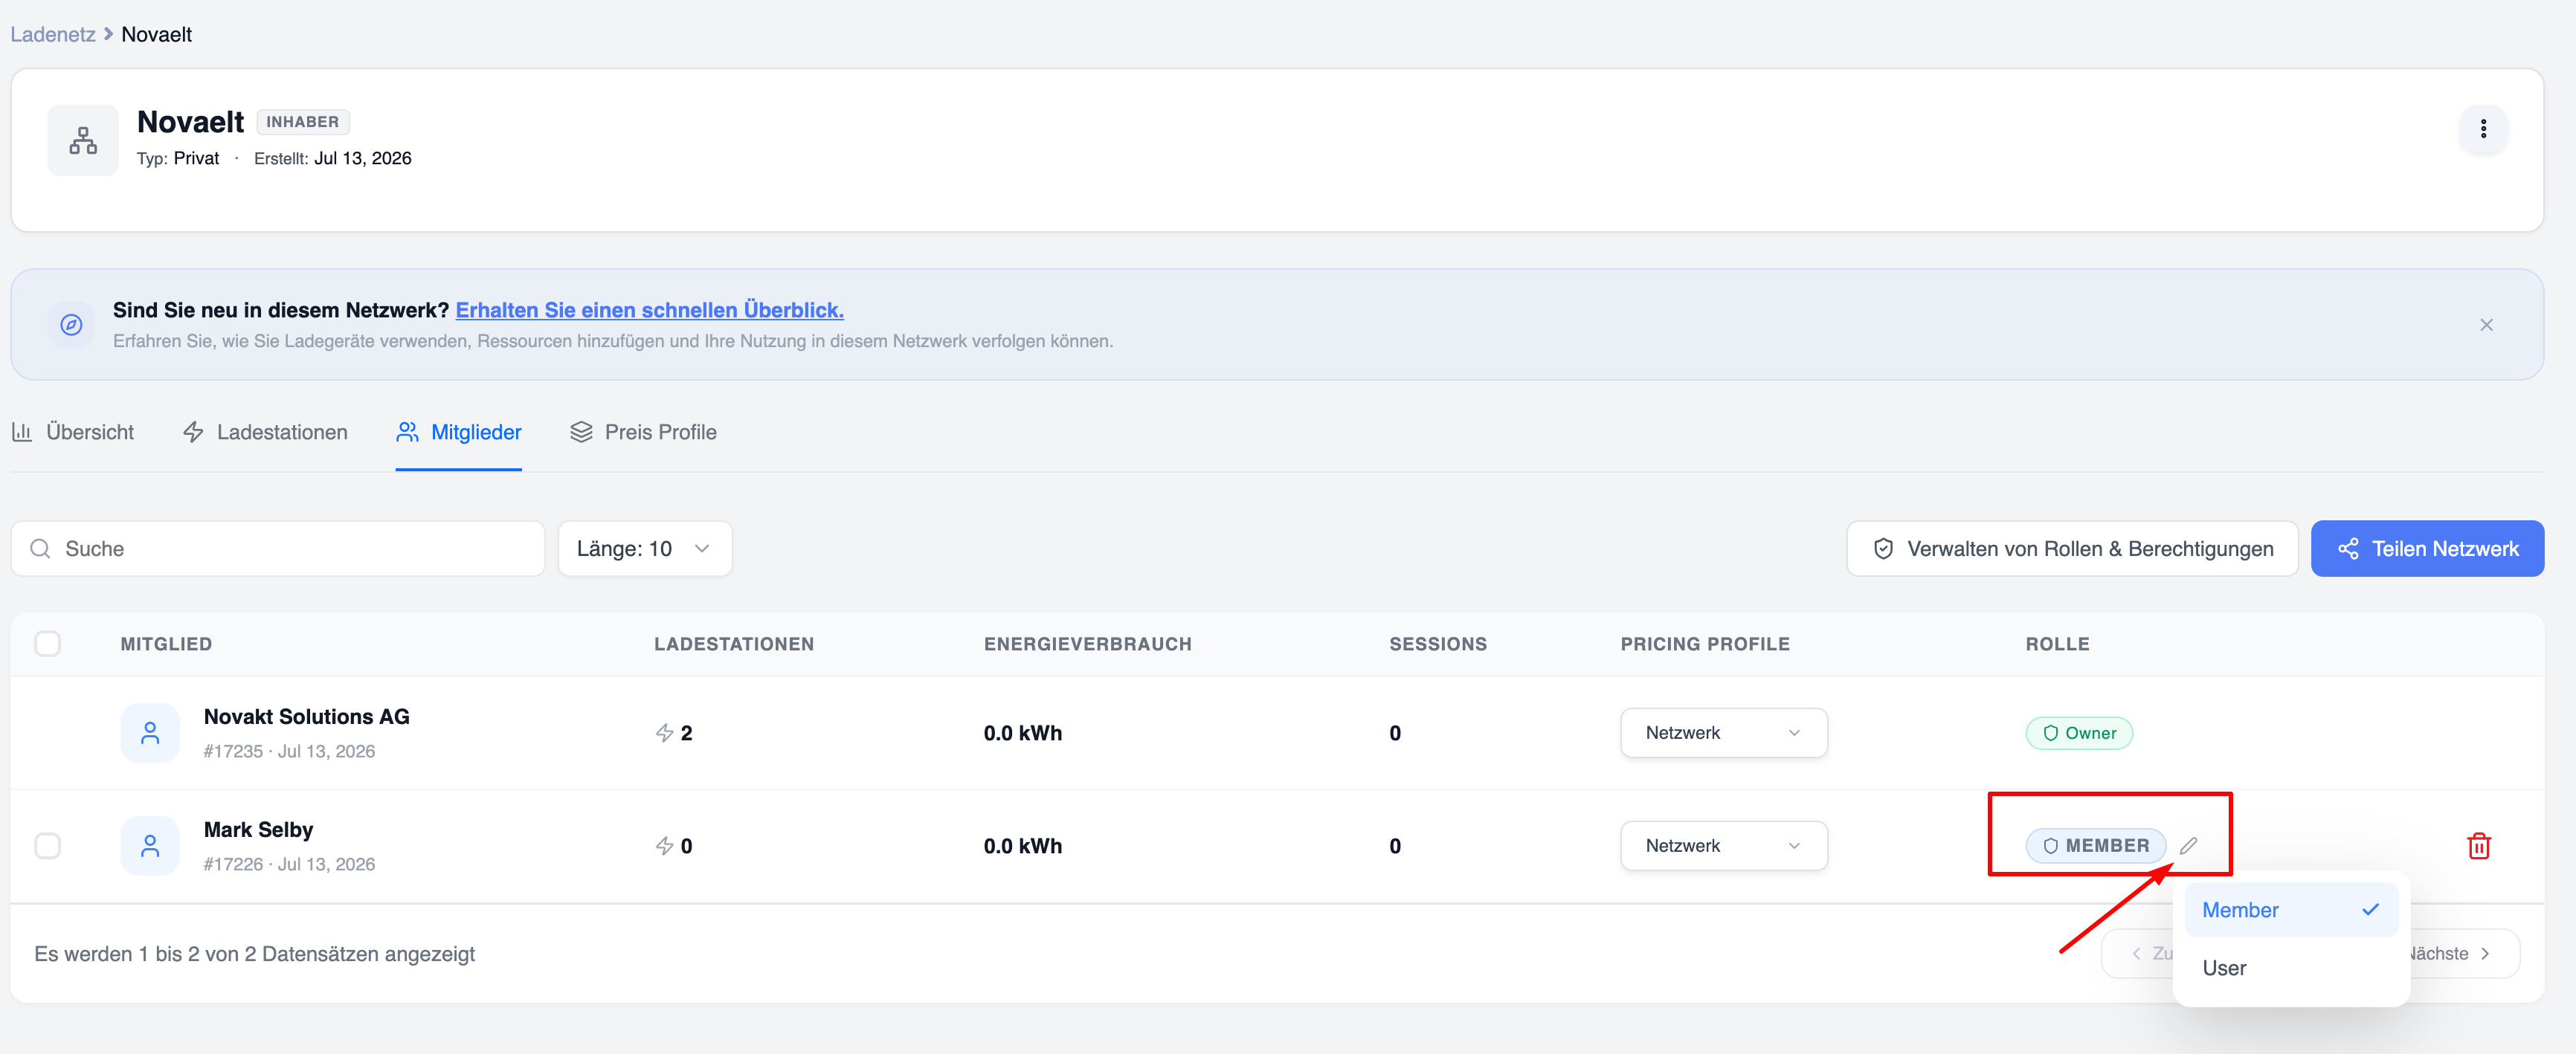
Once a role has been created, it can be assigned to network members.
To assign a role:
-
Open the ‘Members’ tab.
-
Search for the member.
-
Open the actions menu.
-
Select ‘Change role’.
-
Select the desired role.
-
Save.
Deleting a role
Unused roles can be removed to keep the network organised.
Before deleting a role:
-
Make sure that no members are currently assigned to this role.
-
If necessary, assign the relevant members to another role.
To delete a role:
-
Select the role.
-
Click ‘Delete’.
-
Confirm the deletion.
System-defined roles such as ‘Owner’ and ‘Member’ cannot be deleted.
If a user is assigned to a role, it cannot be deleted.
Best practices
Create roles based on responsibilities
Design roles based on areas of responsibility rather than on individual users. This makes future management easier.
Avoid granting too many administrator rights
Only trusted administrators should be able to edit prices, manage members or change network settings.
Reuse existing roles
Before creating a new role, check whether an existing role already meets the requirements. Too many similar roles can make administration more difficult.
Review permissions regularly
As teams grow and responsibilities change, you should review all roles regularly to ensure that members continue to have the appropriate access rights.
Use clear role names
Terms such as ‘Facility Manager’ or ‘Pricing Administrator’ are much easier to understand than generic terms such as ‘Role A’ or ‘Manager 2’.
Common challenges
A member cannot access a feature
Possible causes include:
-
Incorrect role assigned
-
Required permission is not enabled
Check both the role assigned to the member and the permissions included in that role.
Role cannot be deleted
A role cannot be deleted whilst it is assigned to one or more members.
Assign a different role to all members before deleting the role.
Member still has old permissions
If the permissions appear to be incorrect:
-
Ensure that the member has been assigned the correct role.
-
Check that the role has been successfully updated.
-
Ask the member to refresh the page or log in again.