Basic setting
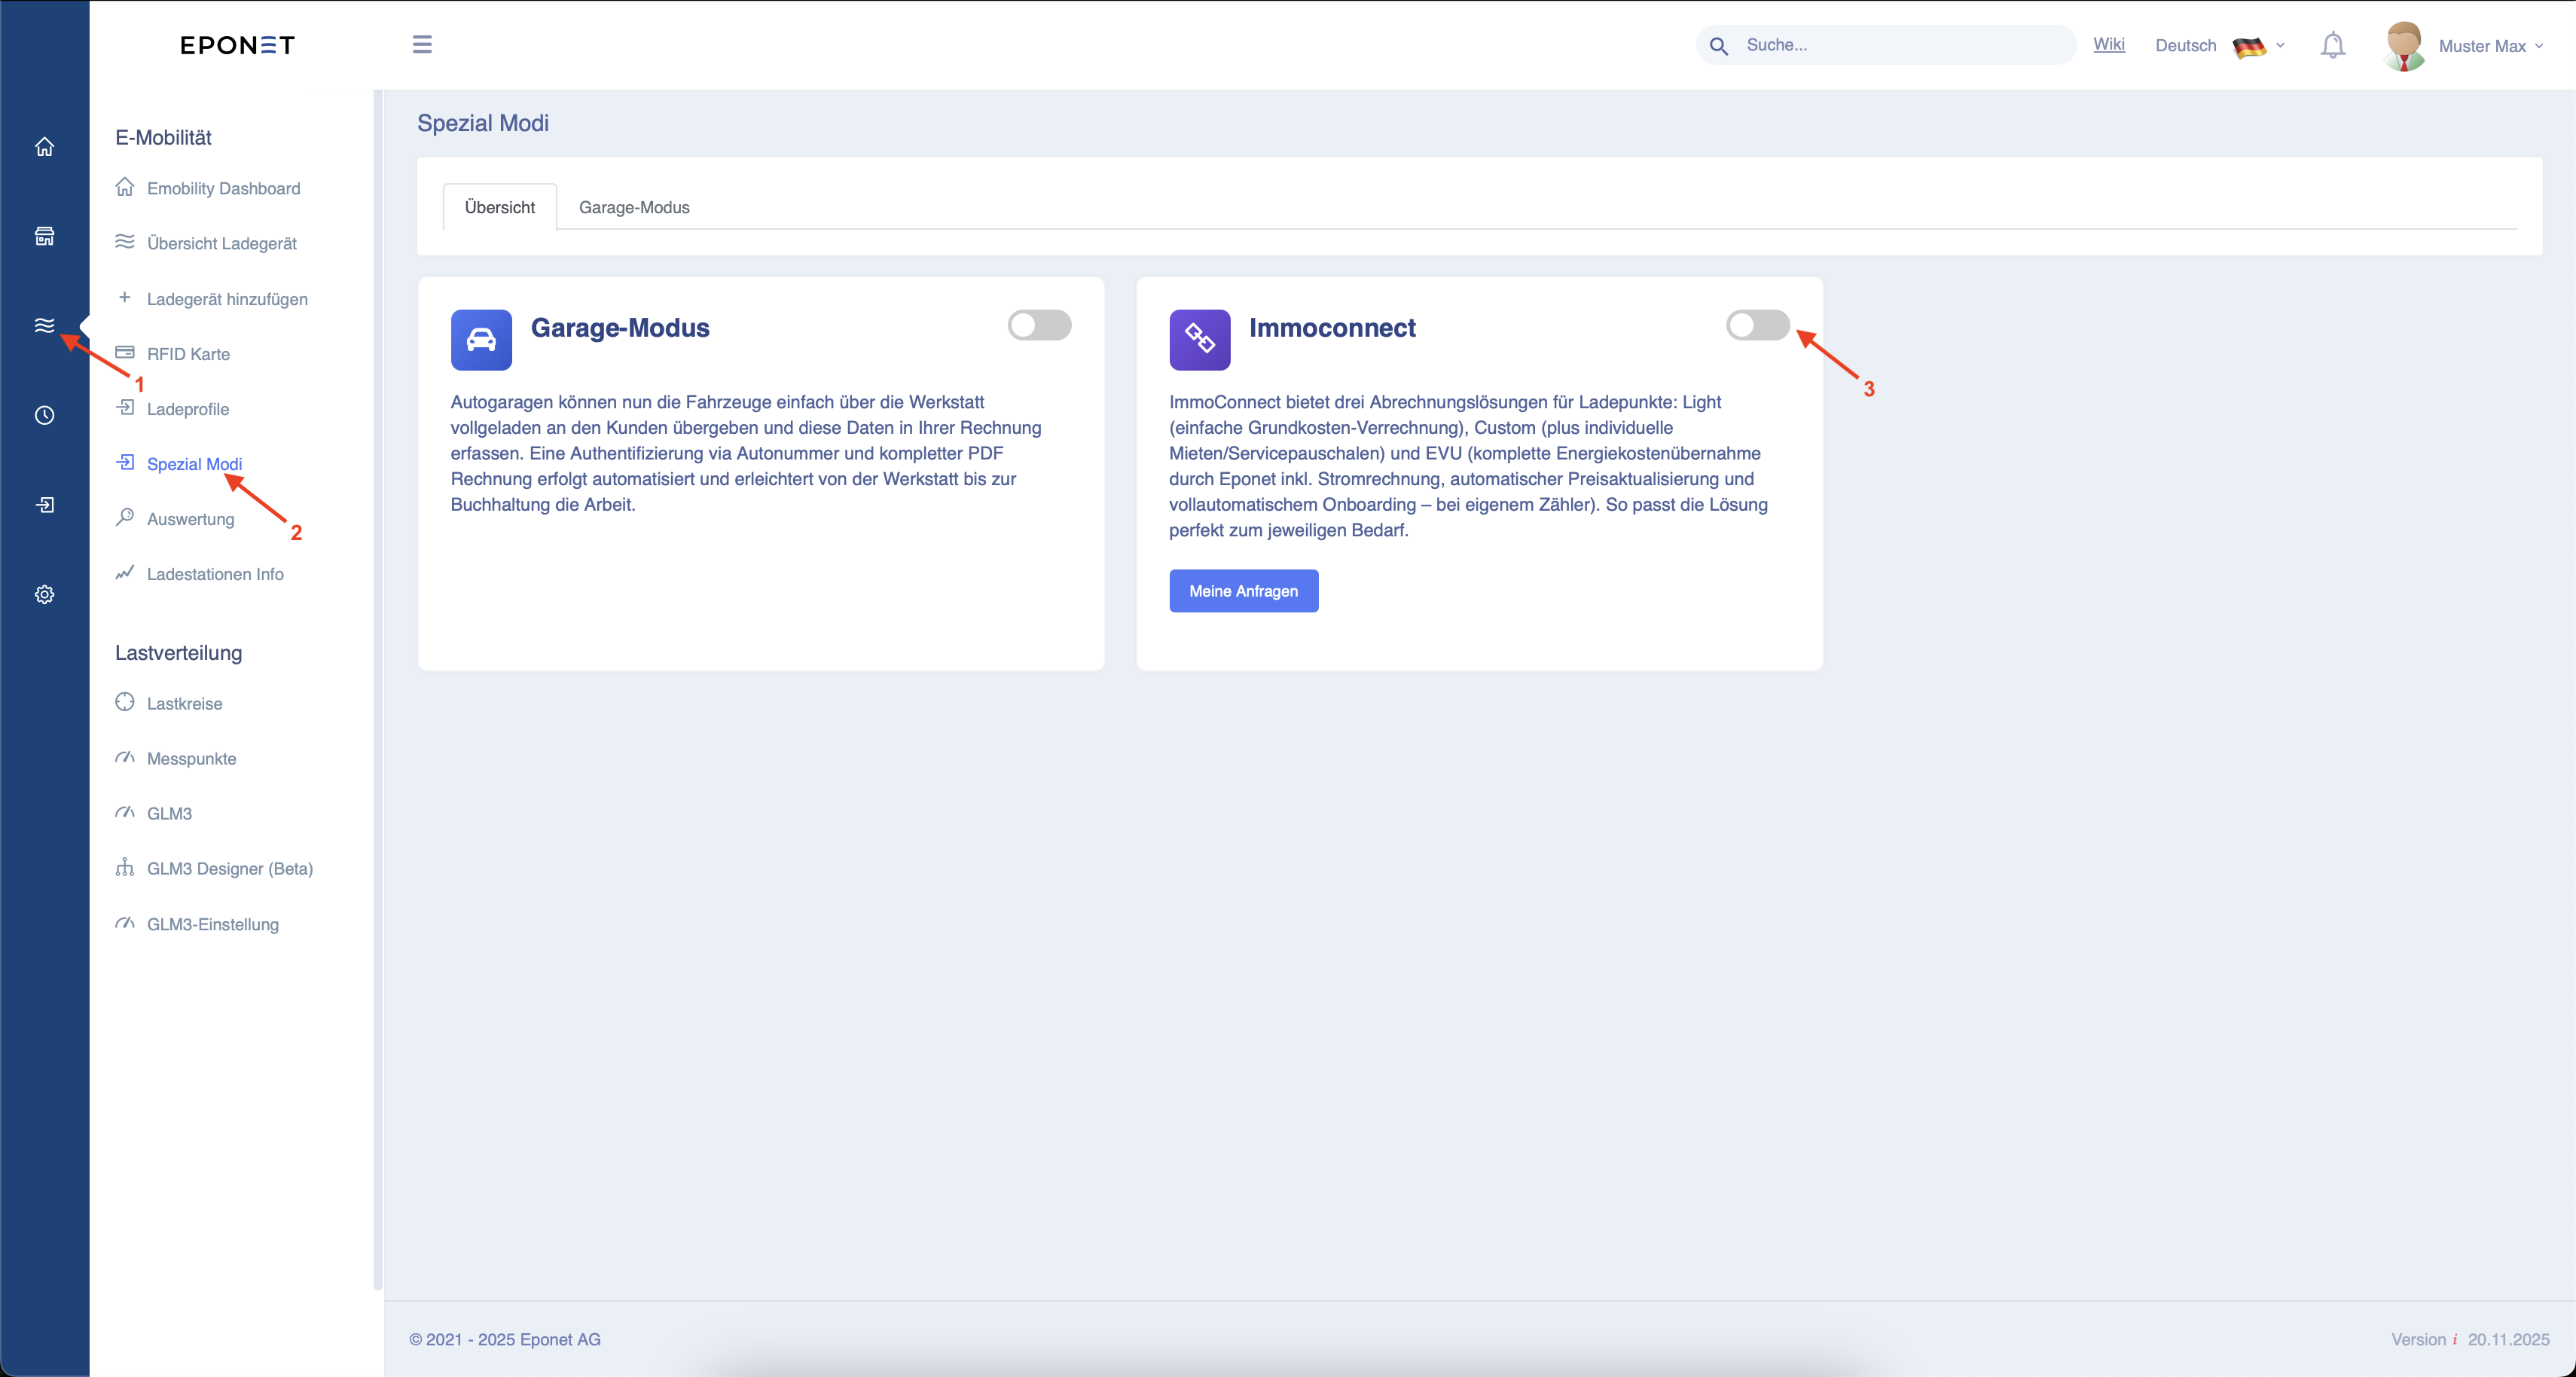
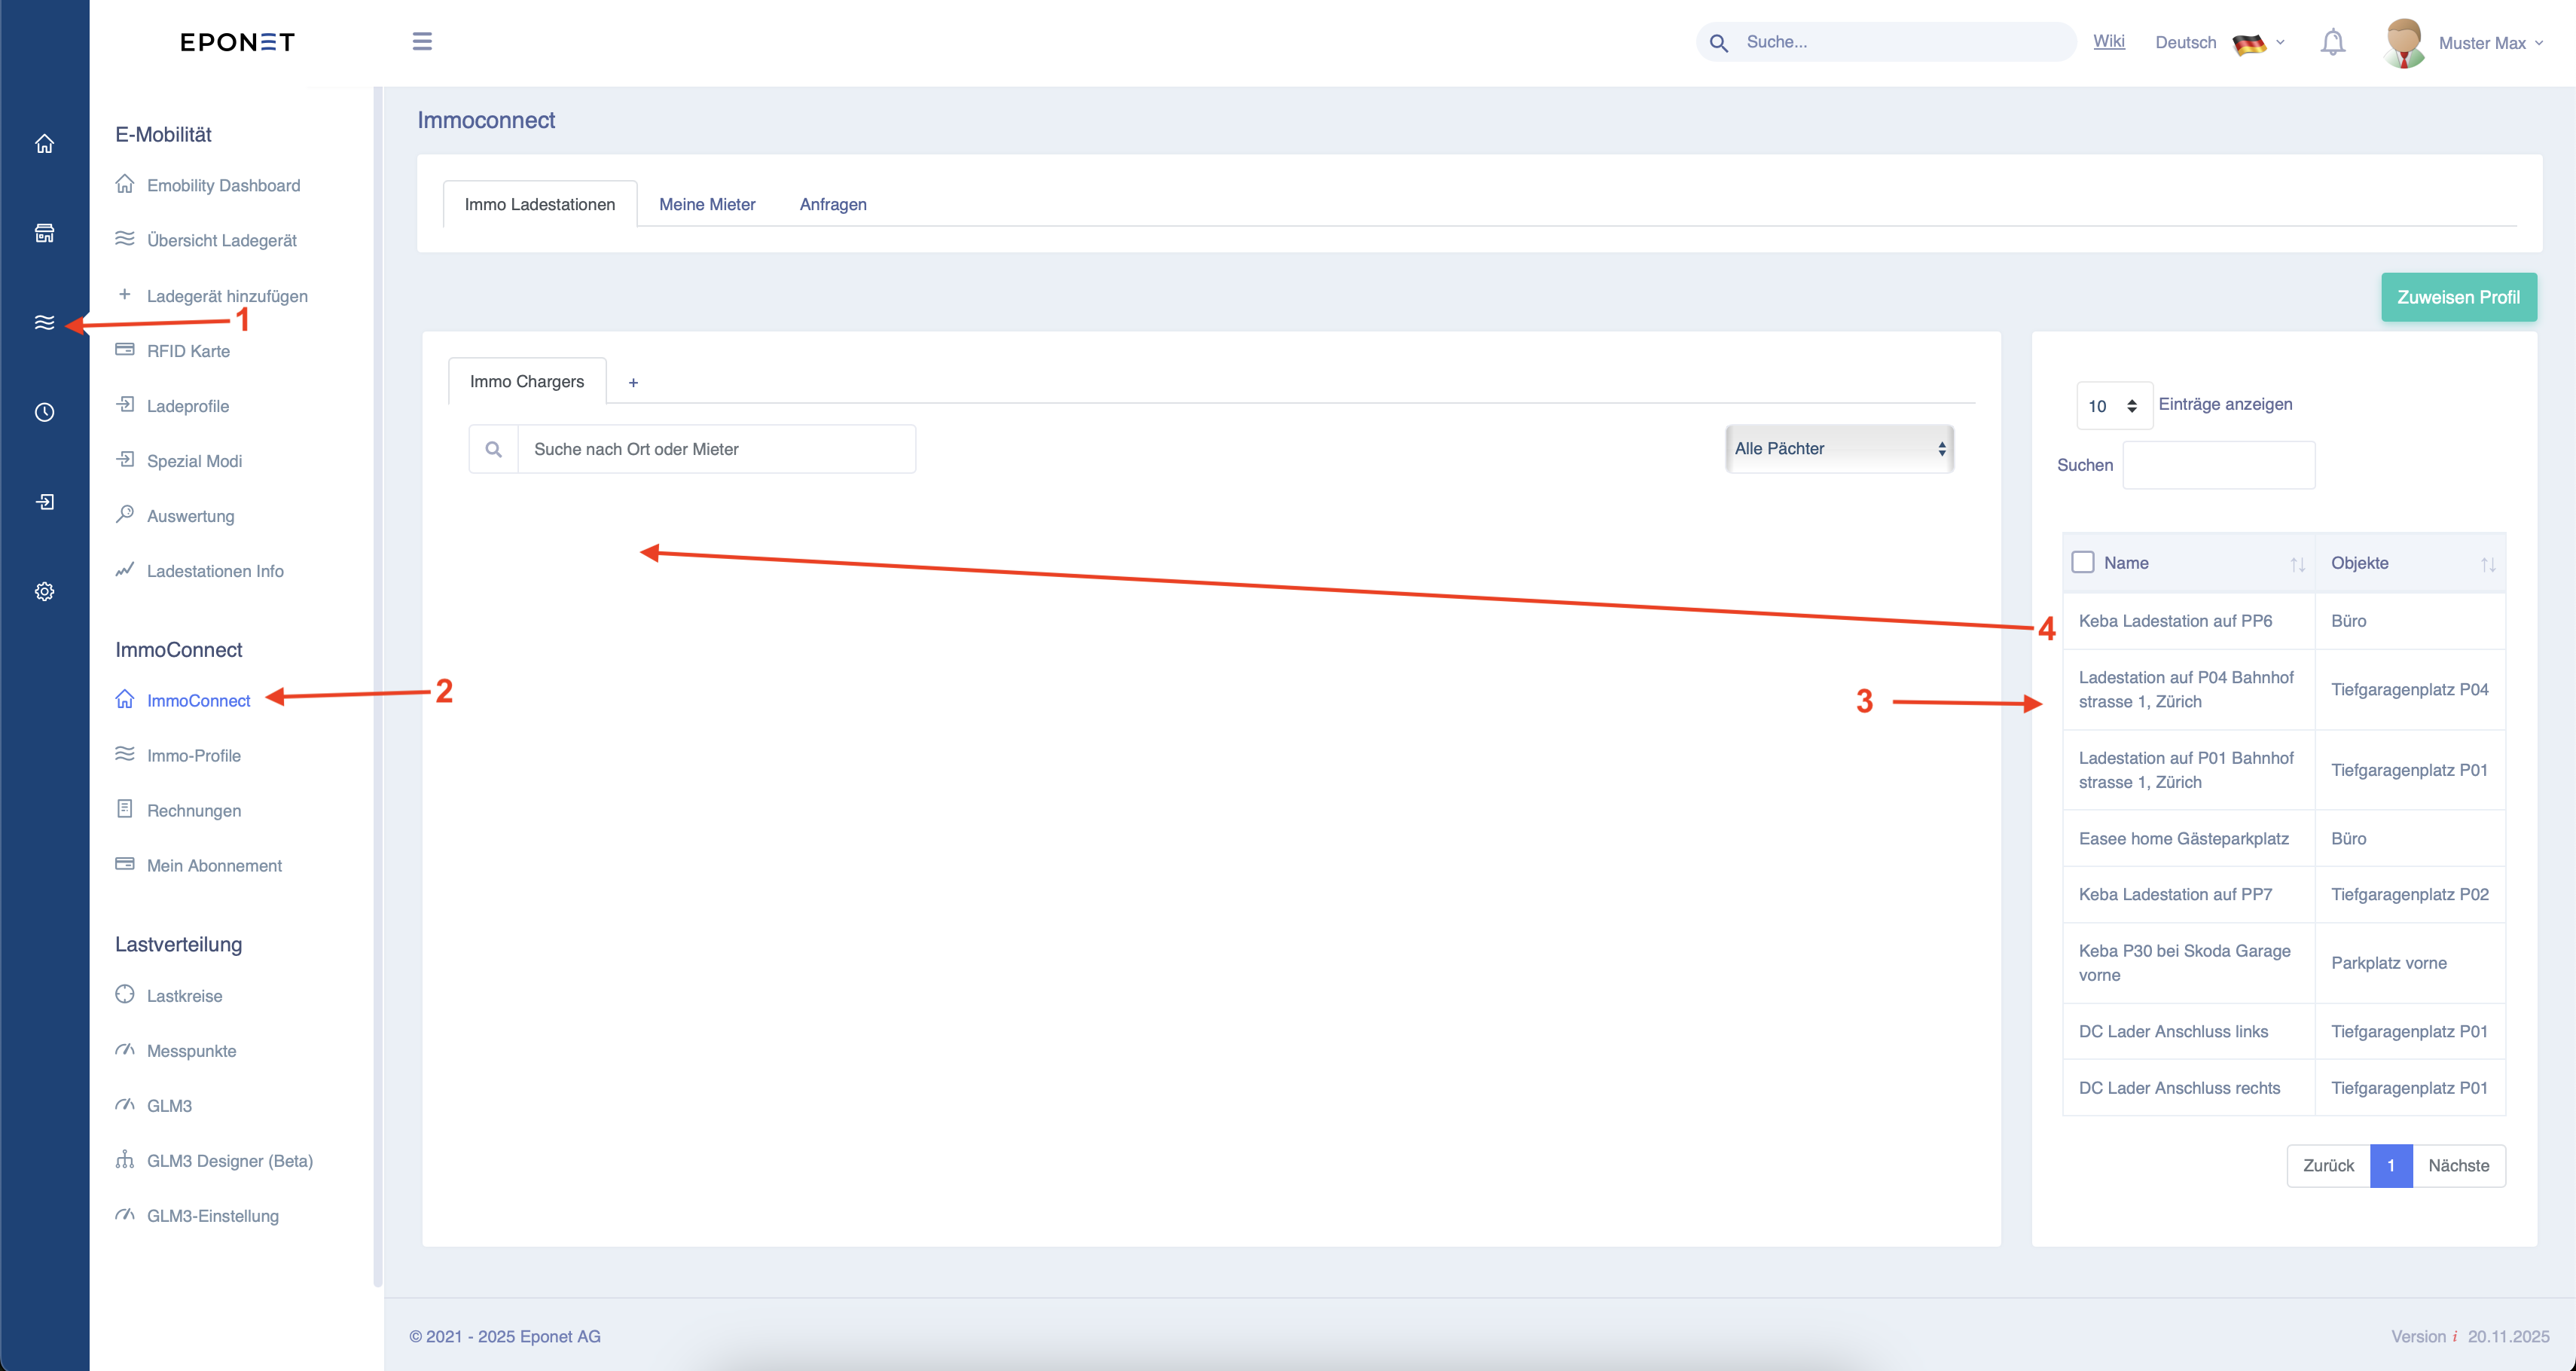
First, follow arrows 1 and 2.
You can now activate ImmoConnect by clicking on the button next to arrow 3.
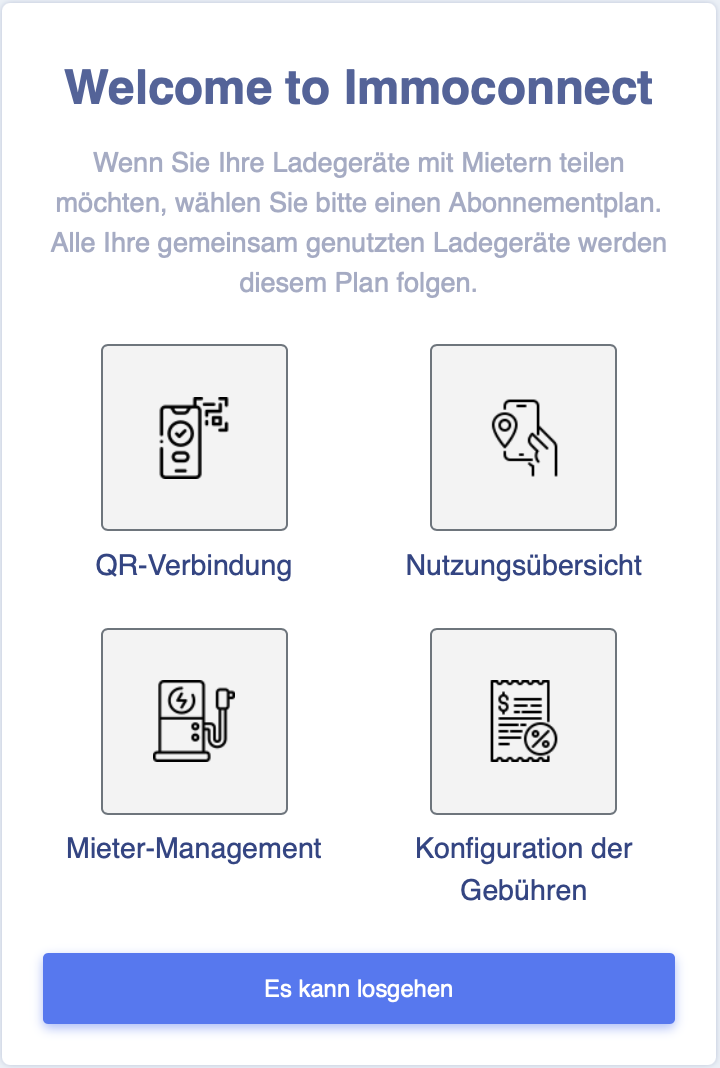
The following window will now open. Click on "Let's get started".
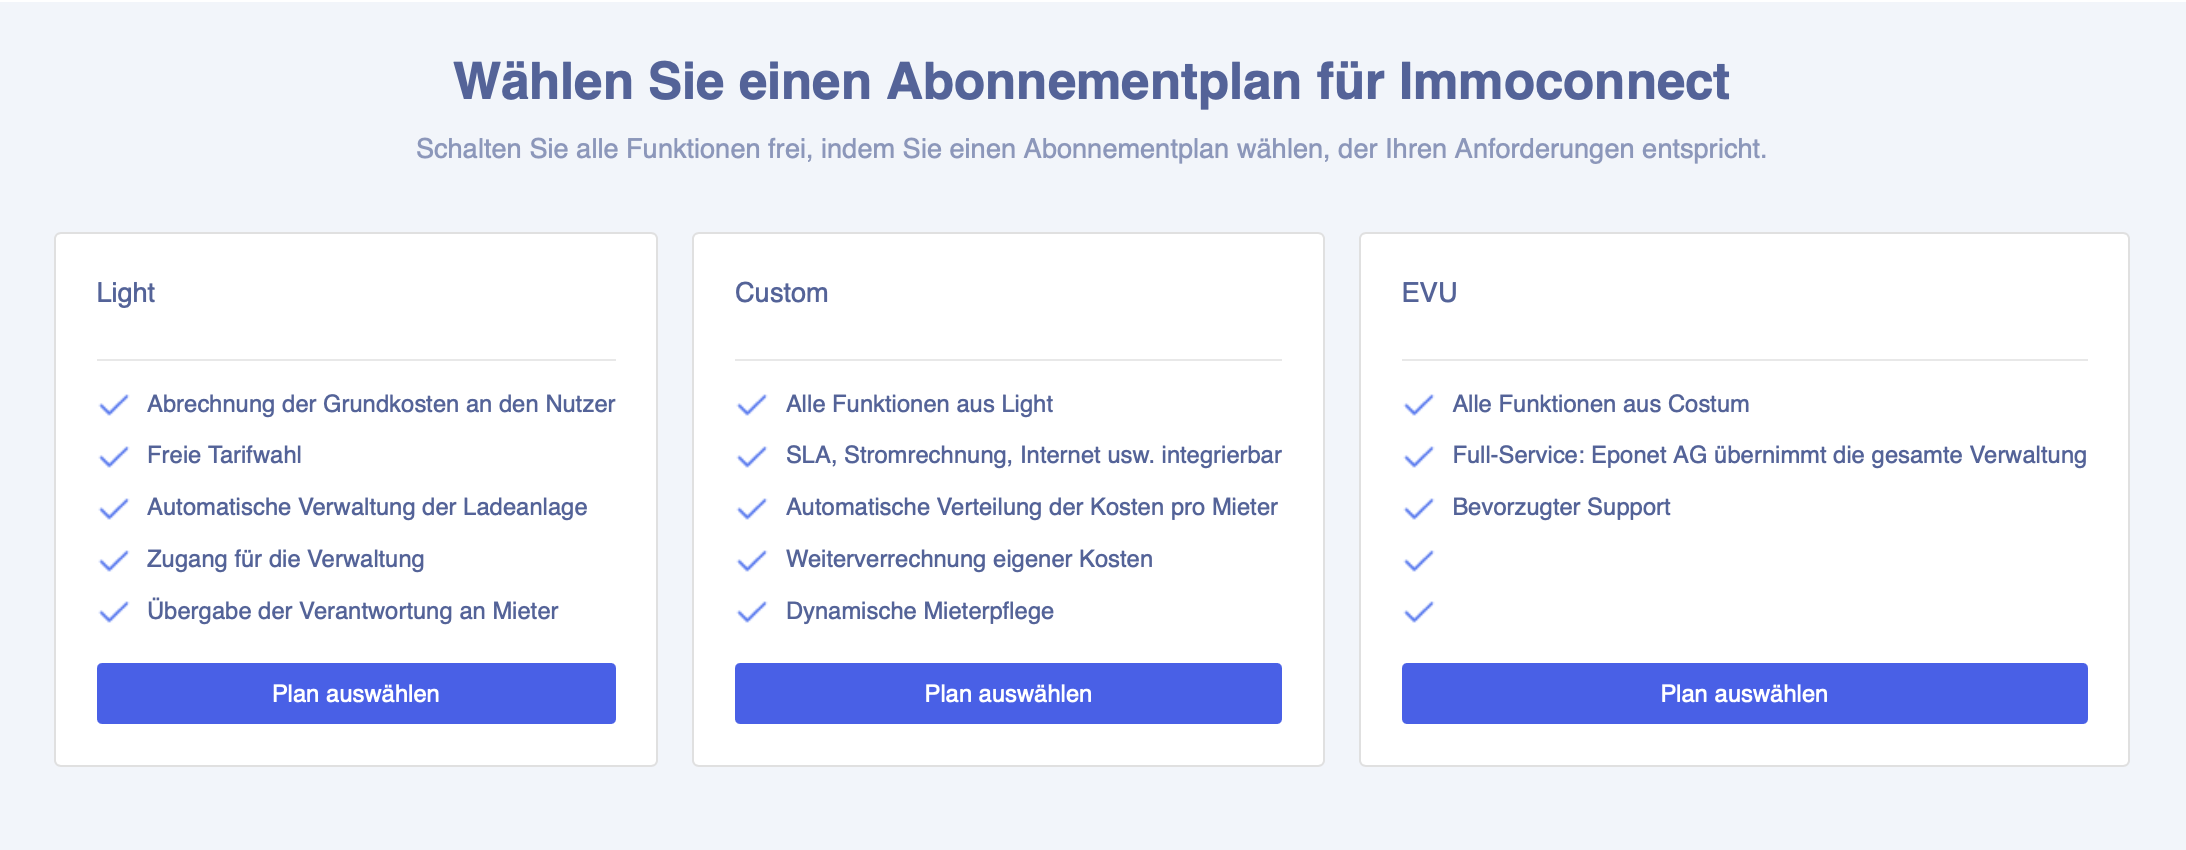
Now select your desired subscription plan.
If you need help deciding which plan is right for you, click here.
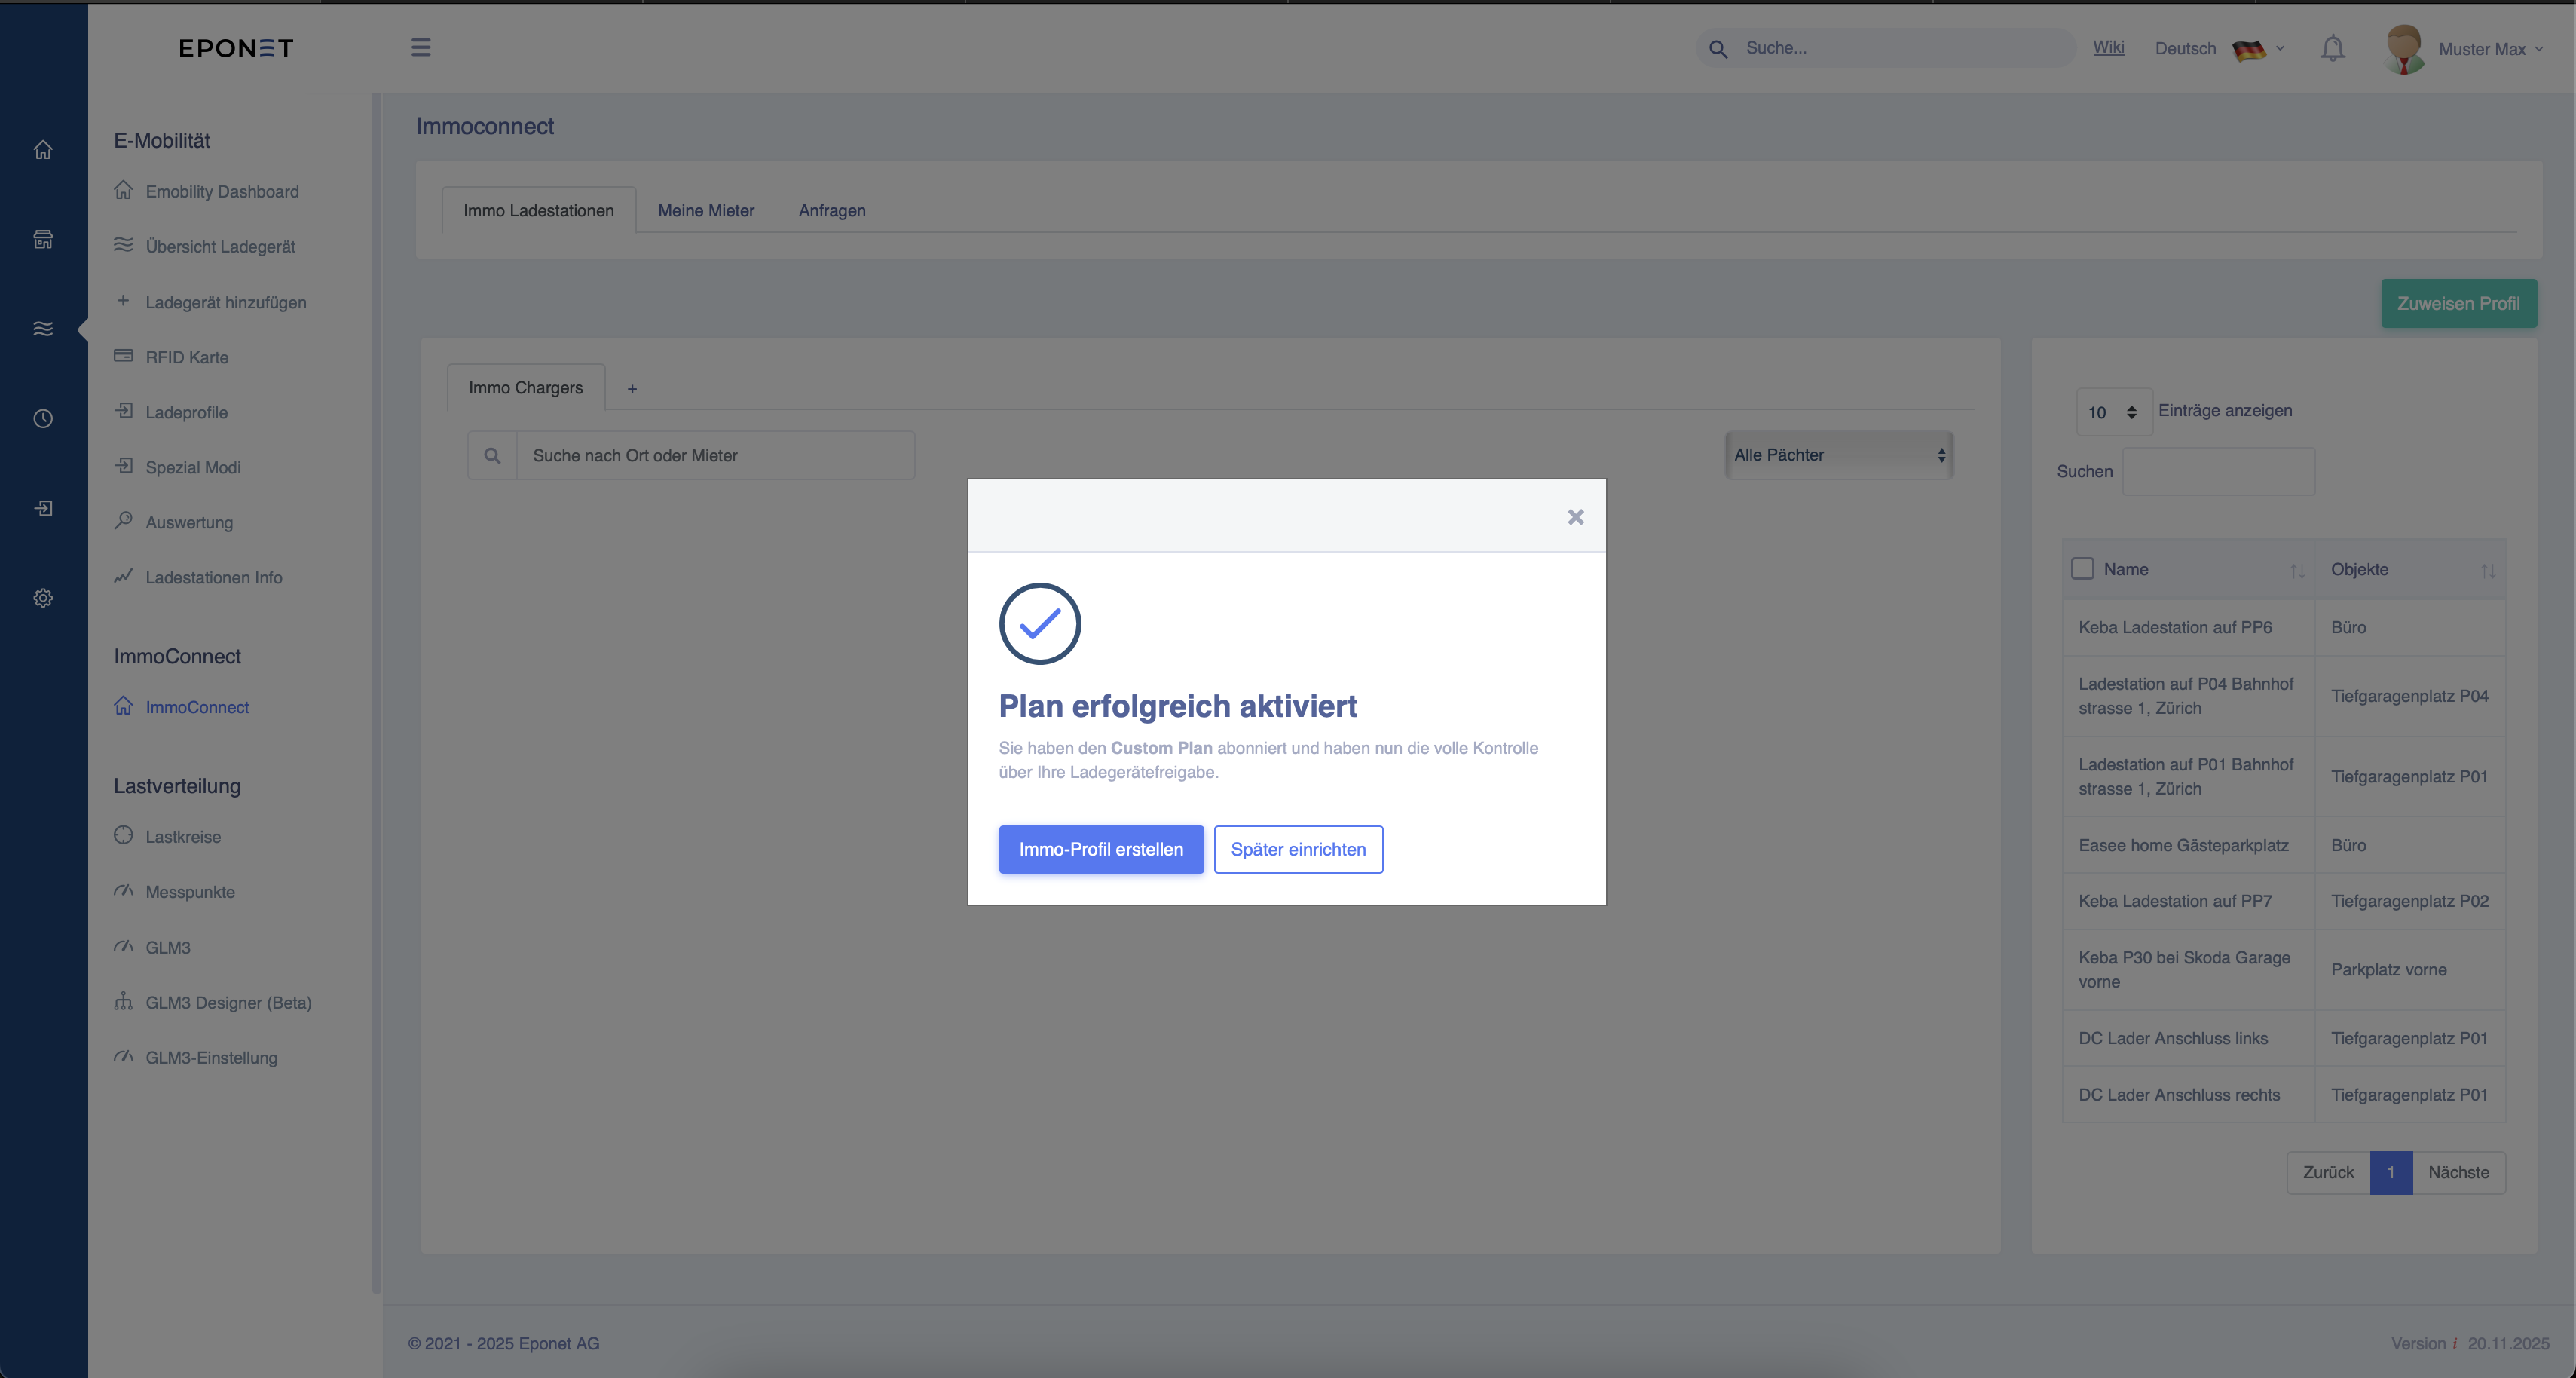
Once you have decided on a plan, you will receive the following message.
You can now go directly to the settings by clicking on "Create property profile".
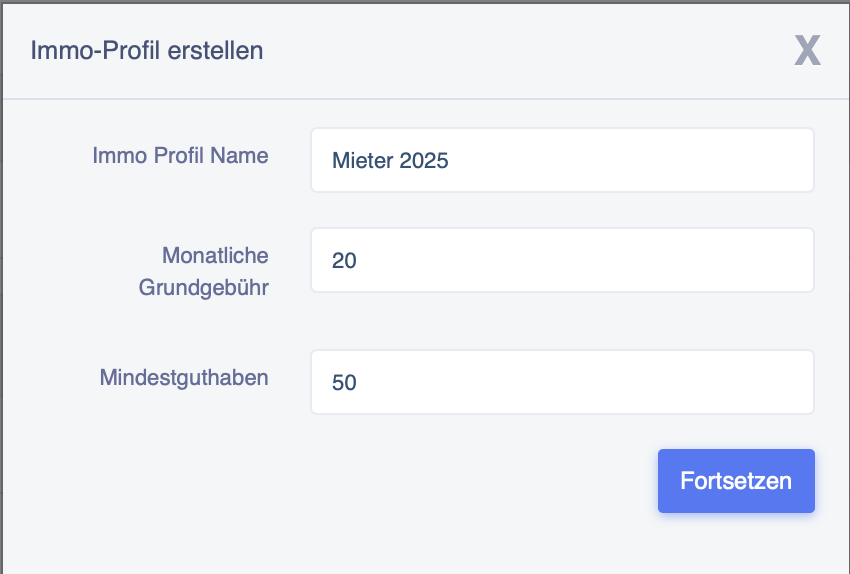
Enter the name of the profile here. You
can also define the monthly basic fee for the charging station and the minimum account balance required for charging on the tenant's Eponet account.
Then click on "Continue".
The following window will now open.
You can now set the following:
1. Should the charging station also be available for use on public holidays?
2. Is the charging station automatically assigned to a tenant after scanning the QR code, or does the tenant require confirmation from you as the administrator?
3. Is the tenant of the charging station permitted to mark it as publicly available and allow public charging?
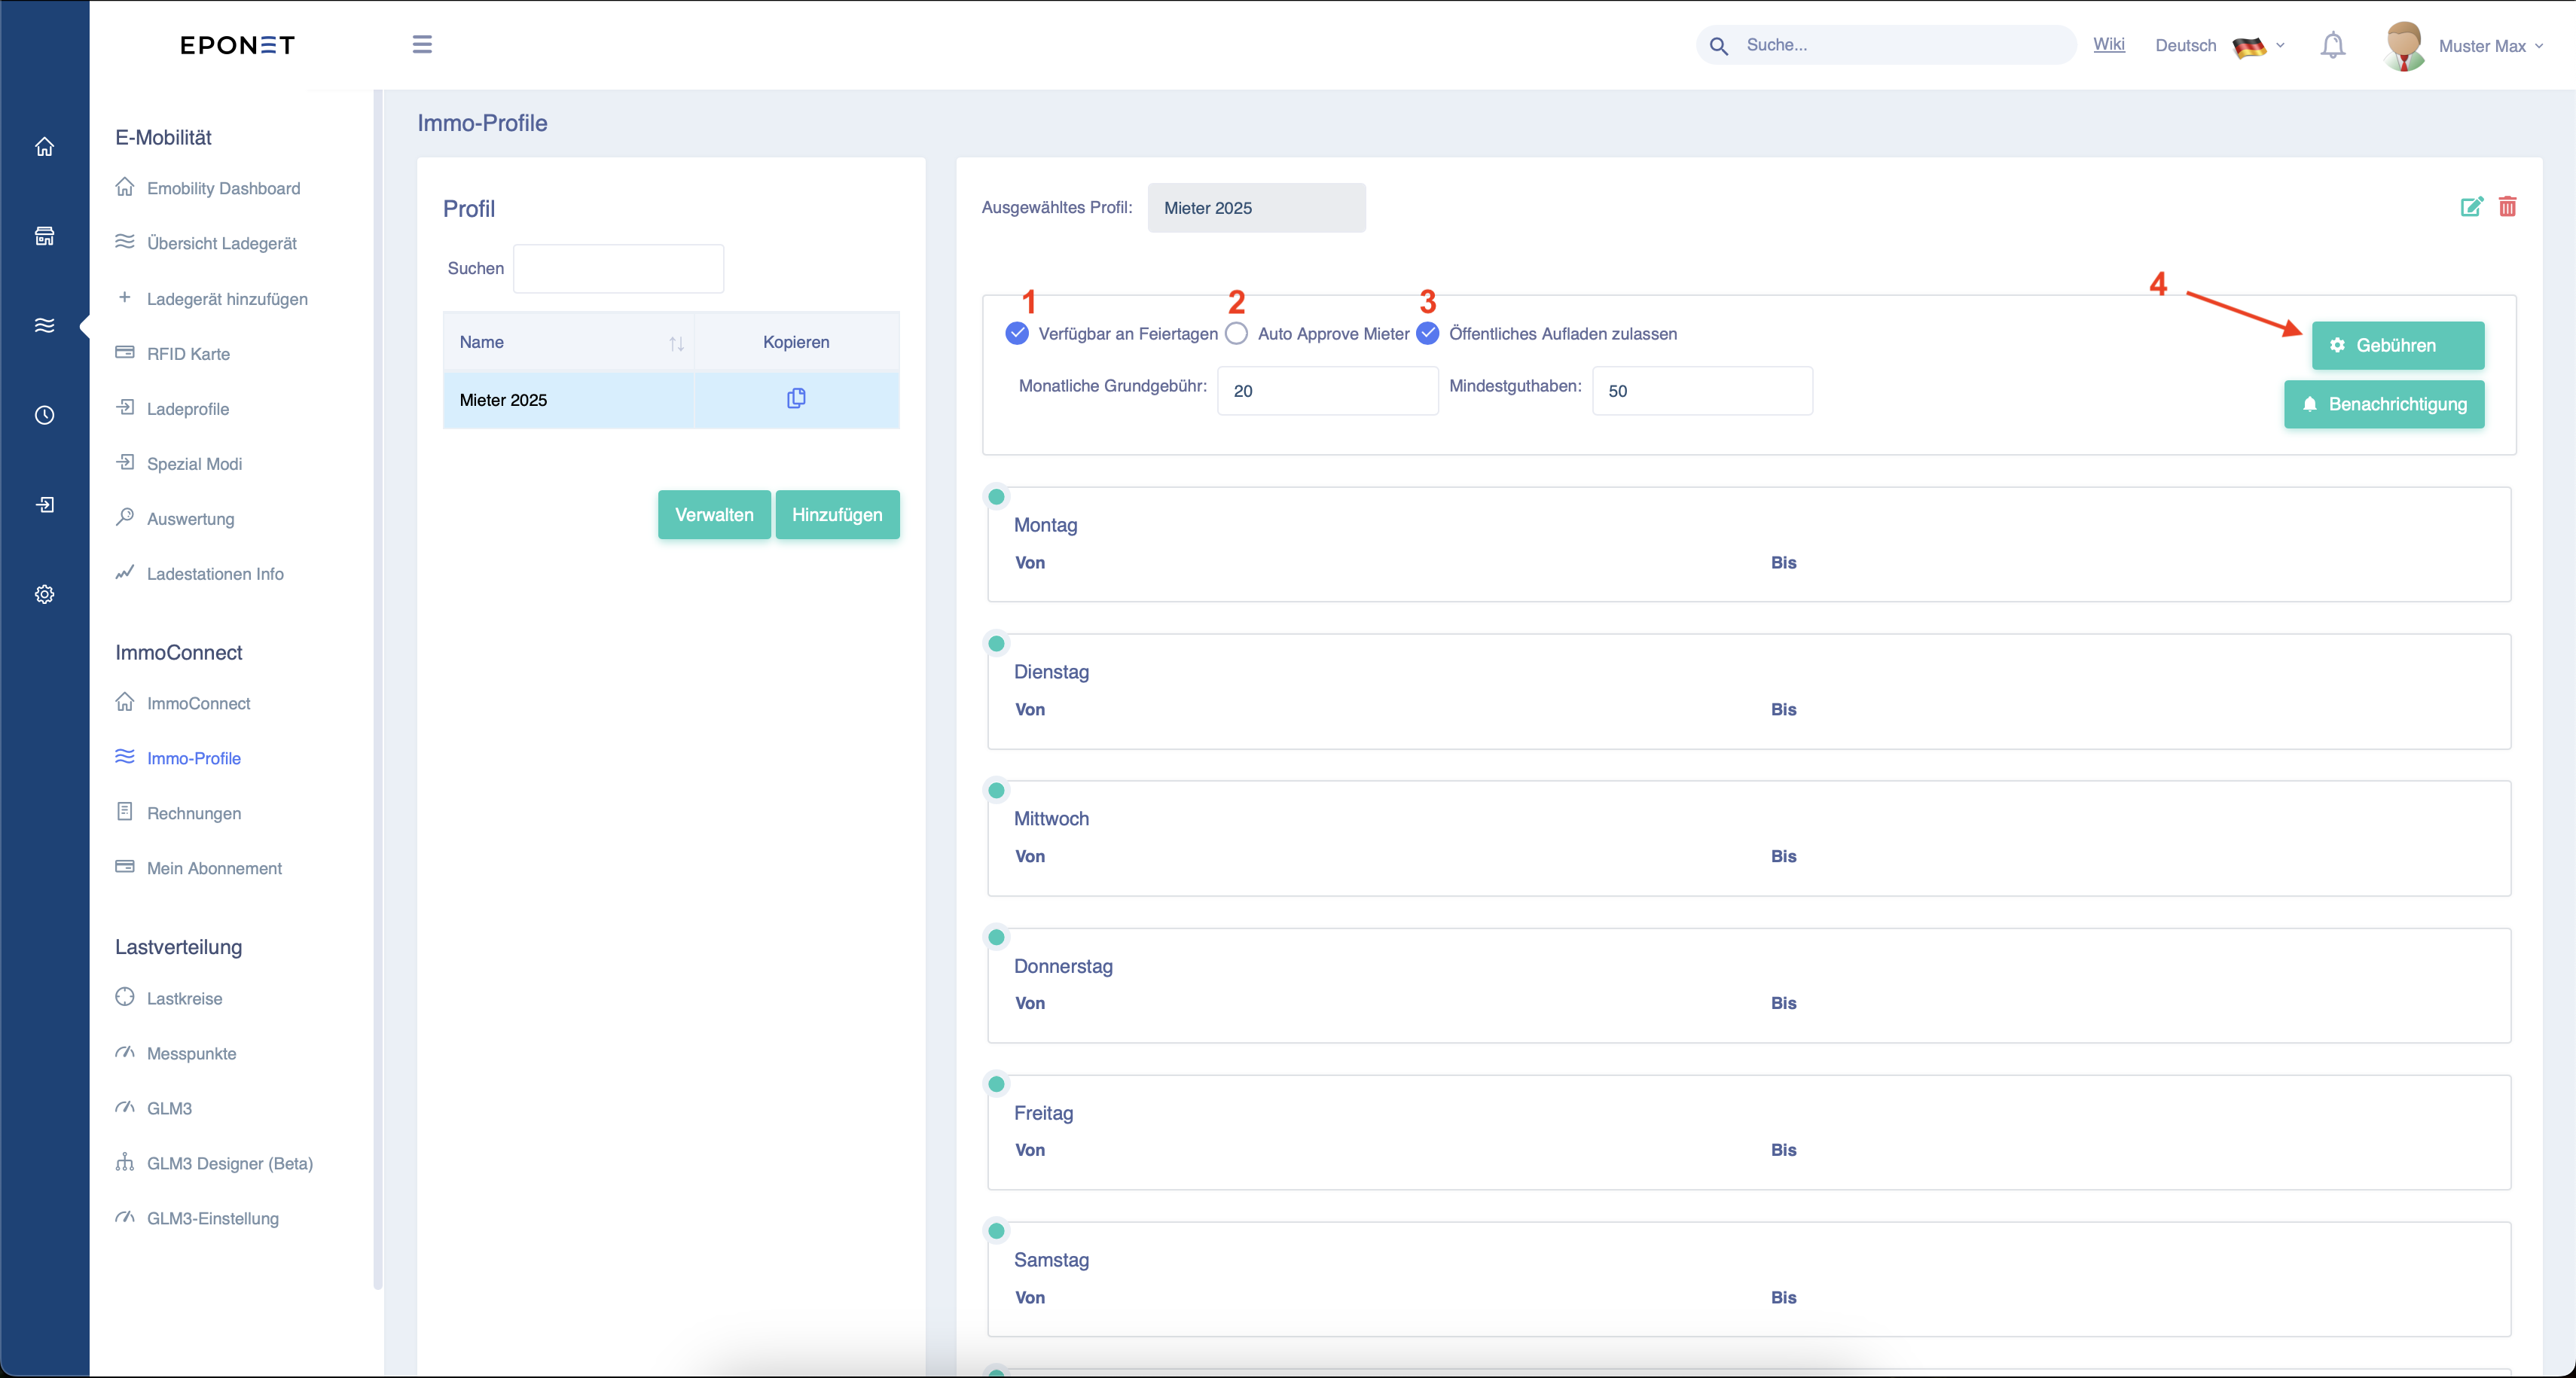
Now click on the button next to arrow 4 to set the charging fees.
Now select which charges are to be paid.
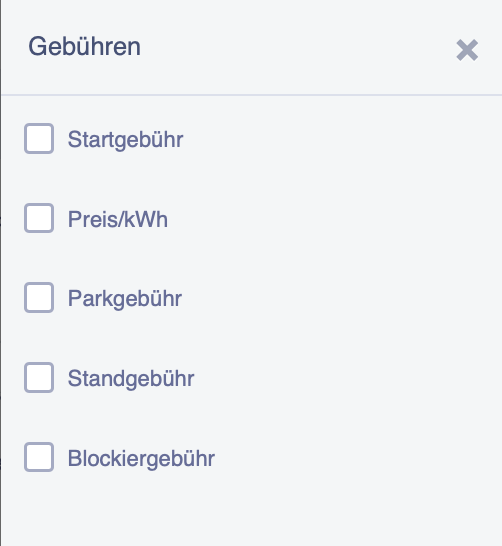
Once you have selected them, scroll to the bottom of the page and click on "Add" at arrow 5.

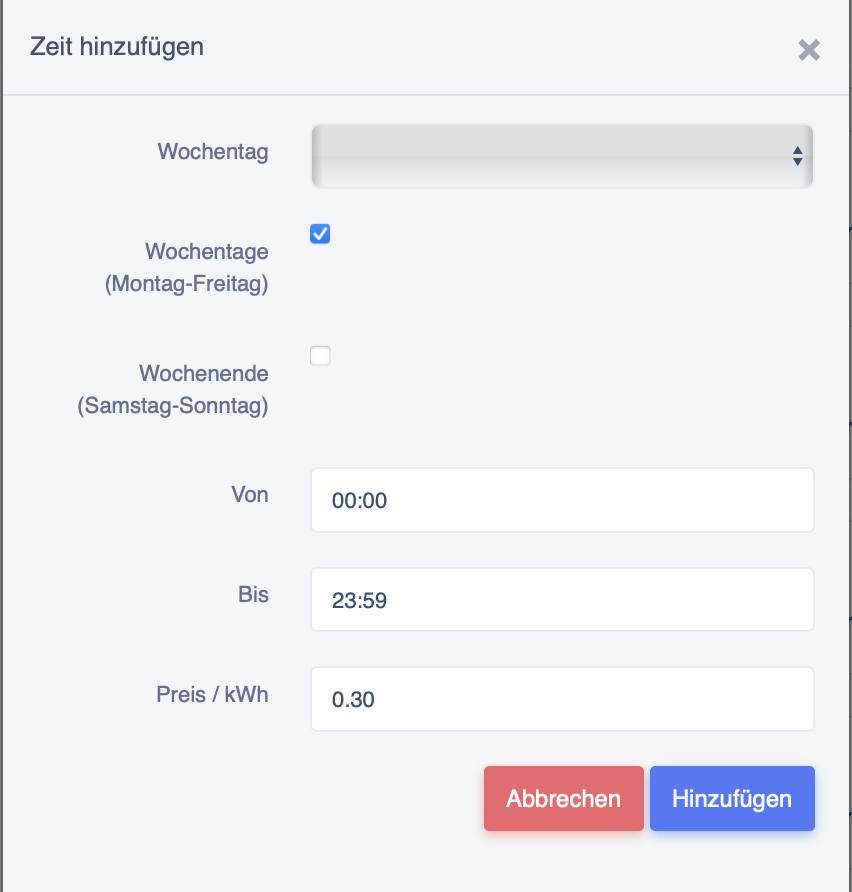
Select the days of the week and the times when charging is permitted. Then click on "Add".
Afterwards, it should look something like this.
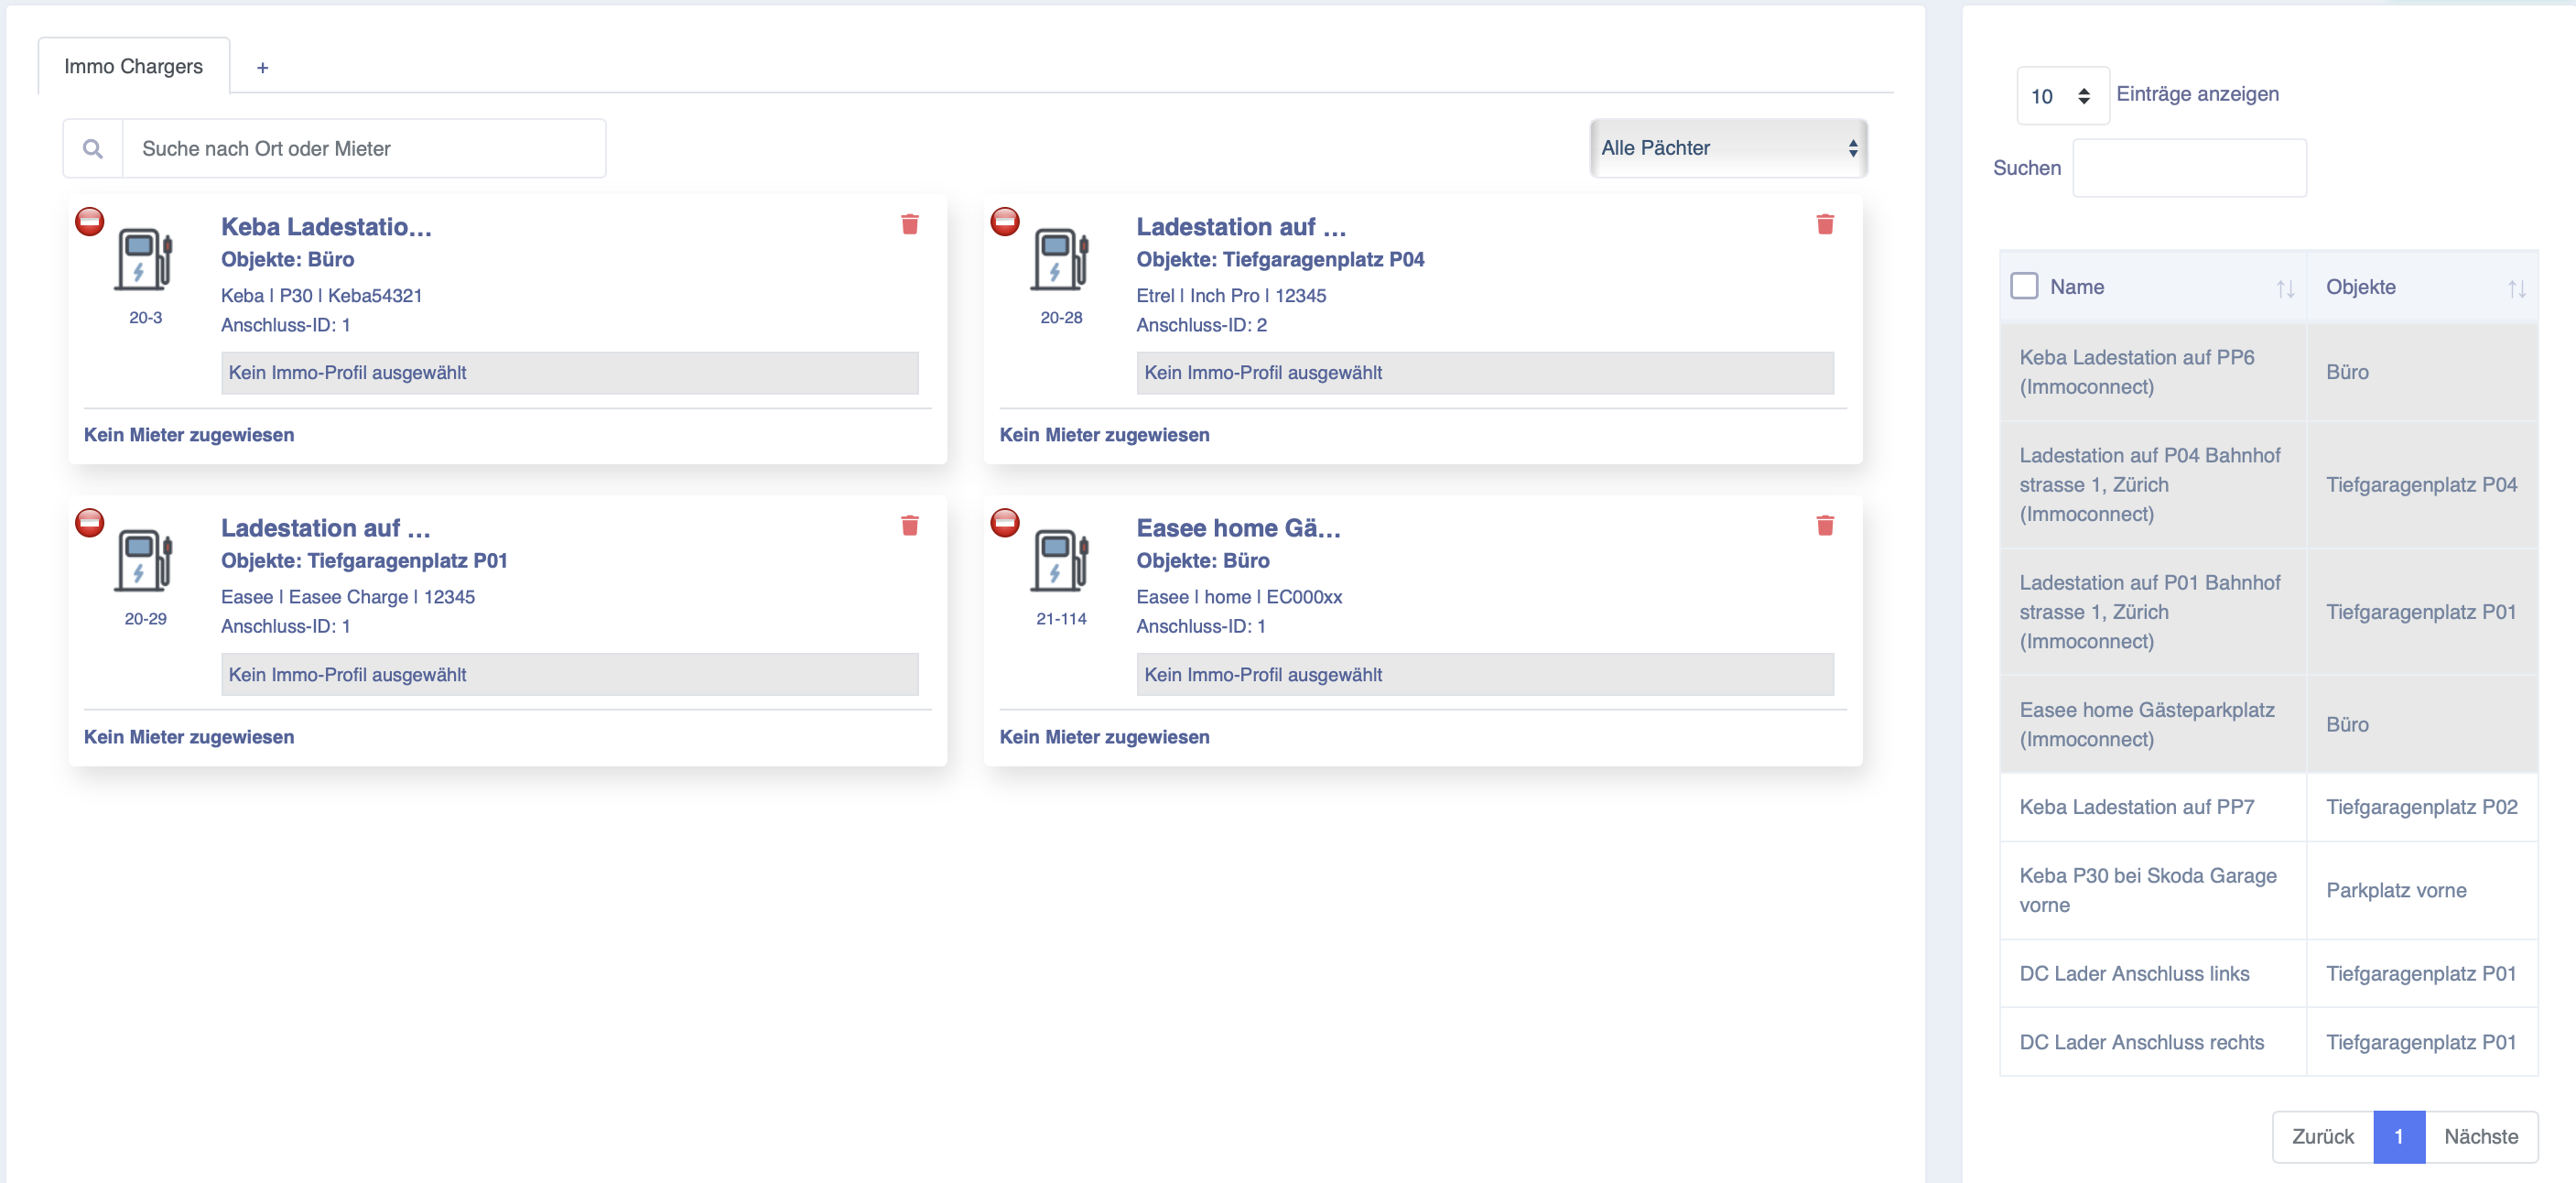
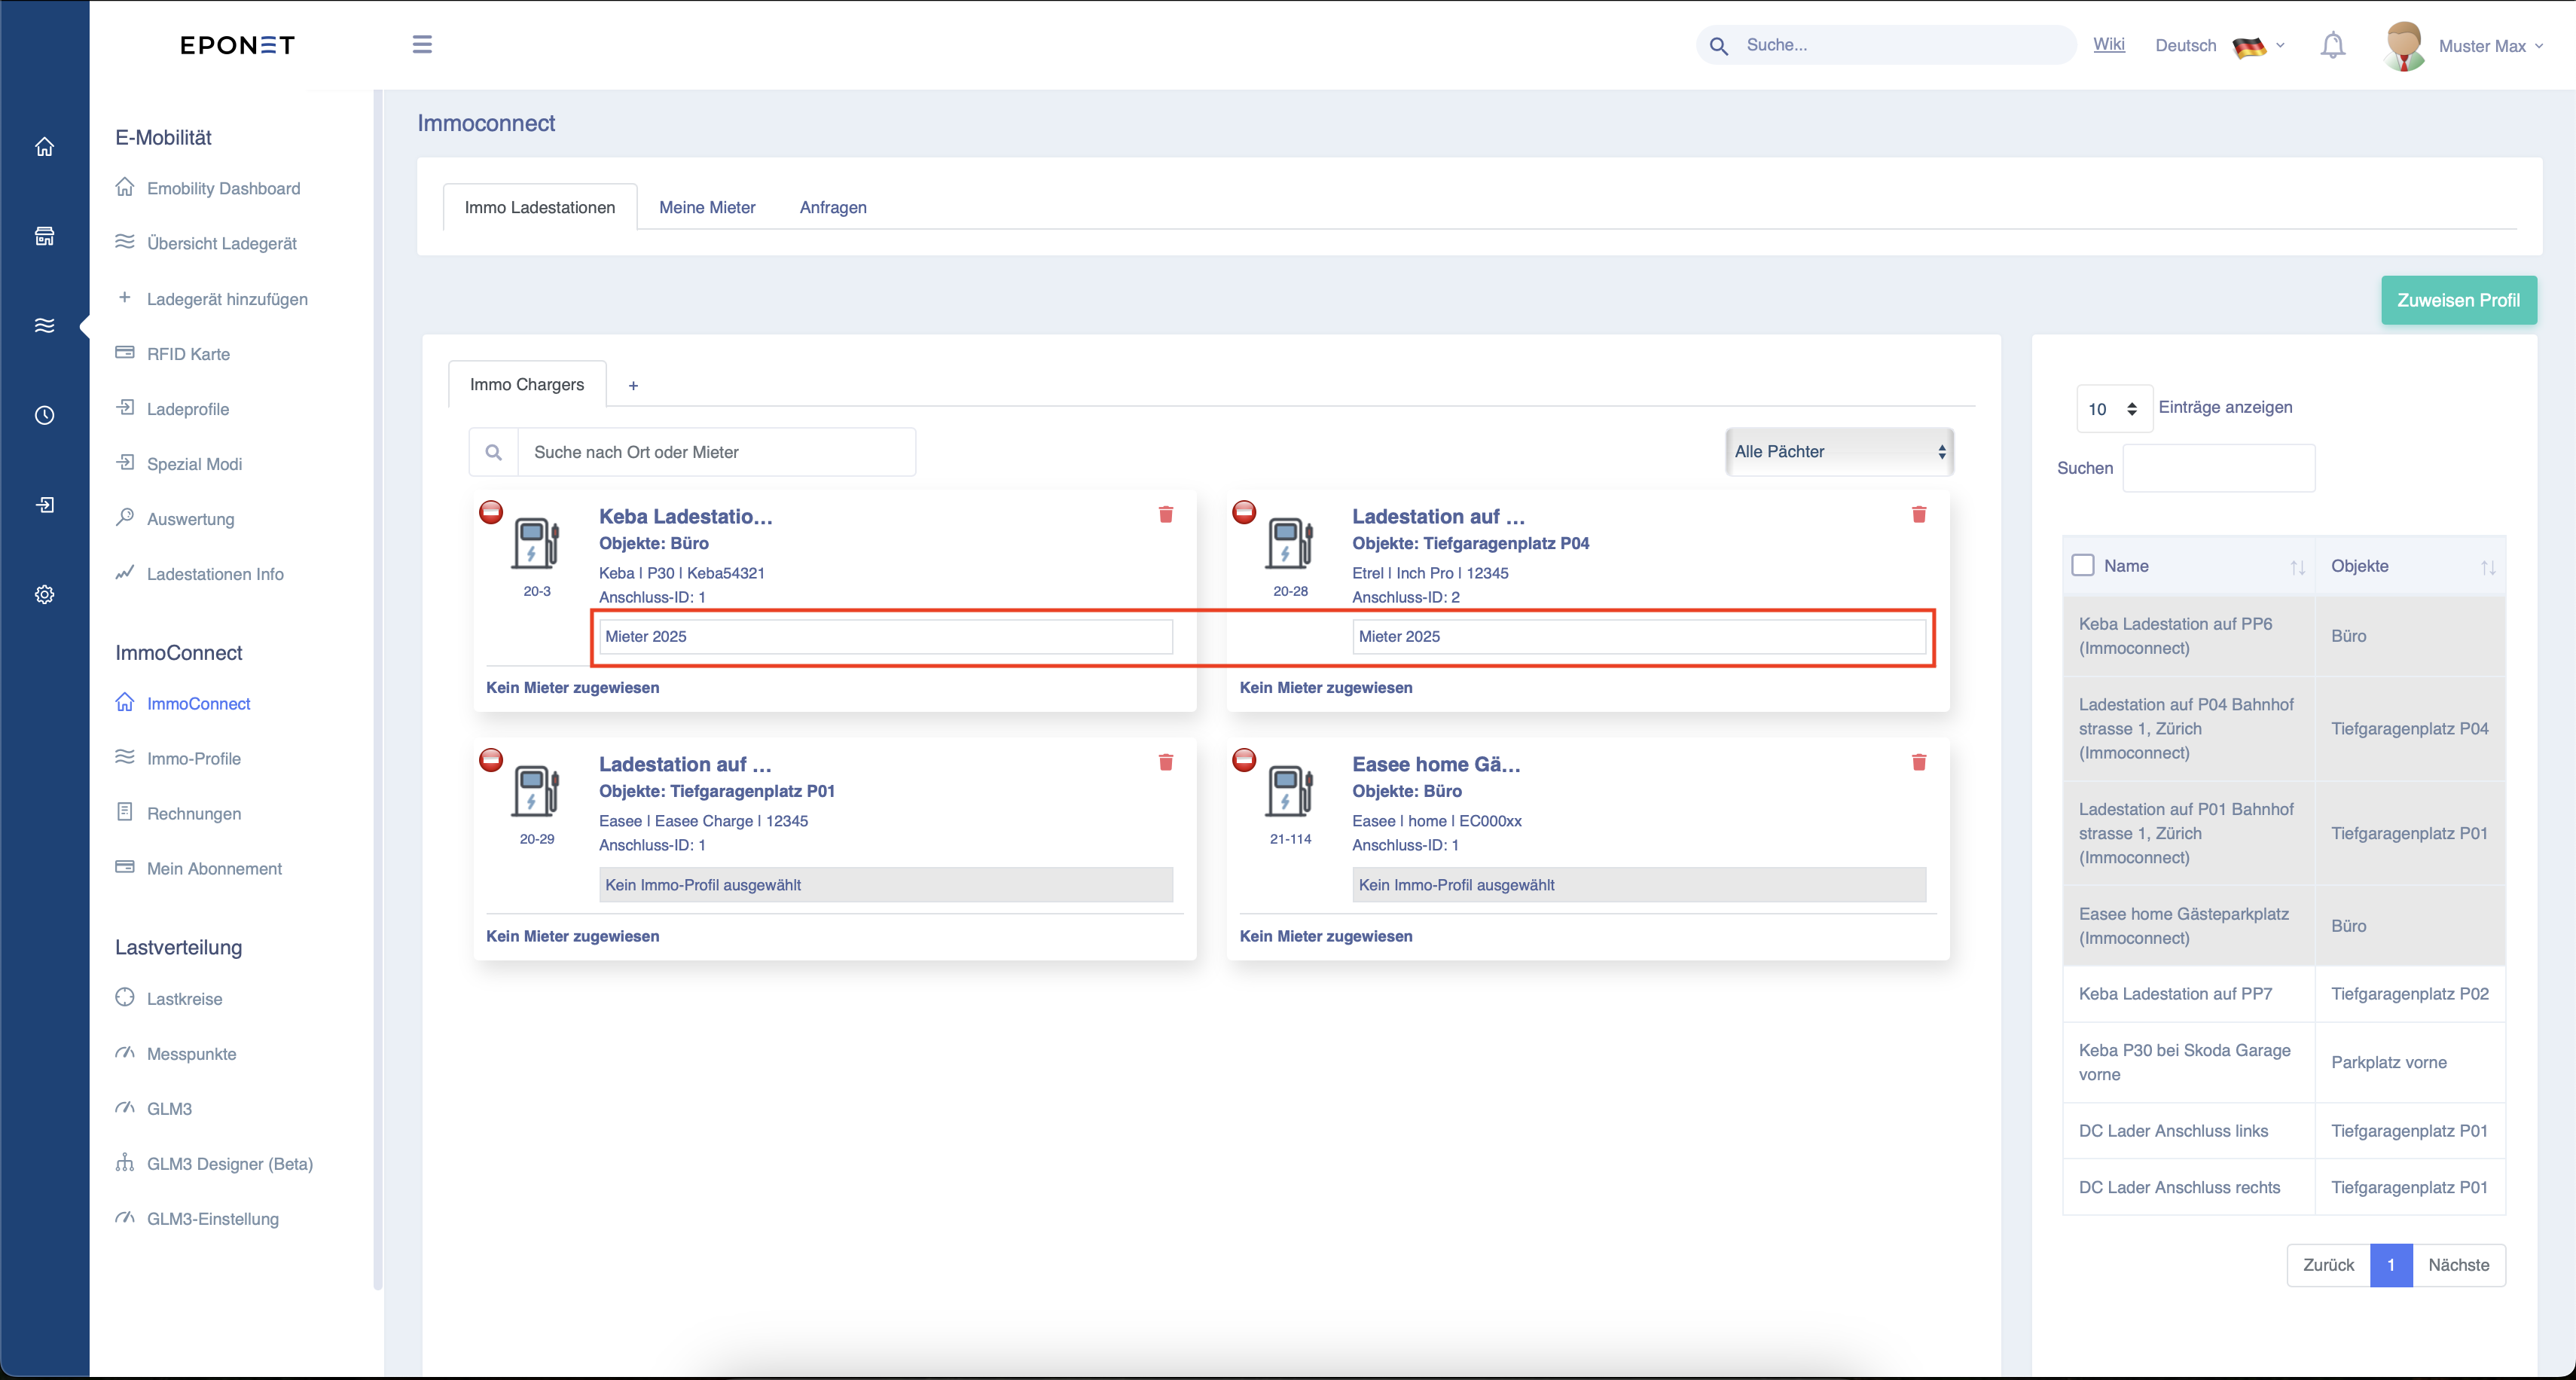
Now you need to assign the previously created profile to the charging station.
To do this, click on "No property profile selected".
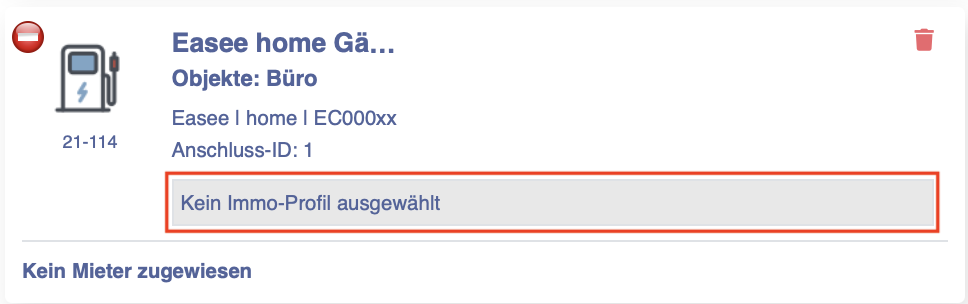
Now click on "Add or change property profiles".

Now select the desired profile and confirm by clicking Save.
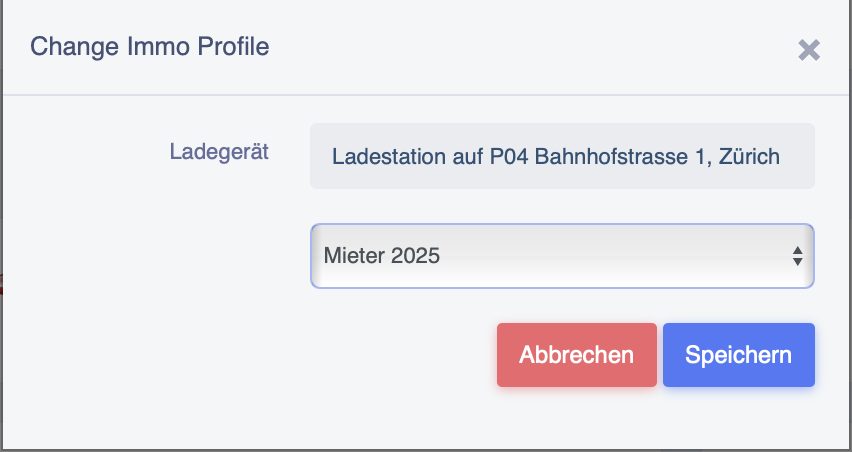
You will now see the profile stored at the charging station.
Everything is now ready for the tenant to rent the charging station using the QR code.