
Step 5 - Assign RFID / release (general step)
Assign the RFID card(s) to the new charging station.
As an important final step, the charging station must now be informed which RFID card is authorised to charge. This can be found in the blue navigation bar E-mobility in the Manage RFID card tab. Select the desired RFID card and allow charging at the new charging station. This RFID approval (own RFID cards) is for charging without automatic billing, i.e. for your own internal RFID cards, e.g. at a company:
Overview
You can grant or revoke RFID access to chargers and assign charging profiles in three ways:
- From the RFID Management page (multiple RFIDs → chargers)
- From the Charger Dashboard (bulk – multiple chargers → RFIDs)
- From the Charger Details page (single charger)
1. From RFID Management Page
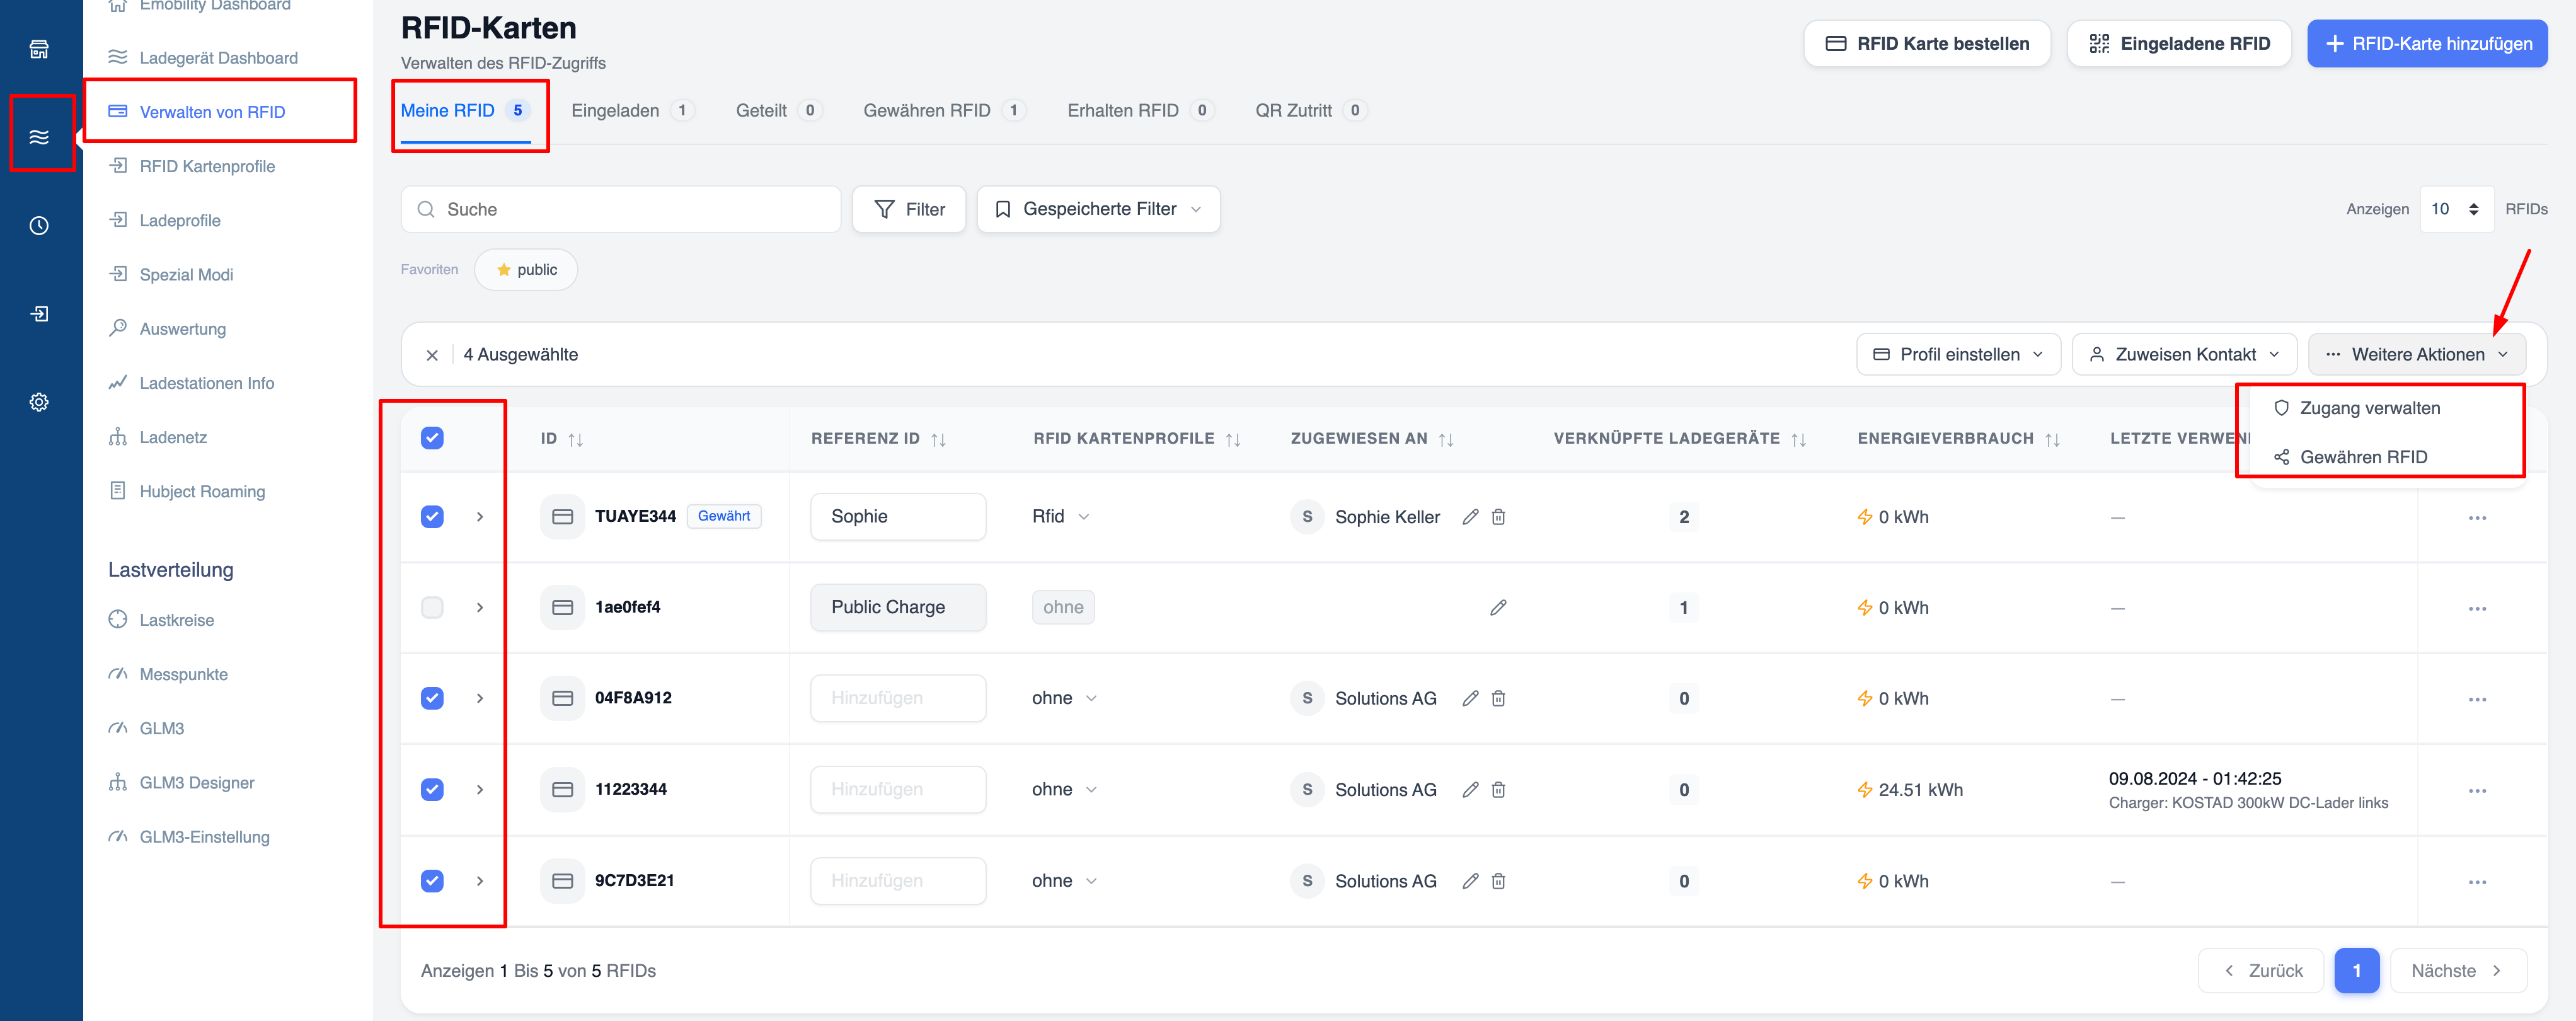
- Go to Verwalten von RFID.
- Select one or more RFID cards.
- Click Weitere Aktionen → Zugang verwalten.
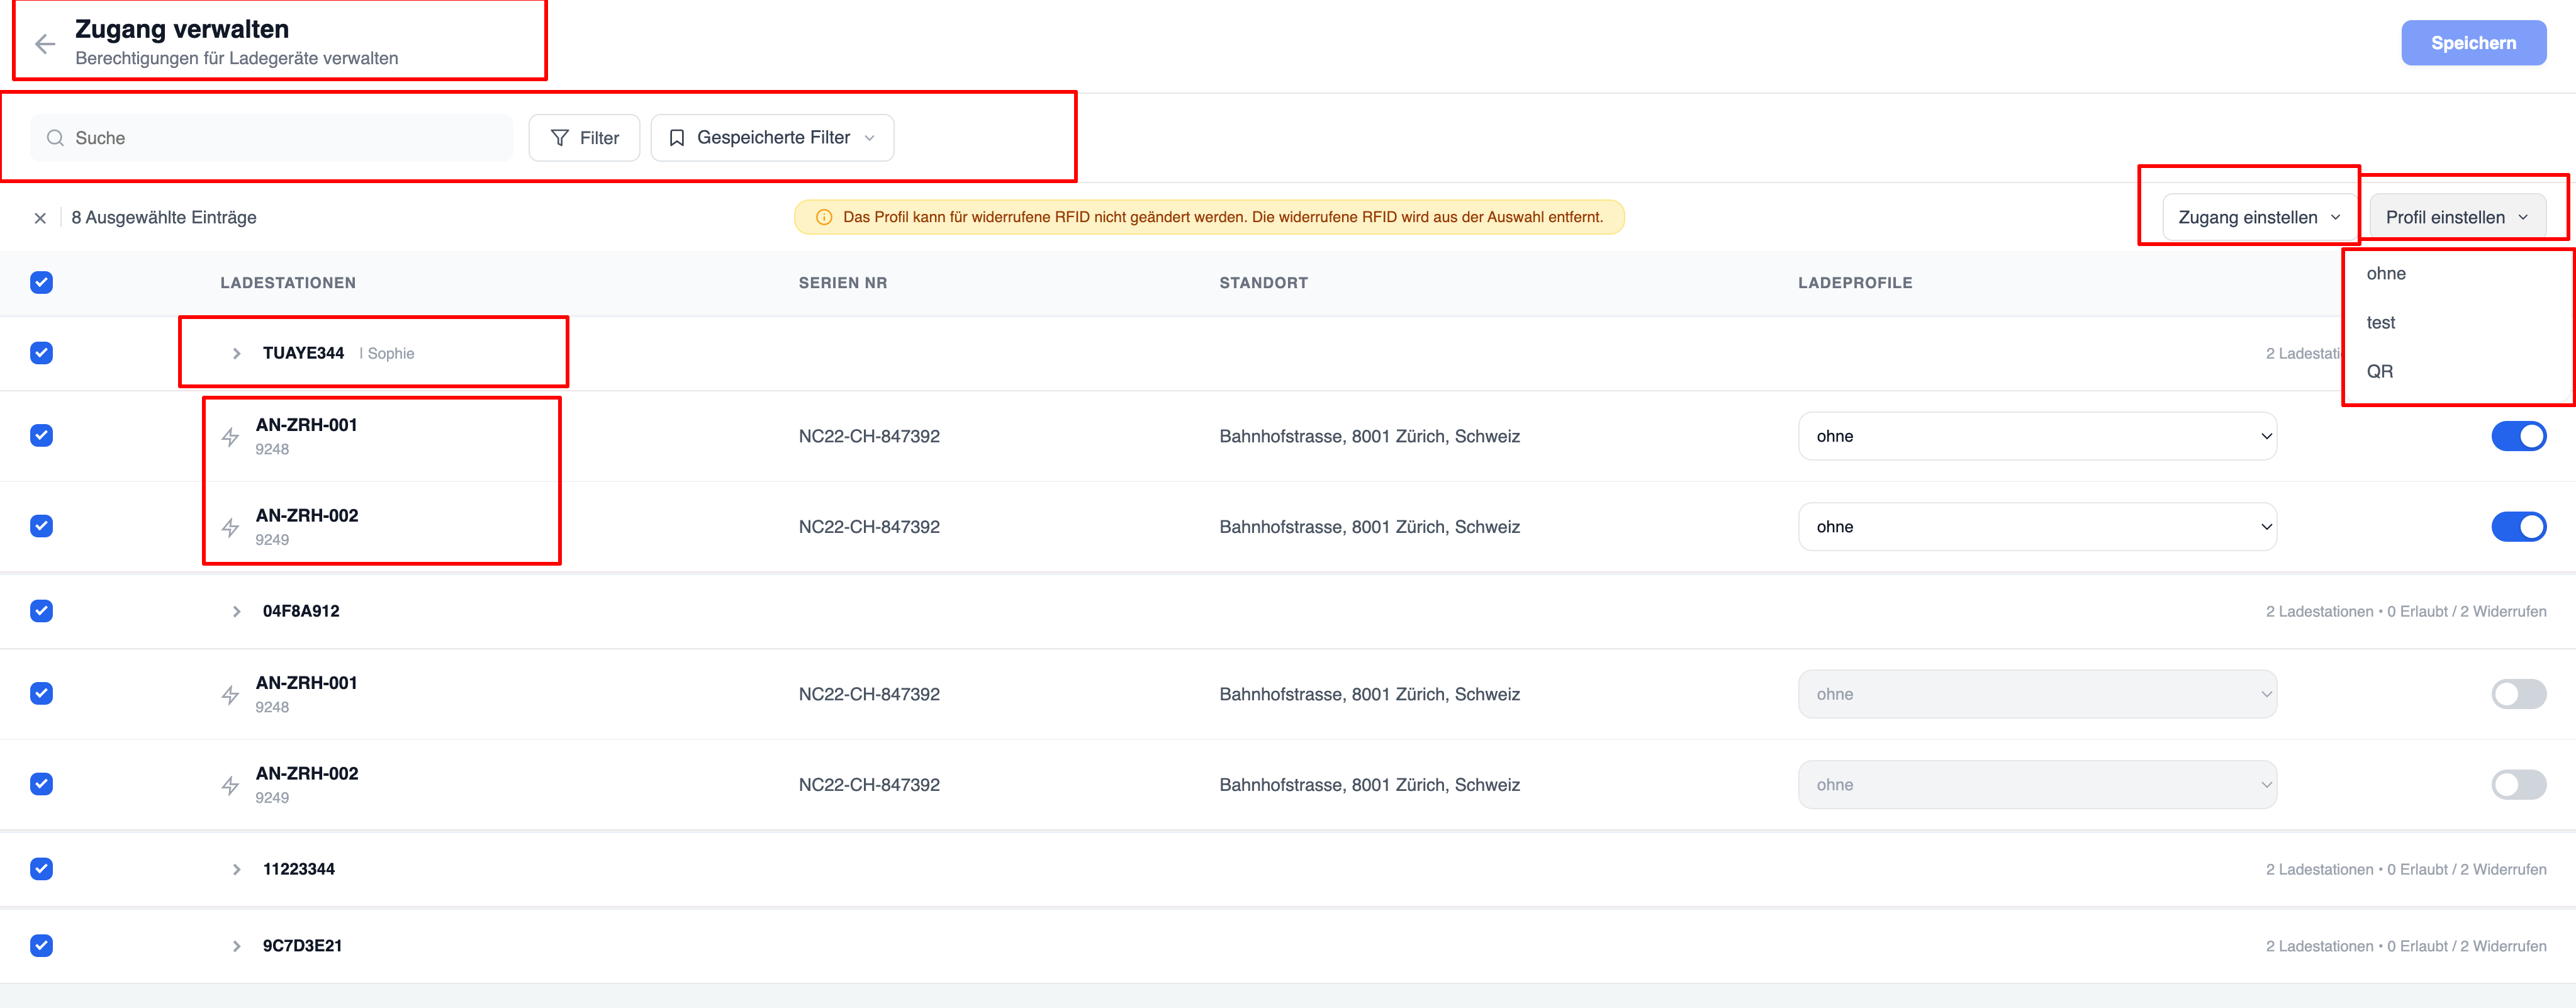
- In the Zugang verwalten screen:
- Select the chargers.
- Toggle Zugang einstellen to allow/revoke access.
- Assign a profile via Profil einstellen (e.g. ohne, test, QR).
- Click Speichern.
2. From Charger Dashboard (Bulk)
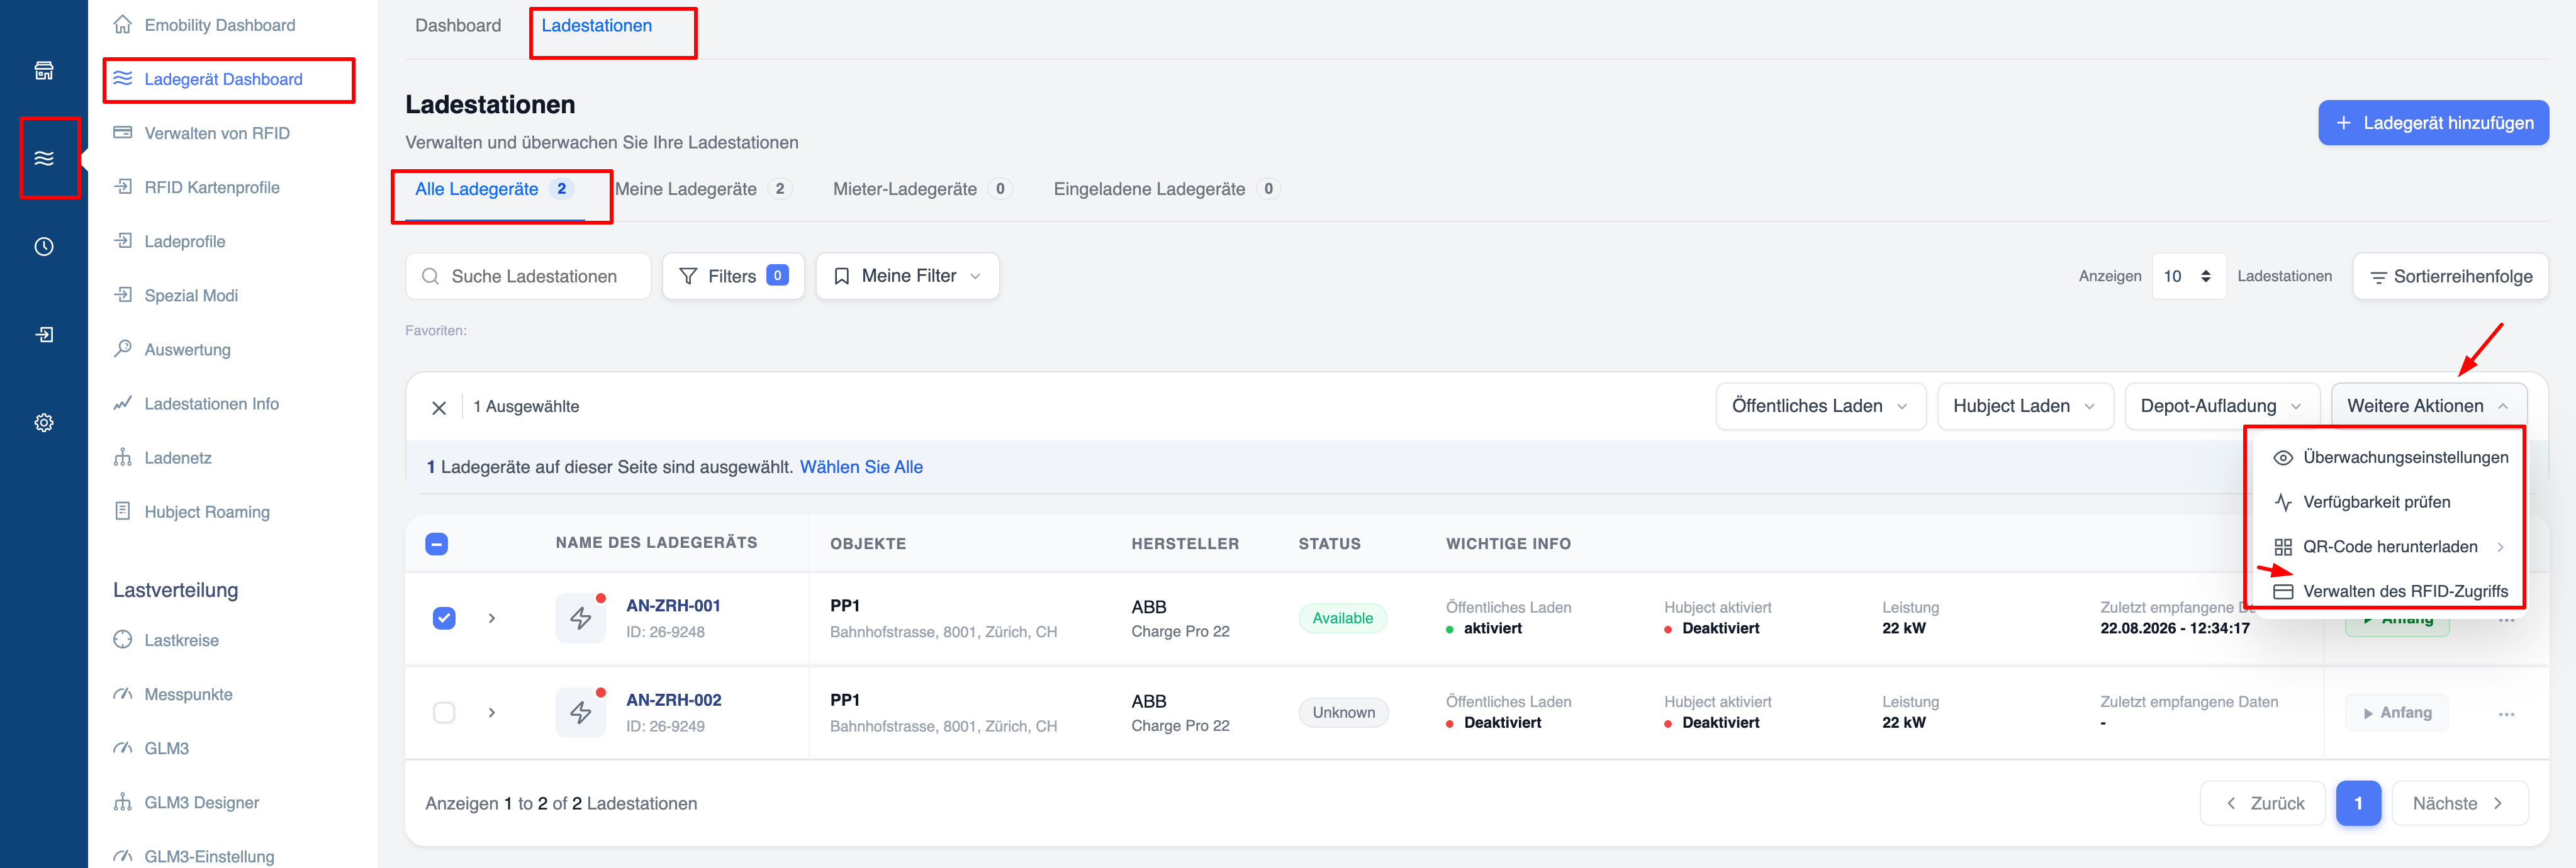
- Go to Ladegerät Dashboard → Ladestationen.
- Select one or more chargers.
- Click Weitere Aktionen → Verwalten des RFID-Zugriffs.
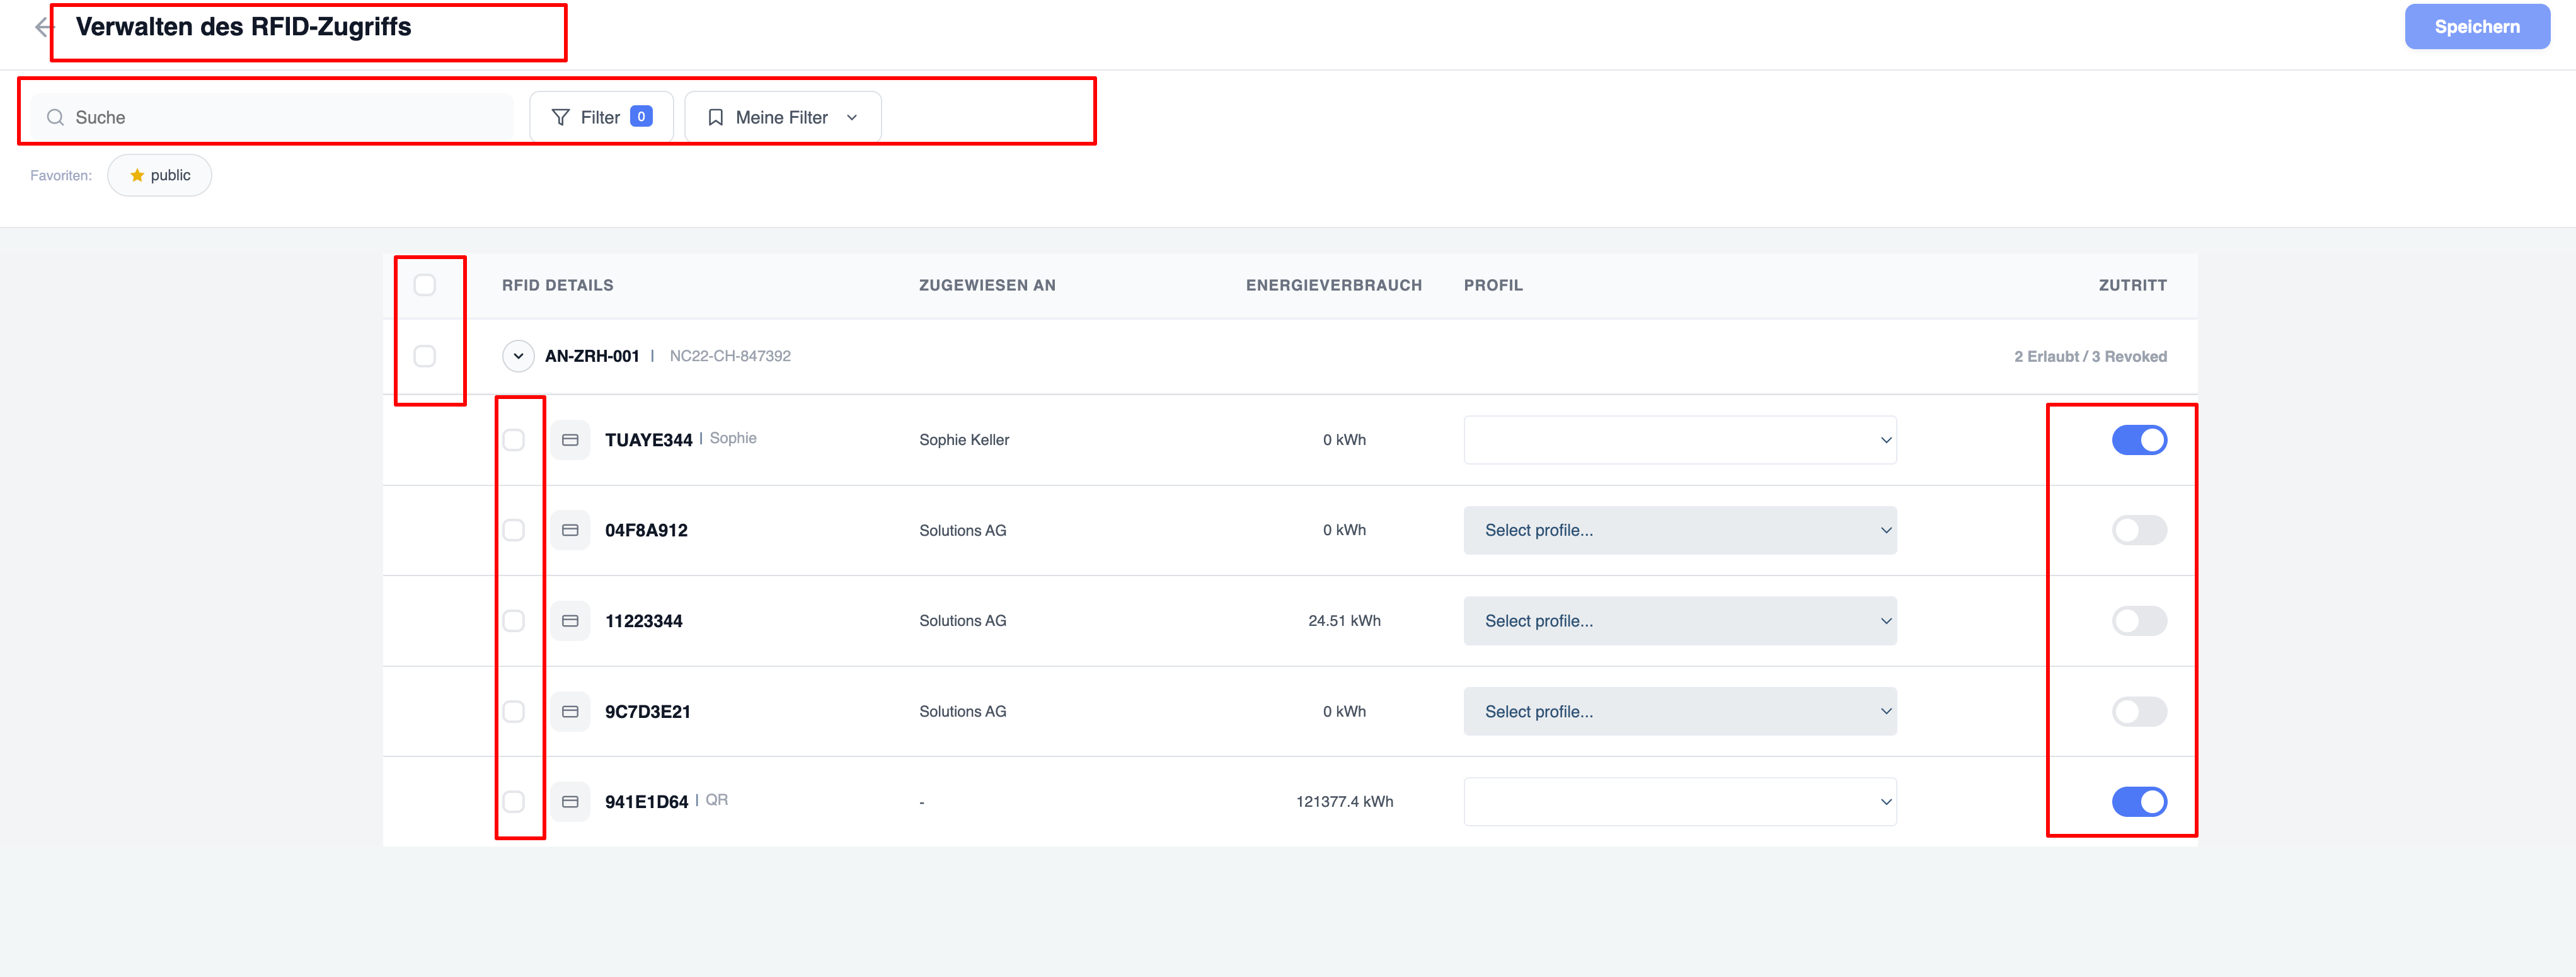
- In the Verwalten des RFID-Zugriffs screen:
- Select the RFIDs you want to allow.
- Toggle the Zutritt switch to grant or revoke access.
- Optionally assign a profile.
- Click Speichern.
3. From Charger Details Page (Single Charger)
- Open the desired charger.
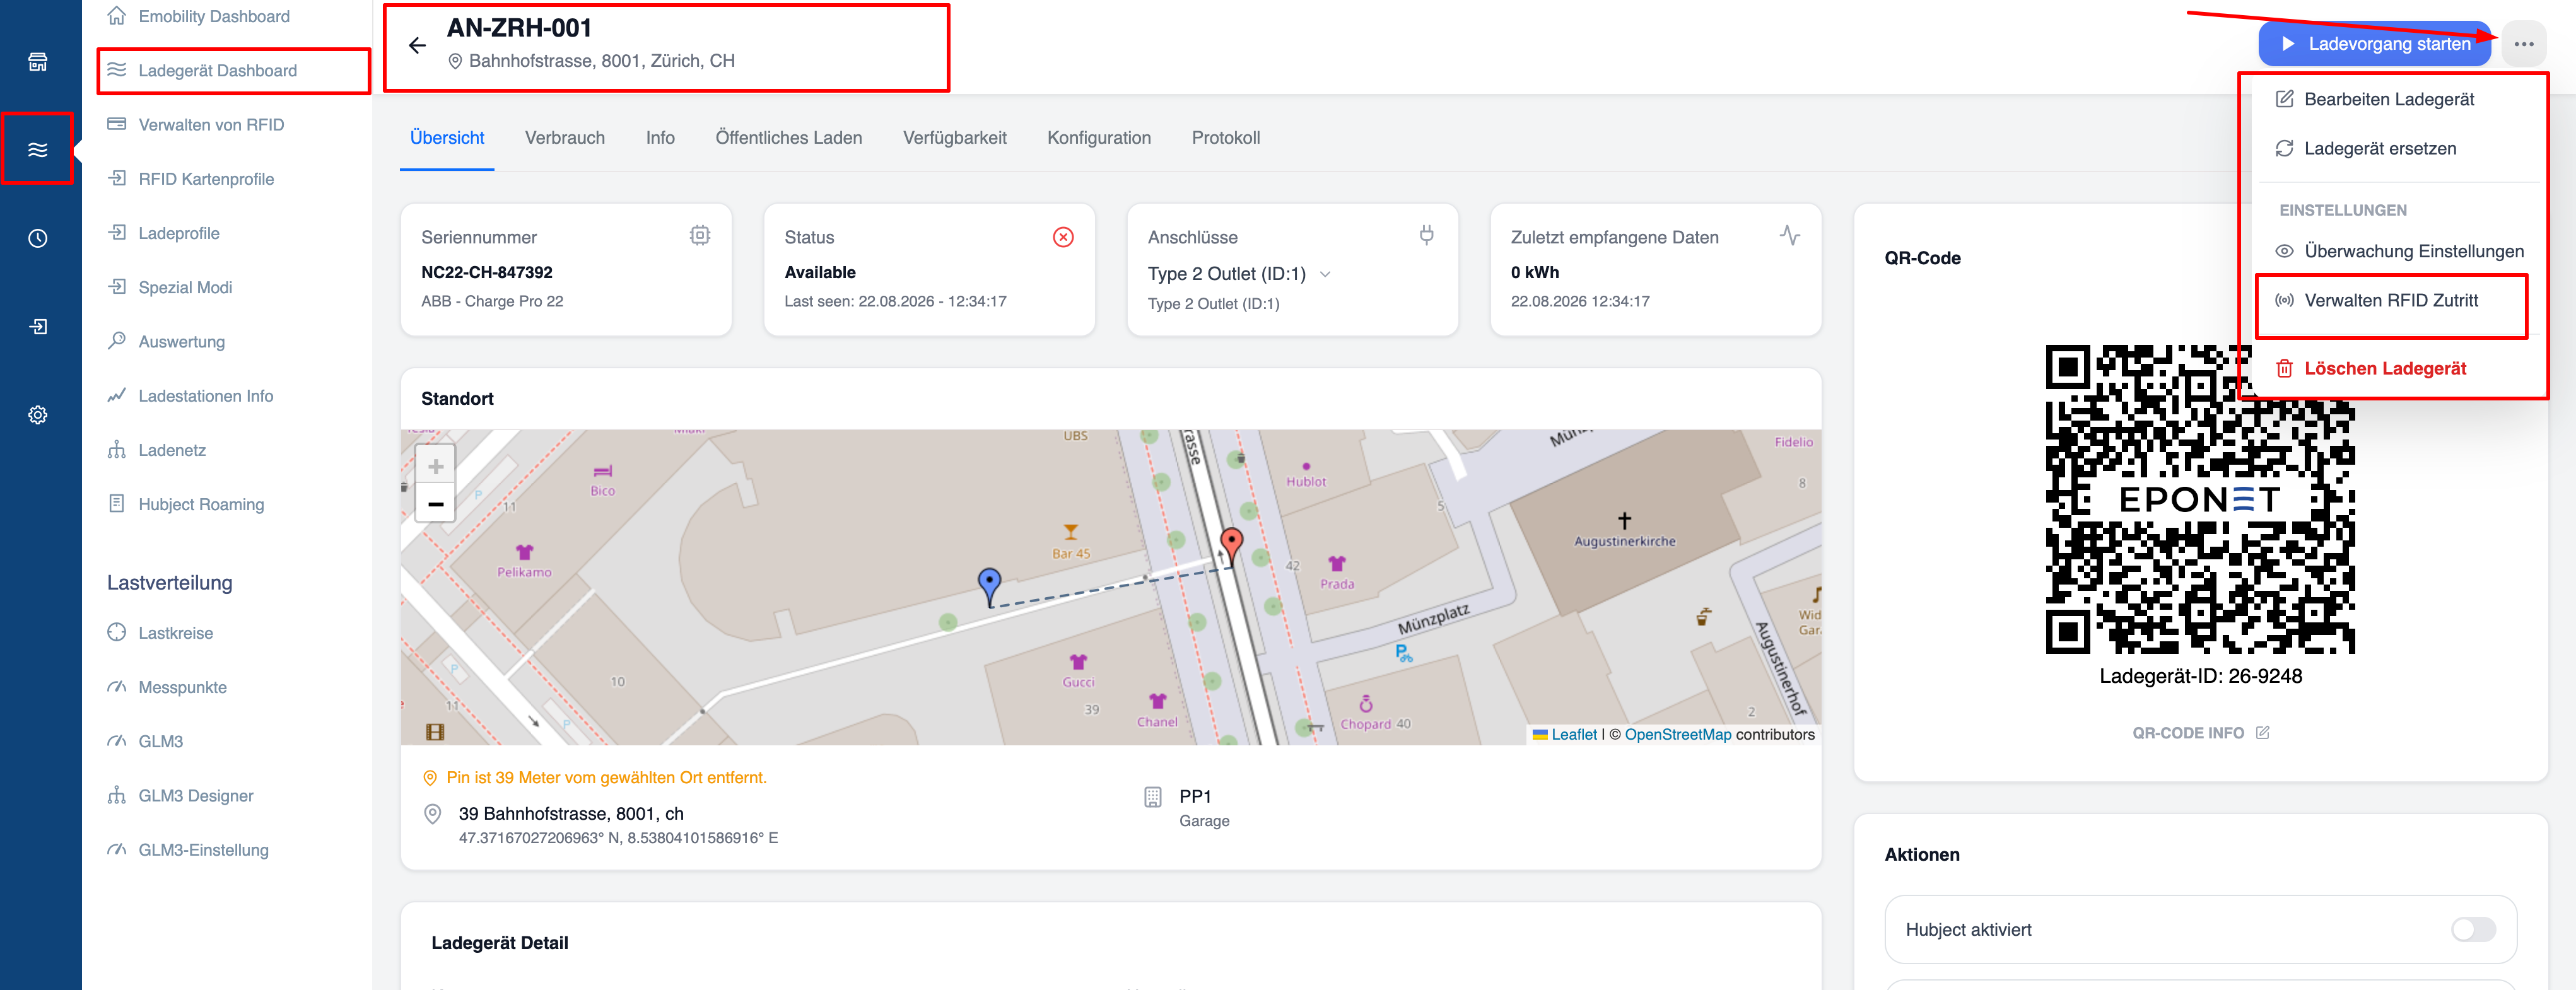
- Click the ⋯ menu (top right) → Verwalten RFID Zutritt.
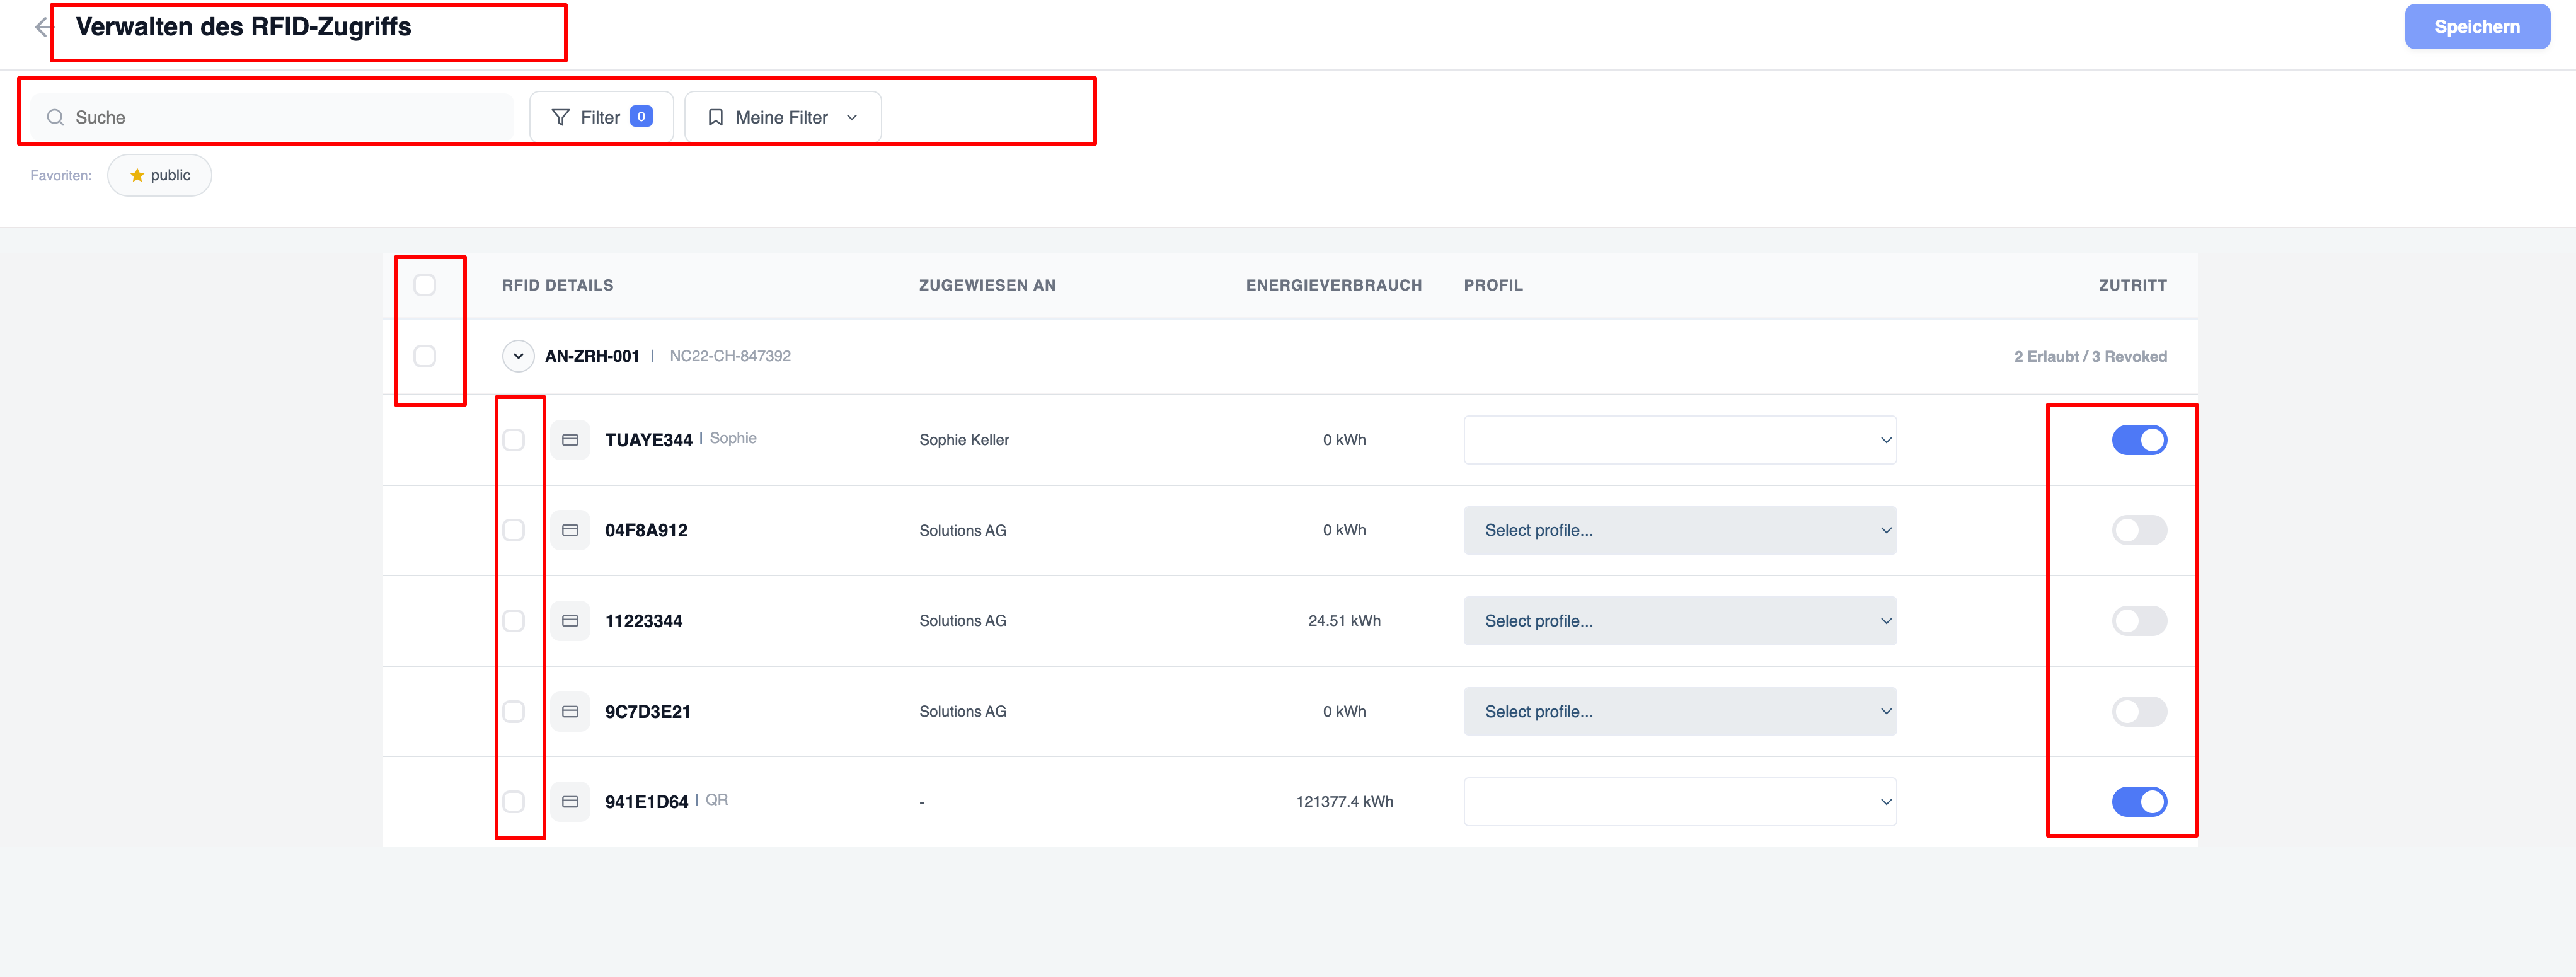
- In the Verwalten des RFID-Zugriffs screen:
- Select the RFIDs.
- Toggle Zutritt on/off.
- Assign a profile if needed.
- Click Speichern.
Note : If no Charging profile is applied then it will be treated as free charge.
Please note: For automatic billing, e.g. for STWE or tenants, the user is invited to a predefined charging profile via the "Invite RFID cards" tab. There are separate instructions for users for this: https://www.eponet.info/download/anleitung/nutzer-account-konfiguration.pdf
Please carry out a loading process at the end to test it.
Tip for installation partners who manage multiple Eponet customer accounts:
Add an RFID card to your personal account and use it to log in to the customer accounts (without a loading profile, as a test card). Whether during commissioning or at a later date in the event of a support case, you can always use this RFID card to activate all loading stations for testing.