Activate Hubject / Roaming charges
This page explains how to activate a charging station using Hubject. This will enable the charging station for international roaming.
Please note: Hubject roaming is an advanced feature. Please only activate this feature in conjunction with Eponet.
Preparation
Before you activate Hubject, please make a note of the charging station’s coordinates or have them to hand. These should be very precise. Longitude and latitude must be specified in the following format: 9.41176,47.06159
Please note:
Longitude and latitude must be entered exactly in this format (exactly the same number of characters, separated by a full stop and a comma, and without spaces). It is essential that you check the coordinates before entering them into Google
(to check them in Google, the longitude and latitude must be swapped, i.e. enter 47.06159,9,41176).
Activation in the Eponet portal
Overview
This function allows operators to activate charging points for Hubject roaming (Hubject Charging). Once activated, the charging point is available on the Hubject network.
Activation can be carried out in three ways:
- Individual activation via the ‘Charging Point Details’ page
- Bulk activation via the charging point dashboard
- Bulk activation via the ‘Object’ page
The same data forms are used for all three methods.
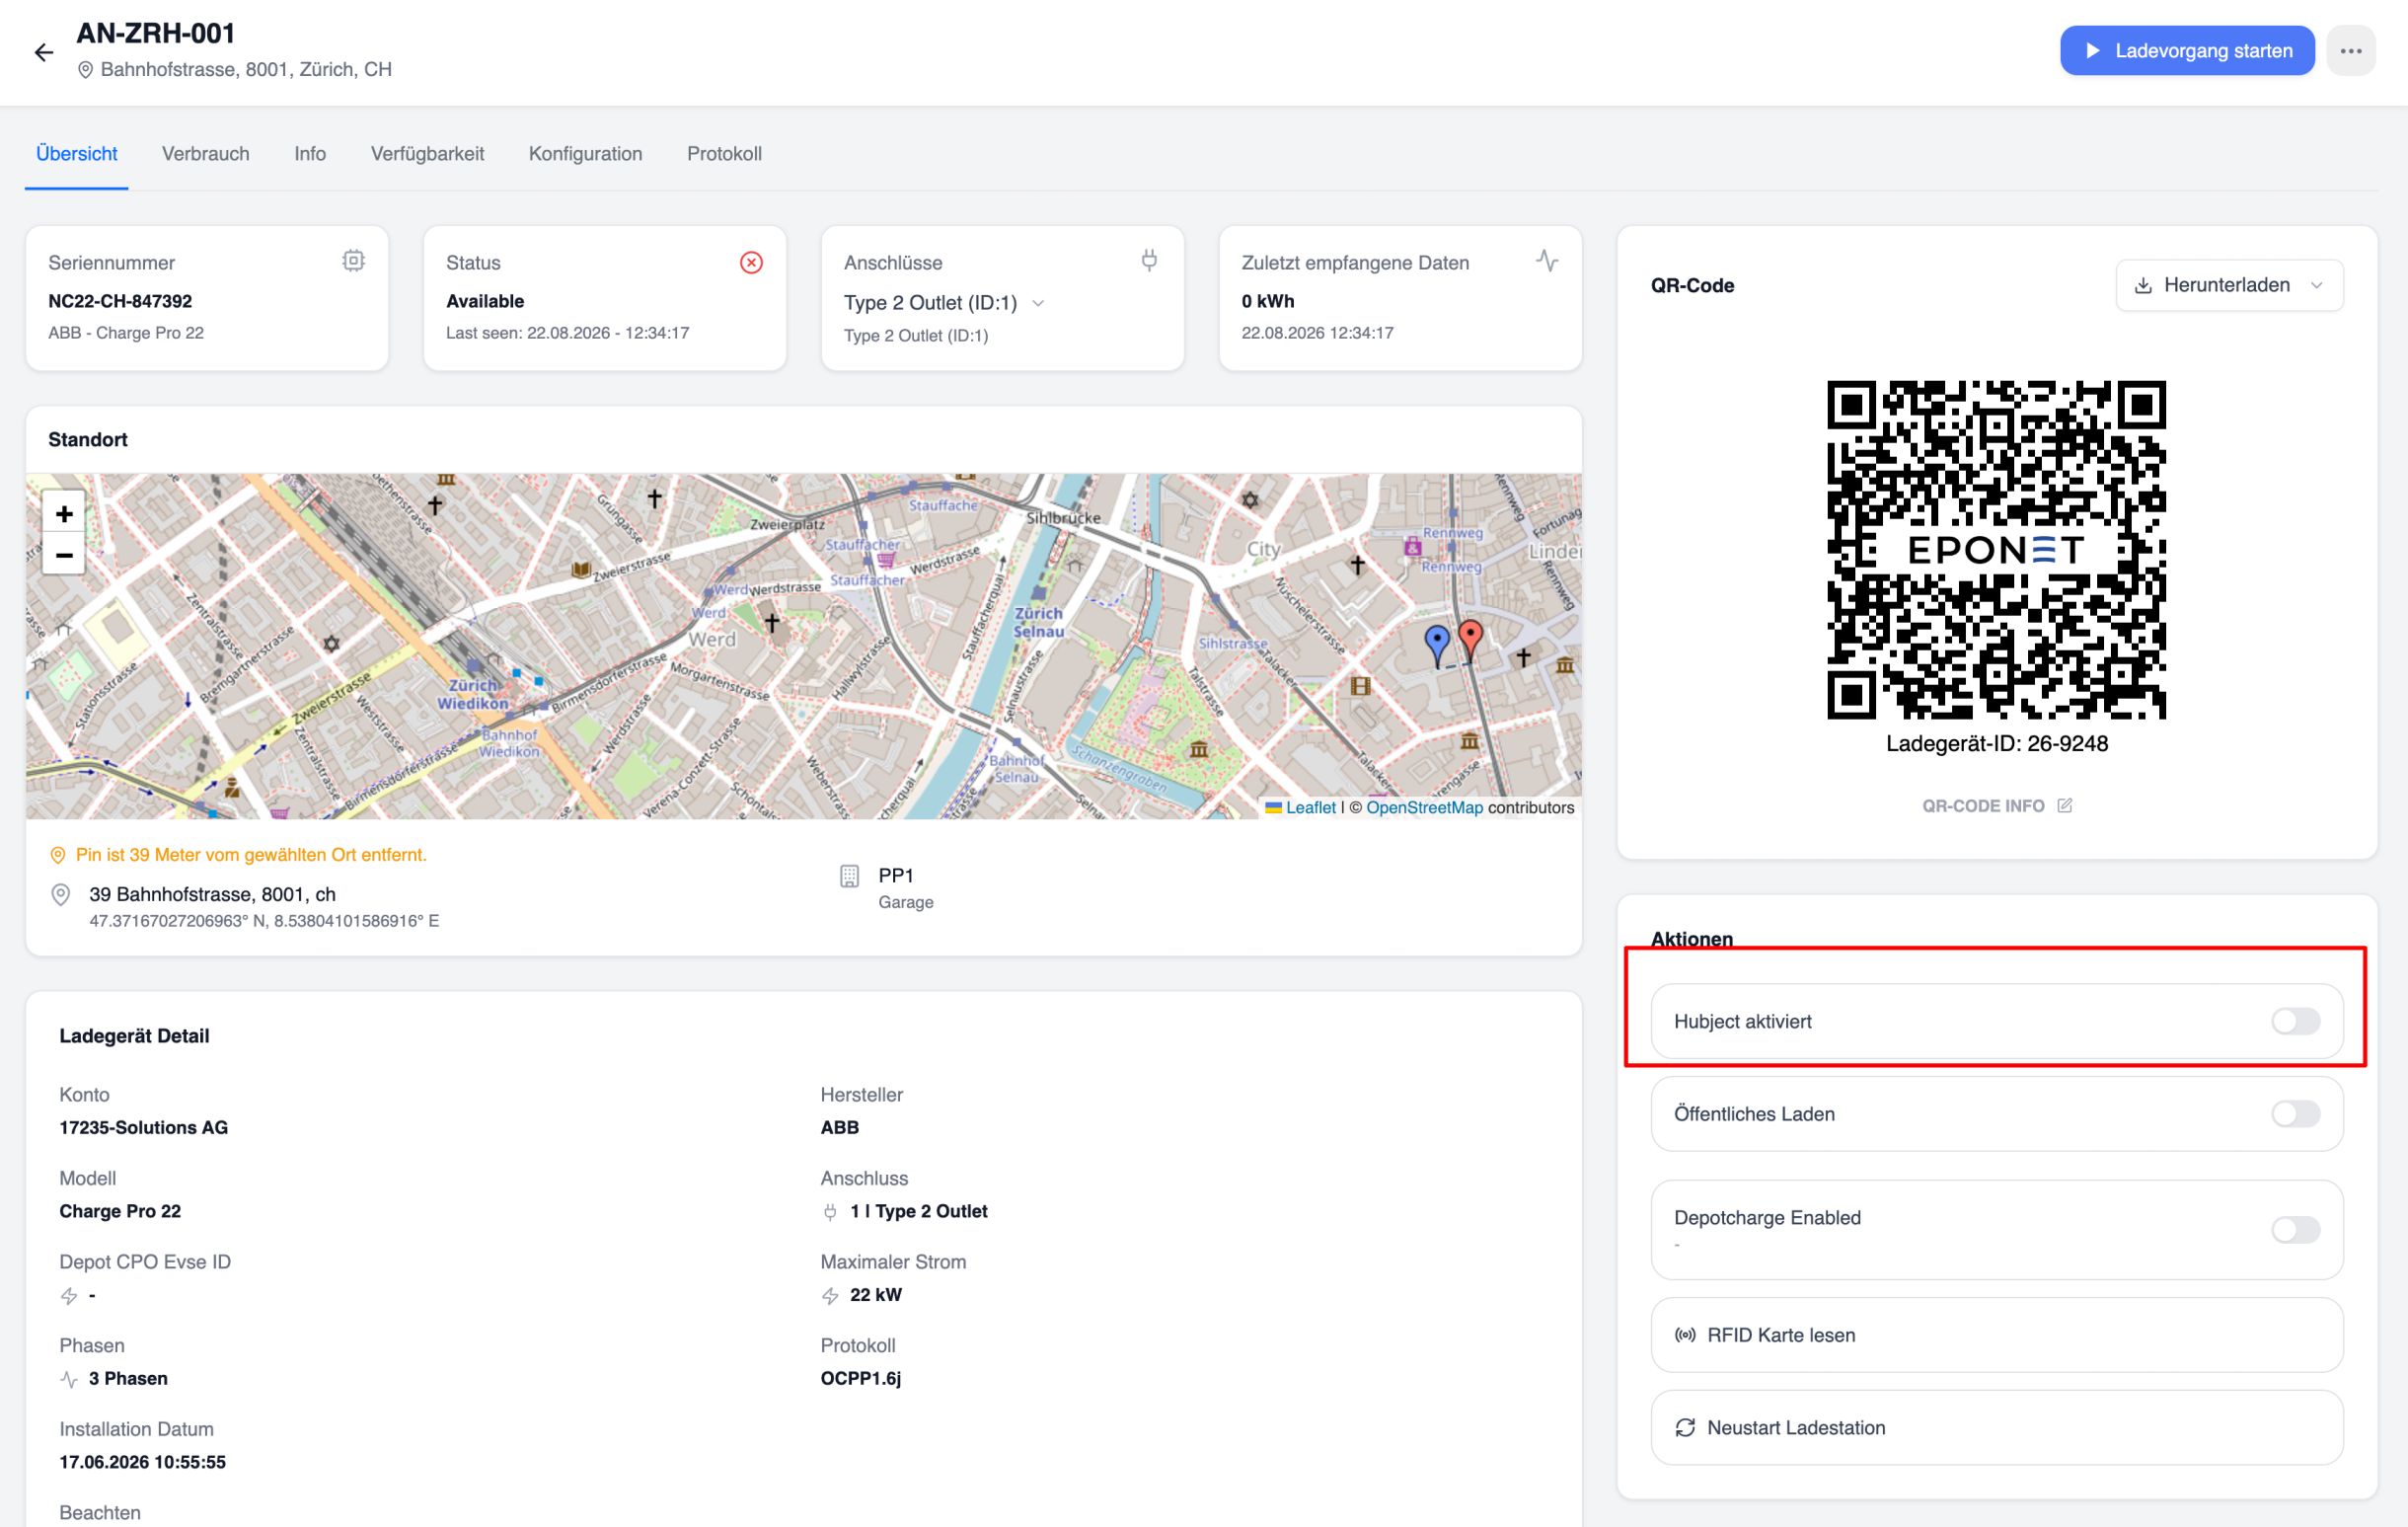
1. Individual activation (the ‘Charging Point – Details’ page)
- Open a charging point
- Toggle ‘Hubject activated’ in the right-hand action panel.
- The “Activate Hubject charger” pop-up window will open.
- Check the mandatory fields or fill them in, then confirm.
2. Bulk activation via the charger dashboard
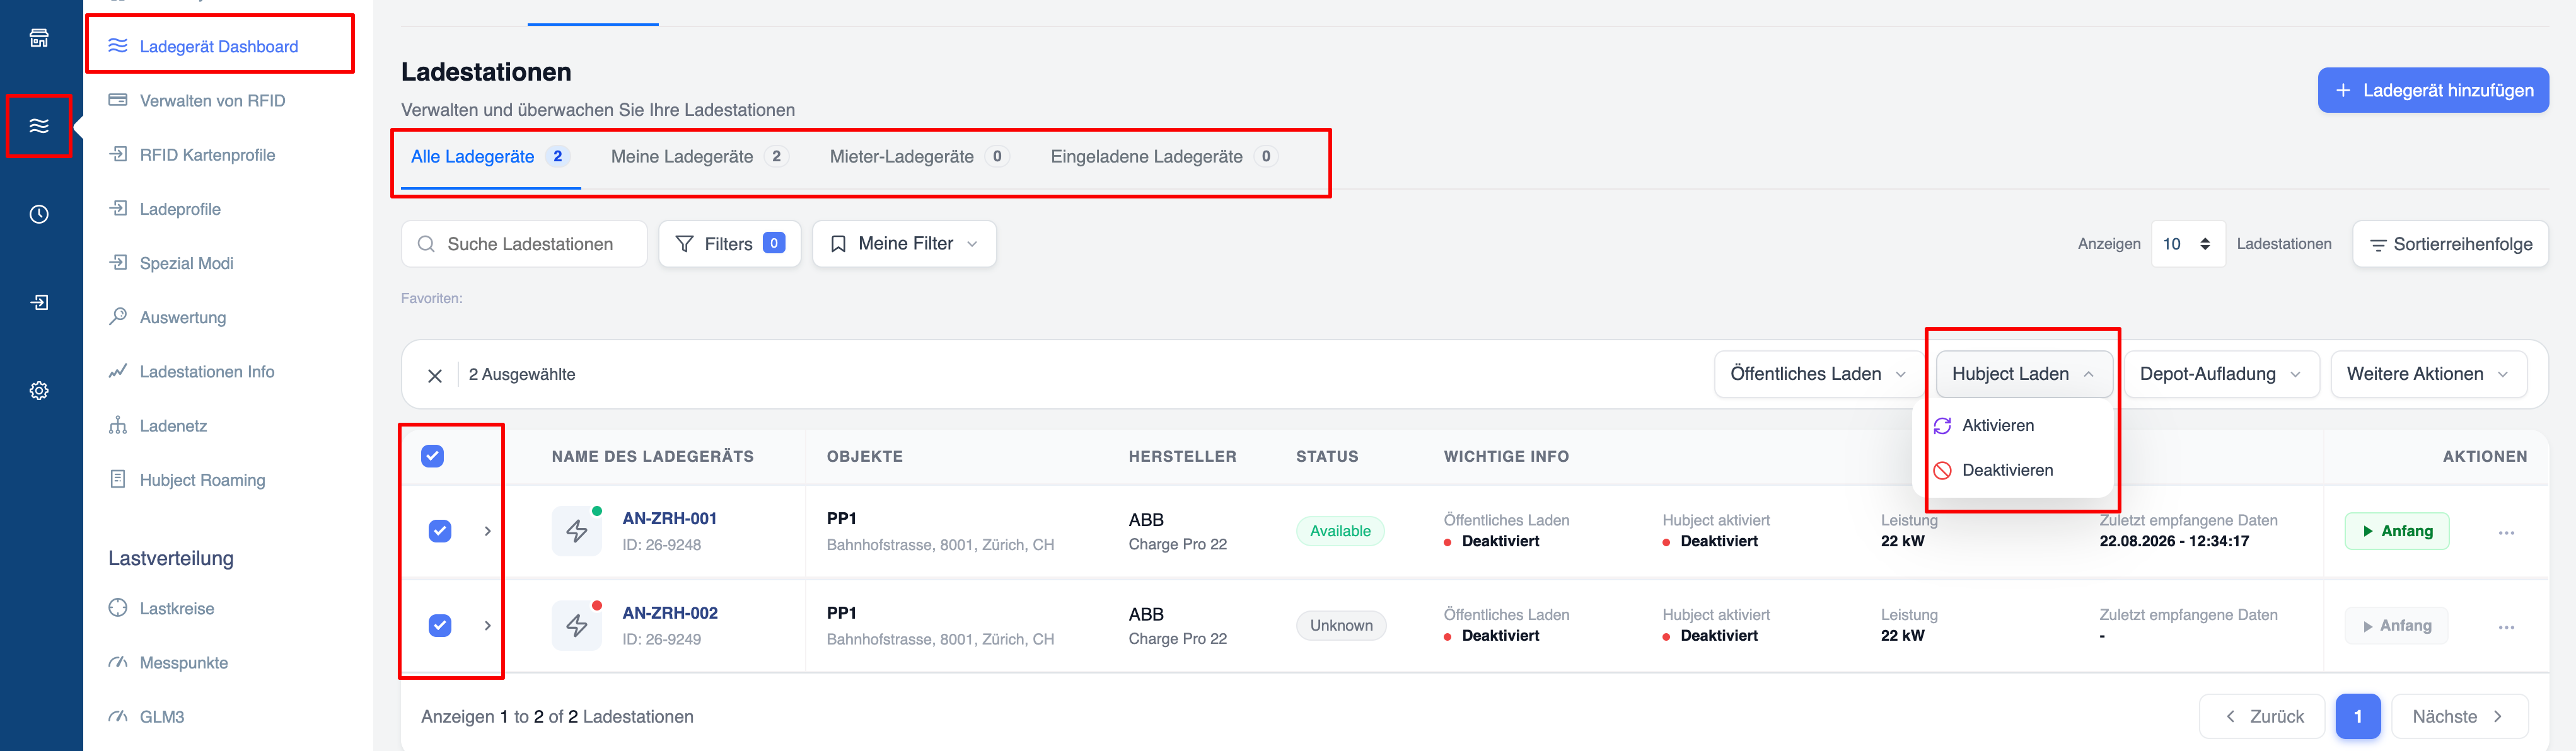
- Go to the Charging Point Dashboard → Charging Points.
- Use the tick boxes to select one or more charging points.
- Click on the ‘Hubject Charging’ drop-down menu → ‘Activate’.
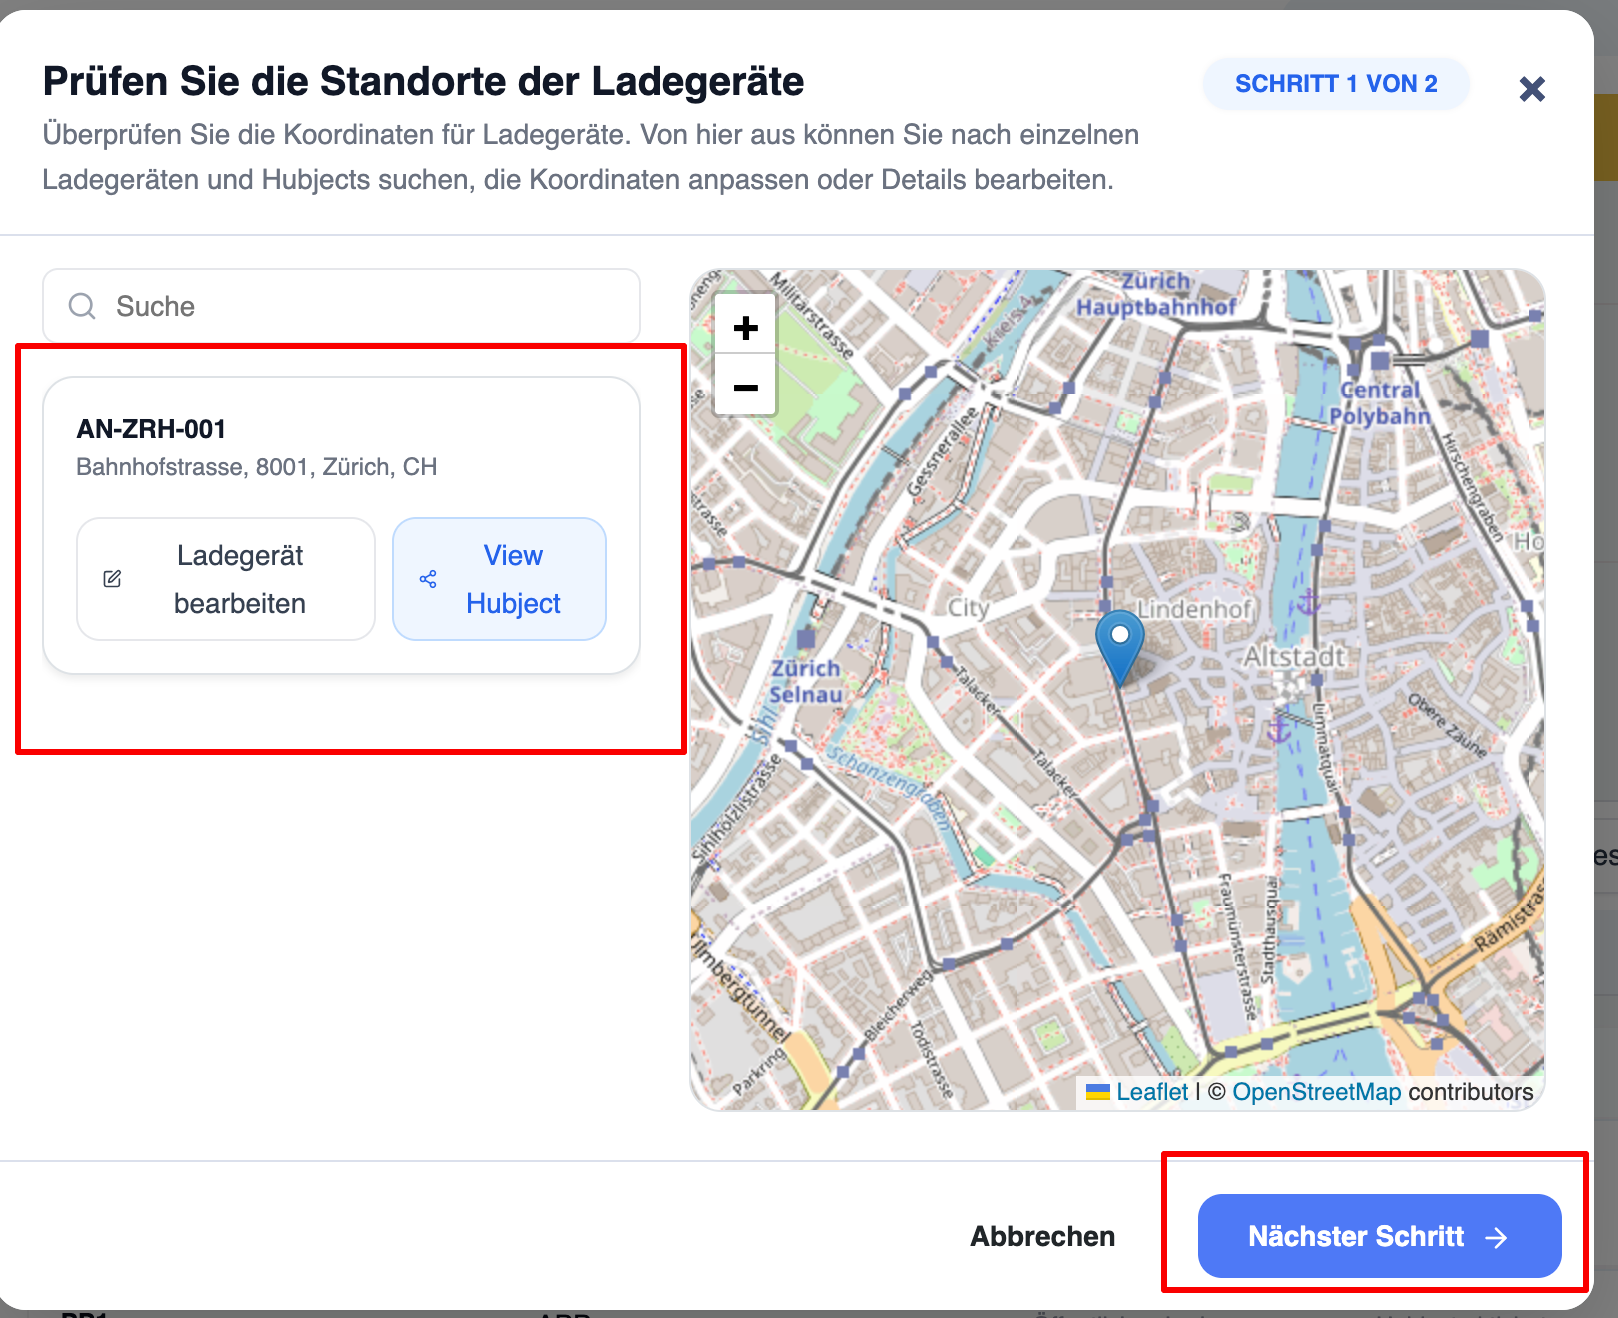
- A two-step wizard will open:
Step 1 – Check the locations of the chargers
- Check the locations on the map
- Option to edit individual charging points or view Hubject details
- Click on ‘Next step’
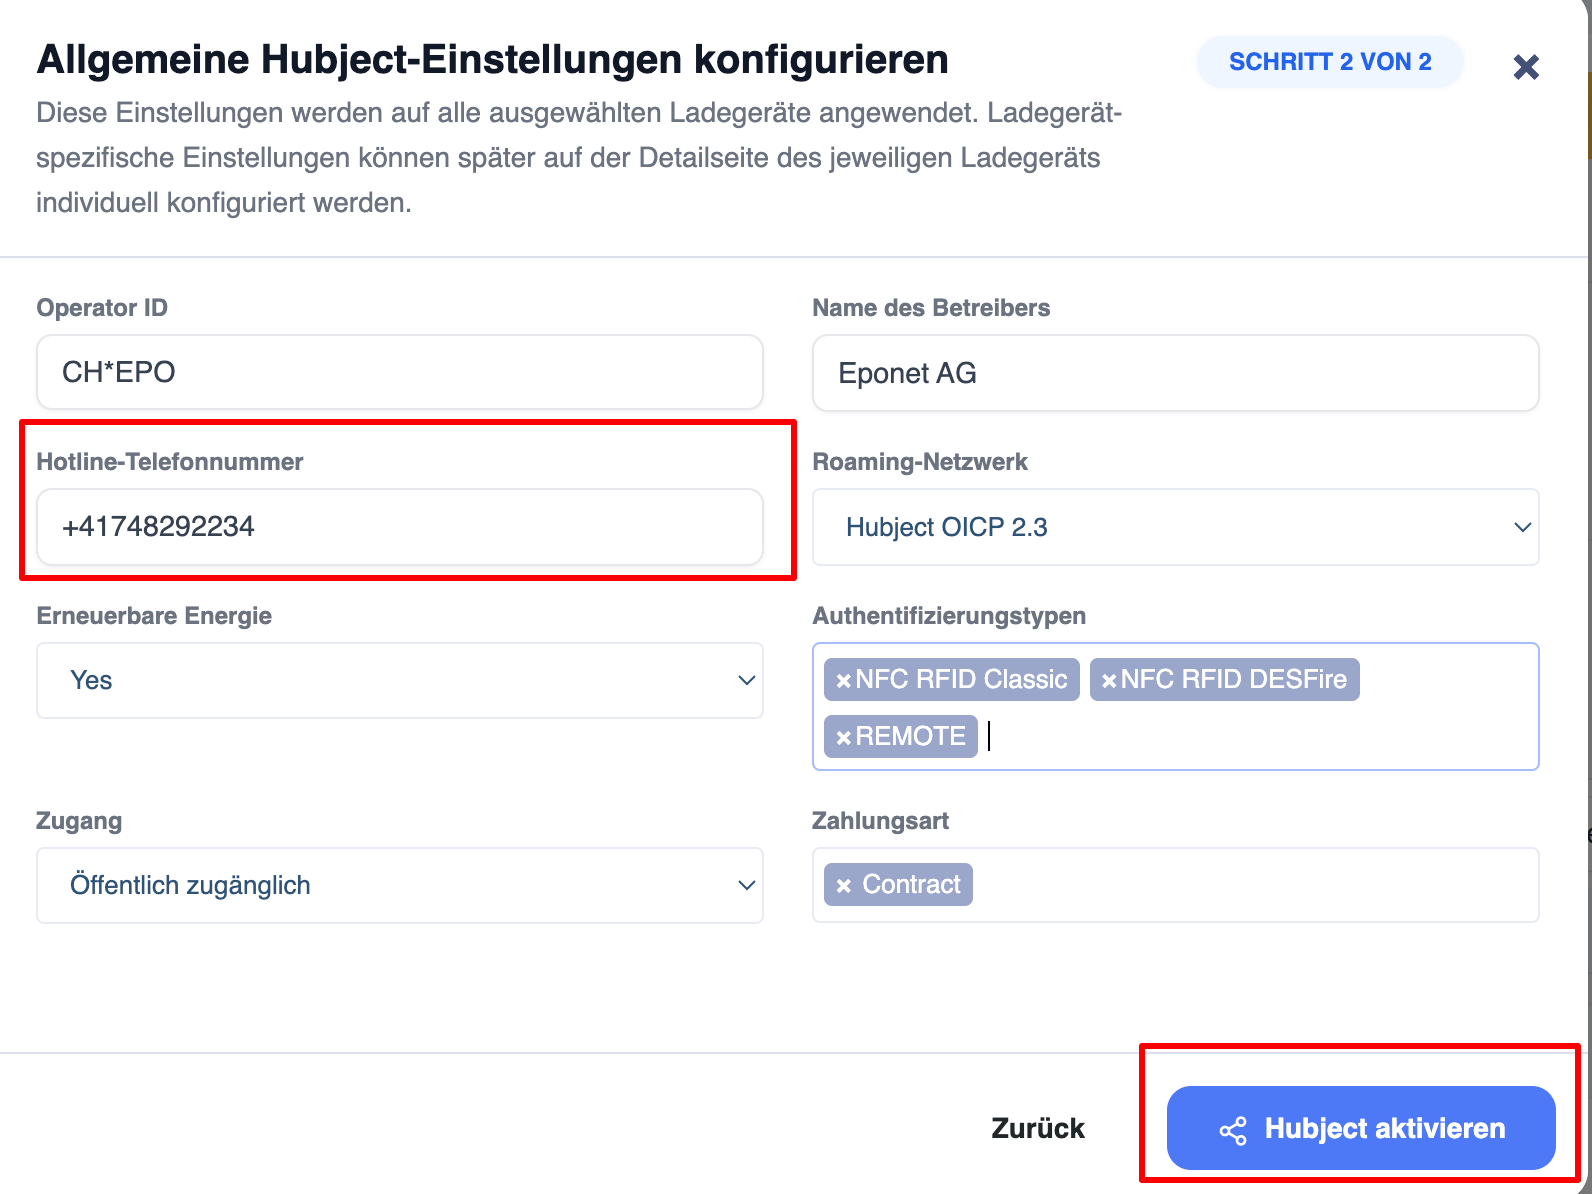
Step 2 – Configure general Hubject settings
- Operator ID, operator name
- Hotline telephone number
- Roaming network (e.g. Hubject OICP 2.3)
- Renewable energy sources, authentication types, access, payment method
- Click on ‘Activate Hubject’.
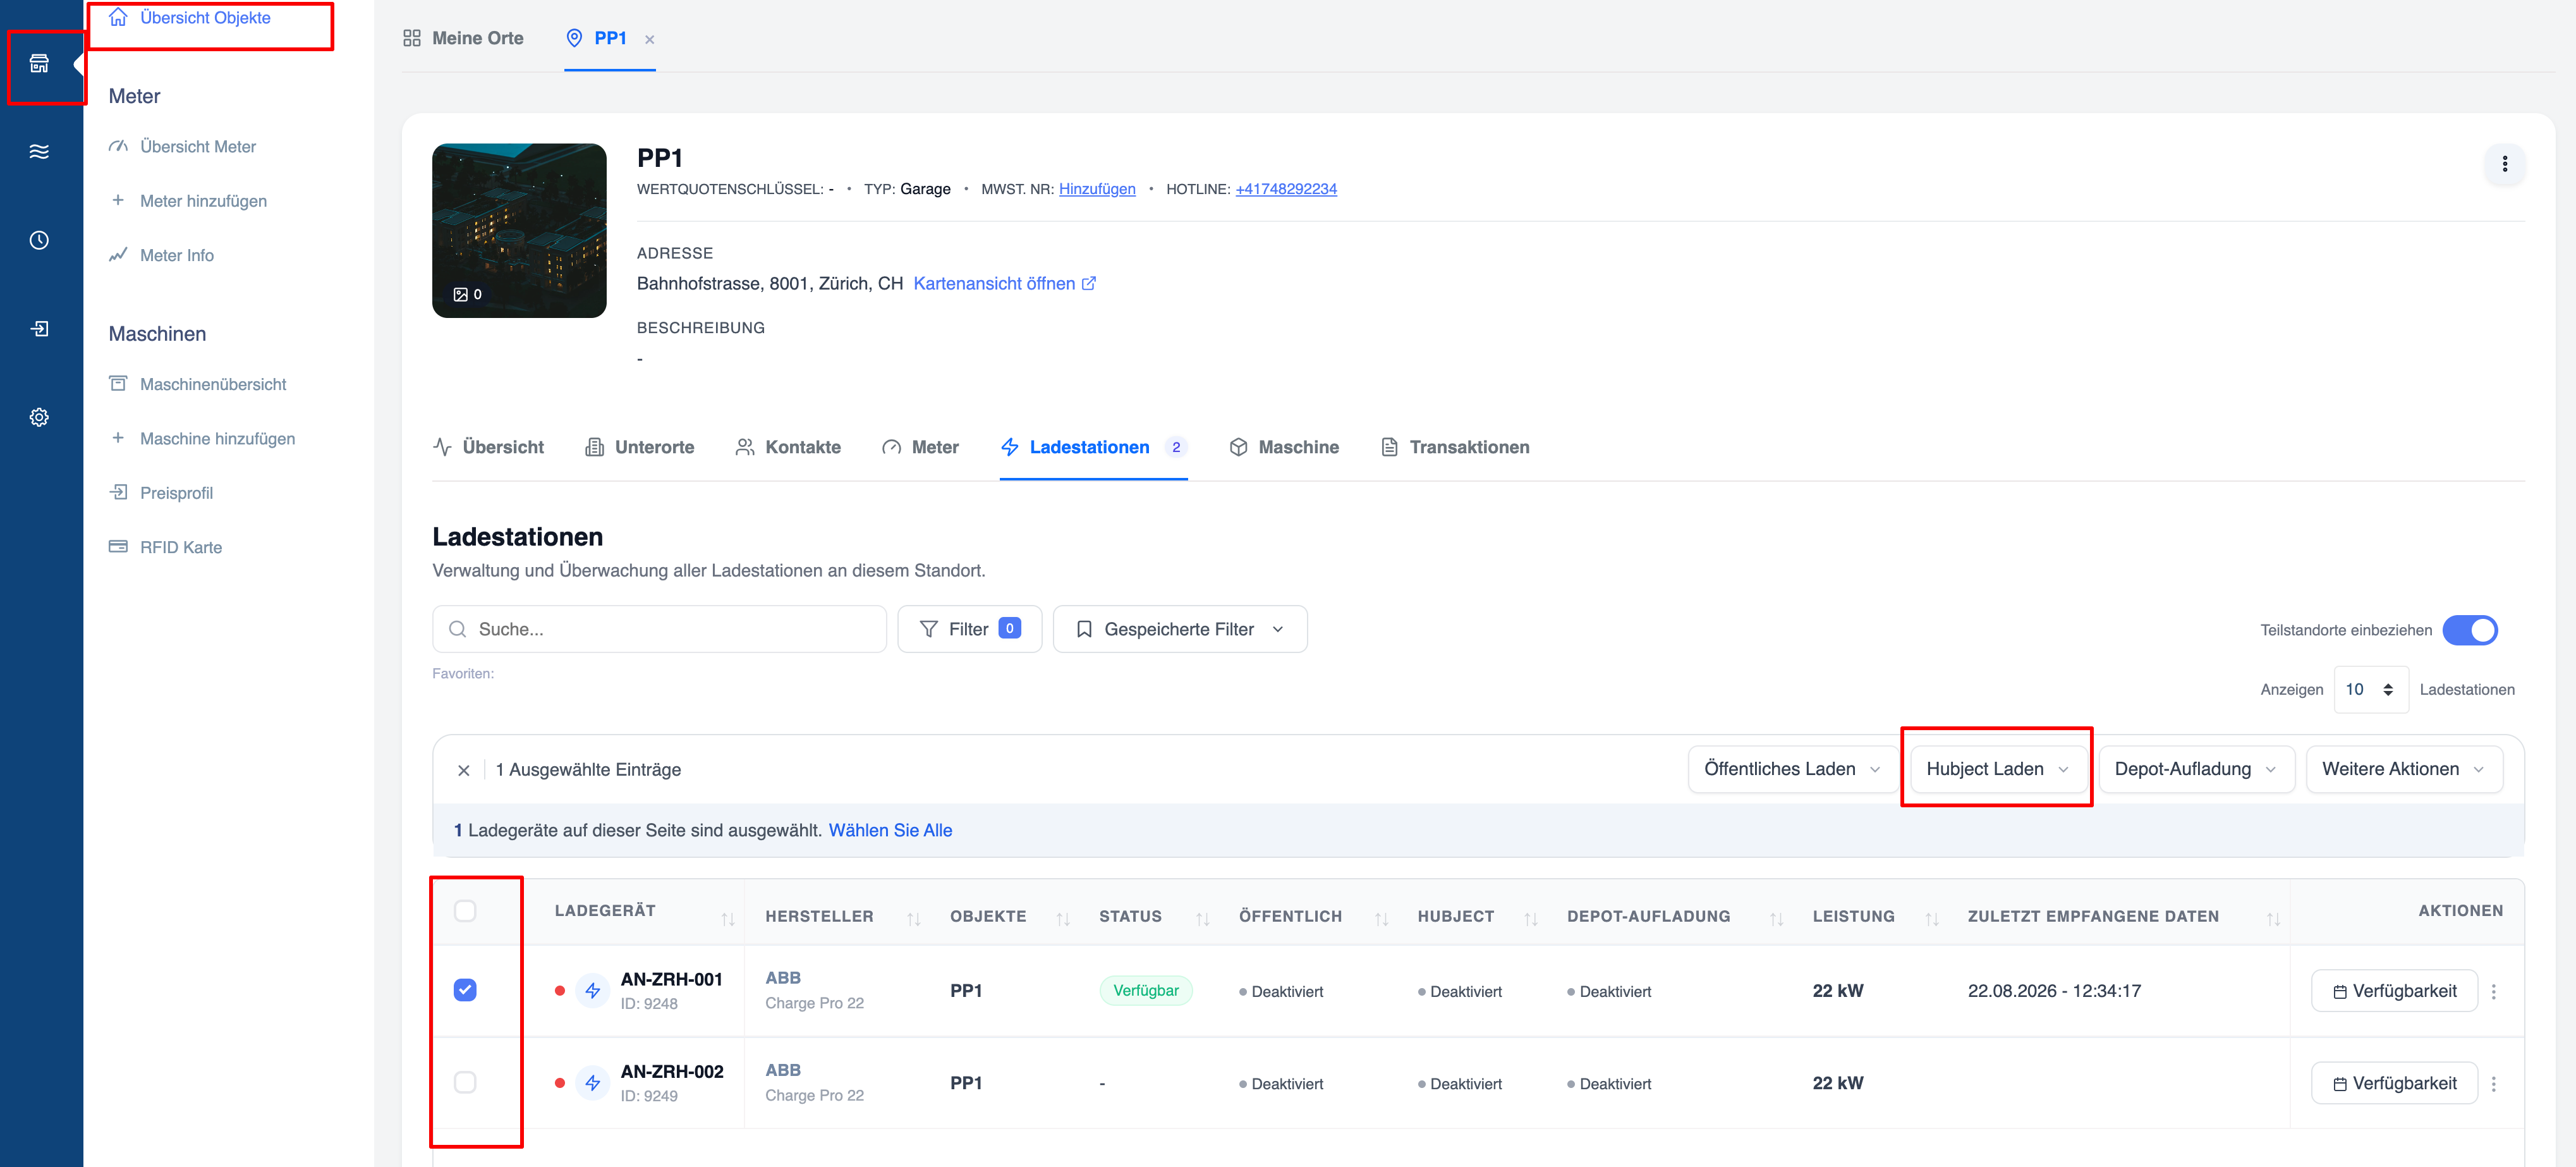
3. Bulk activation from a single location
- Go to ‘Overview of properties’ and open a site
- Open the ‘Charging Points’ tab.
- Select the desired chargers.
- Click on “Hubject Charging” → “Activate”.
- The same two-step wizard as in the charger dashboard will appear.
- Follow the steps and activate the chargers.
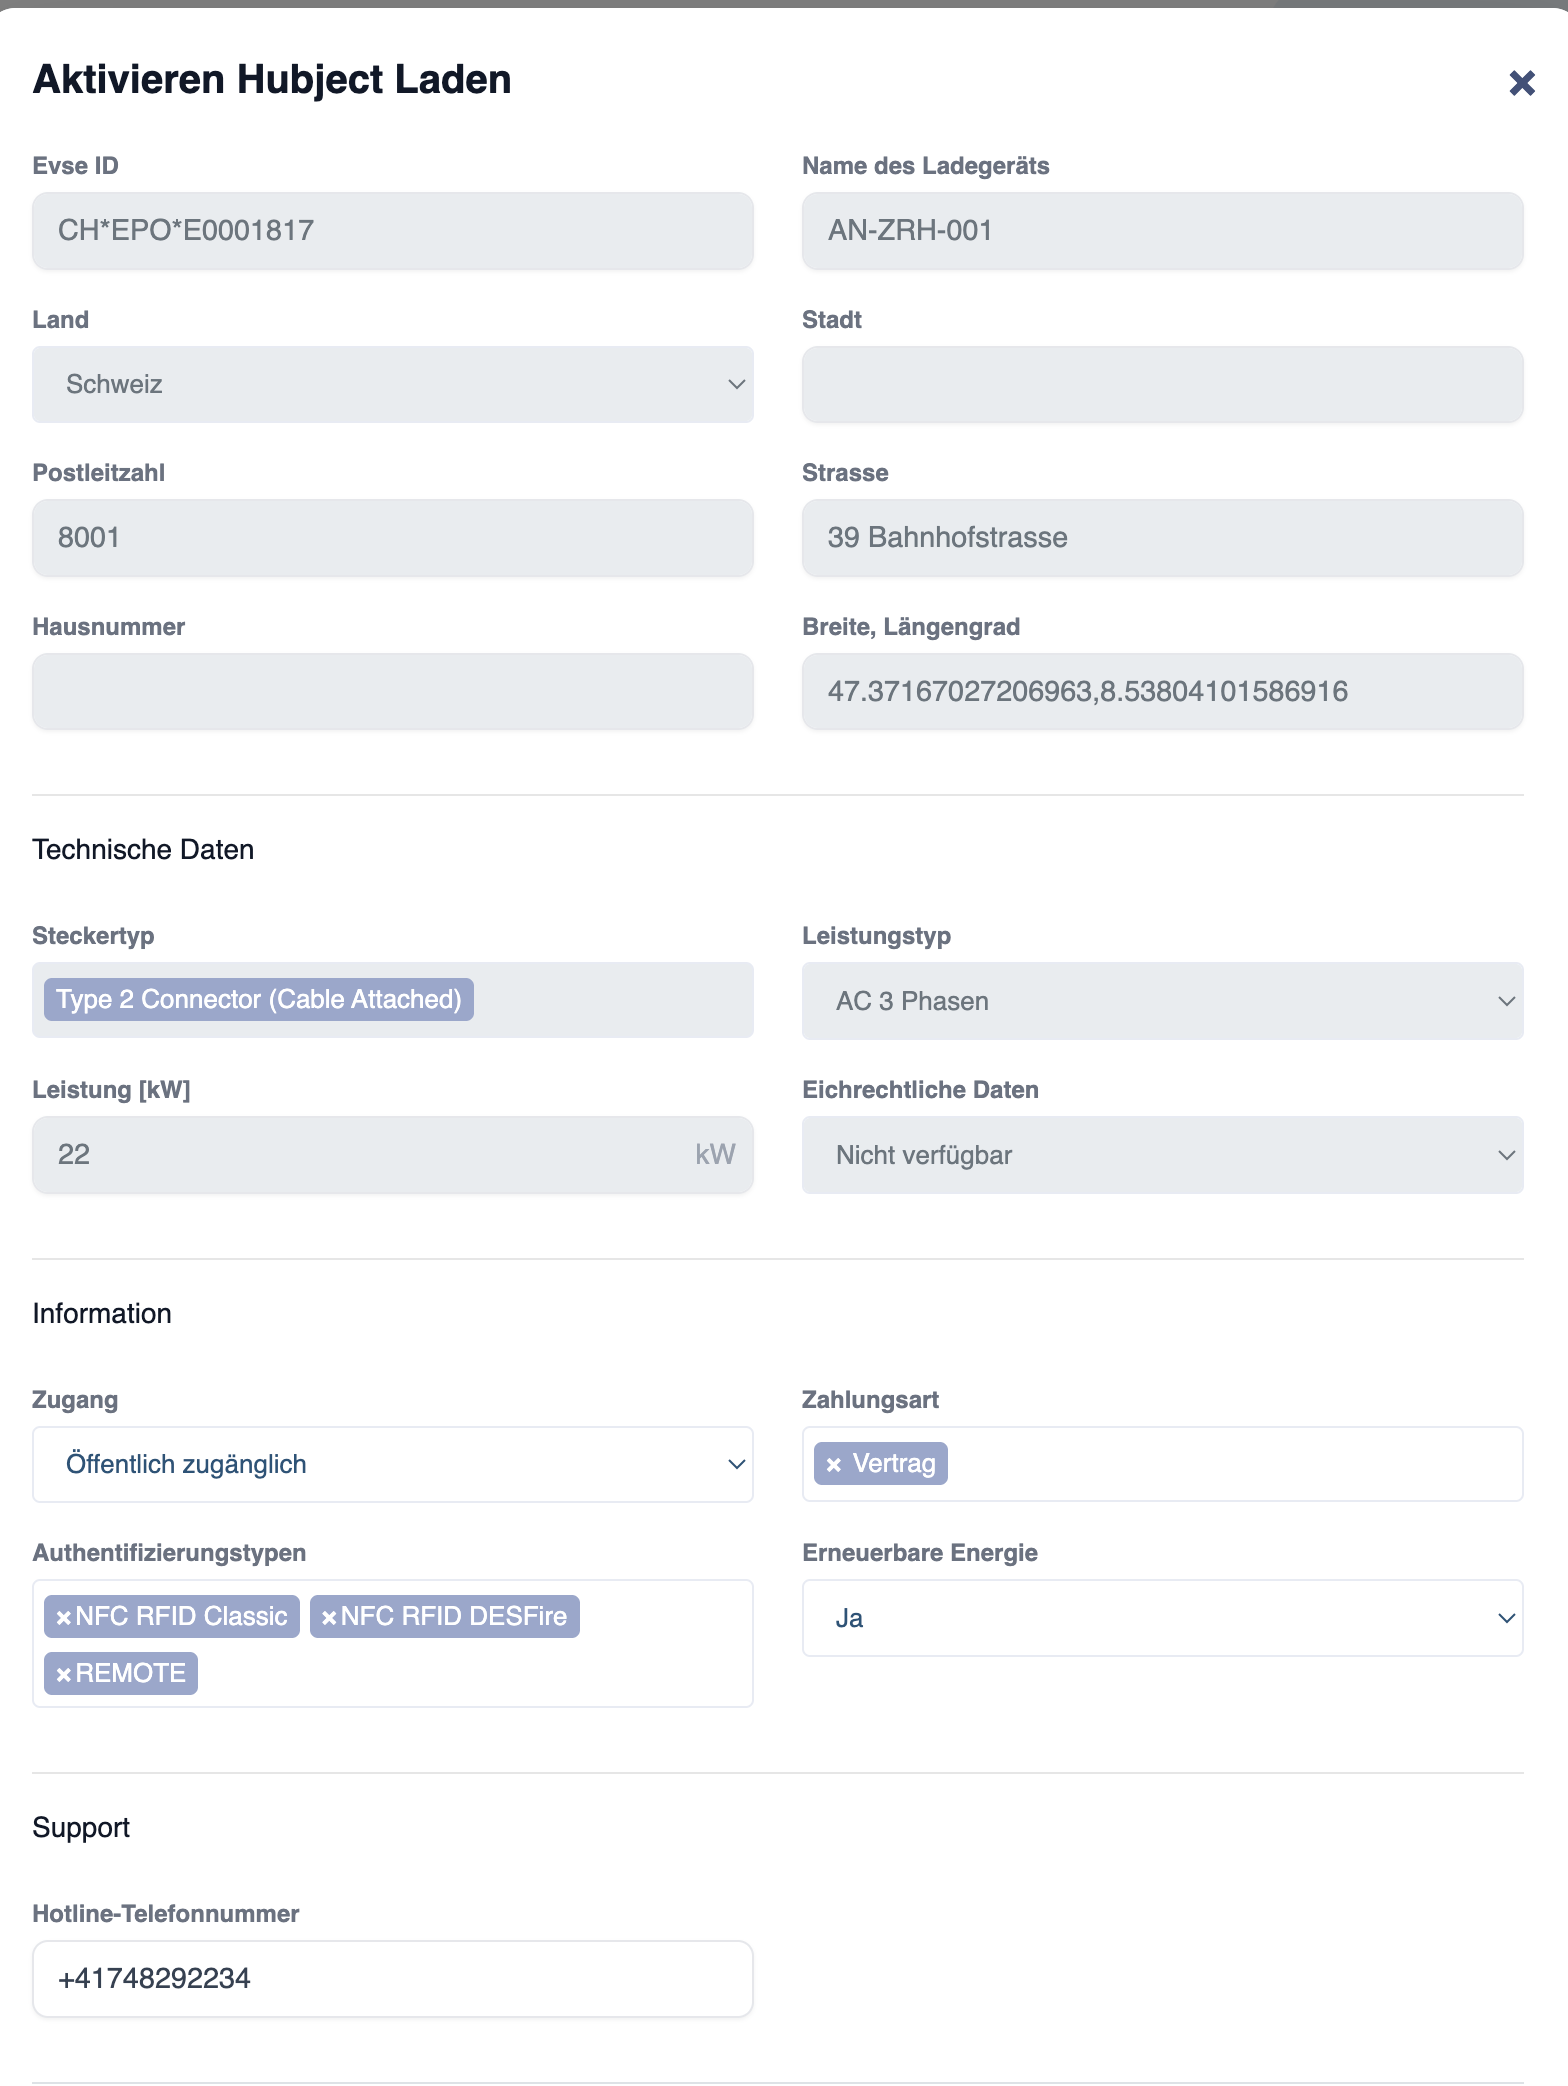
All fields:
- EVSE ID: This number is unique and identifies the charging point during international roaming.
- Charging station name: Enter a suitable name here; this will be displayed in the roaming provider’s apps
- Hotline telephone number: Enter the number of the relevant emergency service here
- Country: Select ‘Switzerland’ here (or the country in which the charging station is located)
- Town: Enter the town
- Postcode: Enter the postcode
- Street: Enter the street name
- House number: Enter the house number
- Longitude and latitude: Enter the exact longitude and latitude in the following format: 9.41176,47.06159
- Plug type: Select the appropriate plug type
- Power (kW): Enter the effective power of the charger
- Renewable energy: Select the type of energy. If in doubt, select ‘No’
- Authentication: Enter the selection exactly as specified above
- Calibration data: If in doubt, select ‘Not available’
- Payment method: Enter the selection exactly as specified above
- Access: Indicate whether the charging point is ‘open to the public’ (must be accessible 24 hours a day); otherwise, select ‘restricted access’. If it is a paid car park, select ‘Paid and open to the public’
If the entries cannot be saved (message: ‘Failed’), this is usually due to an incorrect entry or spaces, which are not accepted. Longitude and latitude coordinates, as well as telephone numbers, must not contain any spaces.
Once you have activated and completed the settings, please send an email to info@eponet.ch with the subject line: “Hubject activation confirmation” and provide us with the account number and the charging point ID of the activated charging point!
Tip for user-friendly operation
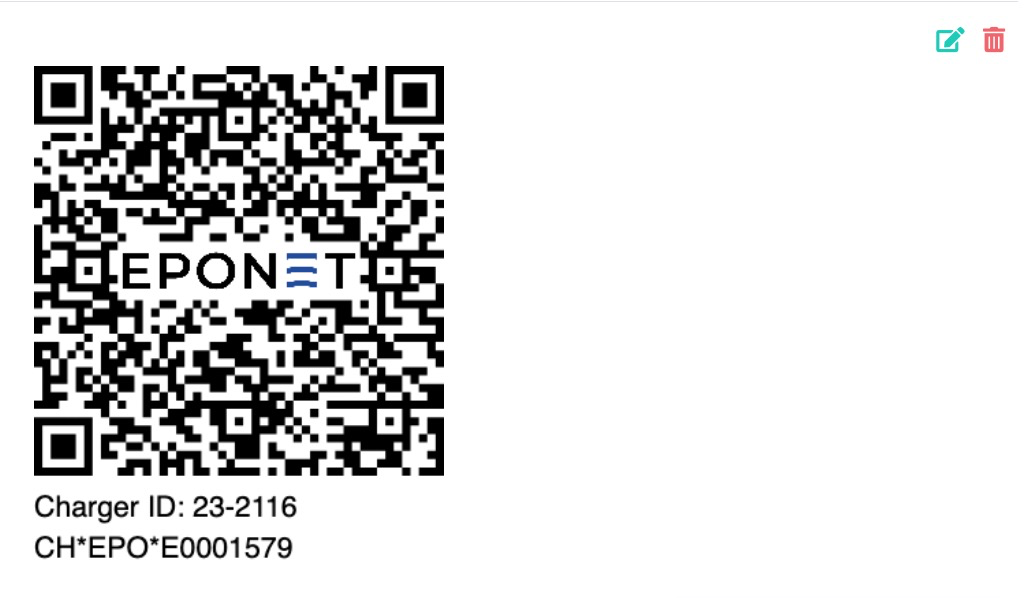
Enter the unique Hubject EVSE ID number (in this case CH*EPO*E0001579) in the field below the QR code and click “Save”. Display the QR code with this EVSE ID number at the charging point.
Reason: Many customers start the charging point via their roaming app and can thus clearly see which connection they are activating!