
Sungrow DC IDC30E
General
Information
These instructions are intended to help you configure the Sungrow DC charging station correctly in the Eponet Portal.
Testing was carried out using a device running the following versions
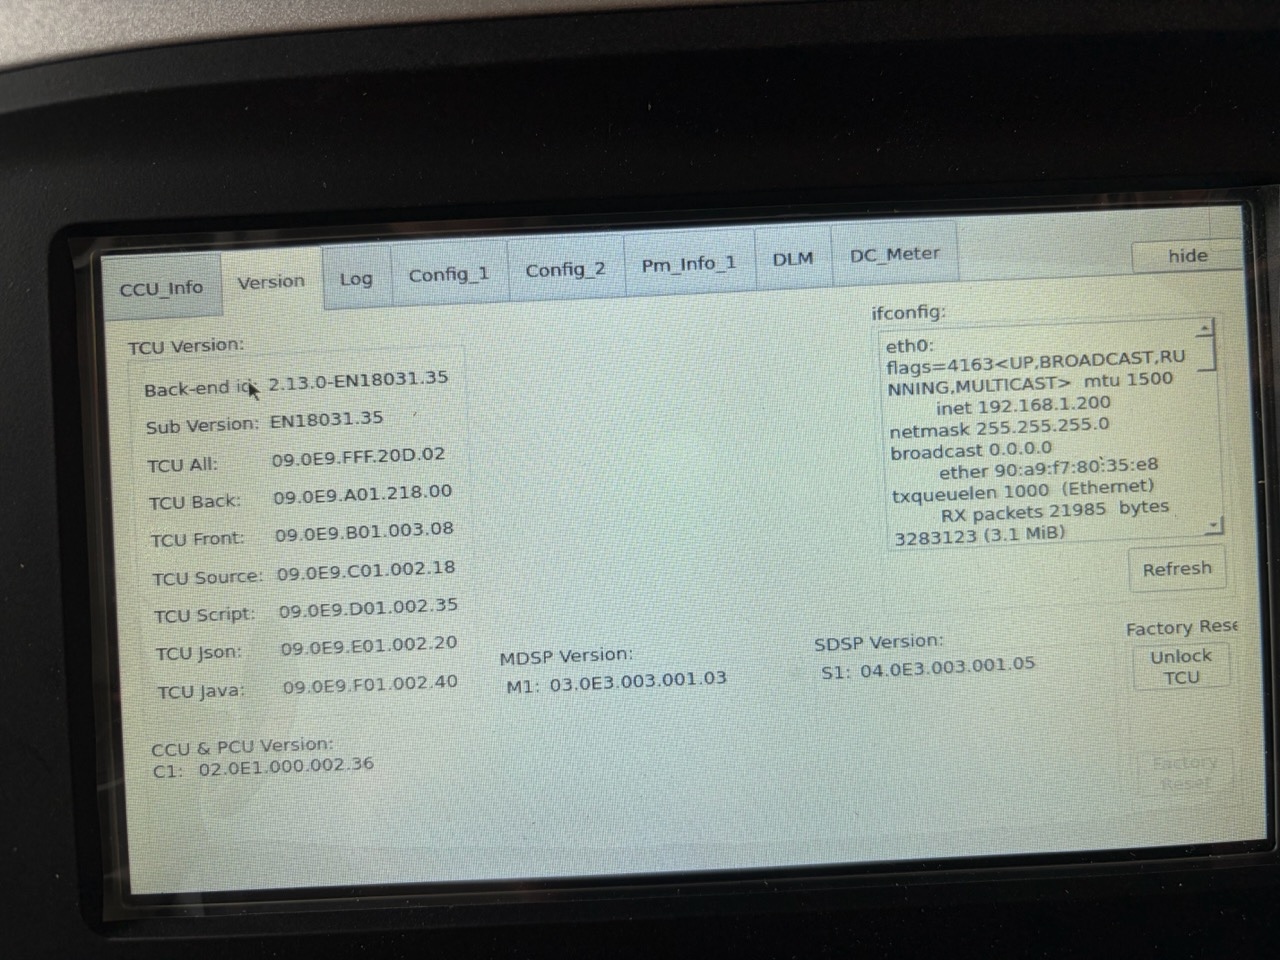
Charging station configuration:
To configure the network settings, OCPP link, etc., you must access the charging station’s Installer menu. To do this, press and hold the top-left corner of the display for several seconds. A code input field will appear.
The service menu code is: 262924
Network configuration
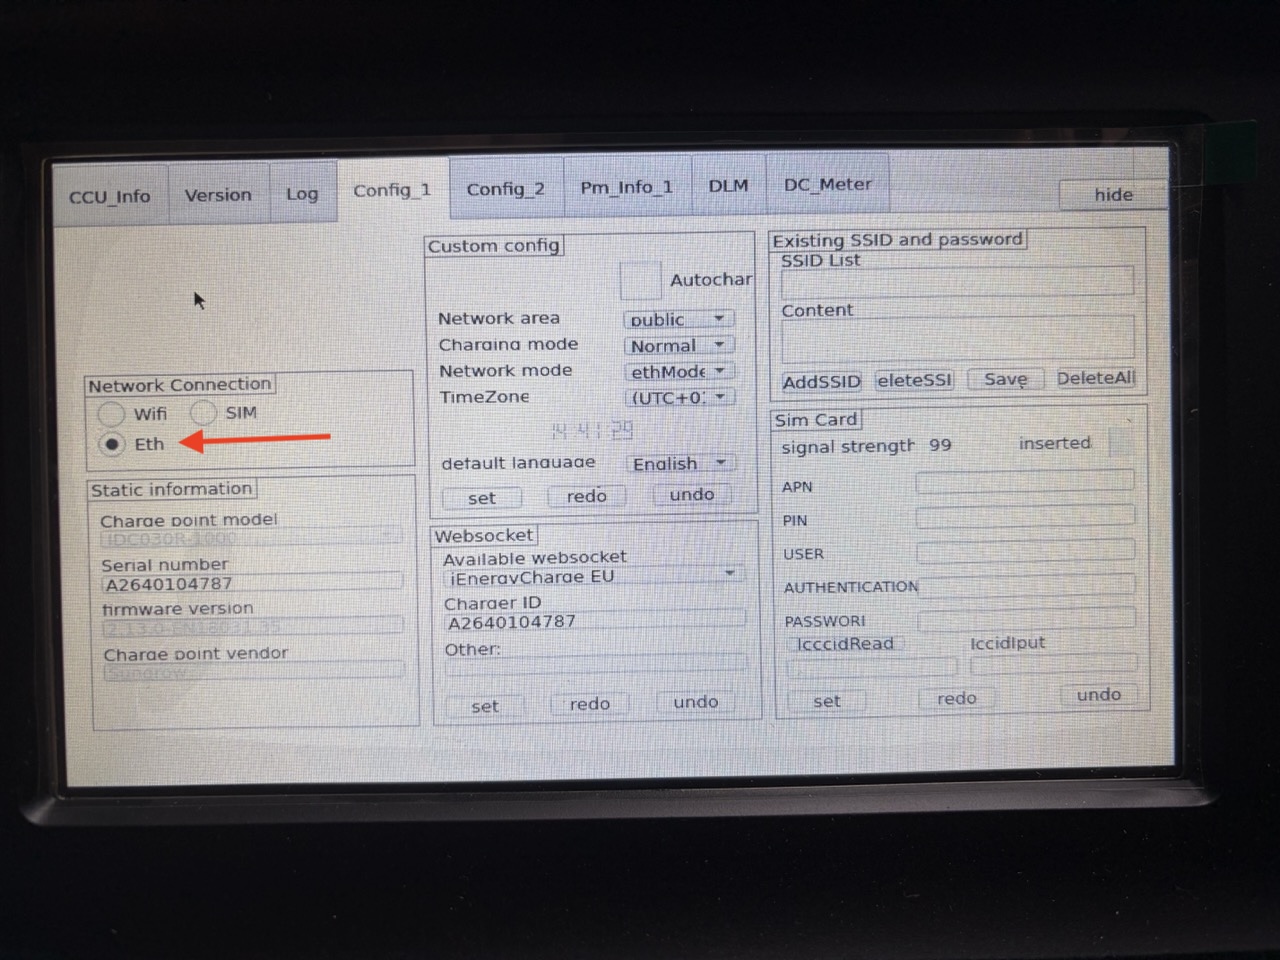
During the test, the charging station was set to use a SIM card. If connecting via a network cable, you must change this in the Config1 menu and then in Config2:
In the Config 2 menu, you should also change the Maintenance Backend to iEnergyCharge EU so that the charging station also appears in the iEnergycloud, if desired.
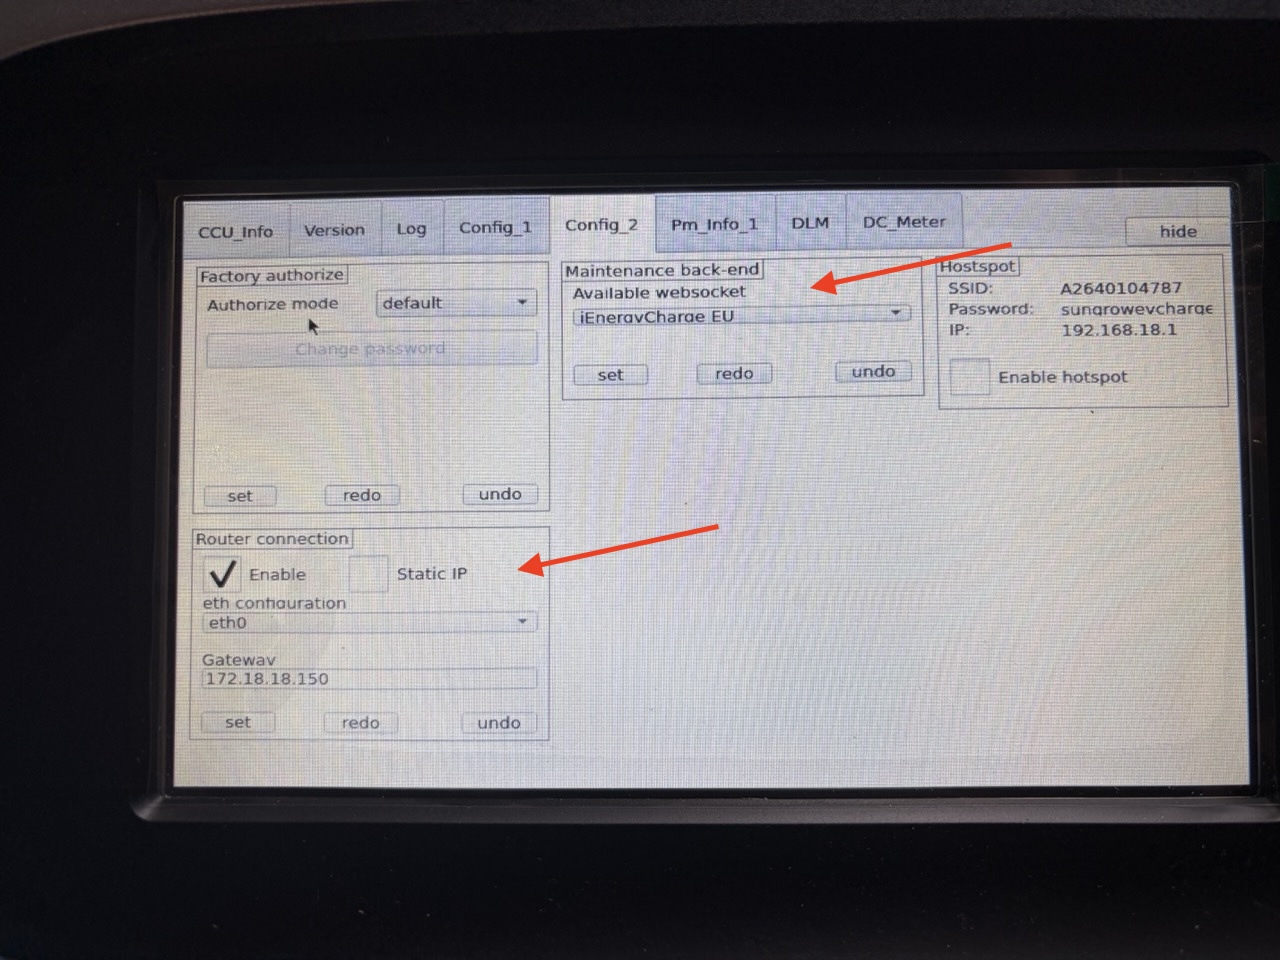
Once you have made these settings, restart the charging station!
Eponet Backend Configuration
Now that the charging station is connected to the internet, you can configure the settings for the Eponet backend.
To do this, go back to the Config1 menu. There, under Websocket, select: Others. Then click inside the link field and enter the Eponet backend link.
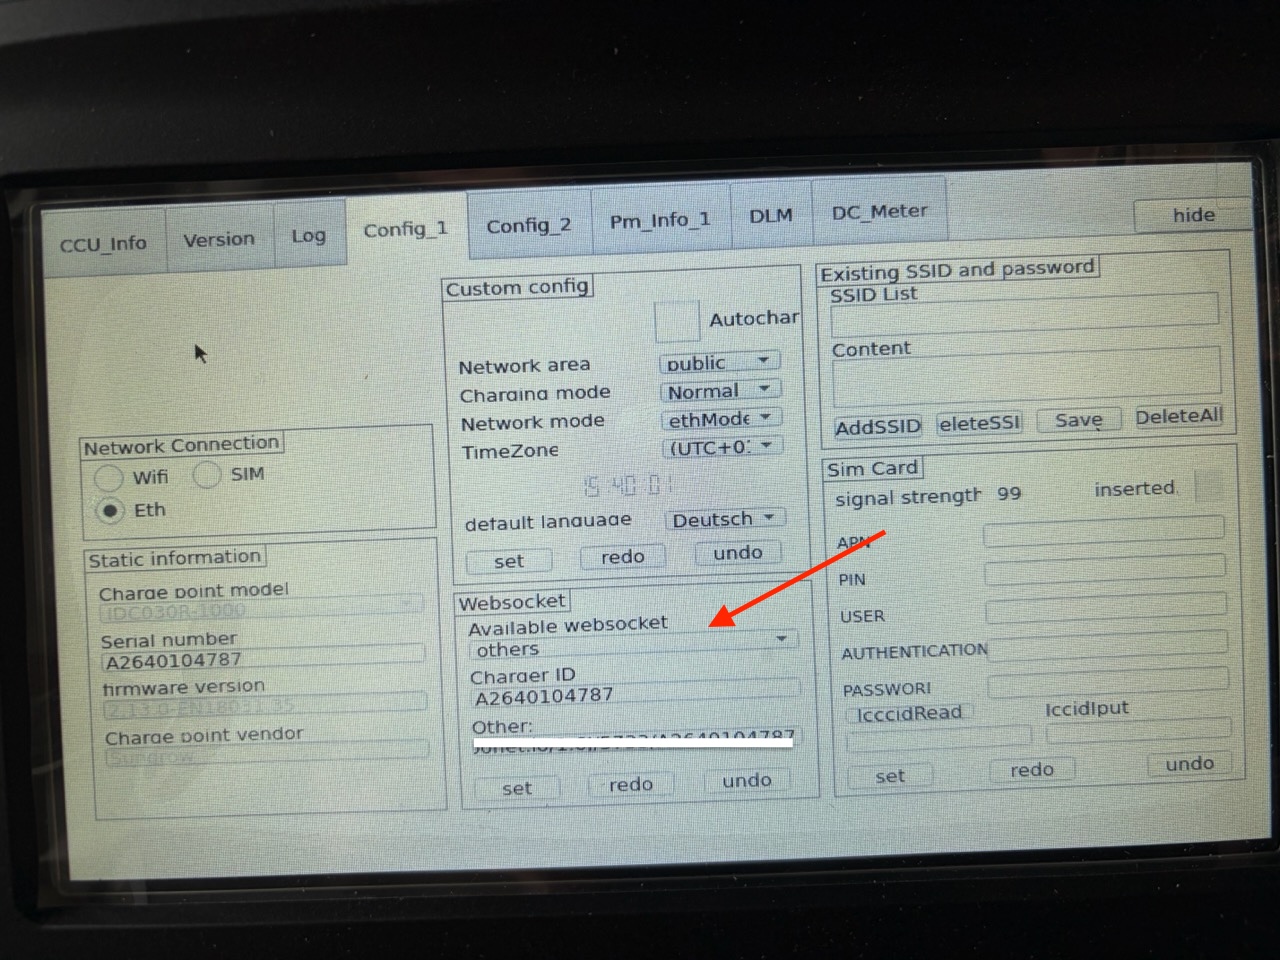
The link is: wss://ocpp.eponet.io/1.6J/9263/{SerialNo} or ChargerID
. You can find the serial number exactly as it appears in the “Charger ID” field. Enter this number into the Eponet backend.
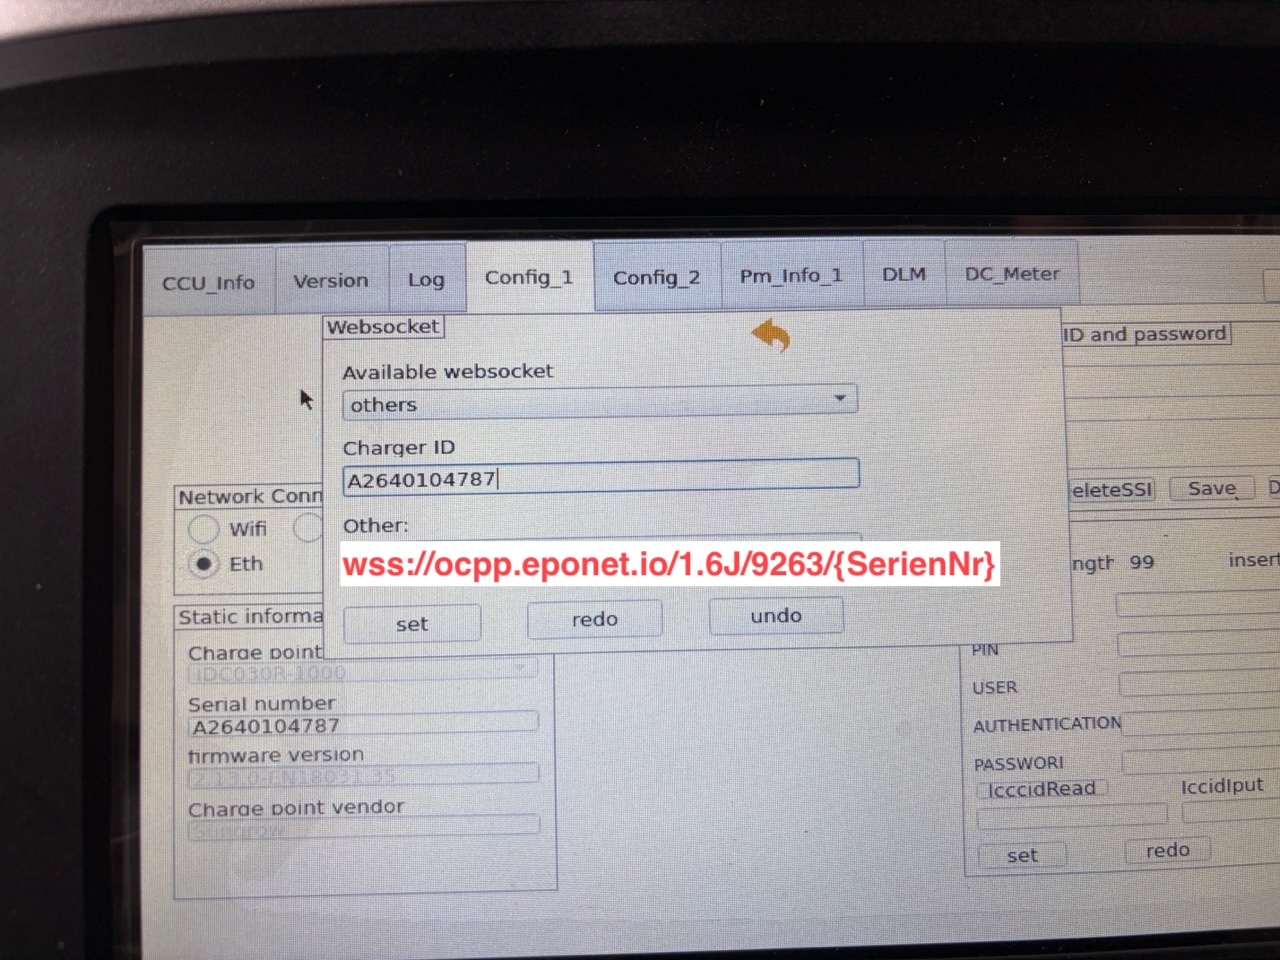
Then save and restart. The charging station is now connected to the Eponet backend. Please check that the charging station’s configuration matches the points mentioned, as described here, for example: https://wiki.eponet.ch/books/ladestationen/page/konfiguration-hager-witty-pro
Please note: the ‘AuthorizeRemoteTx’ value could not be overwritten. Whilst authorisation via the Eponet app or portal is still possible, no additional verification of the RFID card will take place.