Integration of EVlink Pro AC (new version) charging station into the Eponet portal
These instructions are step 3 for connecting an EVlink AC charging station (Schneider Electric) to the Eponet Portal.
Step 1 can be found at this link: Basic guide to integrating charging stations
|
|
Software versions: EV Link Pro AC charging station OCPP Link: wss://ocpp.eponet.io/1.6J/dd60/ |
The EV Link is configured via Schneider’s eSetup app.
First, check that the charging station’s firmware is at least version 1.6.1.
If this is not the case, you can update it via the app.
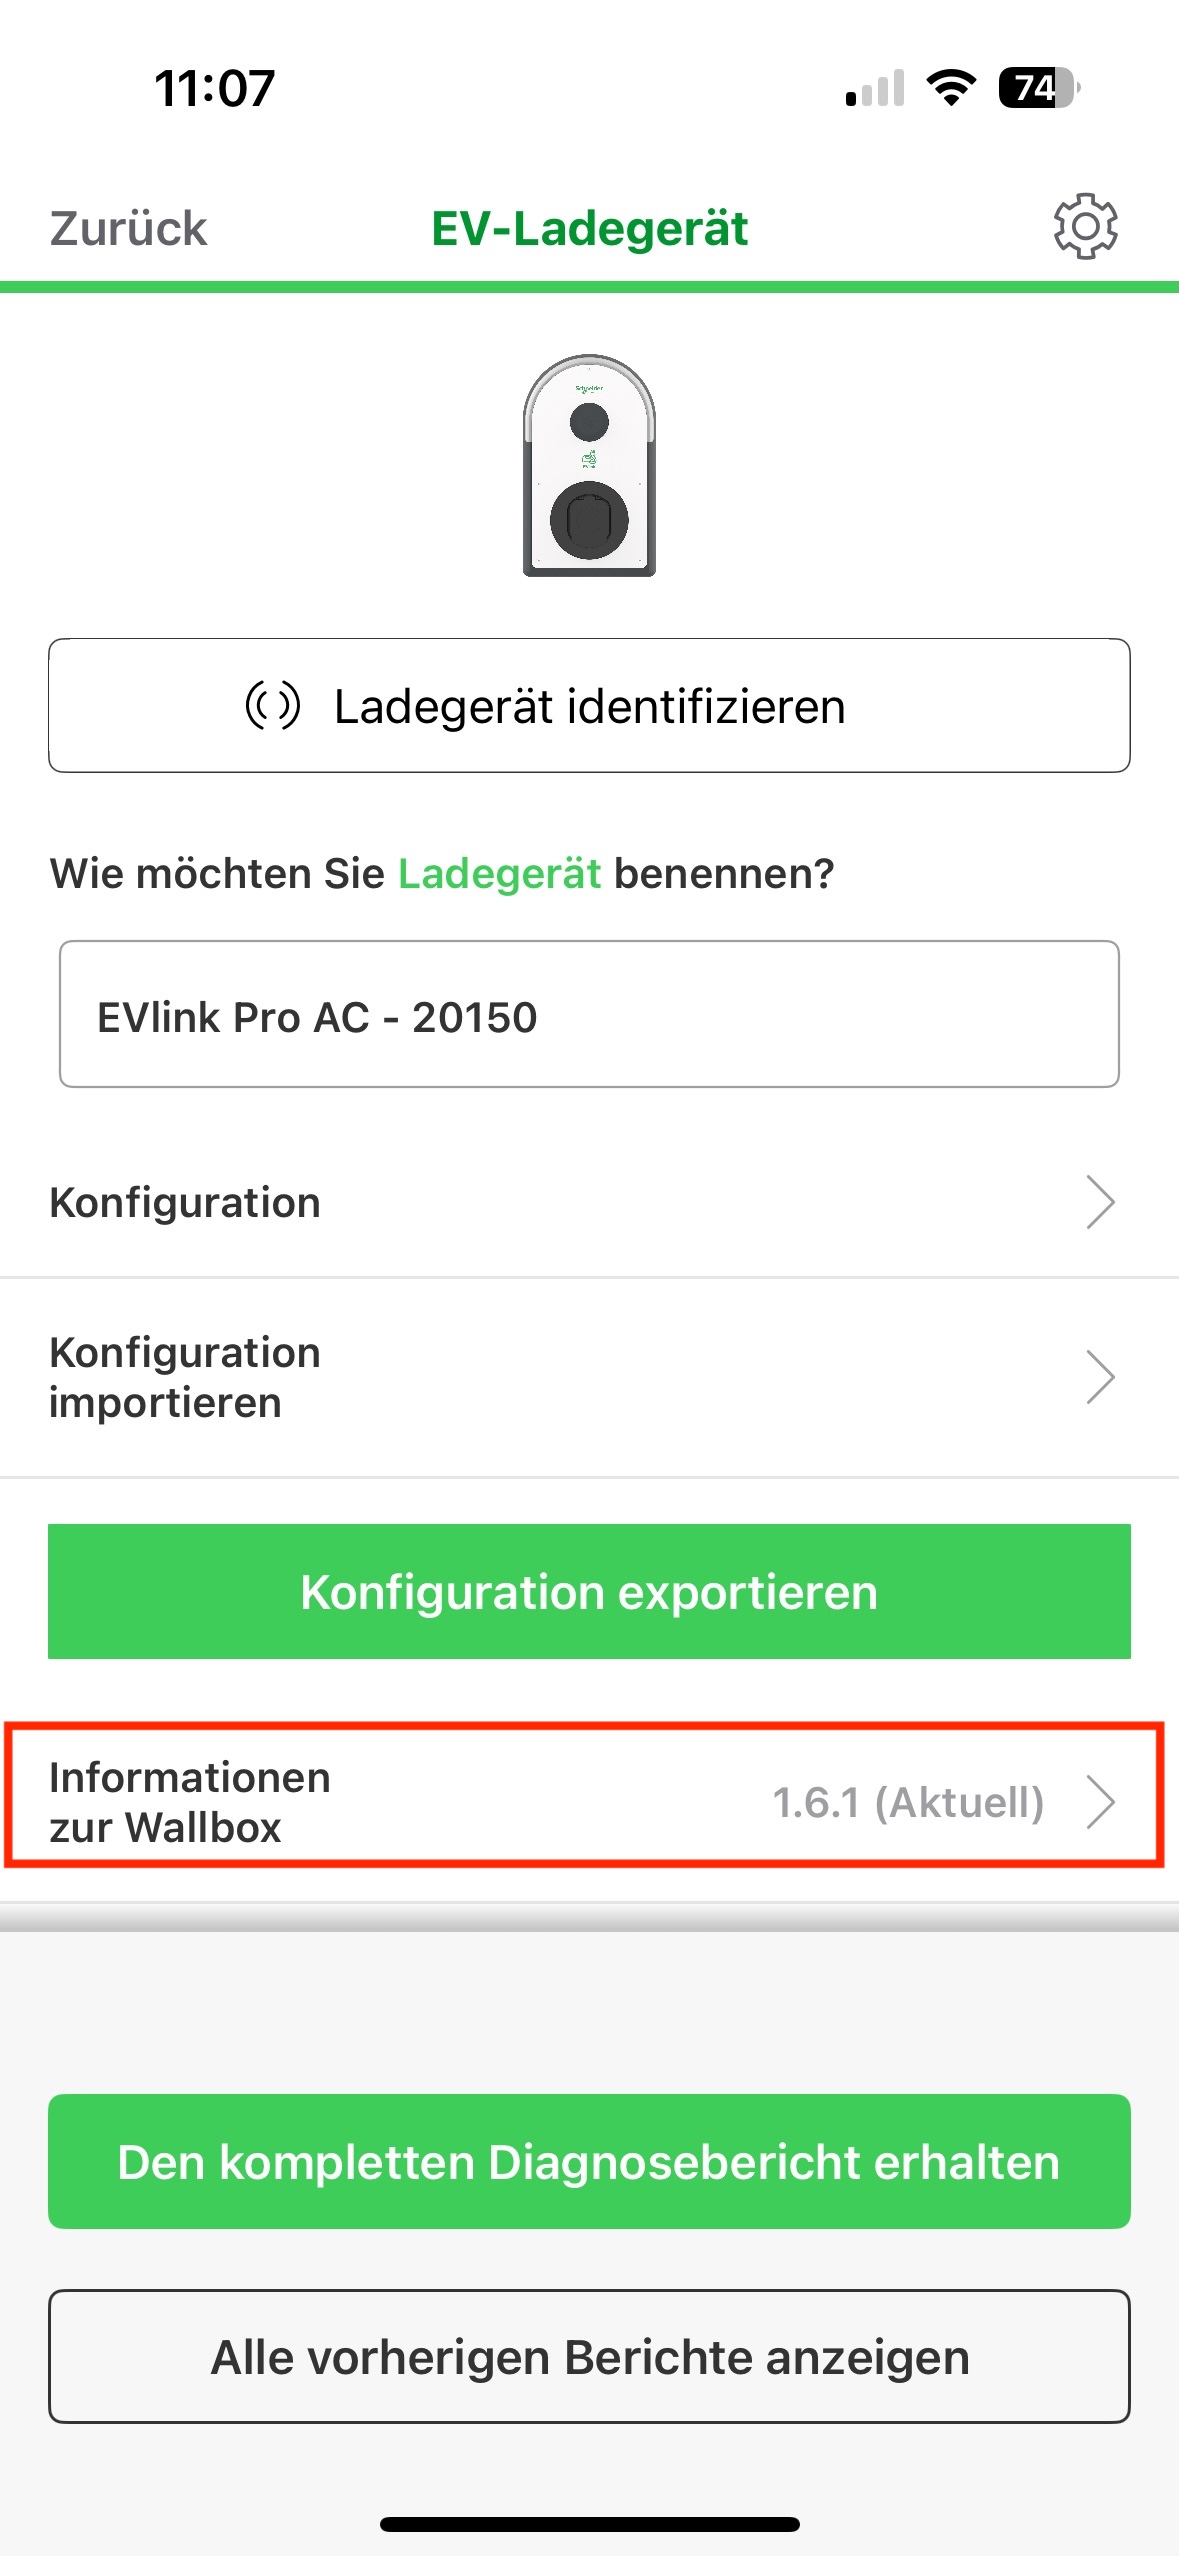
To do this, click on the area marked in red.
You can then update the firmware via the cloud or using a USB stick, which can be plugged into the charging station. You can download the relevant firmware from the official Schneider website.
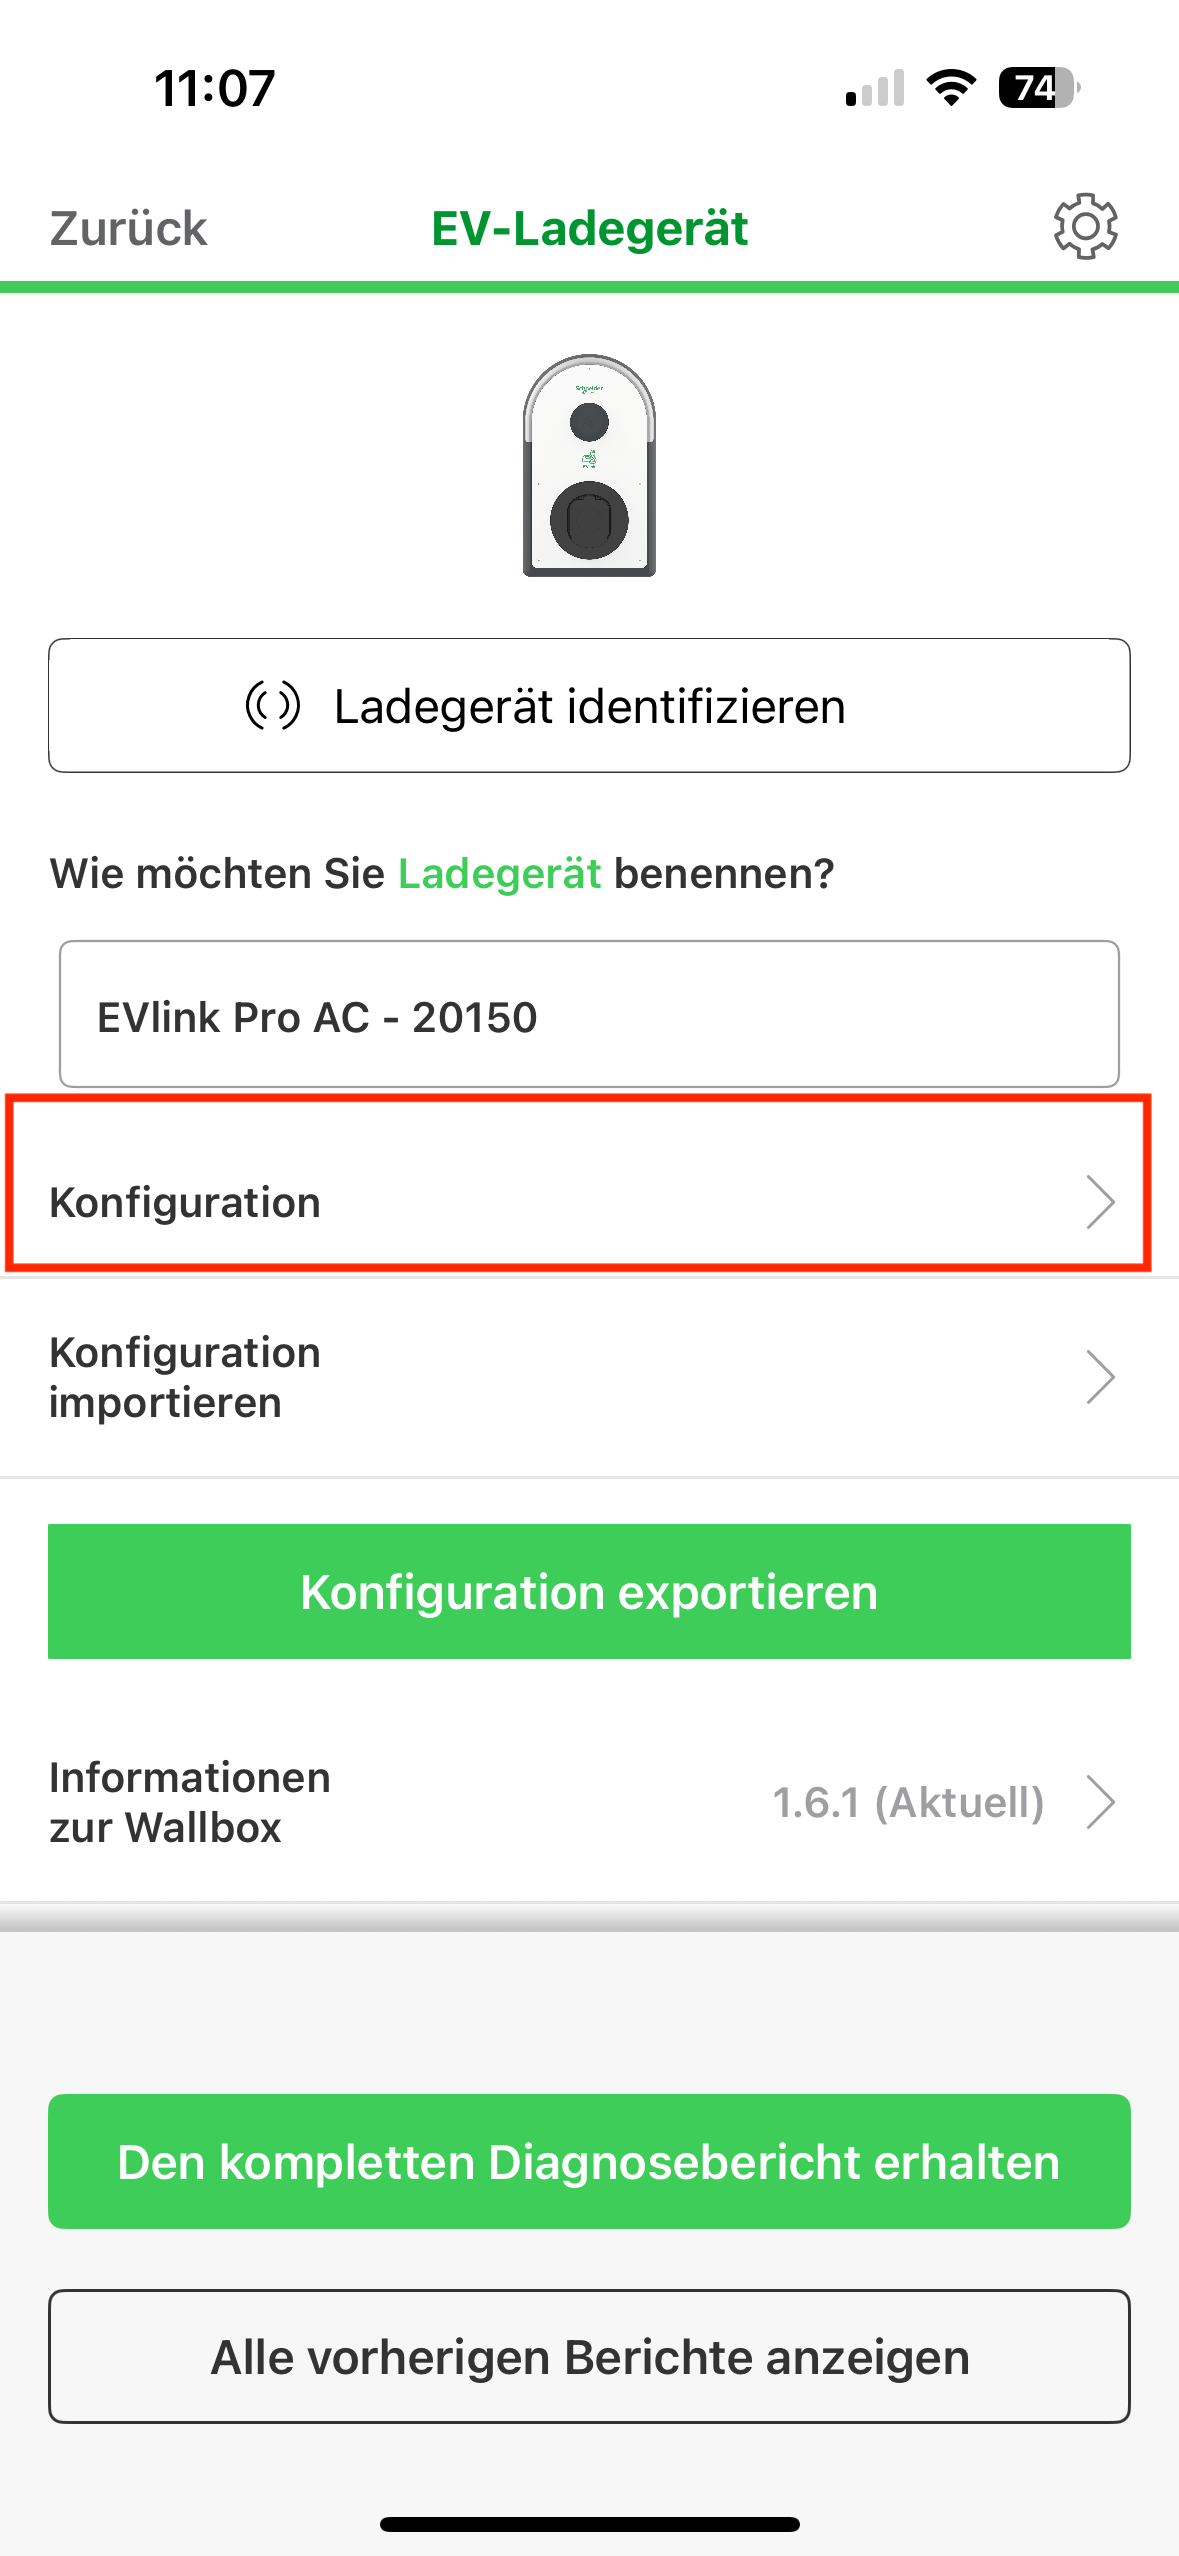
Now click on "Configuration".
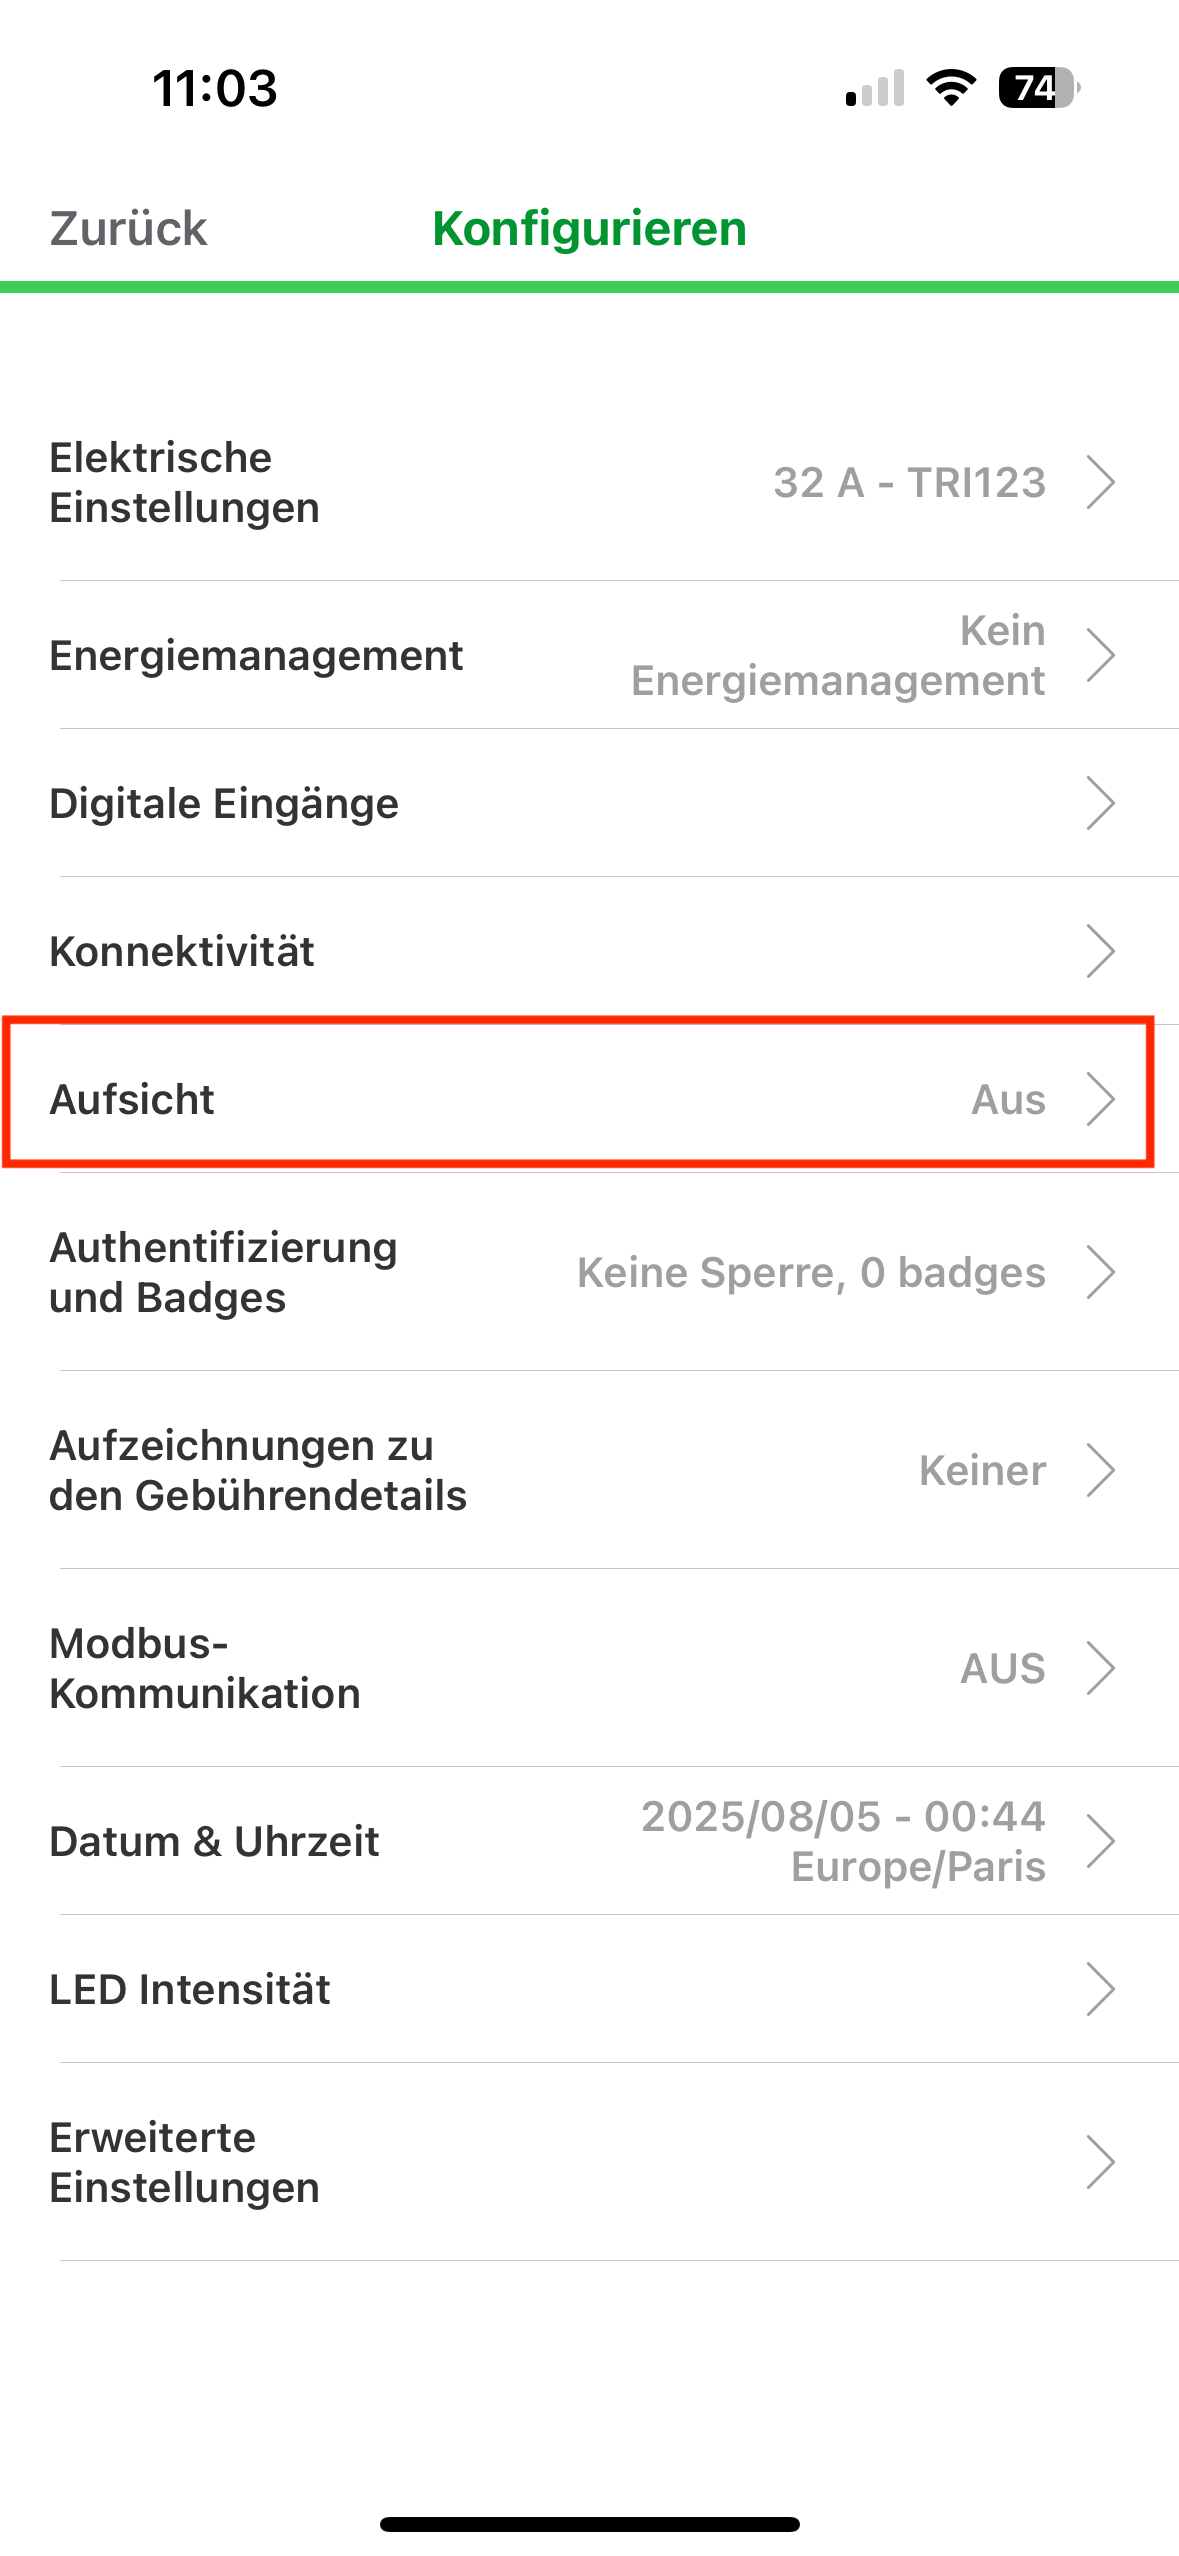
Now click on "Monitoring".
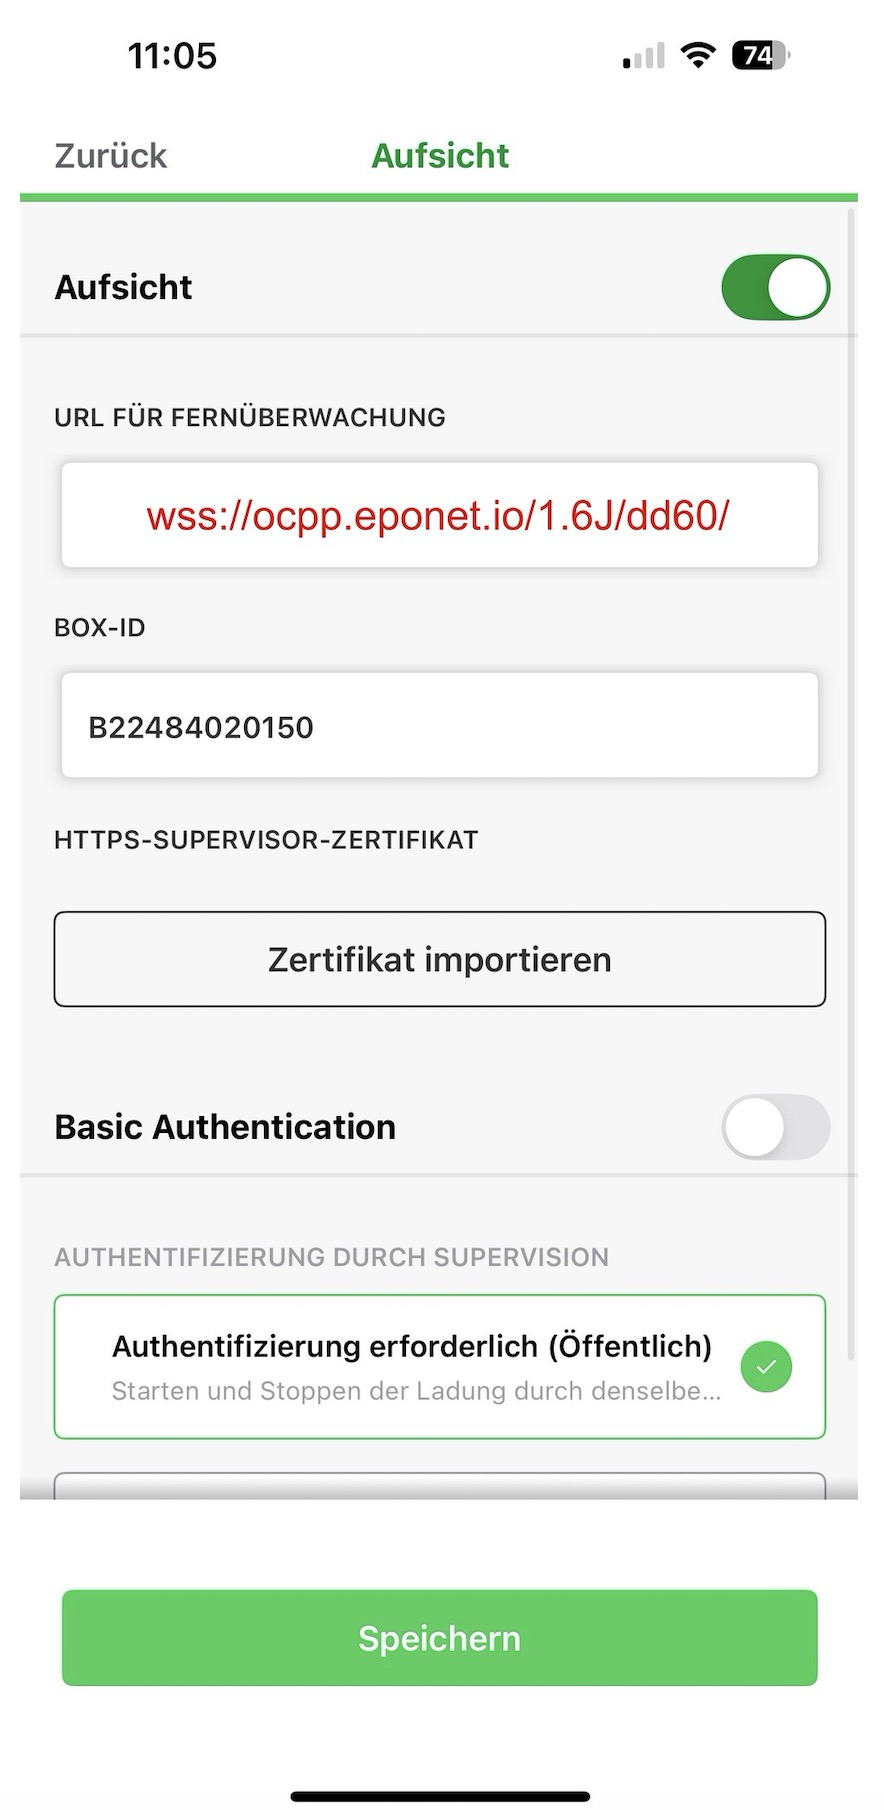
Now enable "Monitoring" and enter the URL as shown above.
The BOX ID must be entered as shown above and corresponds to the serial number that must be entered on the Eponet portal.
Now click on "Save". The charging station should then be displayed as online on the Eponet portal.
Checklist:
-
Software checked / up to date?
-
OCPP installed and charging station online on the Eponet portal
Advanced settings:
Please adjust the following OCPP settings (Meter Values) for each charging station.
Select the desired charging station on the charger dashboard and click on Configuration.
In the search window, you can filter the entries by "meter" and will now see the entries, which must look as follows:
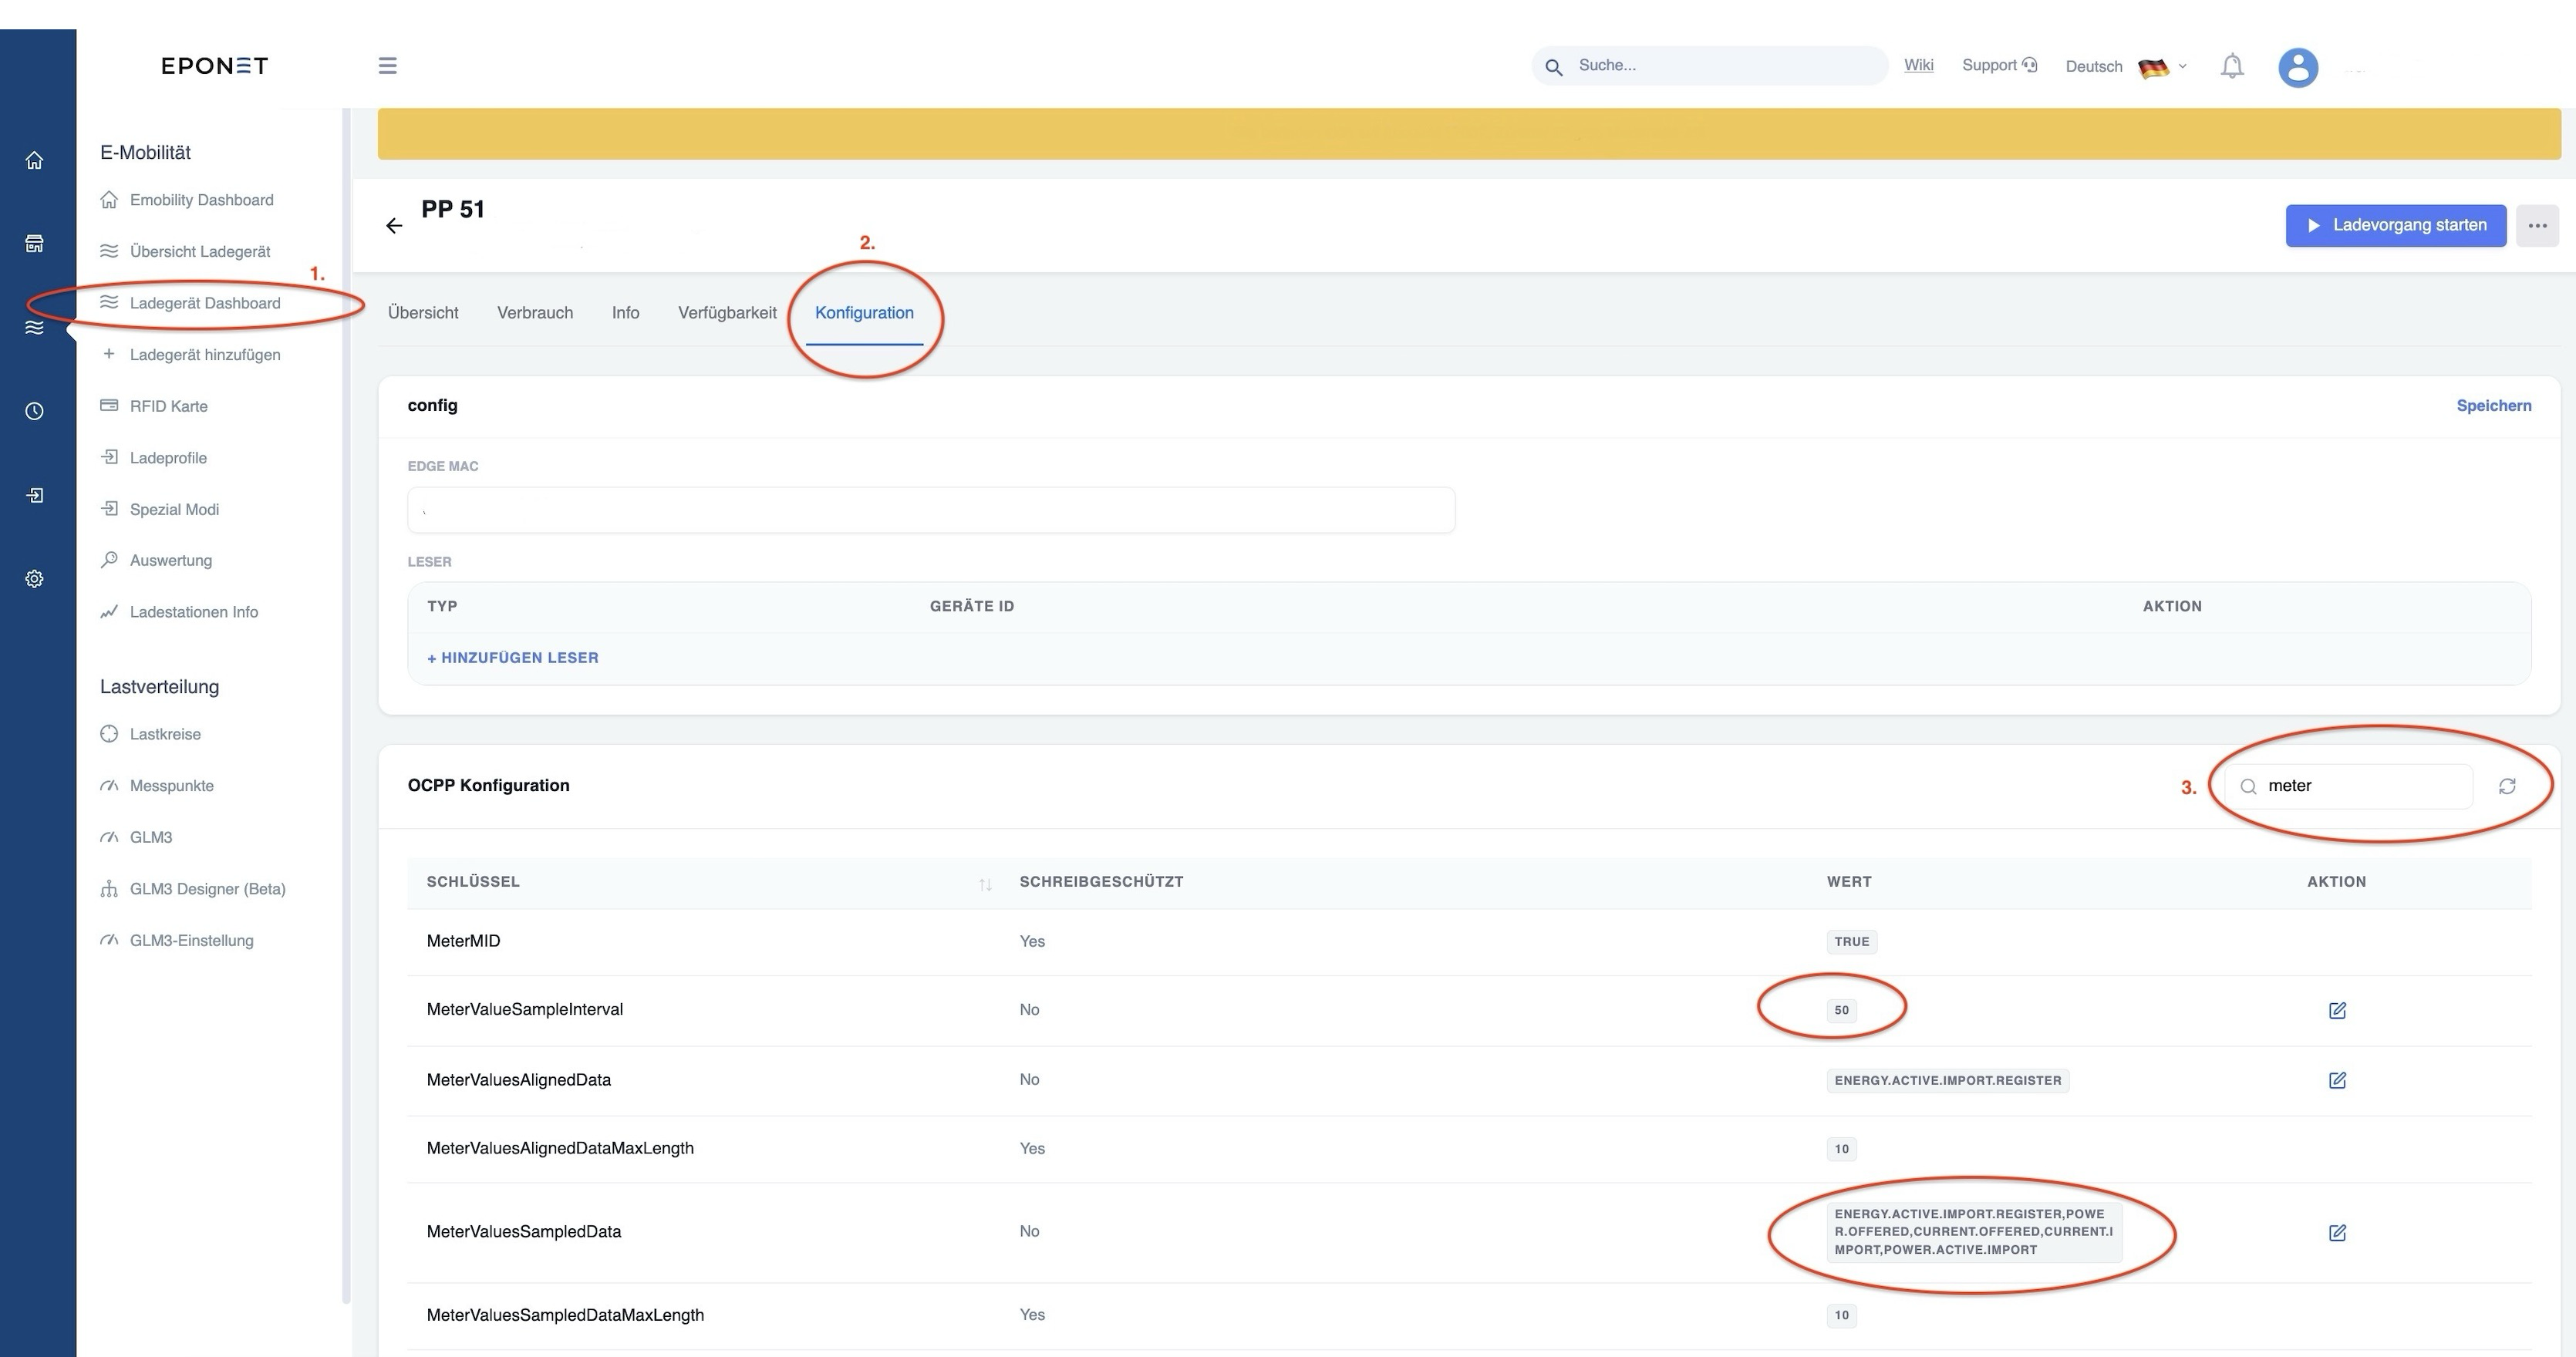
You should configure/check the following settings:
MeterValueSampleInterval > set
to 50 MeterValuesSampledData > Energy.Active.Import.Register,Power.Offered,Current.Offered,Current.Import,Power.Active.Import