Integration of DEFA AC charging station into the Eponet portal
These instructions are step 3 for connecting a DEFA charging station to the Eponet Portal.
You can find Step 1 at this link: Basic guide to integrating charging stations
|
|
Tested with software version 4.3.8
|
Prepare the charging station via the Power Setup app
Open the DEFA Power Setup app and connect to the charging station via Bluetooth.
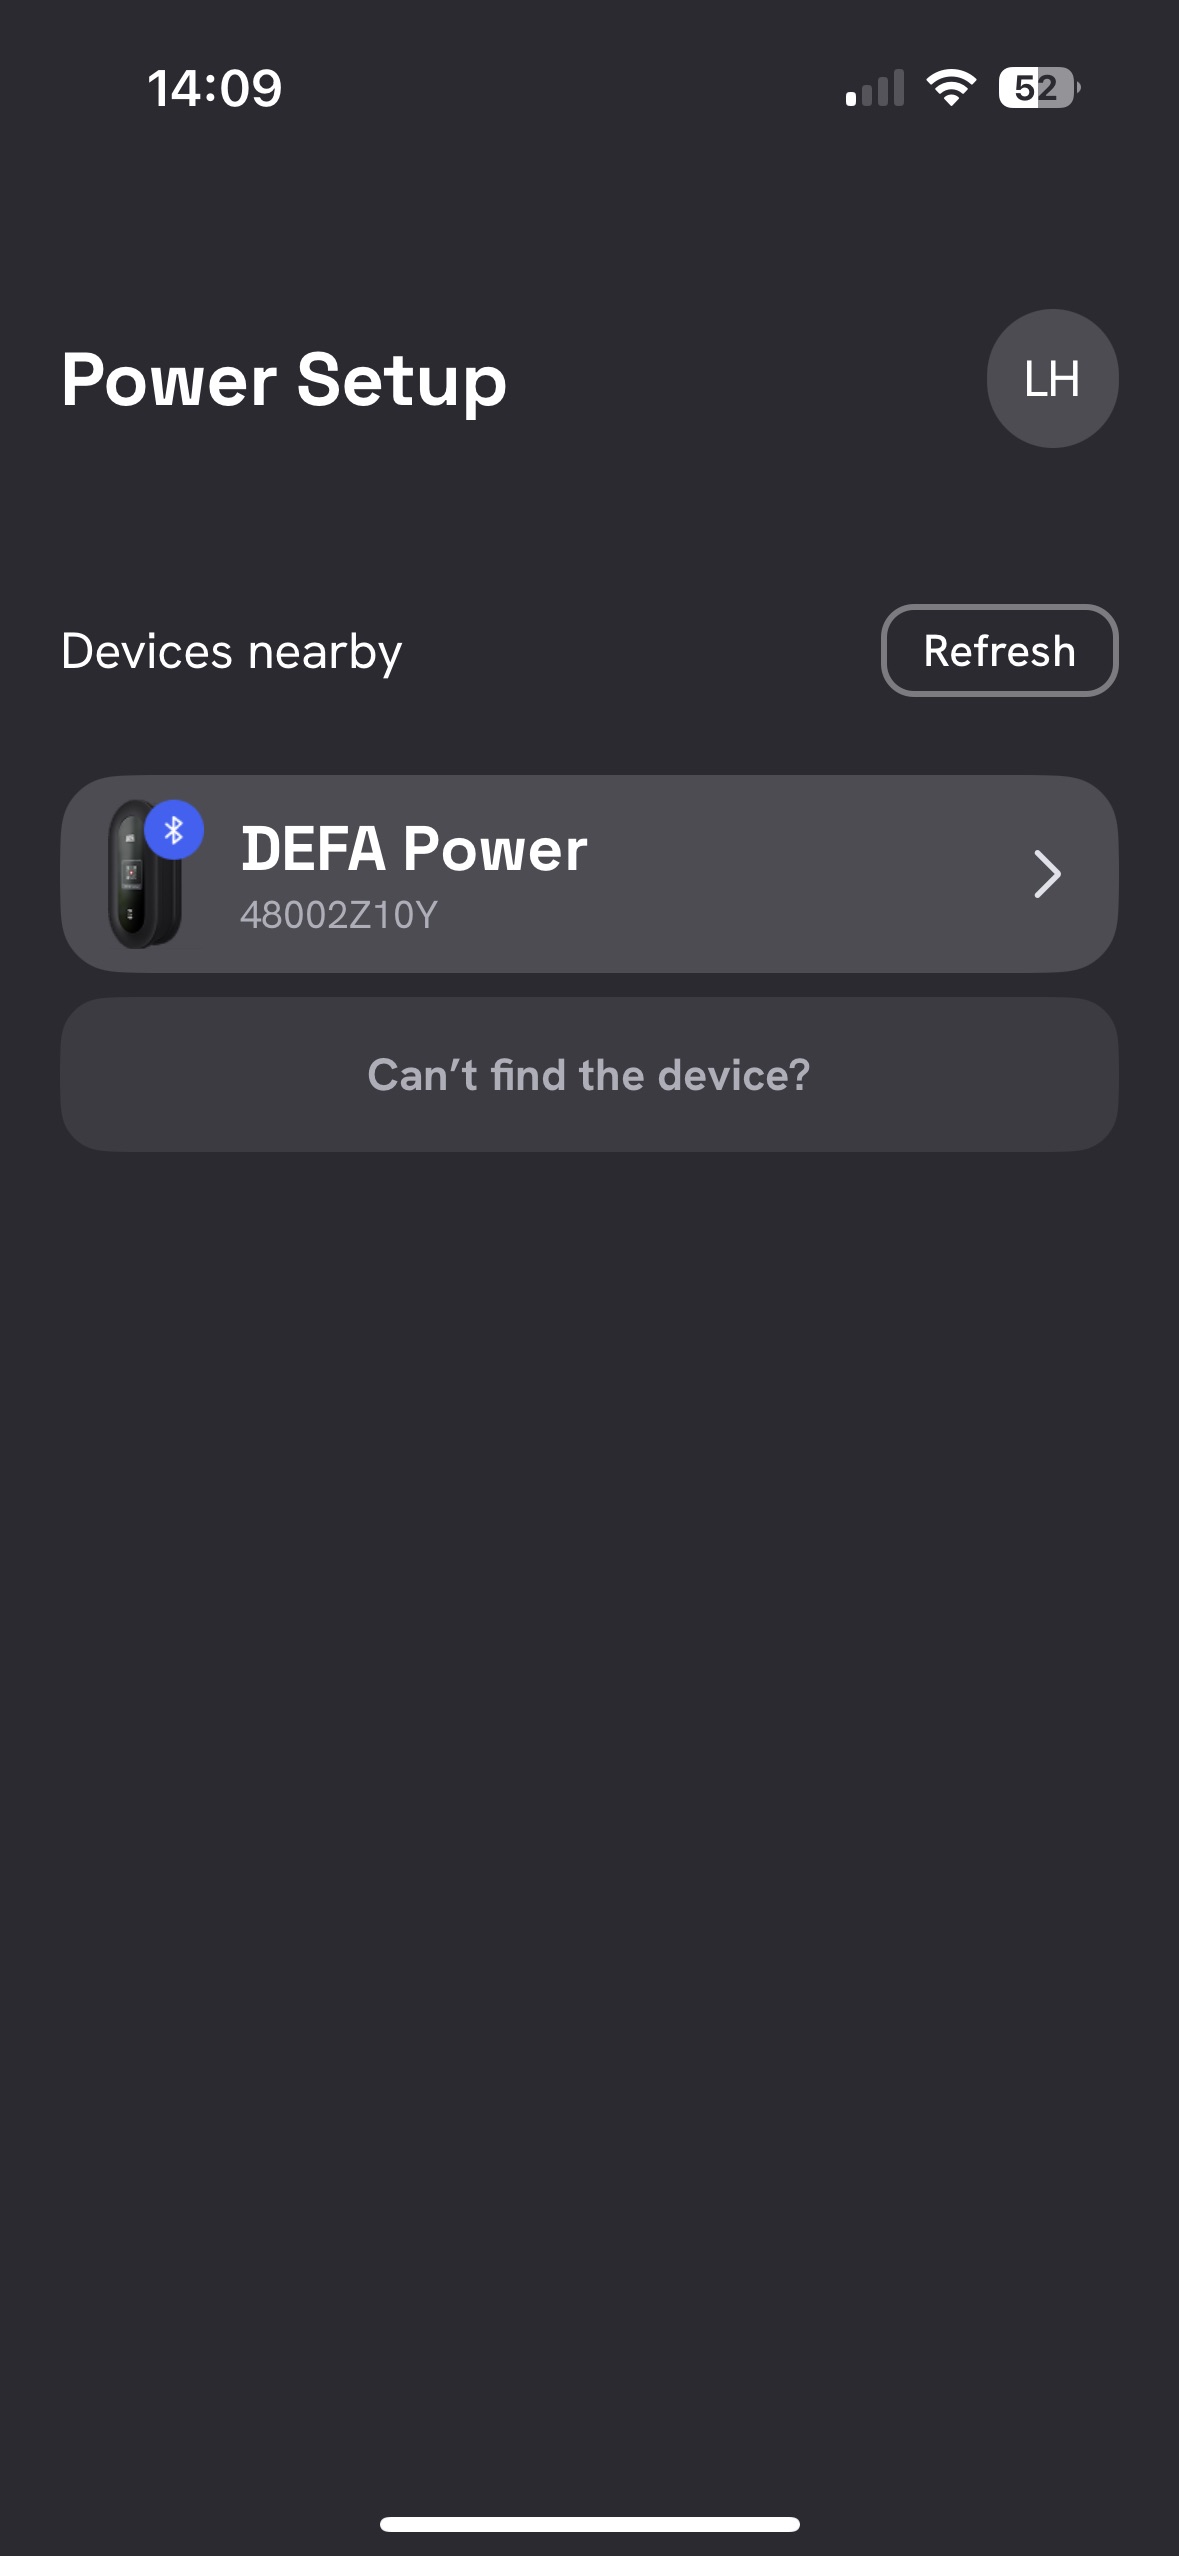
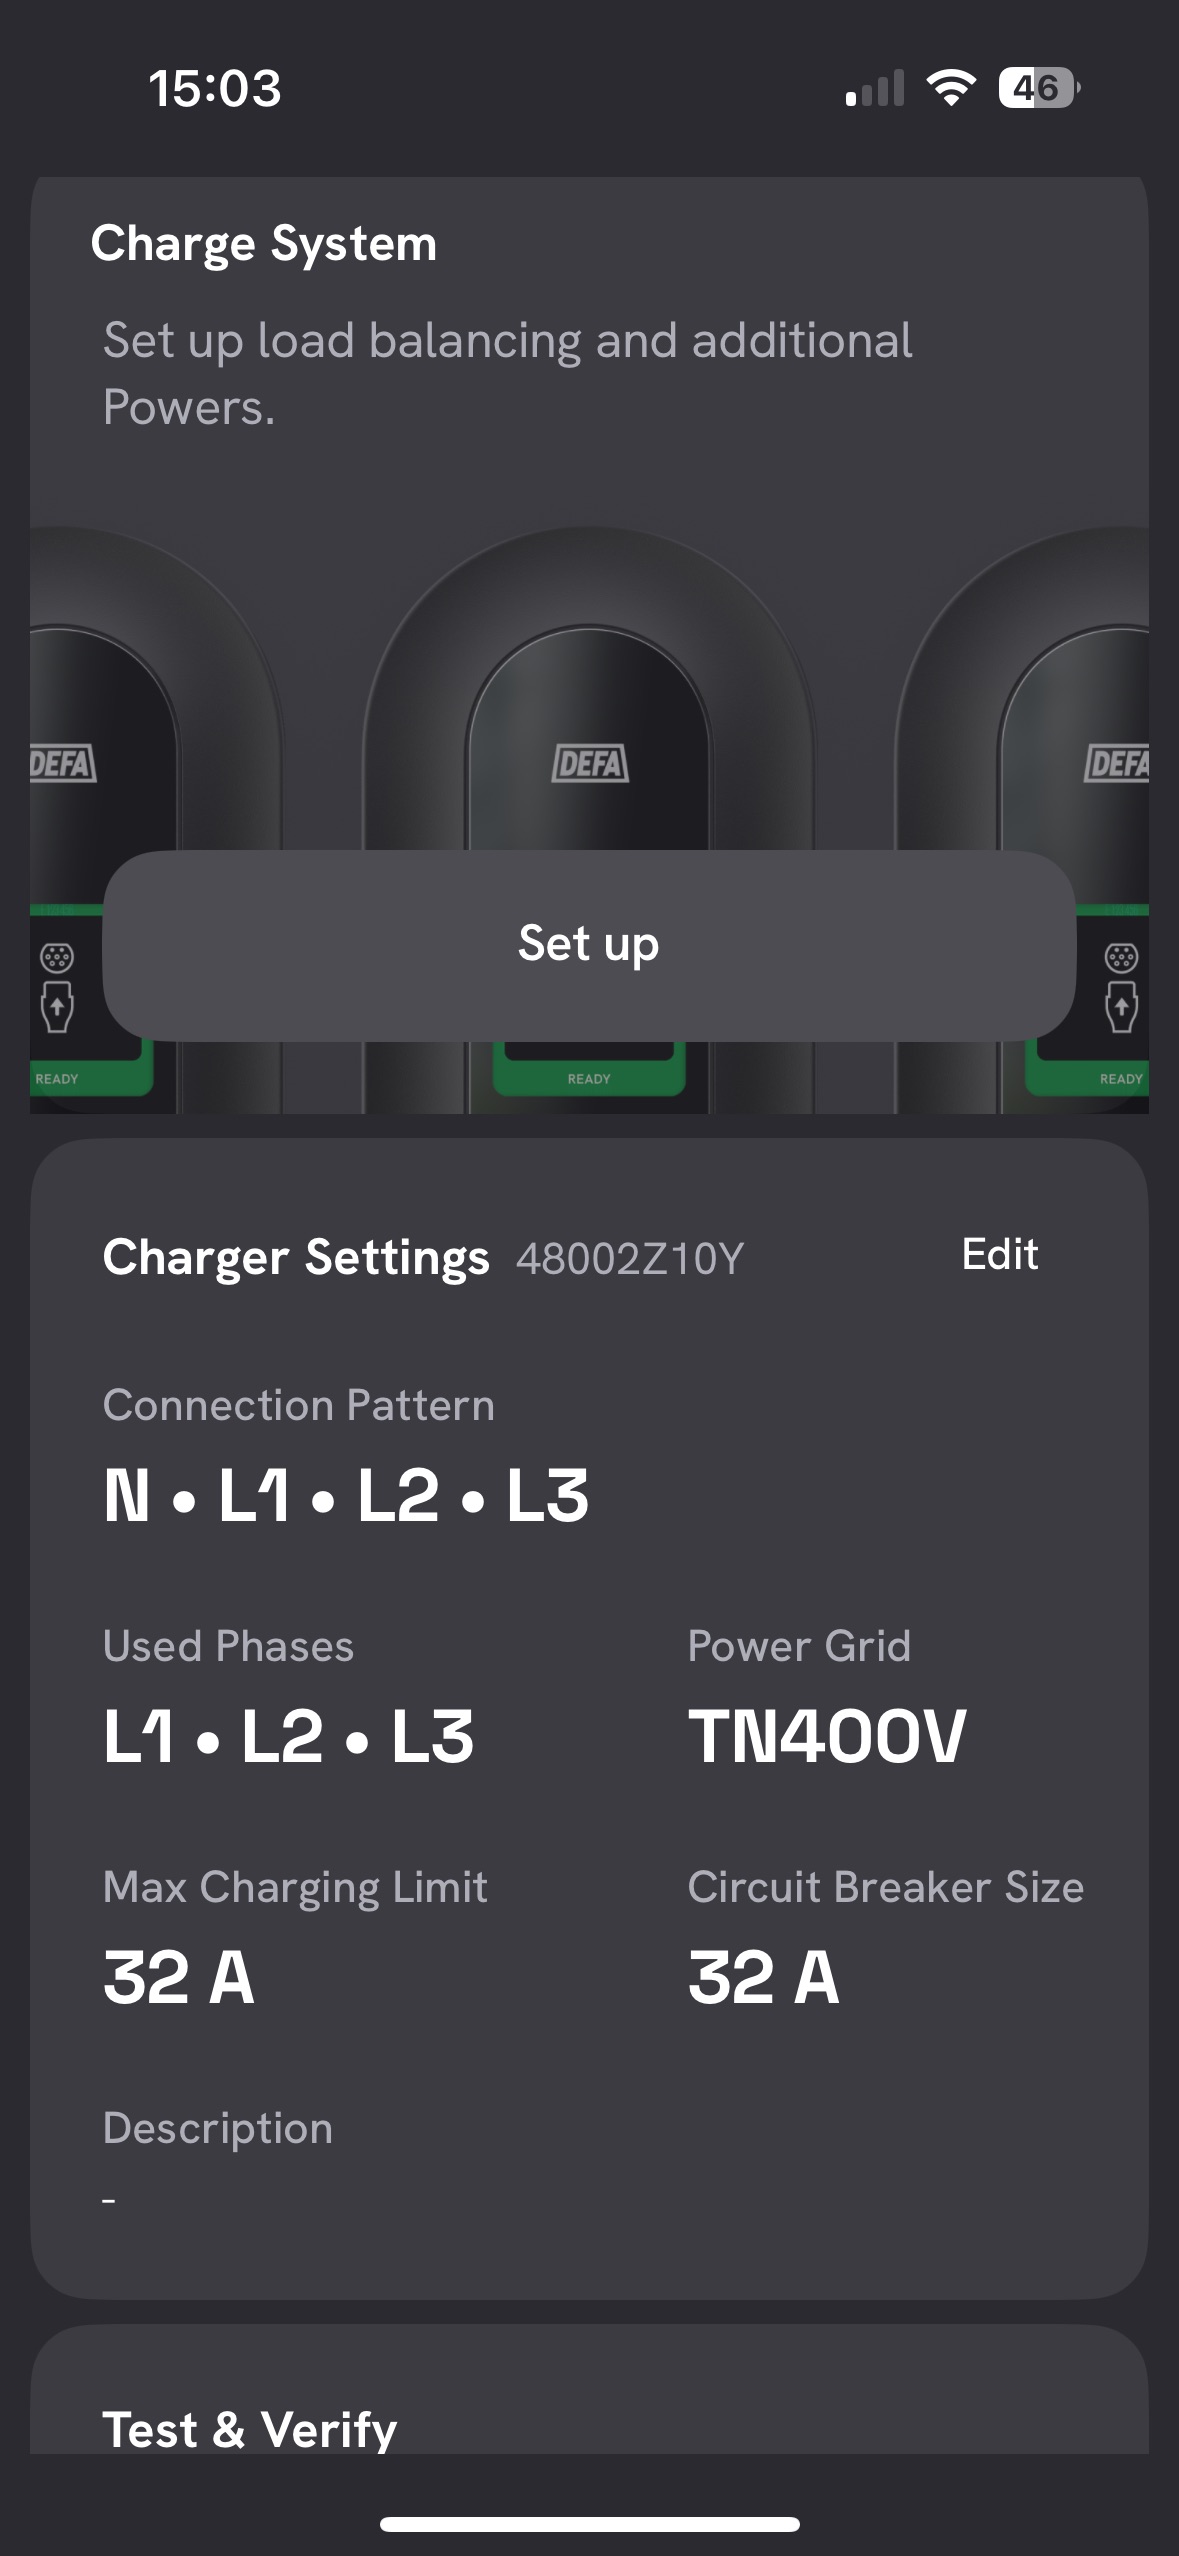
You should now see this screen.
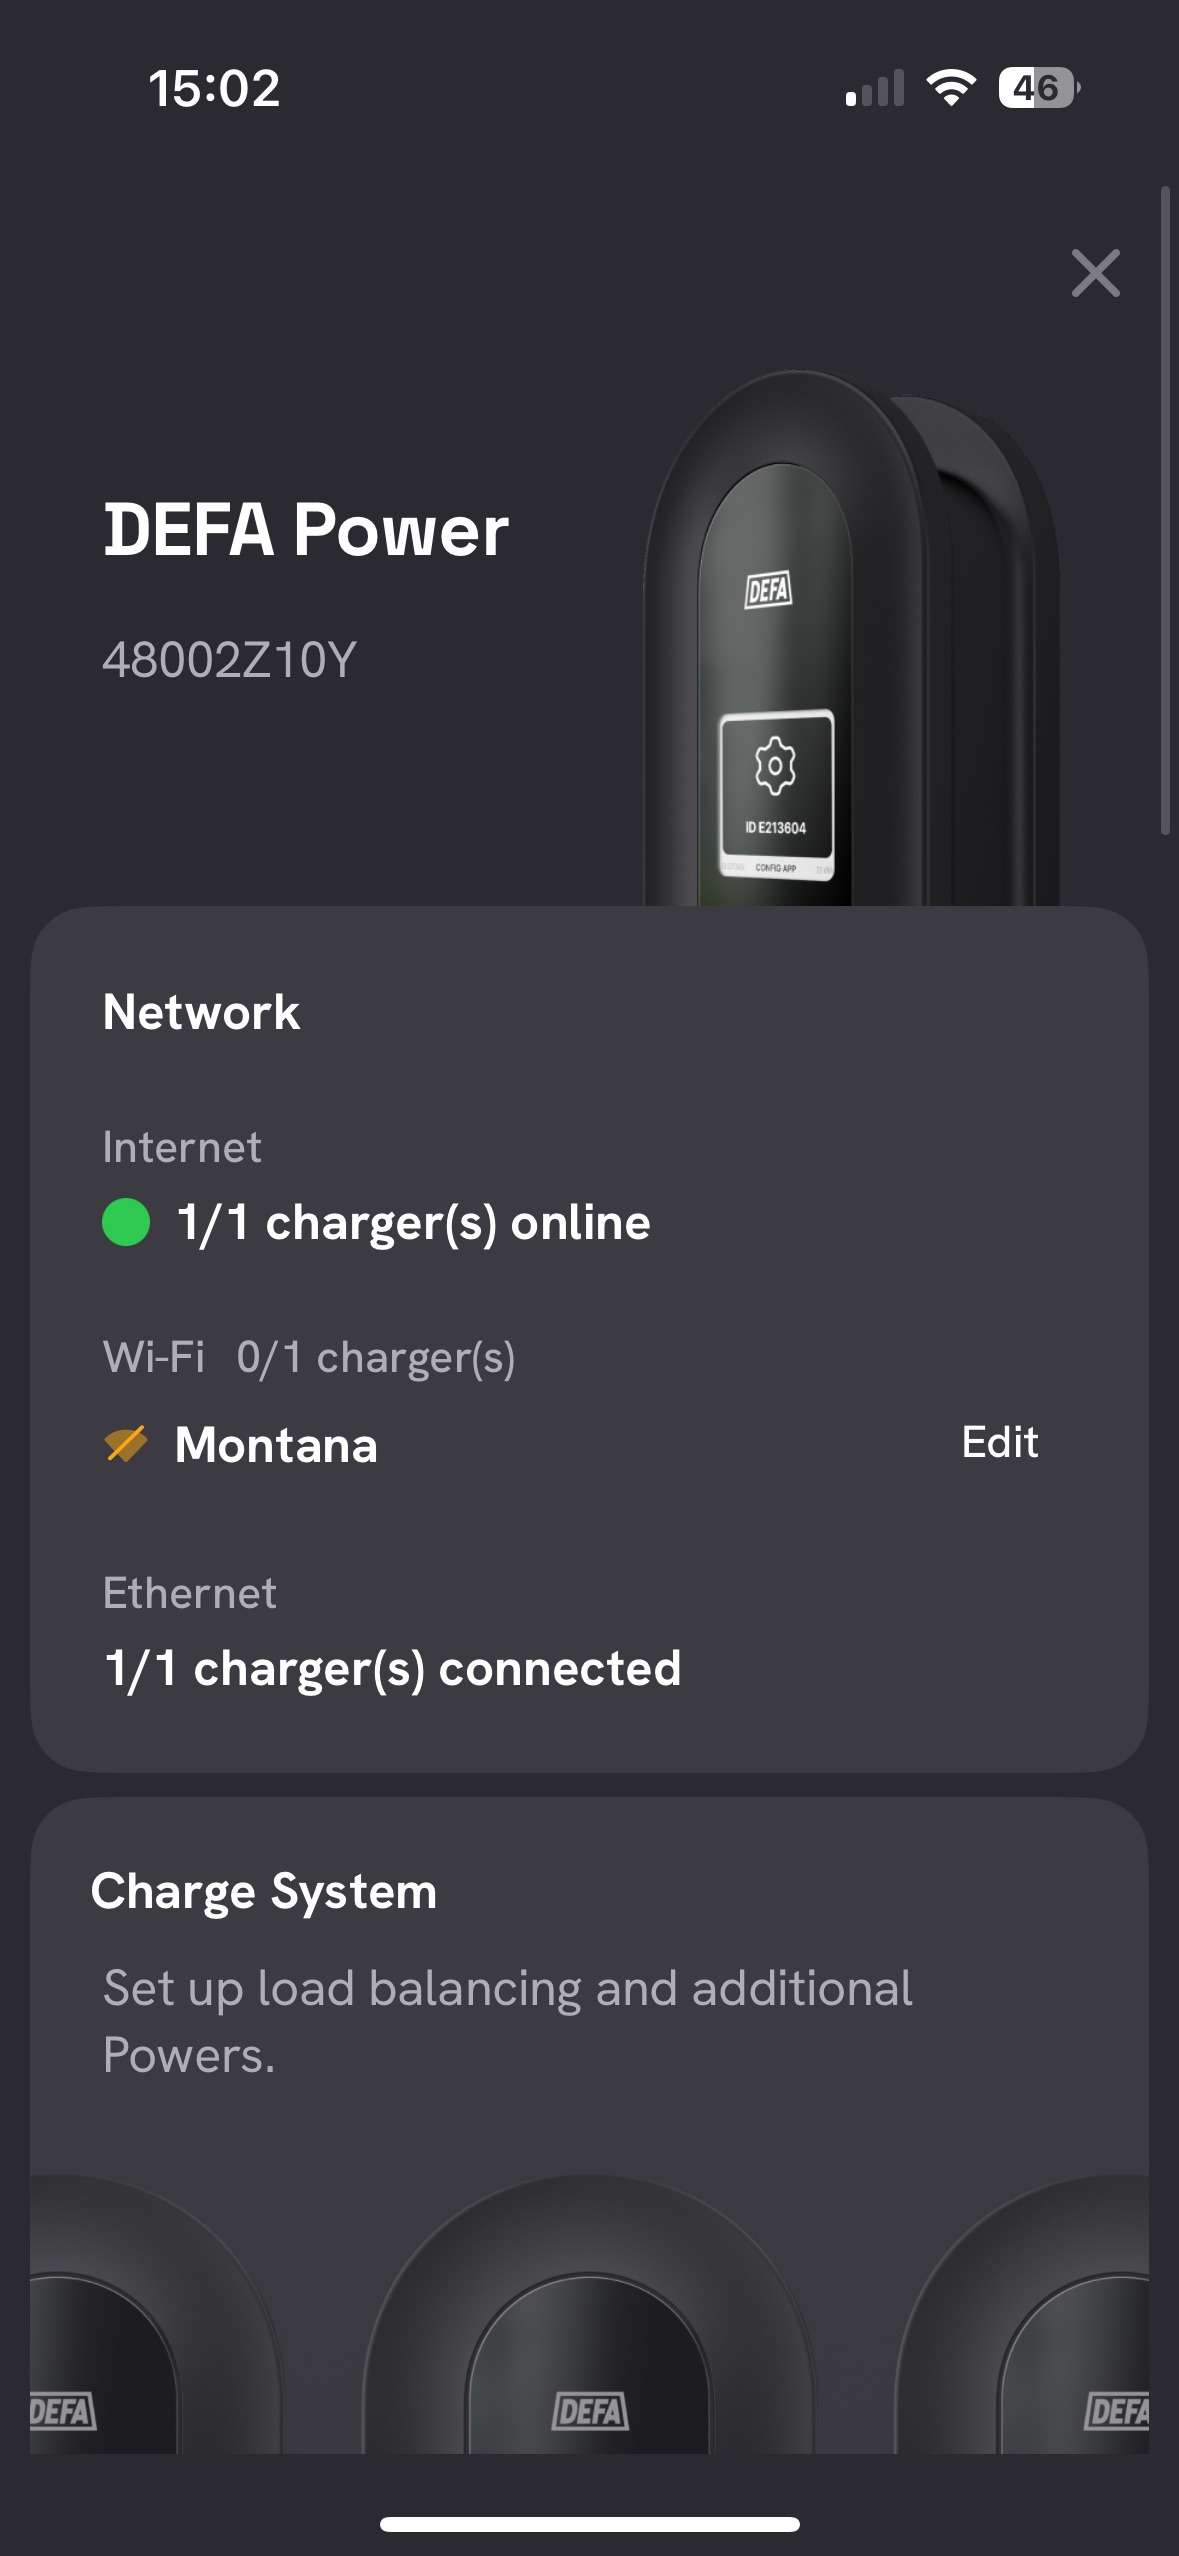
Scroll down further and click on ‘Edit’ under ‘Charger Settings’.
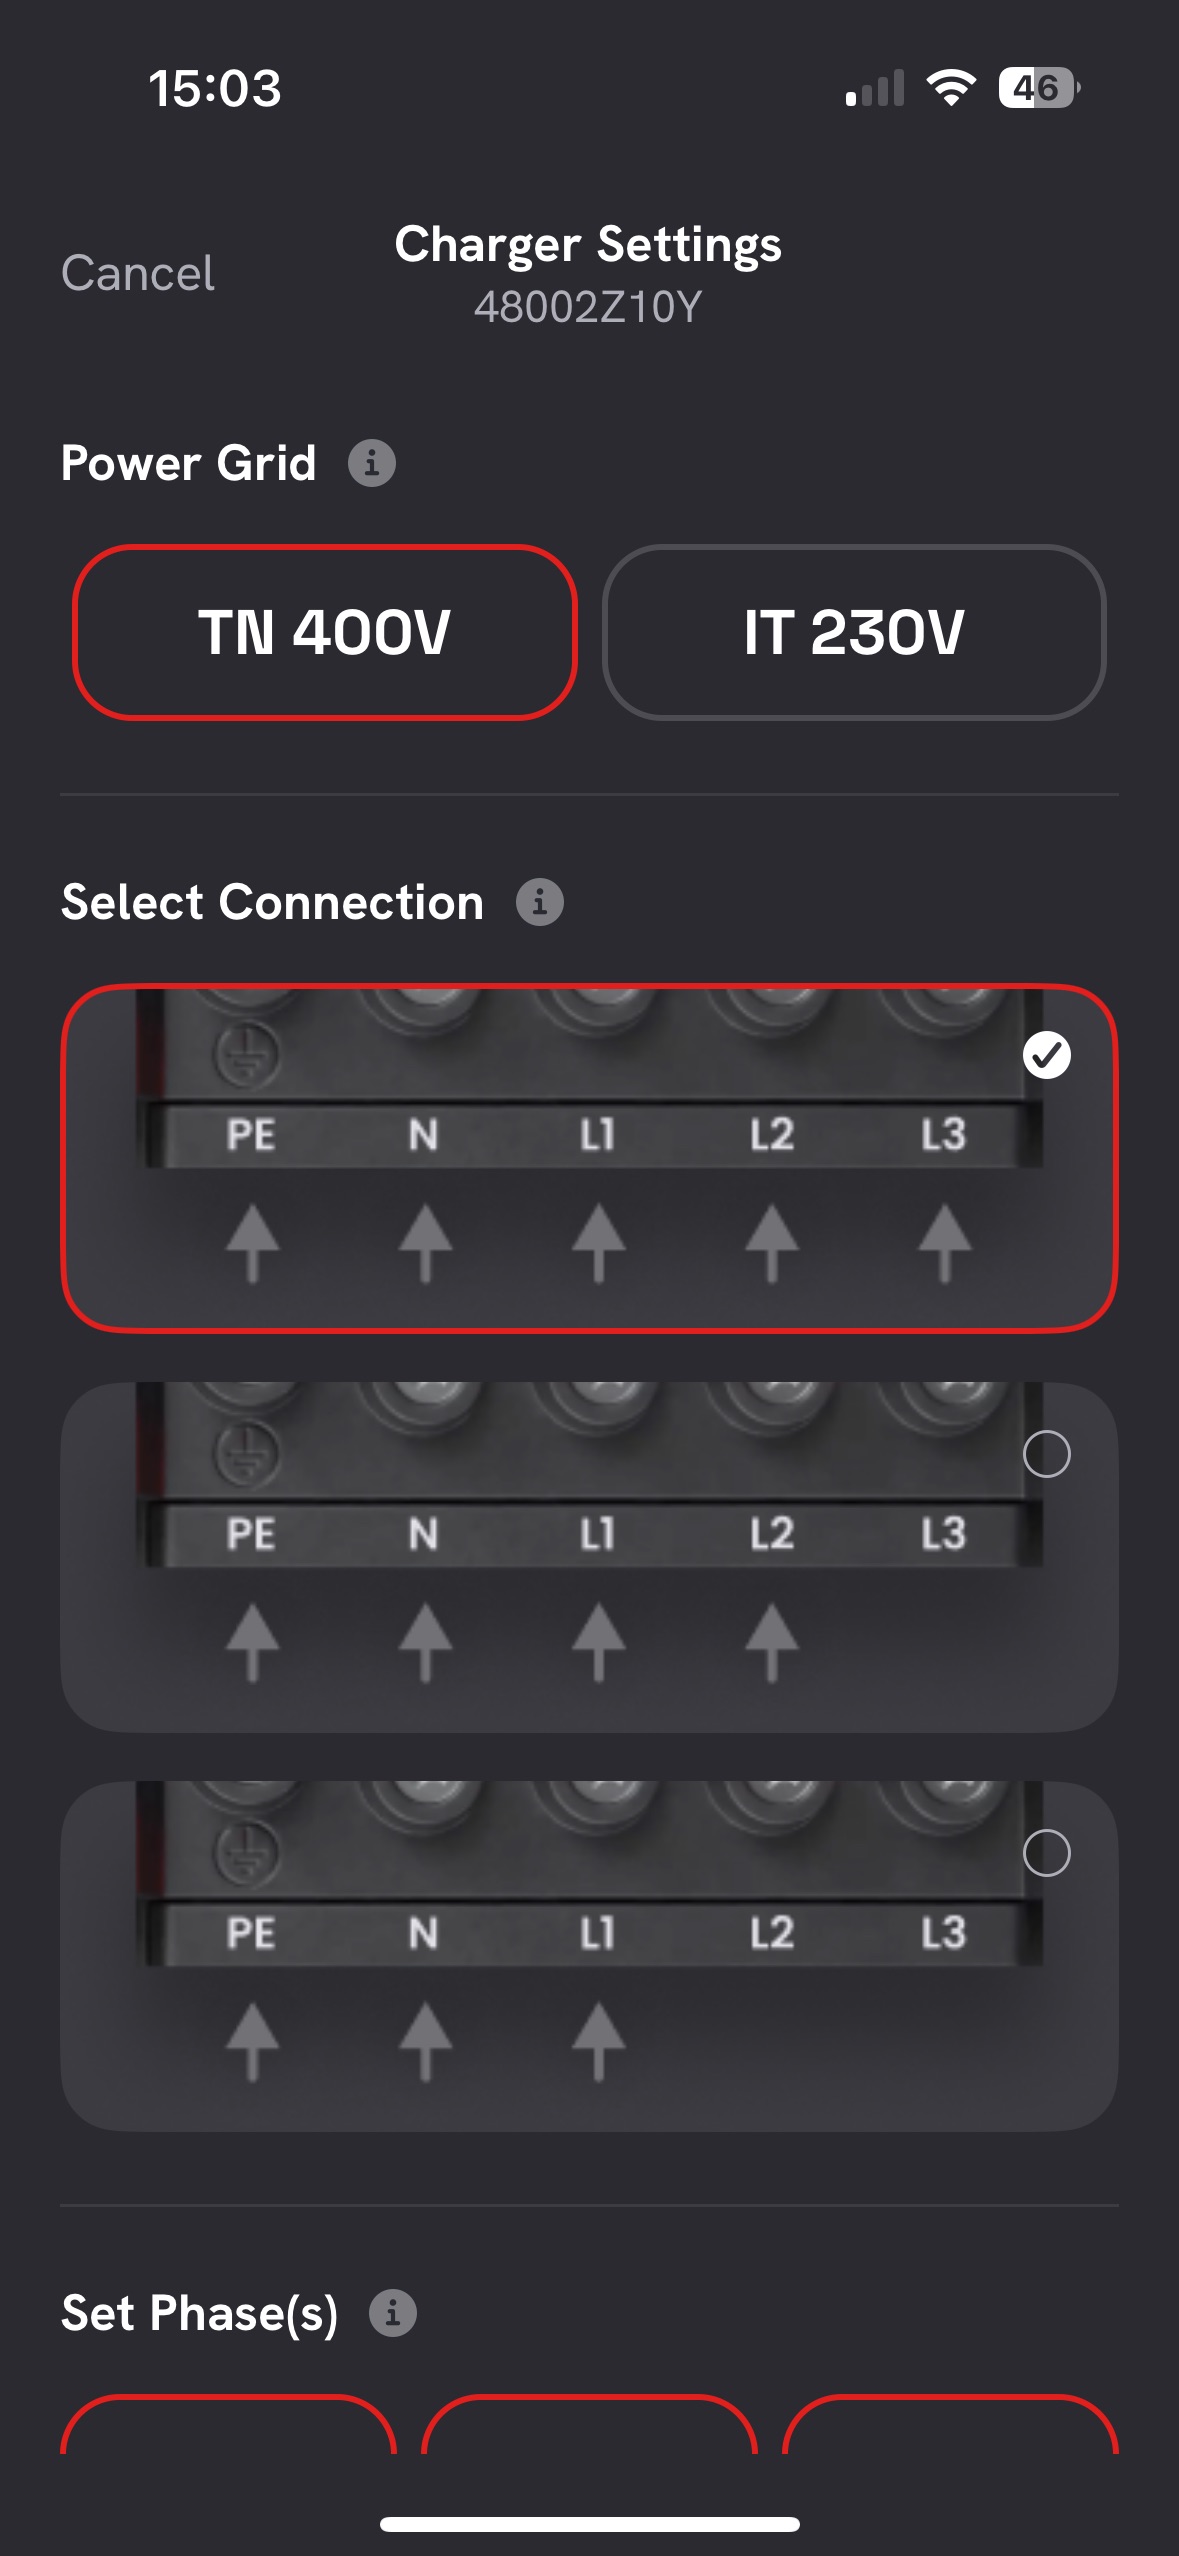
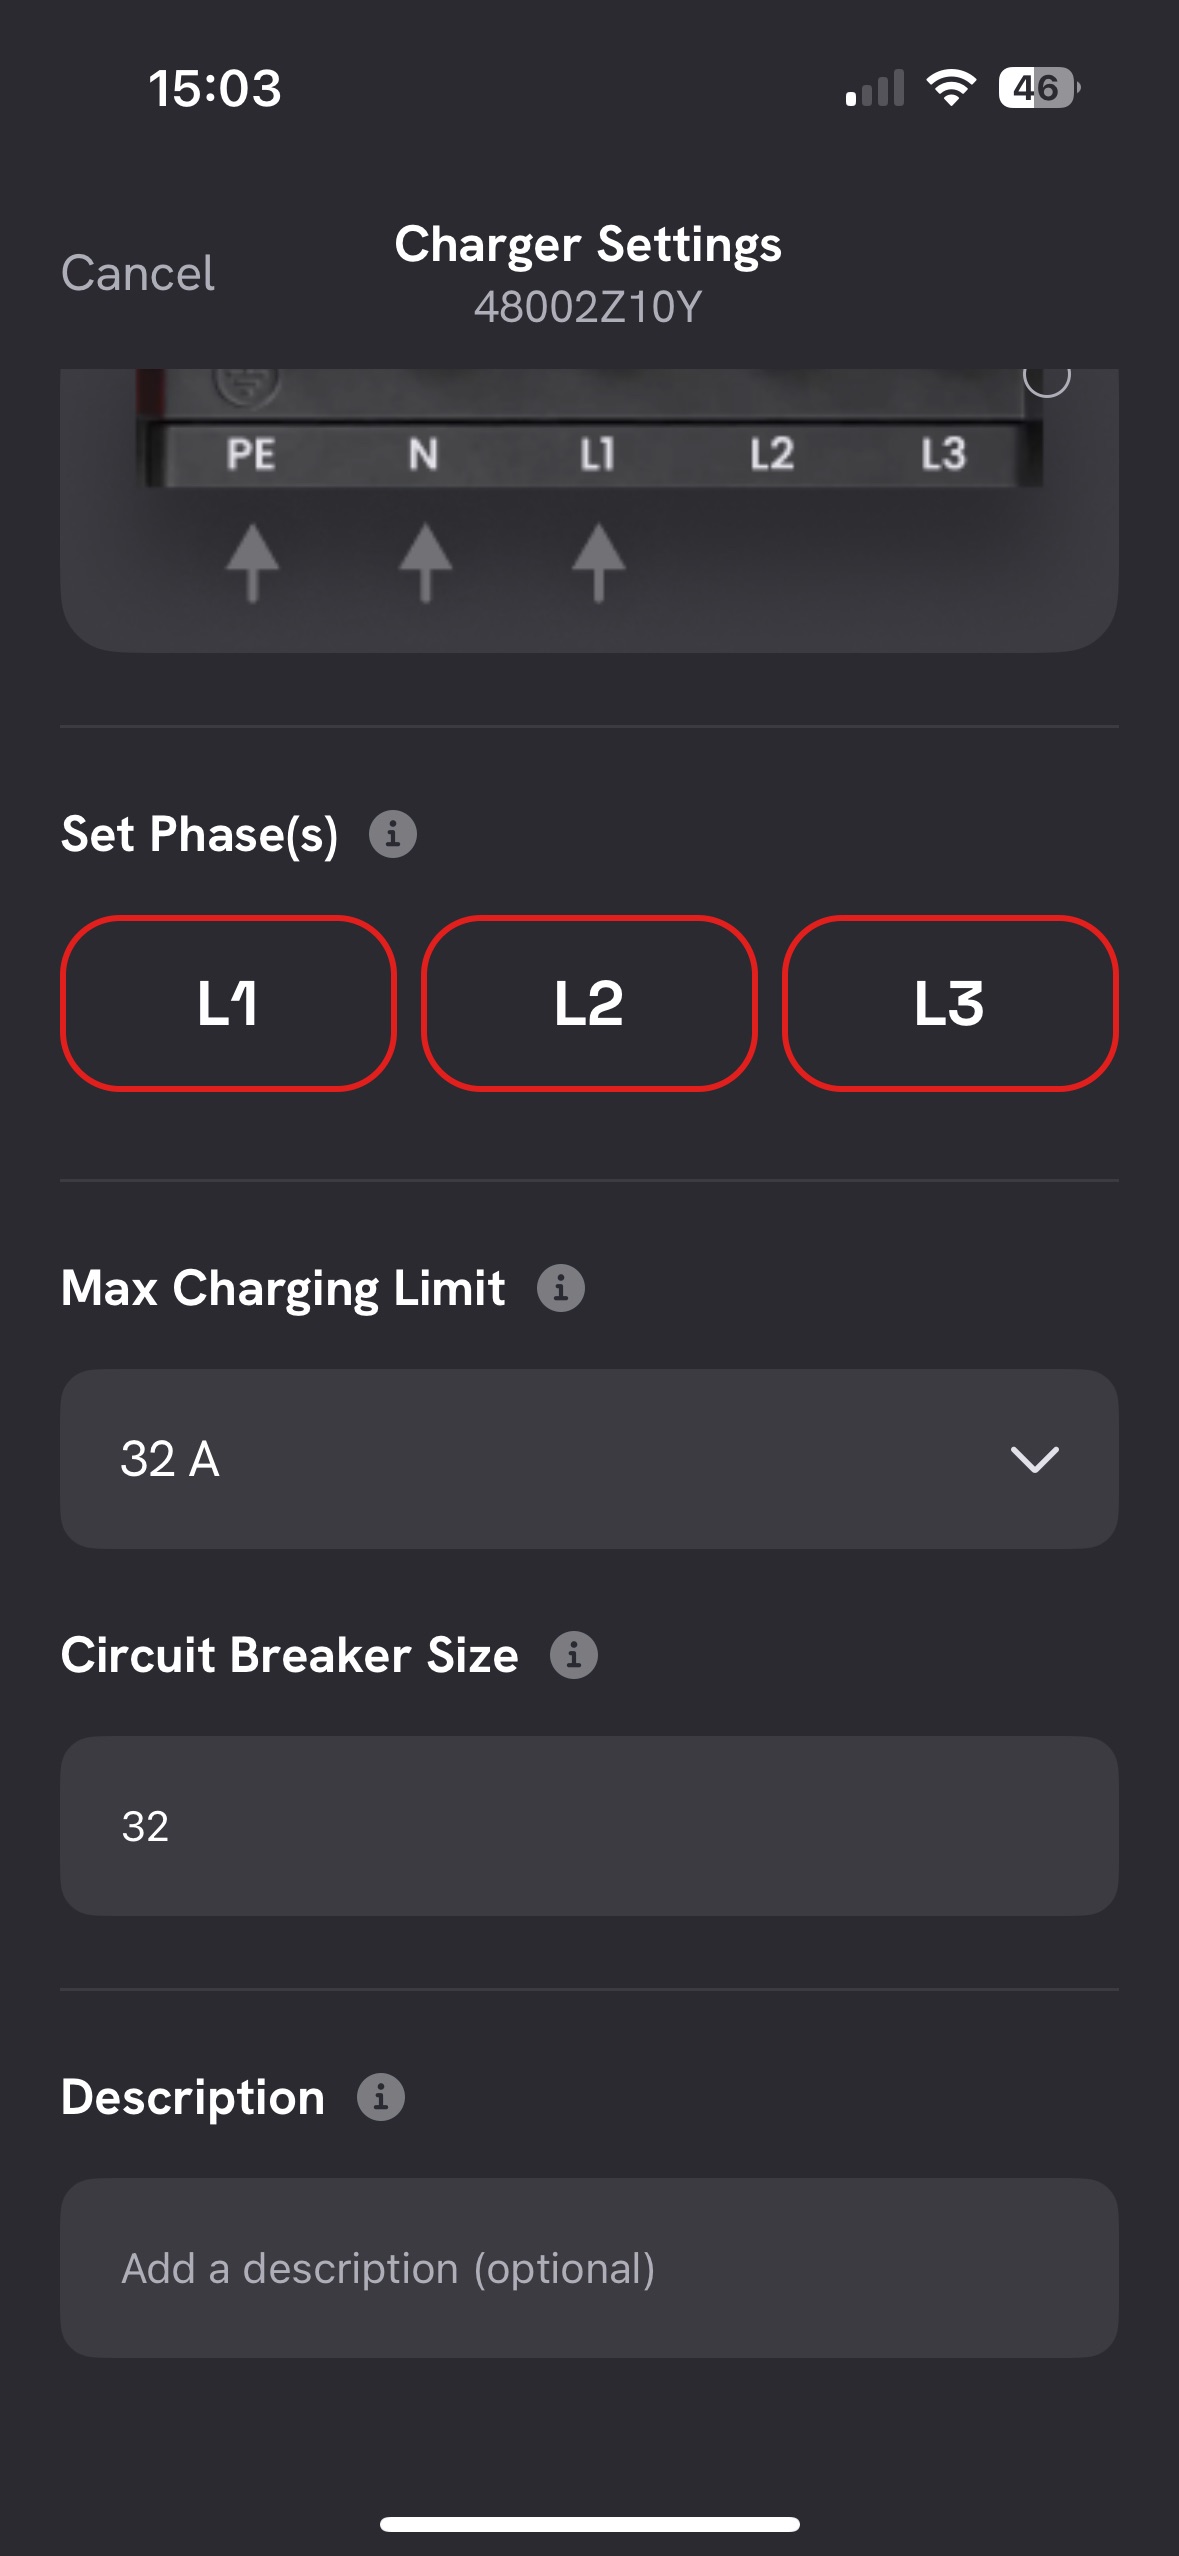
Now configure everything as shown.
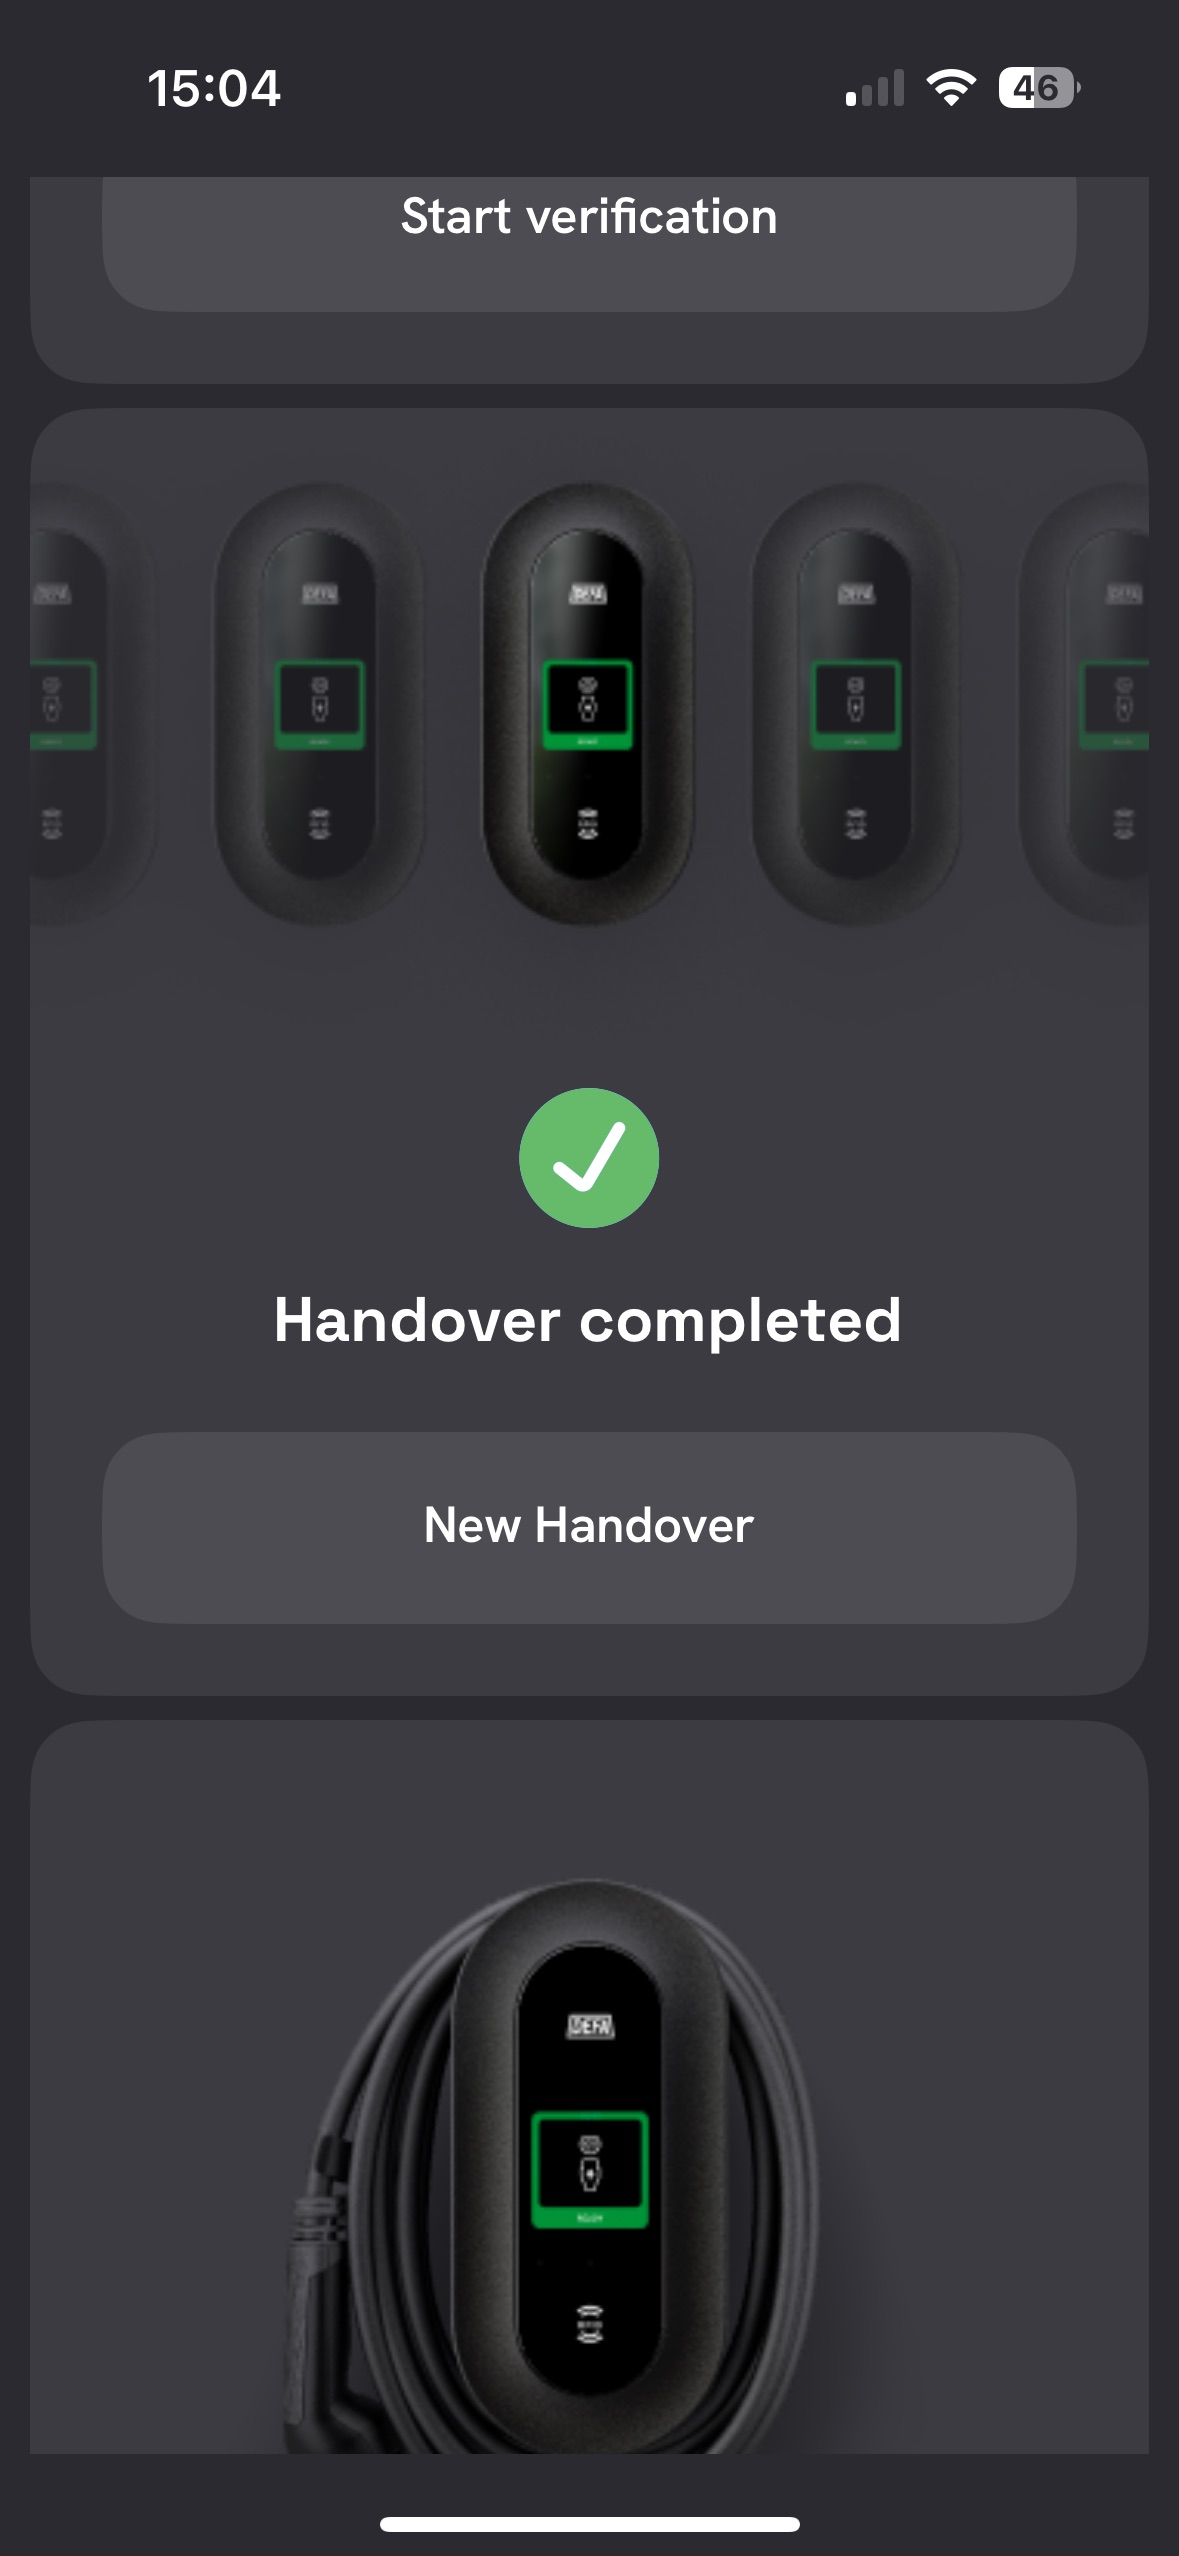
Confirm these settings, scroll further down and click on "New Handover".
Now enter the name of the charger here and select “Eponet” as the backend. Then click on “Hand Over”.
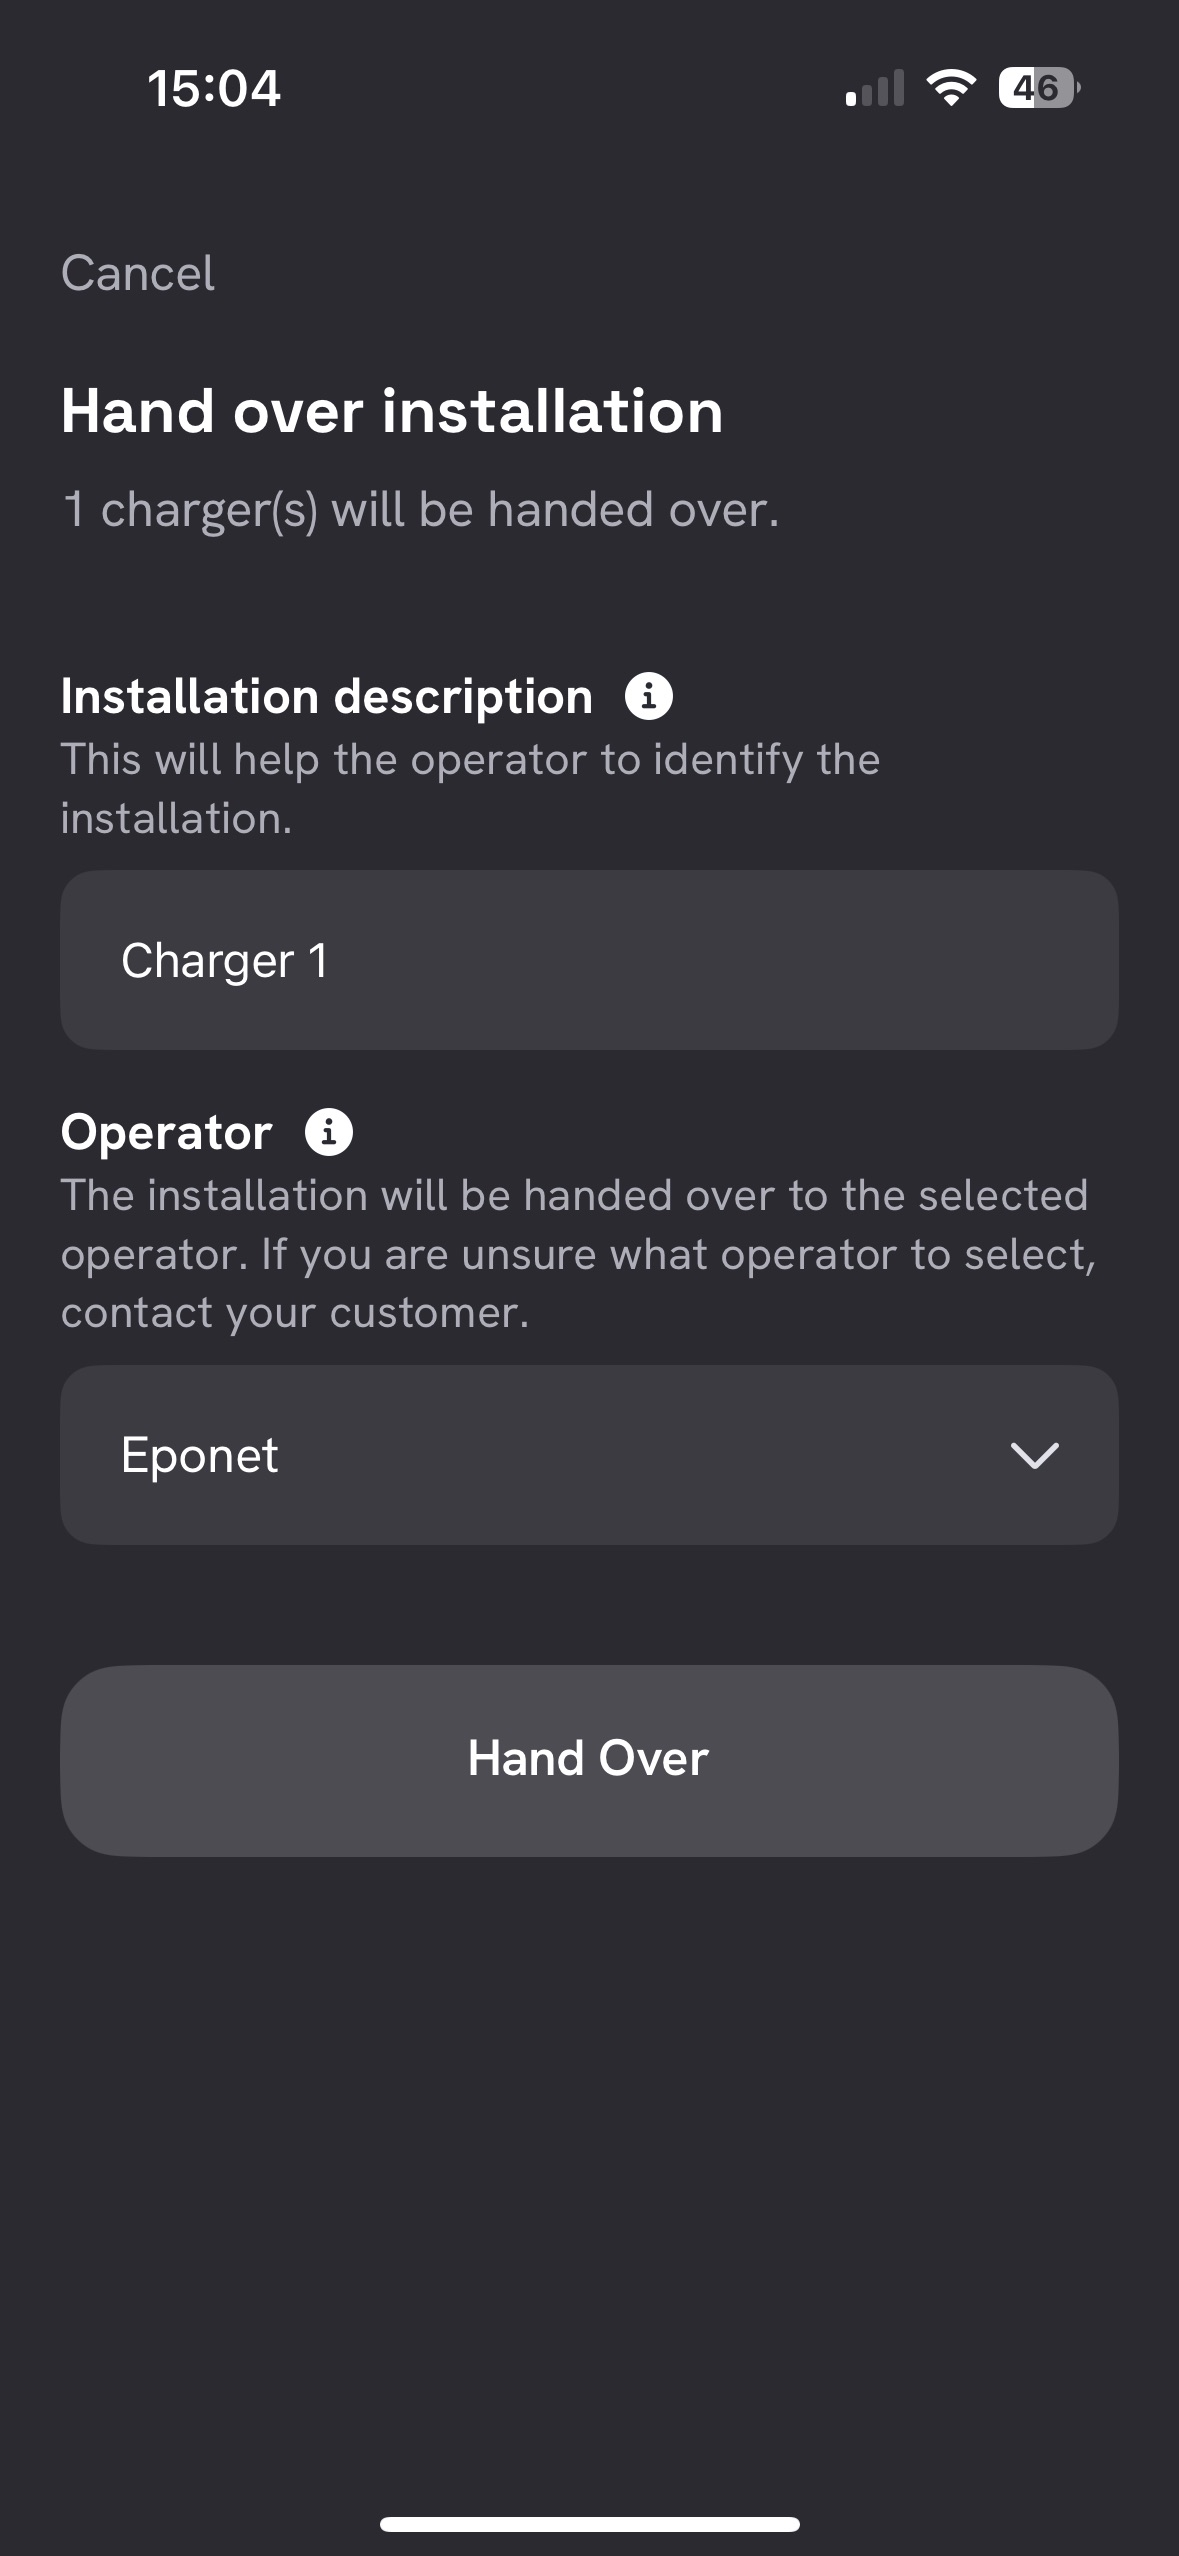
You can now scroll right to the bottom and select "Complete Setup".

From this point onwards, the charging station is connected to Eponet and should appear online on the Eponet portal.
To start a charge using an RFID card, this must first be activated. To do this, follow the steps below.
Follow arrows 1 and 2. Then select the relevant charging station and click on arrow 3.
At arrow 4, you can now search for “authCtrlr”.
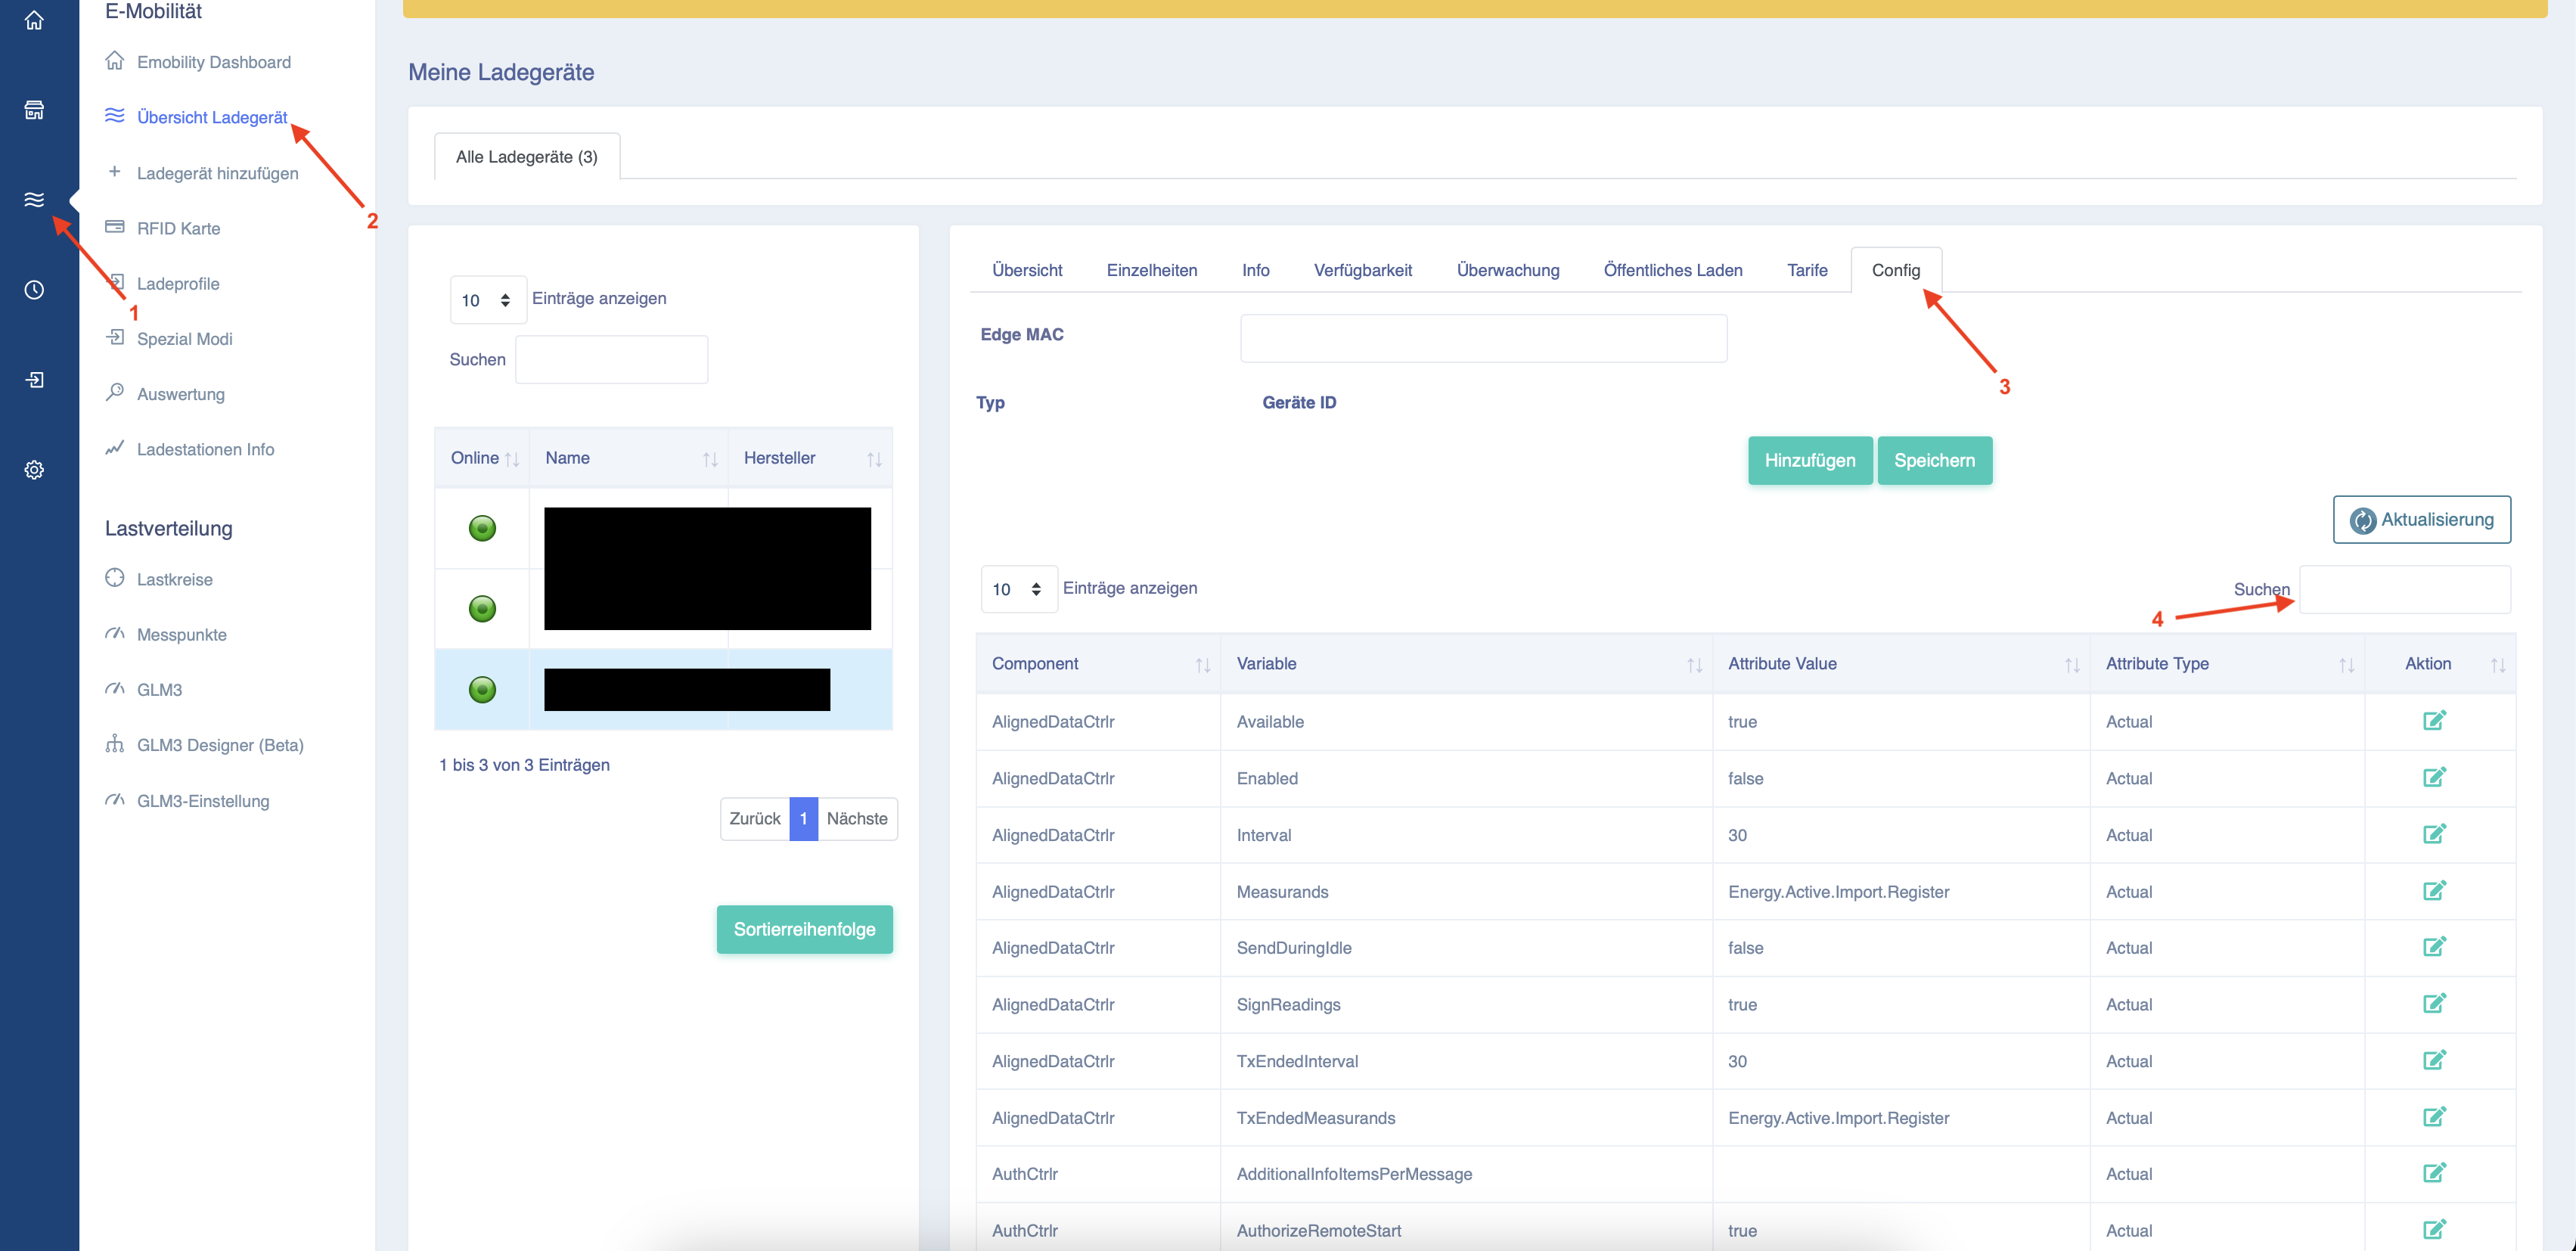
You will now see a short list of settings.
Select the entry shown below.
Click on ‘Edit’ at arrow 1 and change the value from ‘false’ to ‘true’.

Then click on Save.
An RFID card can now be used.
Important settings for correct billing via the Eponet Portal:
“EVConnected” must be changed to: “EVConnected,Authorized”

Checklist:
-
Authentication required > must be enabled
-
Deactivate authorisation if the charging stations are offline > must not be enabled
-
Is the charging station online on the Eponet Portal?
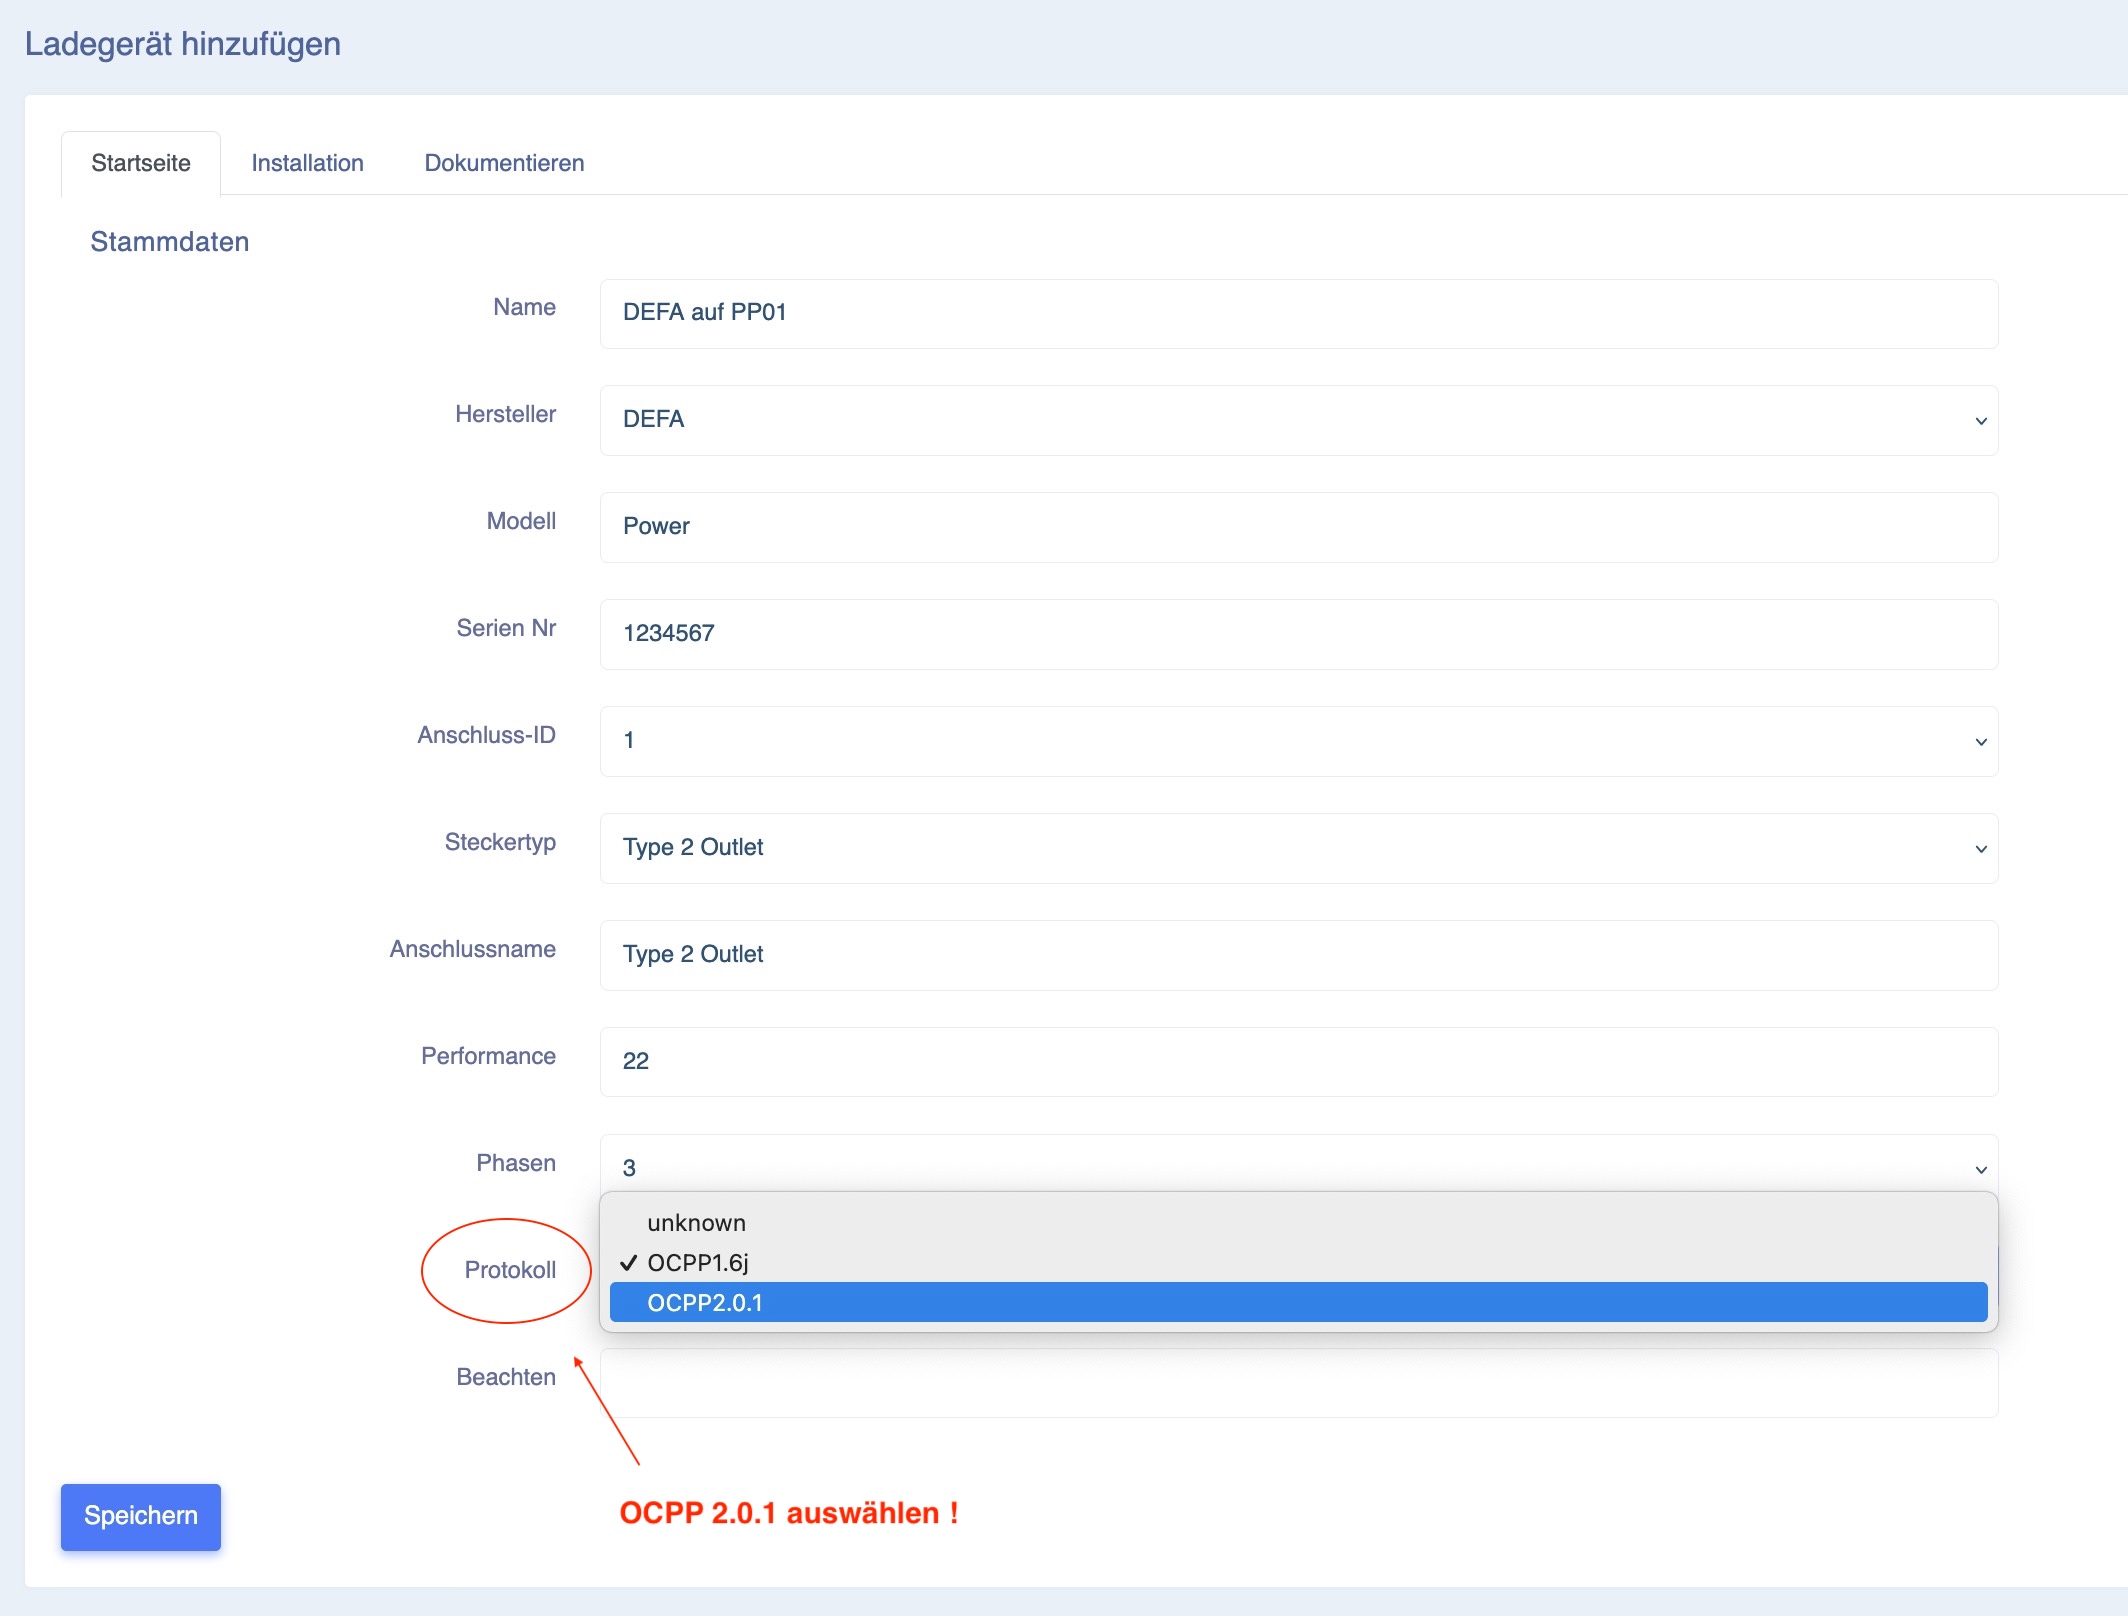
Important information before proceeding to step 4:
The DEFA AC charging station communicates exclusively with OCPP 2.0.1 – this must be selected when connecting to the Eponet Portal!