Set up a cron job and download the report
Settings :
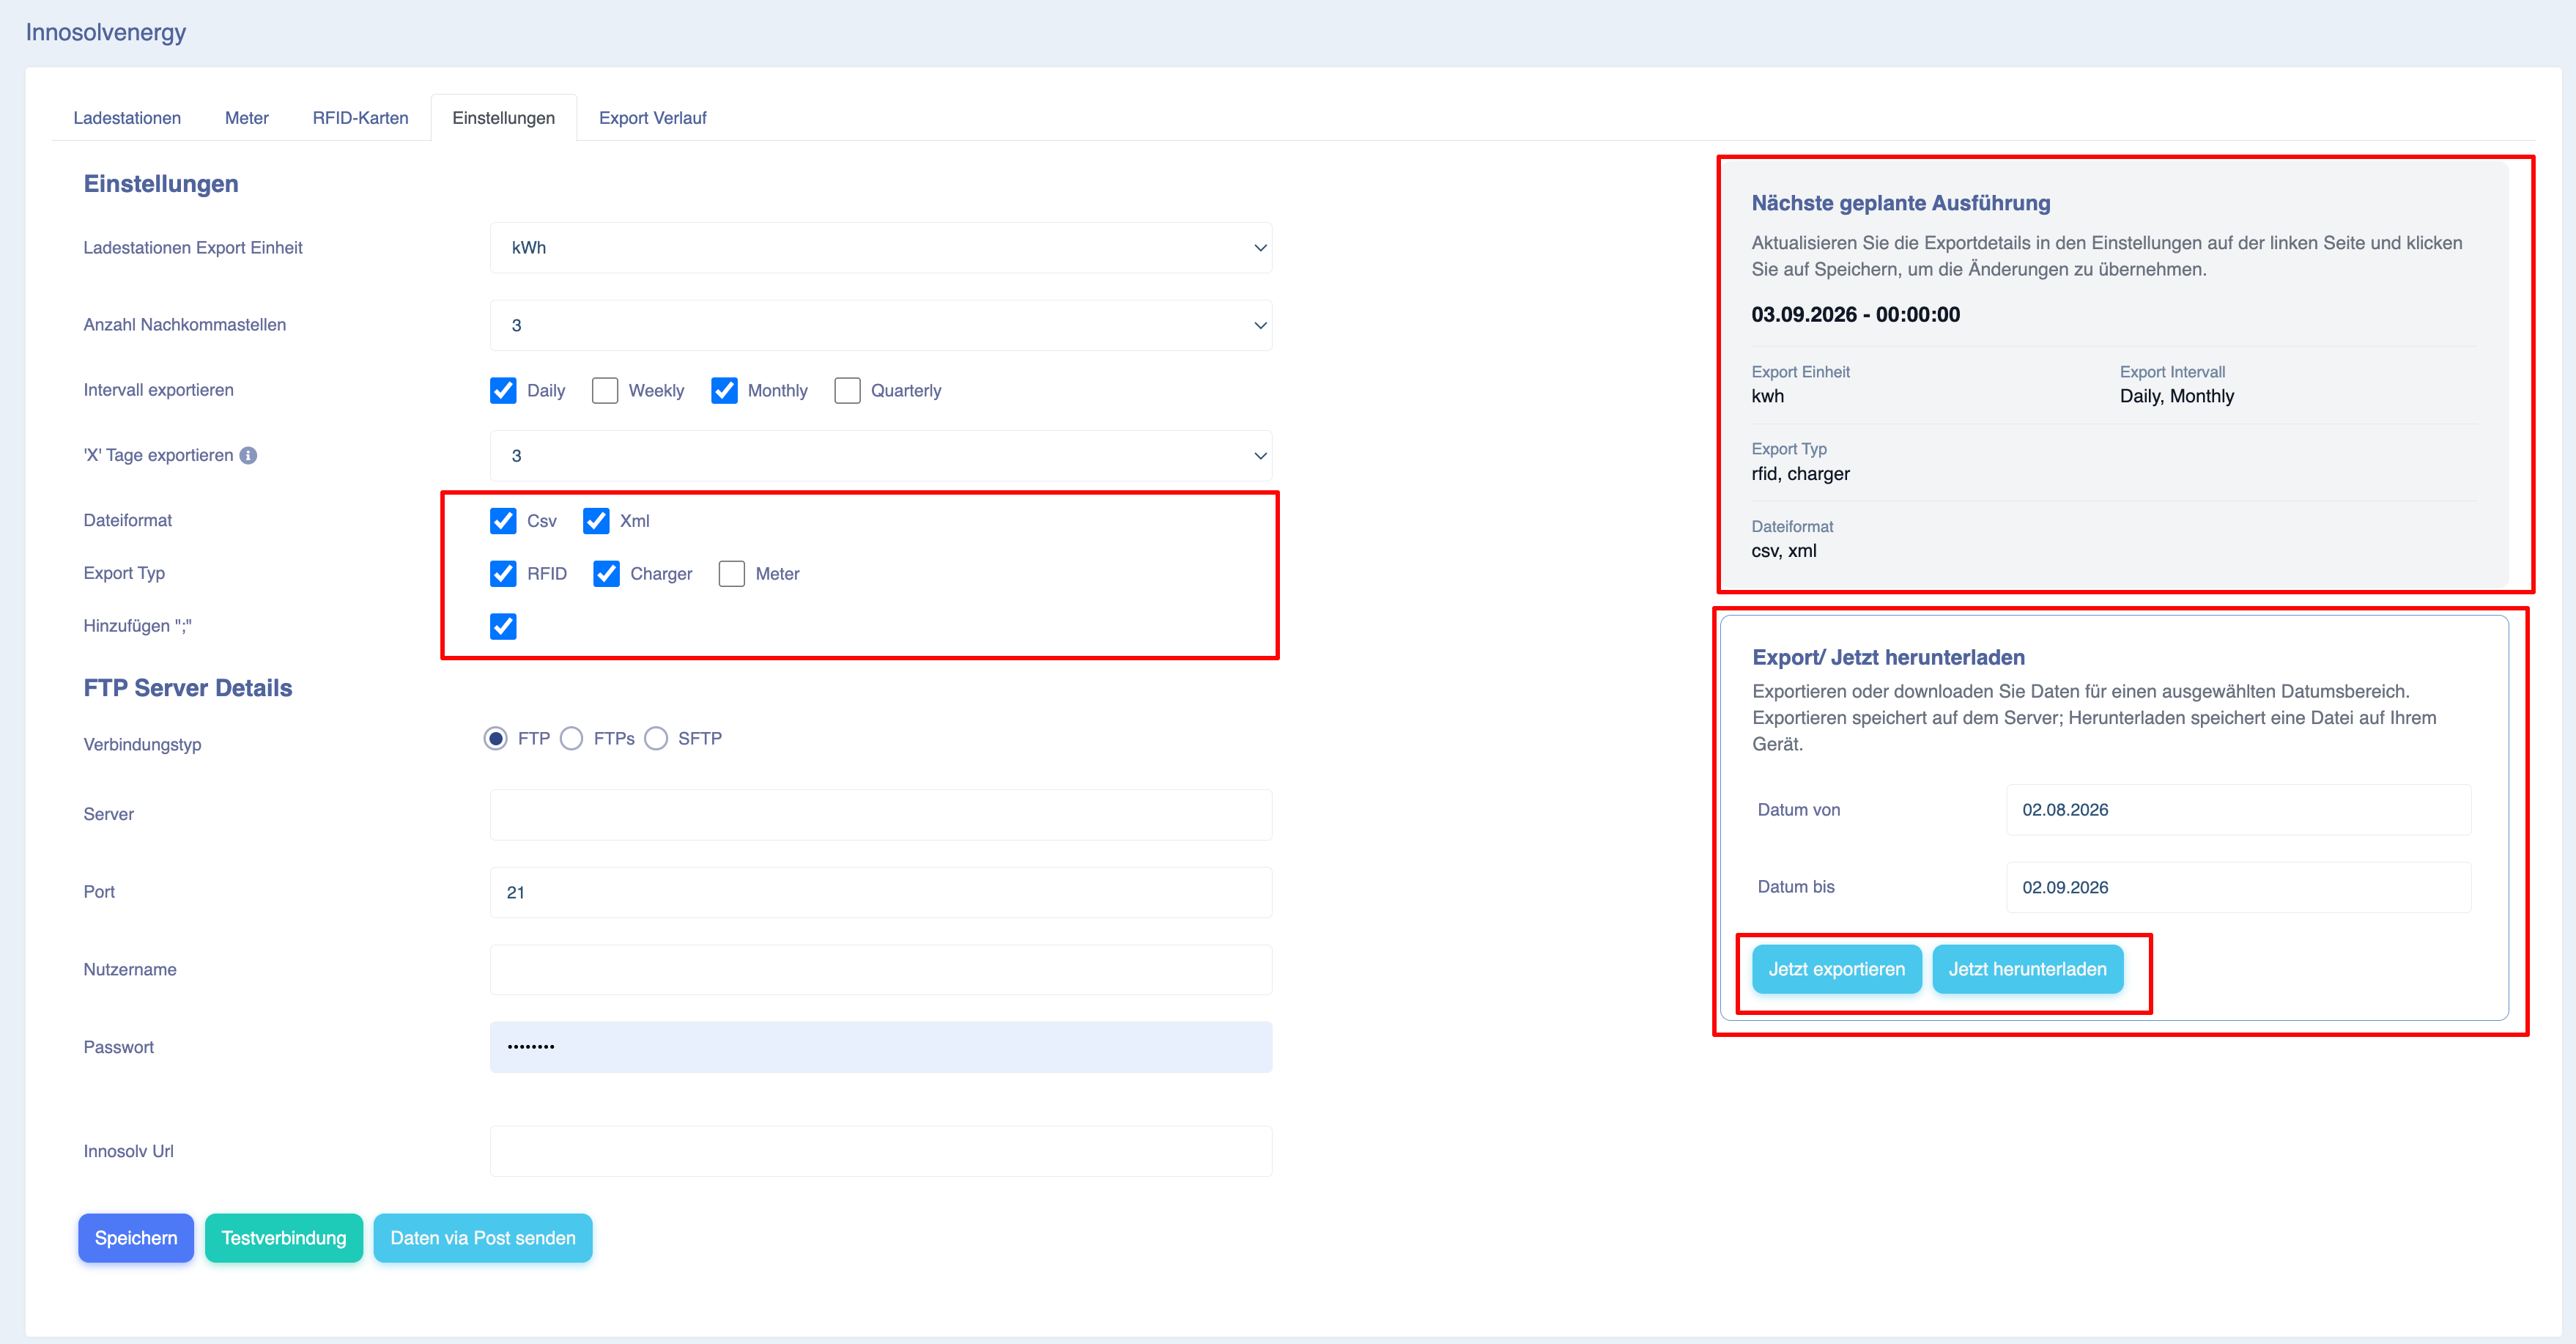
To configure a cron job for automated data export, go to the ‘Settings’ tab in the application
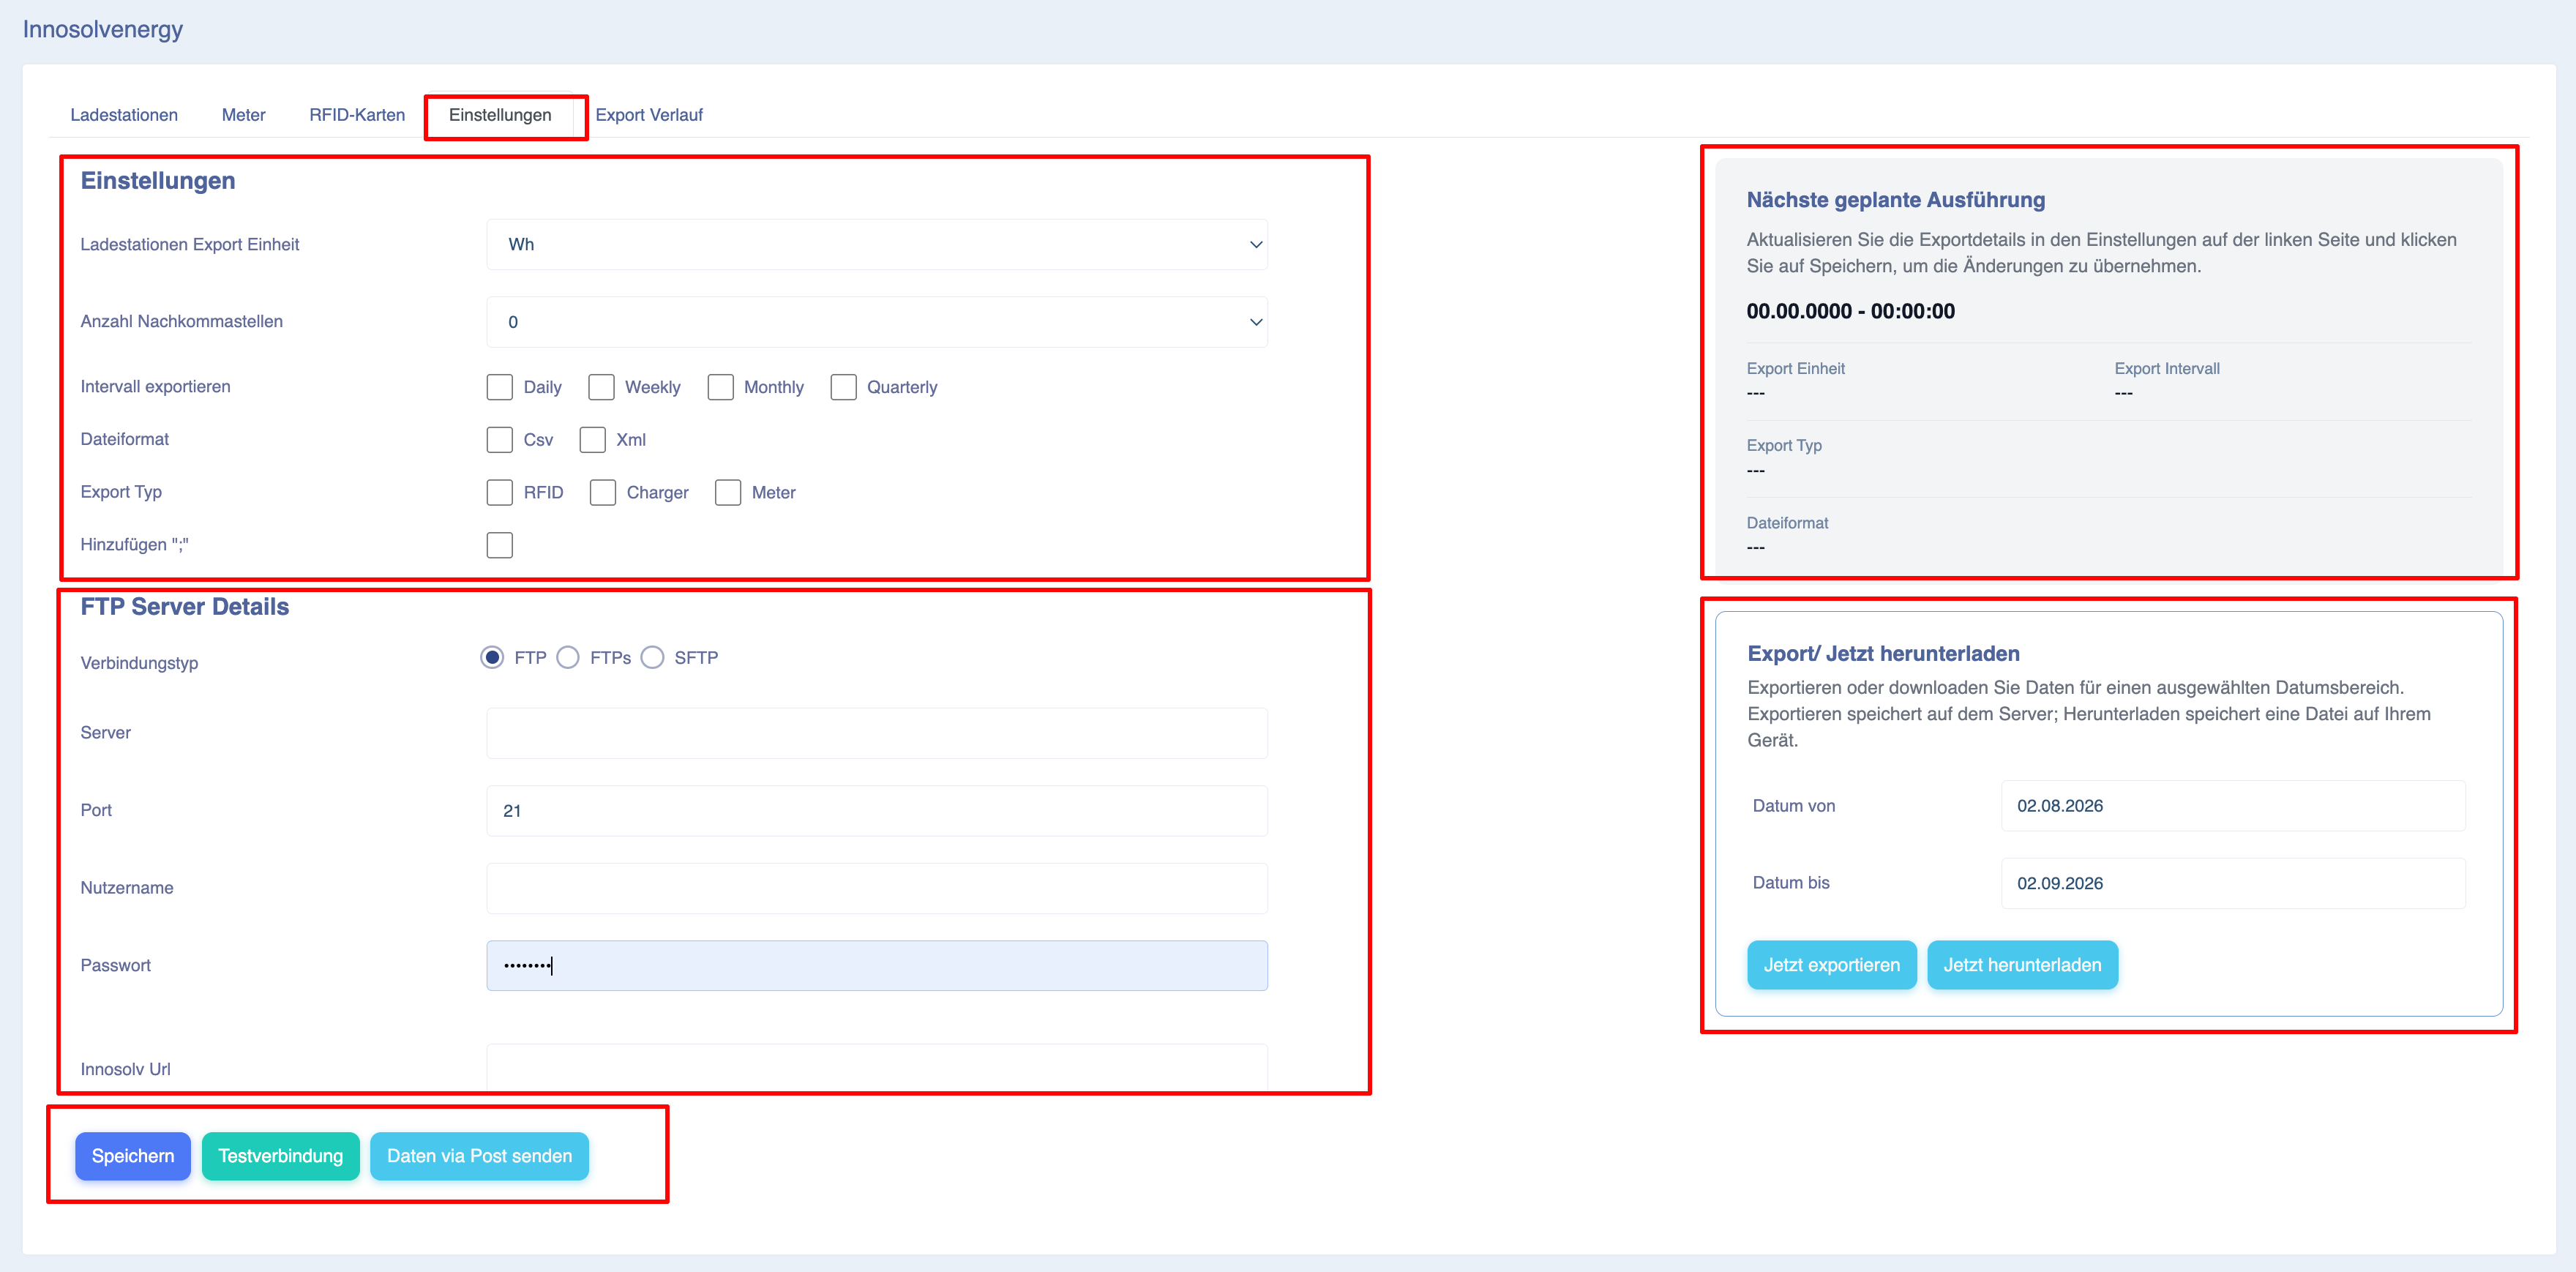
In the ‘Settings’ section, configure the following parameters according to your requirements:
-
Charger export unit: Select the unit for data export – either Wh (watt-hour) or kWh (kilowatt-hour) – depending on your preference.
-
Decimal places: Specify the number of decimal places for the exported data. For example, if you select 4, values such as 2.0190 kWh will be displayed, whilst selecting 2 will display the value 2.01 kWh.
-
Export interval: Specify the time interval at which data is to be generated and stored on the server.
-
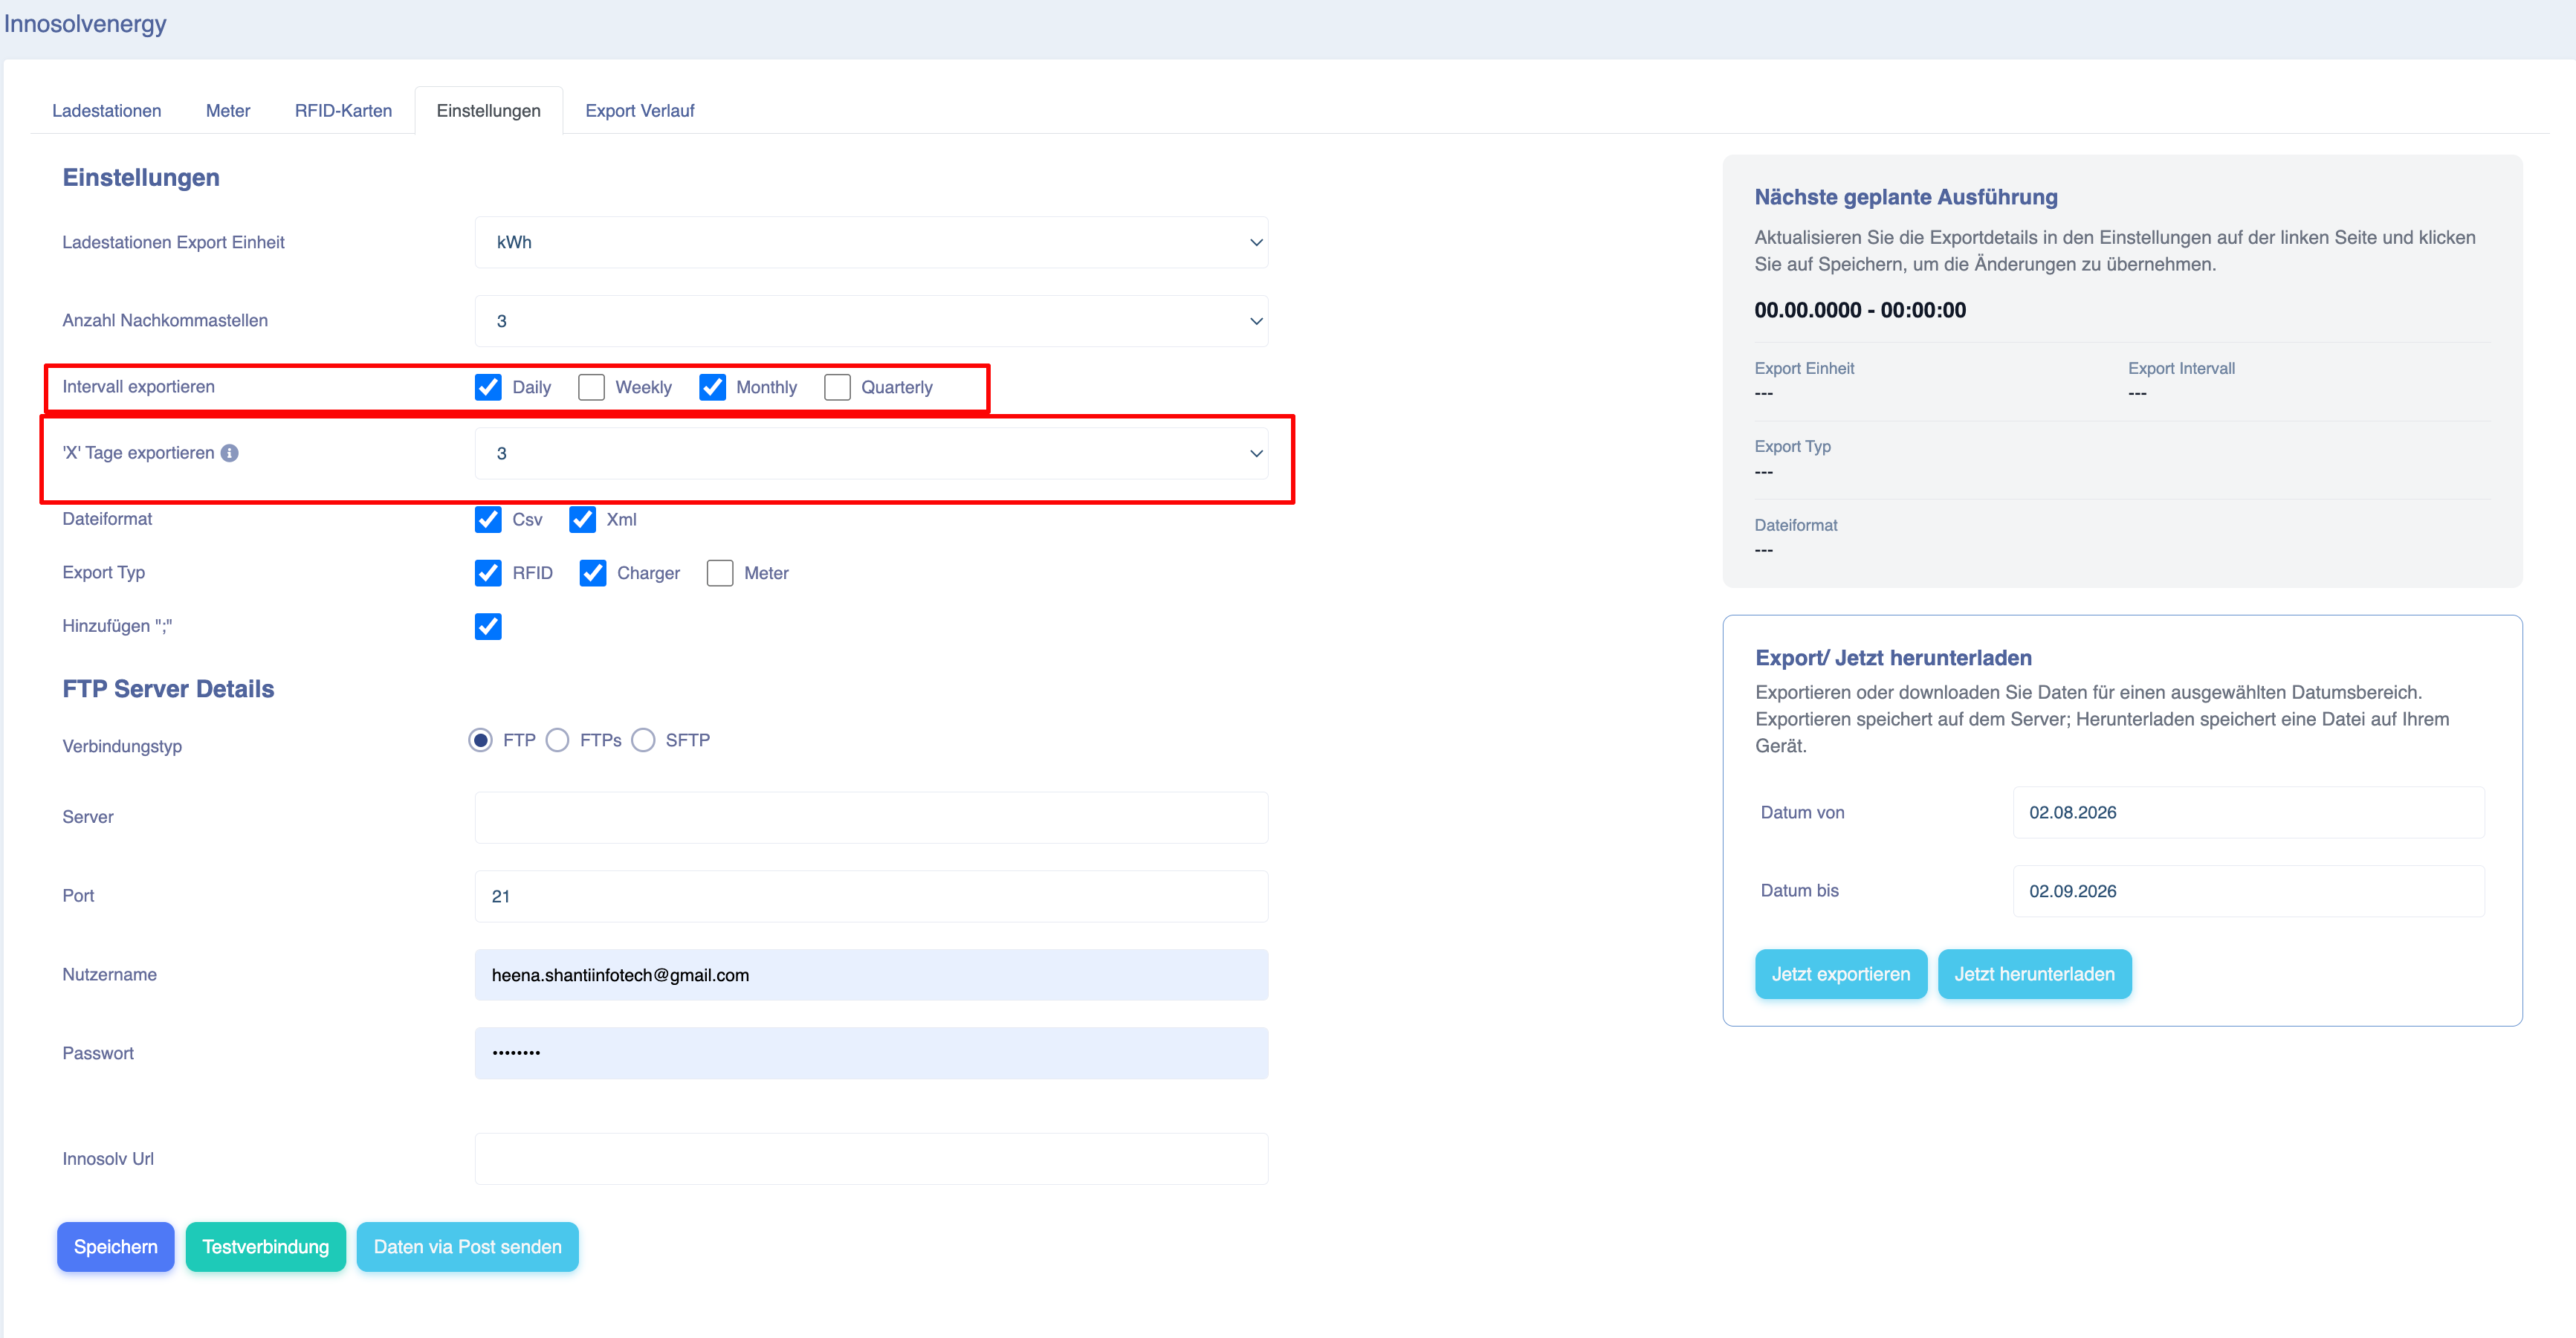
Daily - Export data on daily basis
- Last "x" days - This drop down option gives you option to export data for last "x" days, for example is selected 3 then daily data will be exported for last 3 days
- Weekly - Export data on weekly basis on every Sunday data exported for last week
- Monthly - Every 1st of the month data for last month will be exported
- Quarterly - Data will be exported on quarterly basis for the last 3 months
-
Note - You can setup multiple schedulers at the same time.
-
-
File format: Select the desired export format. You can choose one or more formats, such as CSV or XML.
-
Export type: Select the type of data you wish to export, e.g. RFID, charger or meter. Multiple selections are possible.
-
FTP server details: Enter the login details for the FTP server on which the exported files are to be stored.
To check the FTP configuration, click the ‘Test Connection’ button. The system will indicate, based on the details provided, whether the connection was successful or failed.
Once you have entered all the required details, click the ‘Save’ button. After saving, the cron job details will be displayed on the right-hand side of the ‘Settings’ page.
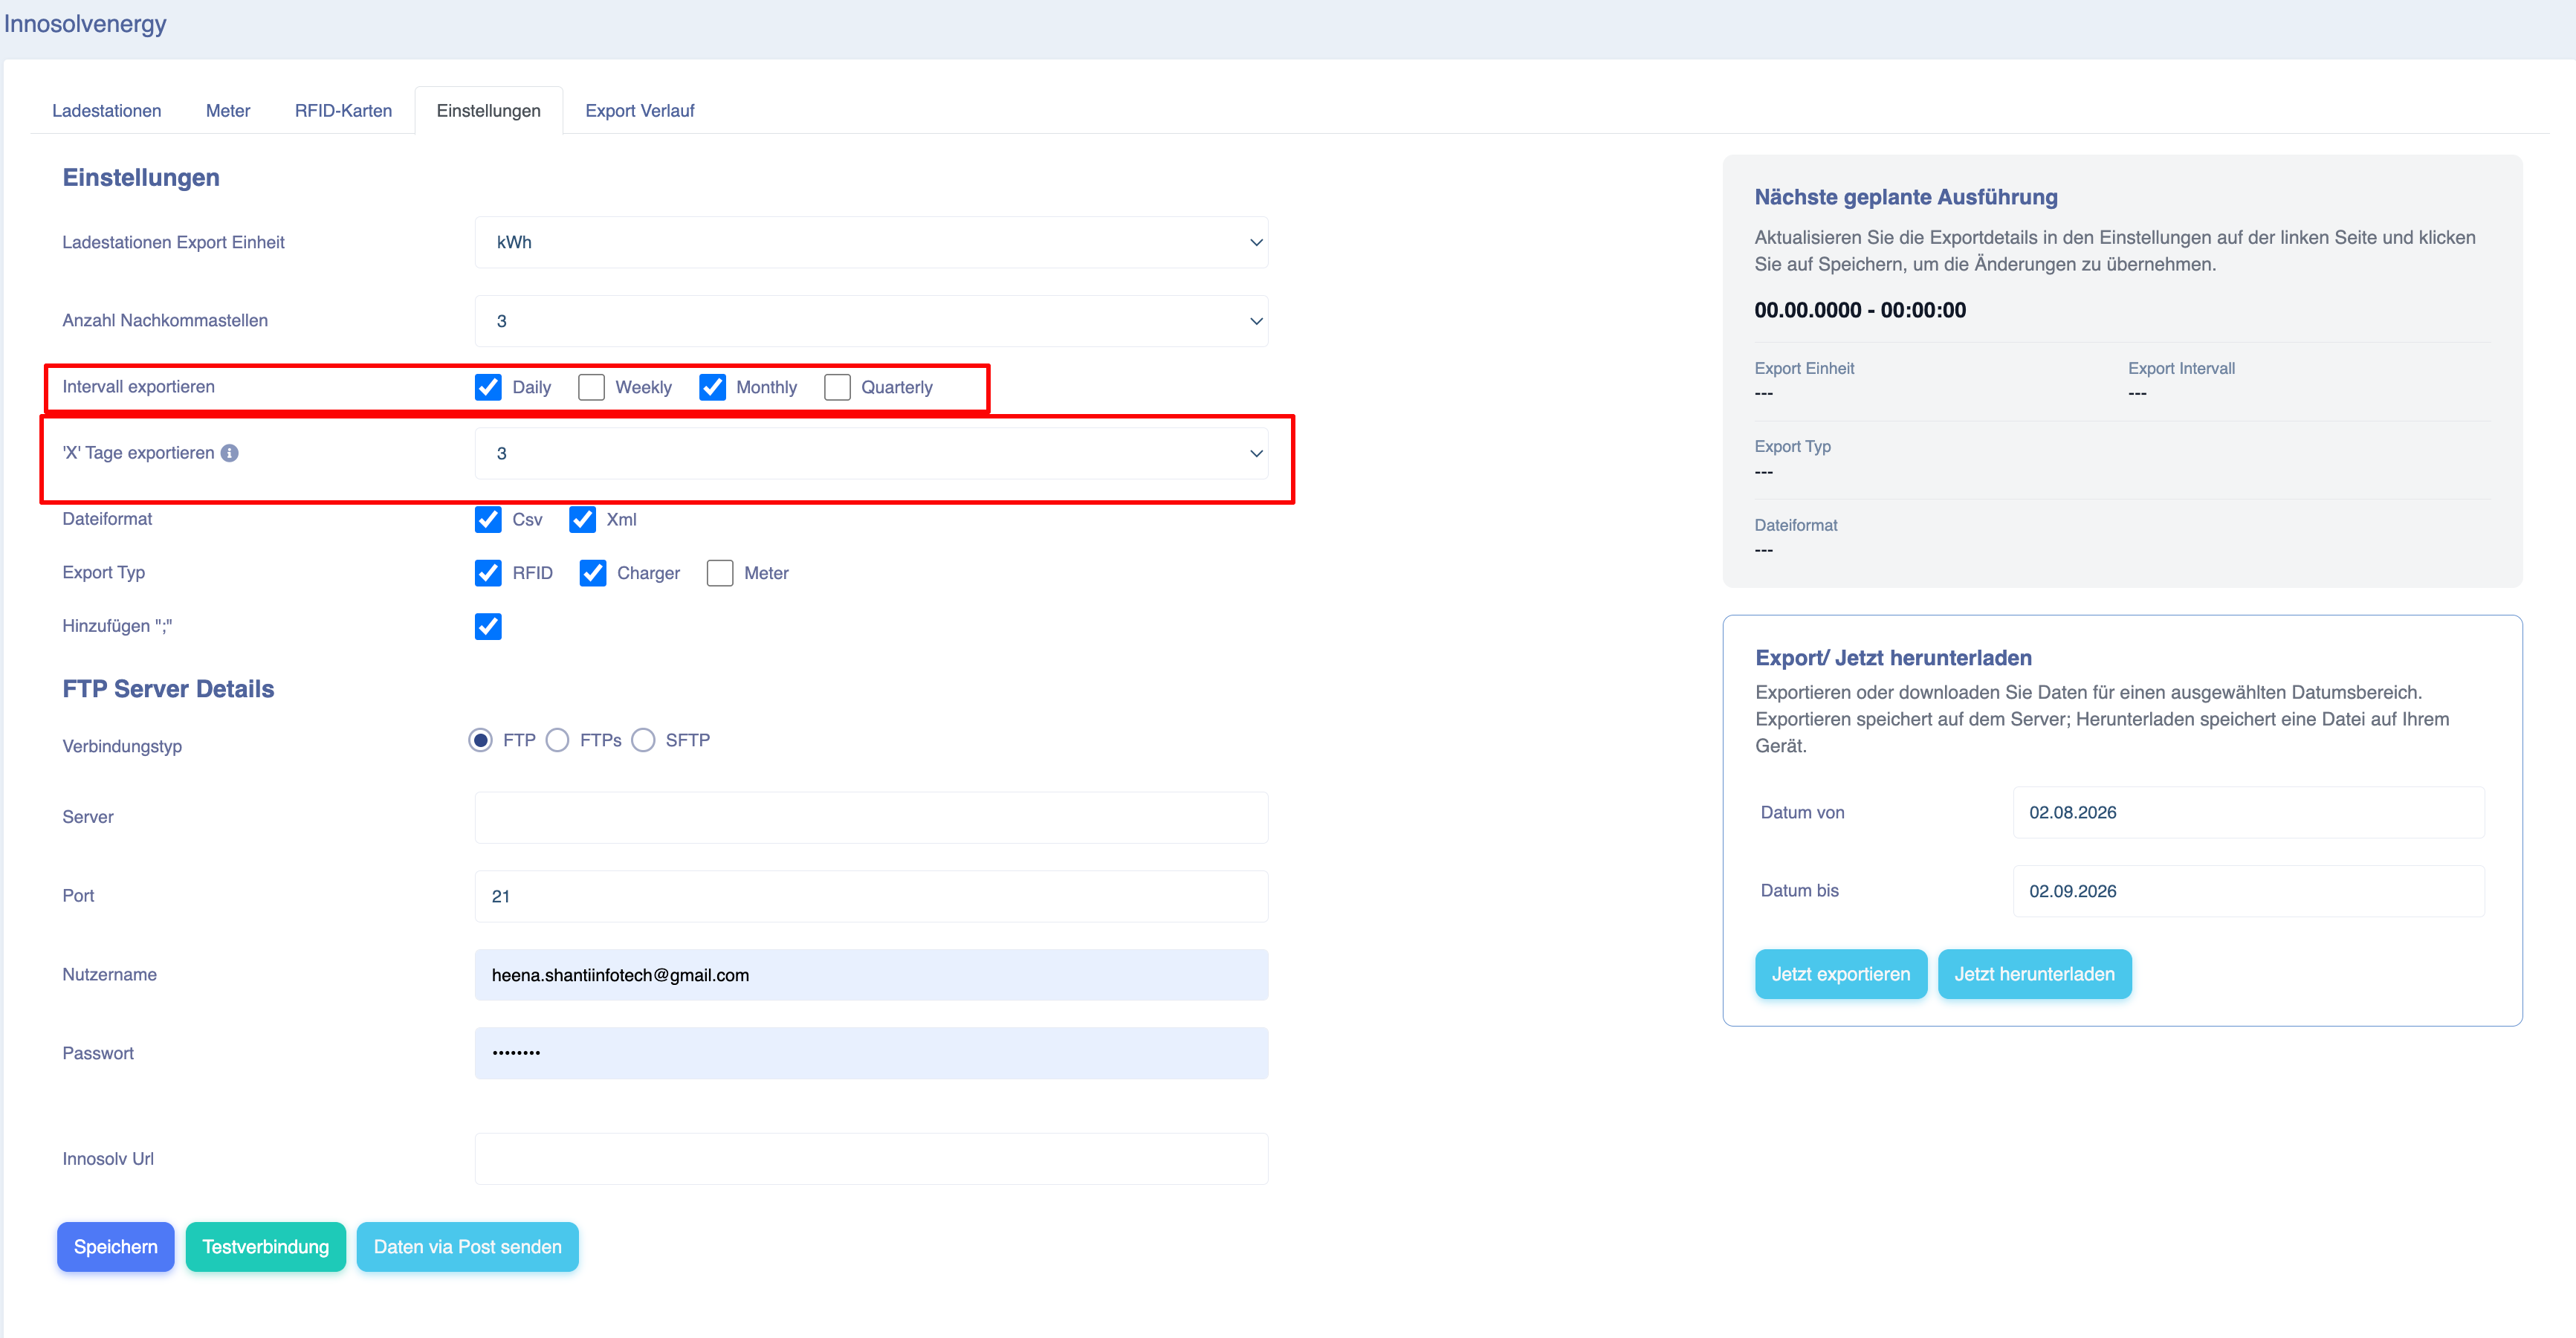
‘Send data via POST’ option – To use this feature, enter a valid POST endpoint in the ‘Innosolv URL’ field and click the ‘Send’ button. Once submitted, all data will be uploaded to the specified endpoint.
To download reports manually, navigate to the bottom right-hand section of the ‘Settings’ tab.
Select the ‘Date from’ and ‘Date to’ fields to specify the desired date range, then click the ‘Download now’ button.
When clicking on download you will asked to enter the email to send the files download link :
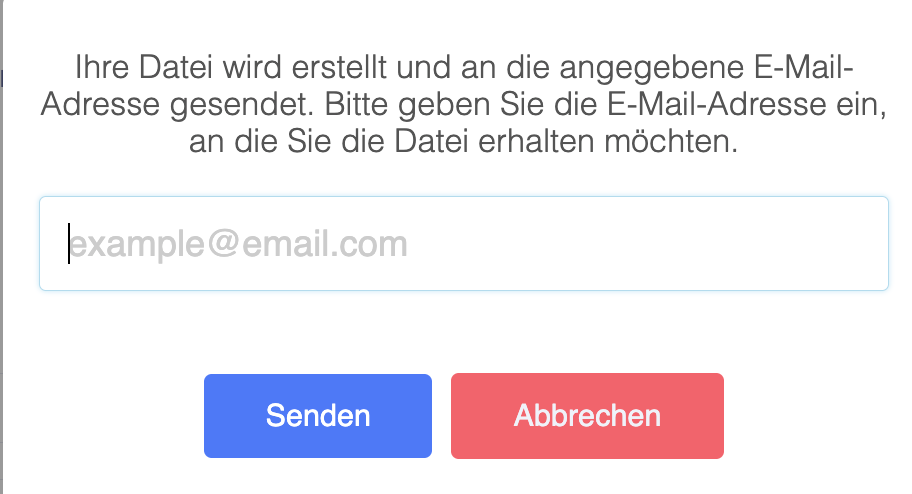
Once you have selected the date range, a pop-up window will appear asking you to confirm the email address. Enter the email address to which you wish to send the report, then click the ‘Send’ button.
Depending on the volume of data, the report will be sent to the specified email address within a few minutes.
Note: Currently, reports can only be downloaded for a maximum period of 3 months
Note : We highly recommend to download files of short intervals to receive them quickly
Export History
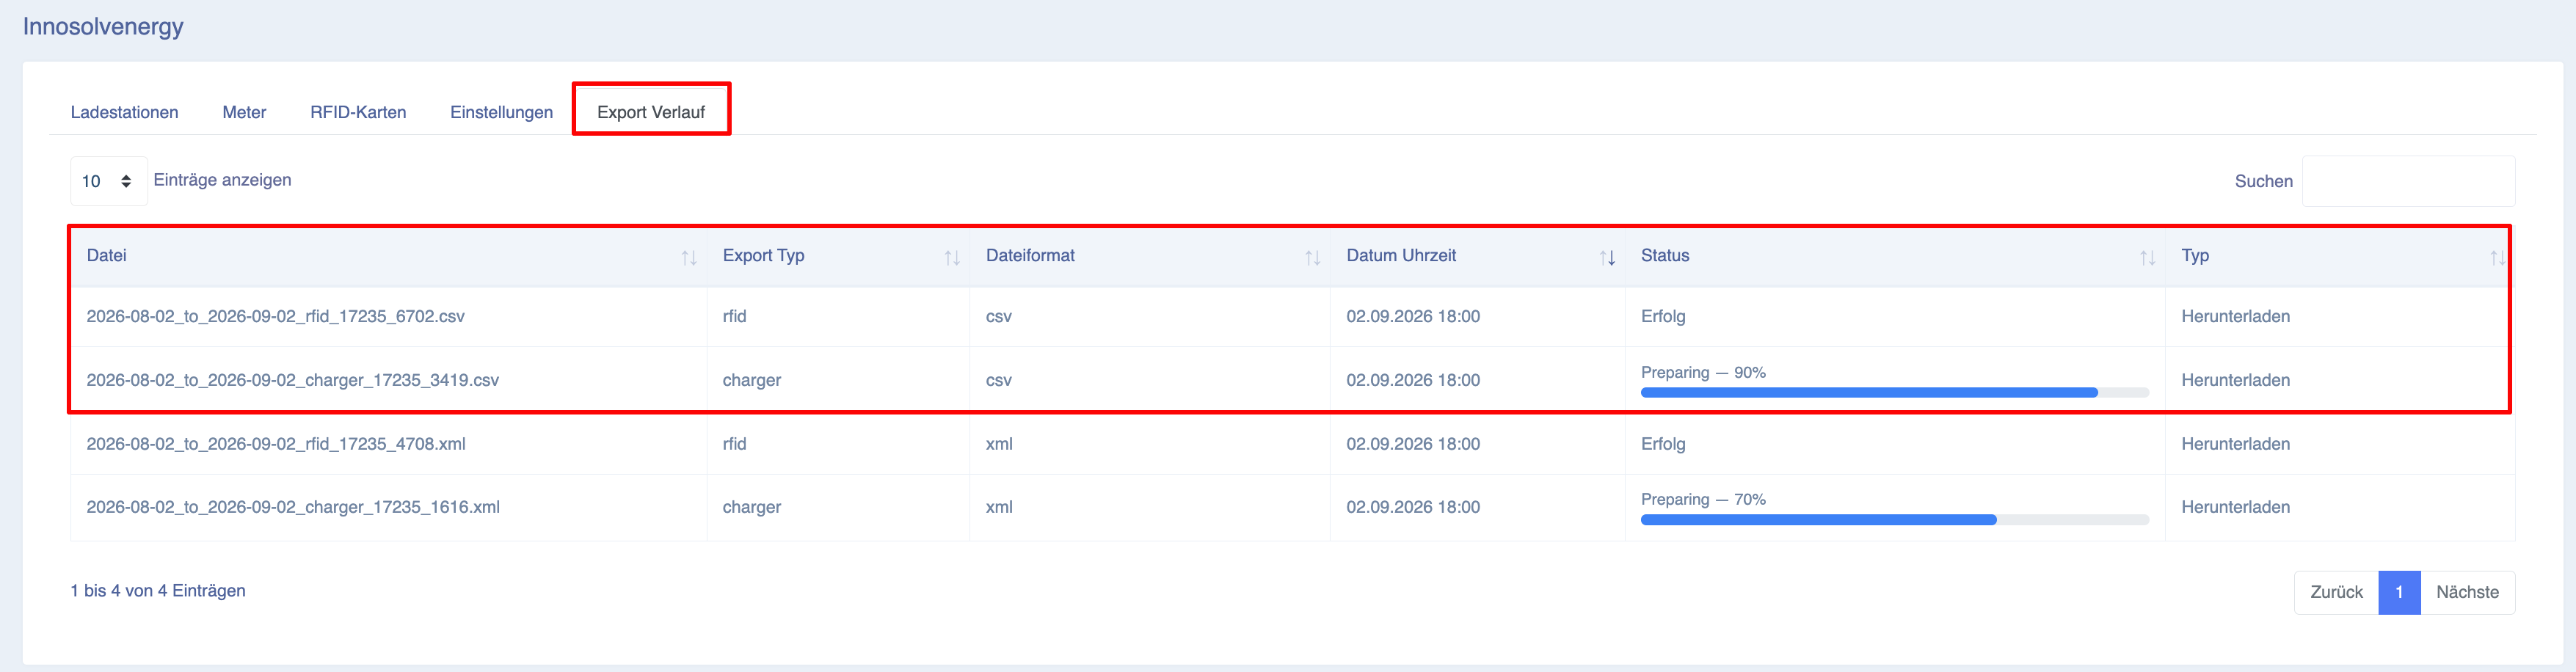
To view details of cron jobs and the export history, navigate to the ‘Export History’ tab.
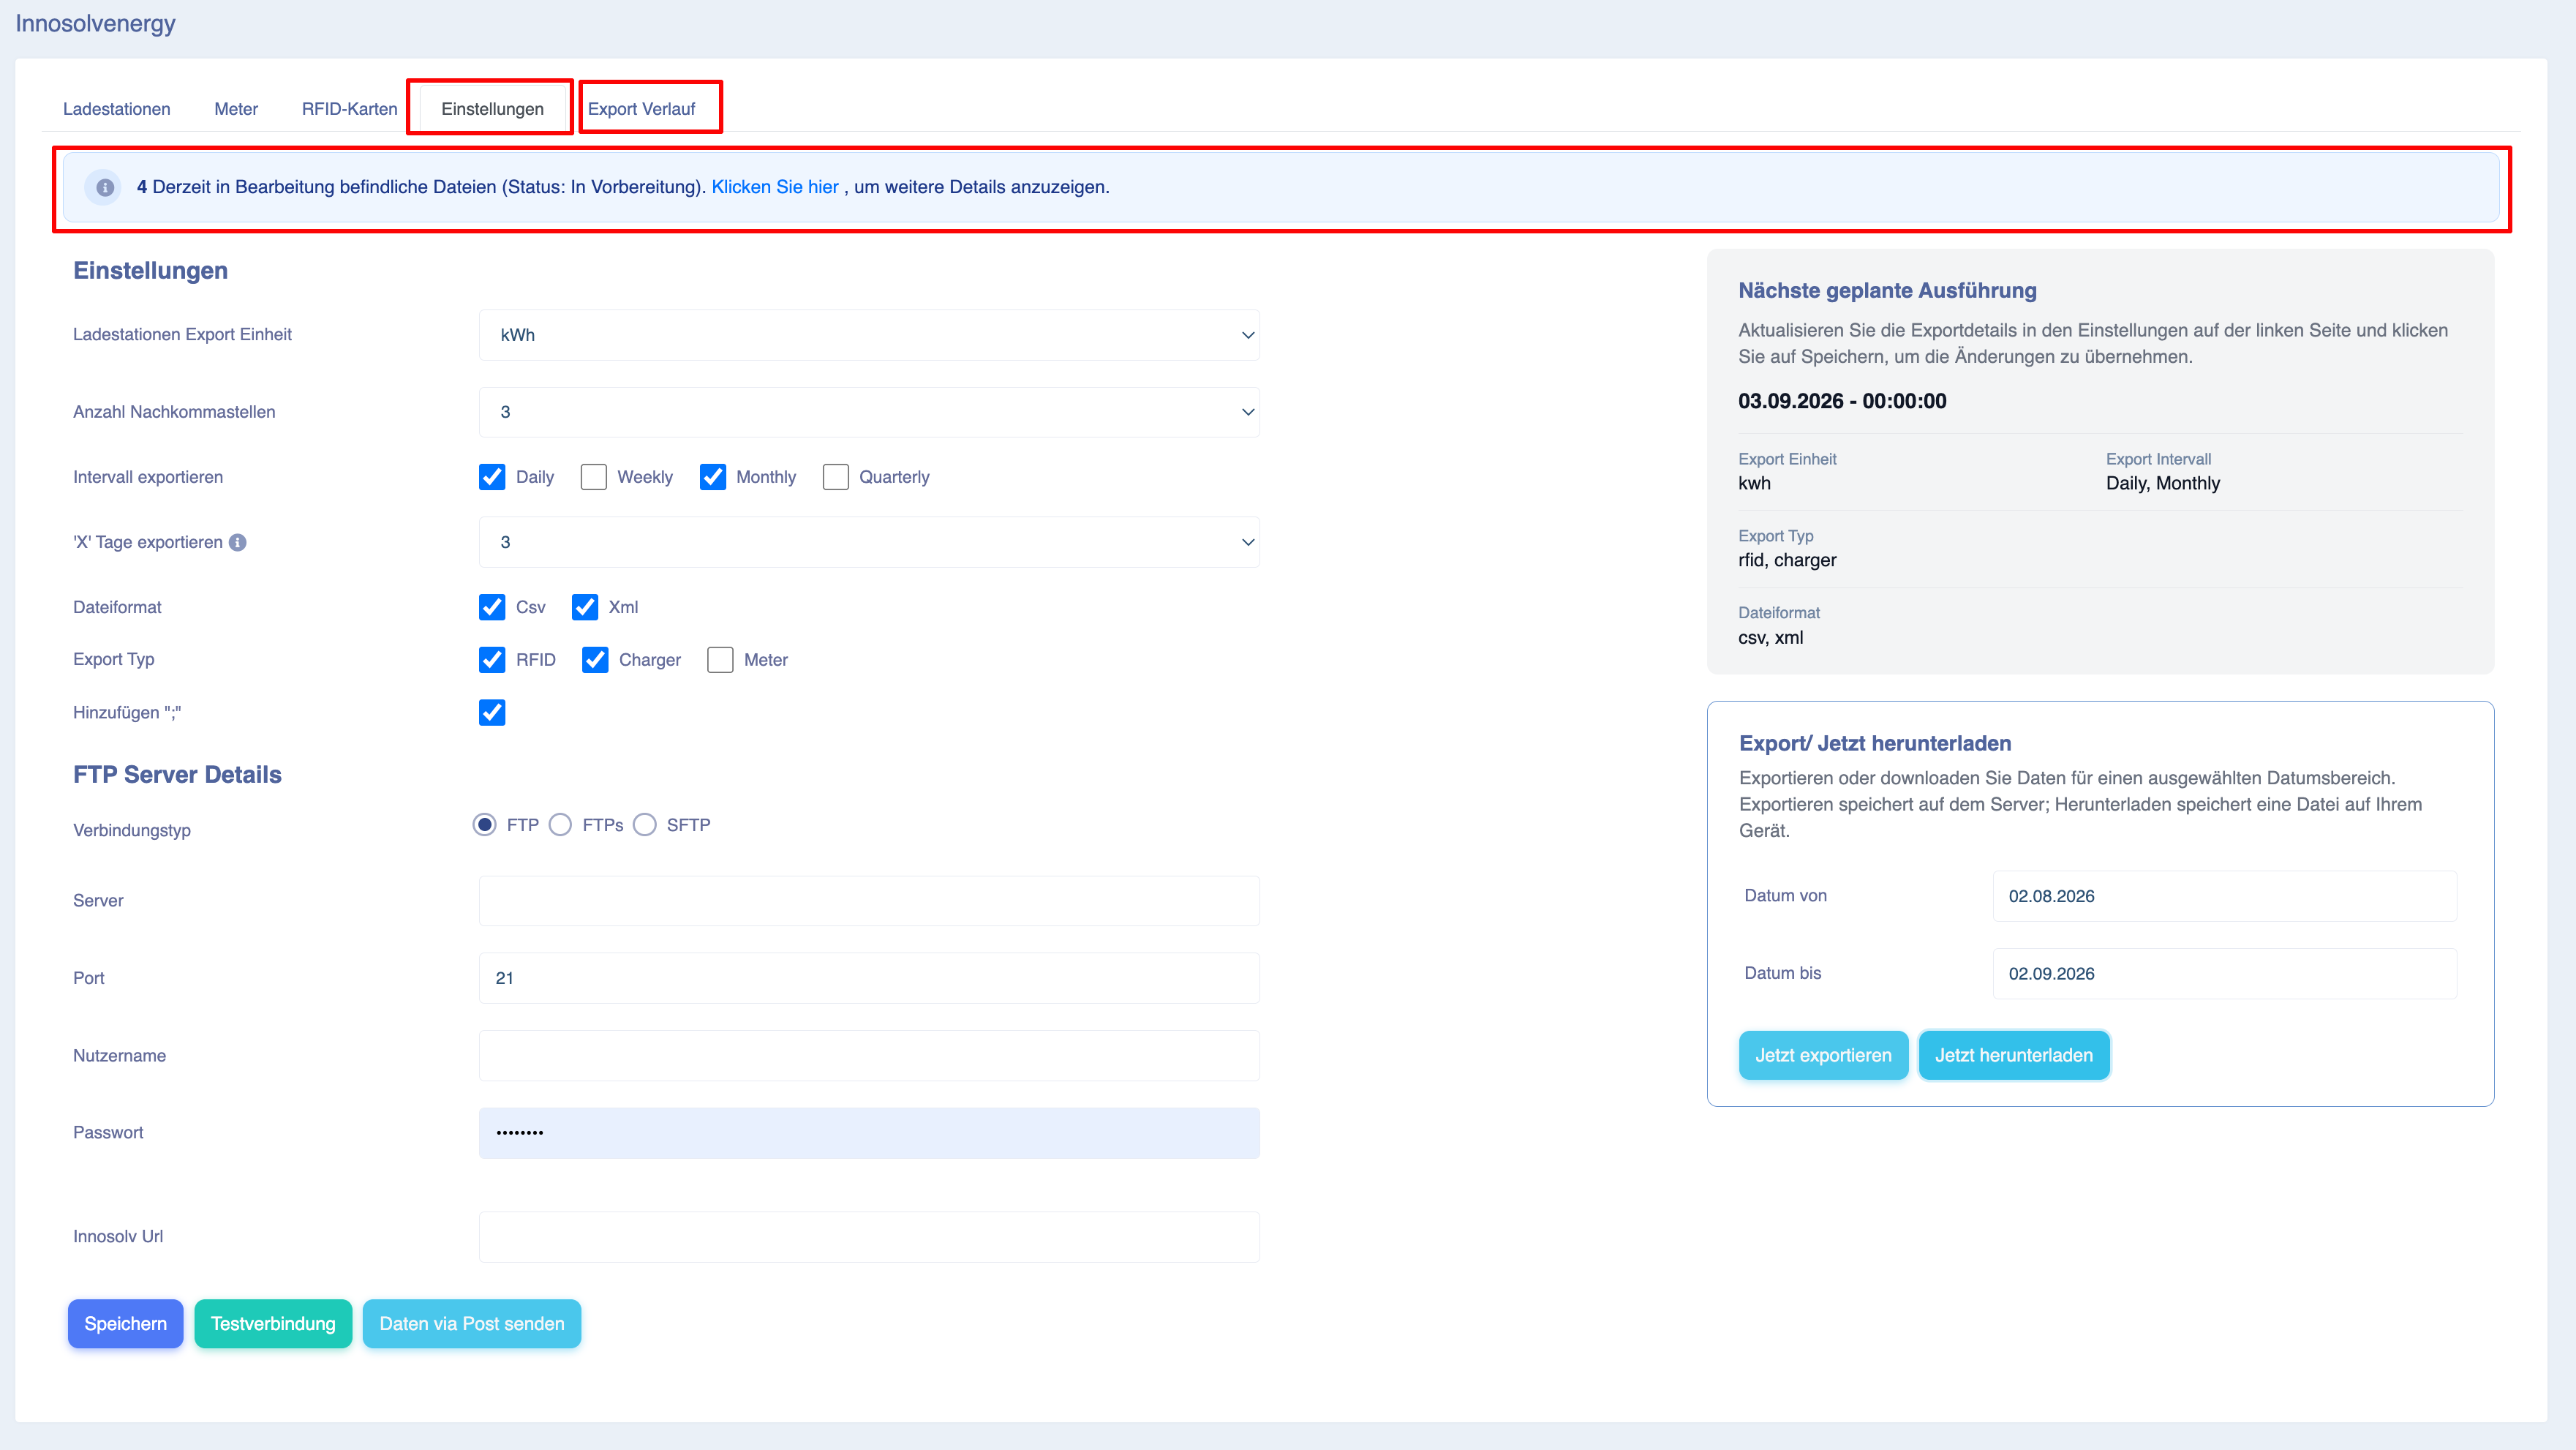
This section displays detailed logs, including:
-
Date and time of the export
- File name
-
File format
-
Export type
-
Export status