Enable / disable public charging
Enable public charging
You can enable public charging for a charging point in three places:
- In the charging point list
- On the charging point’s details page
-
Via a location (property)
Option 1 – Enable via the charging point list
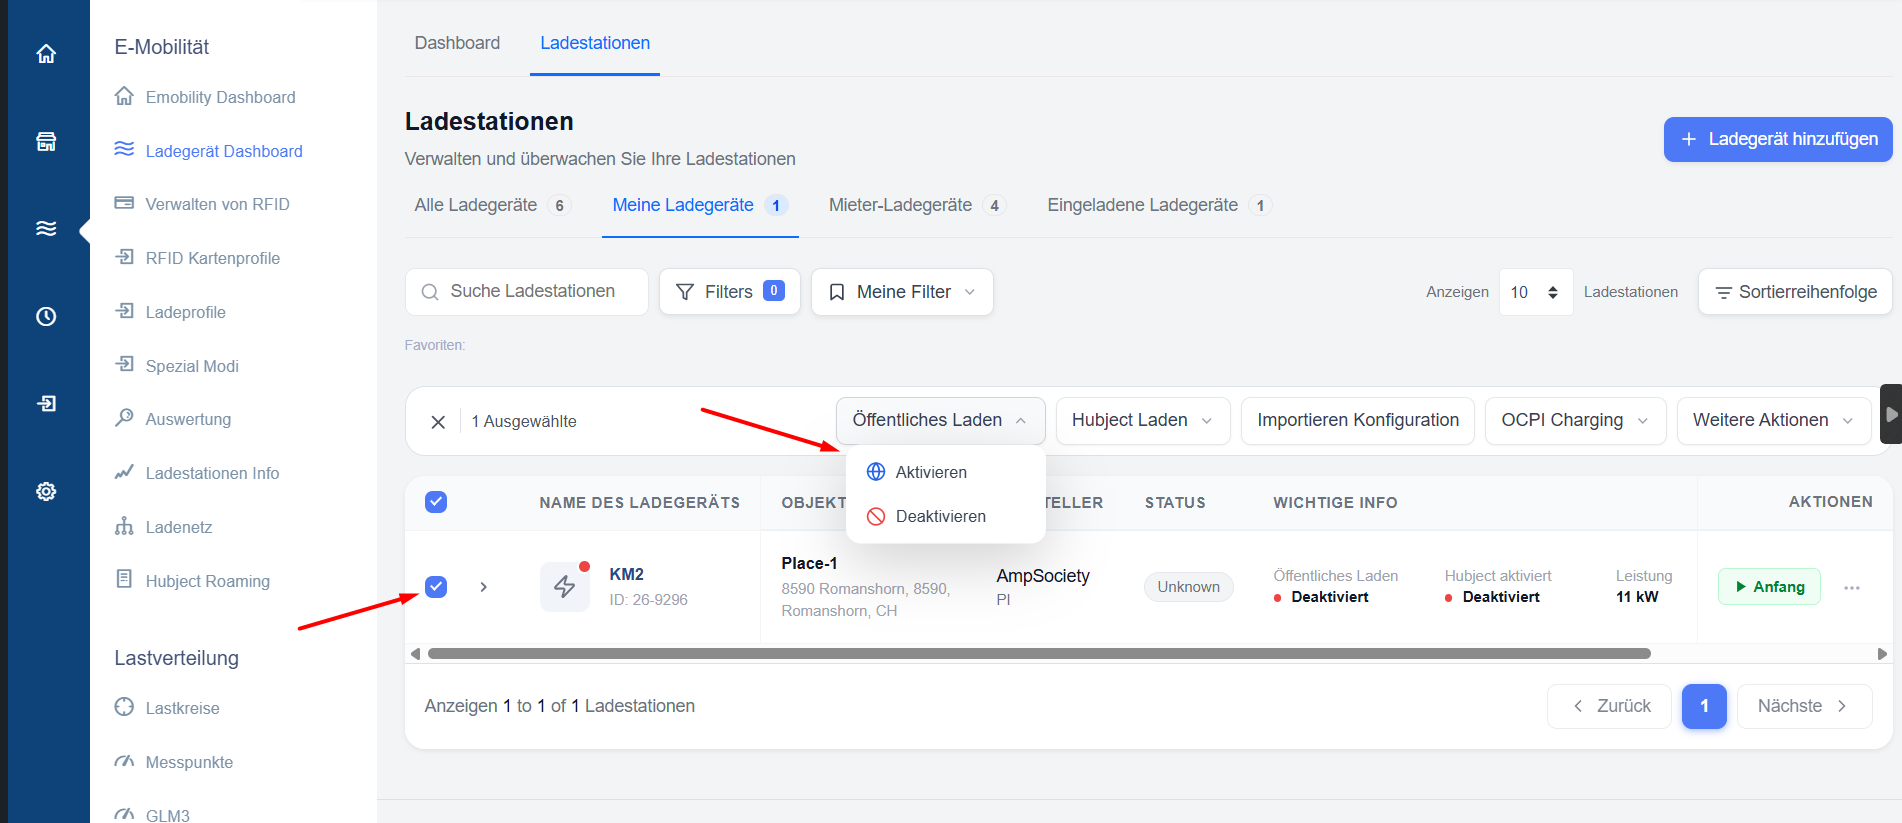
- Go to E-mobility → Charging Point Dashboard → Charging Points.
- Open the ‘My Chargers’ tab.
- Select the charging points you wish to activate by ticking the checkbox.
- Click the ‘Public Charging’ button in the action bar.
- Select ‘Activate’.
Question regarding VAT liability
A pop-up window will appear: “Are you liable for VAT?”
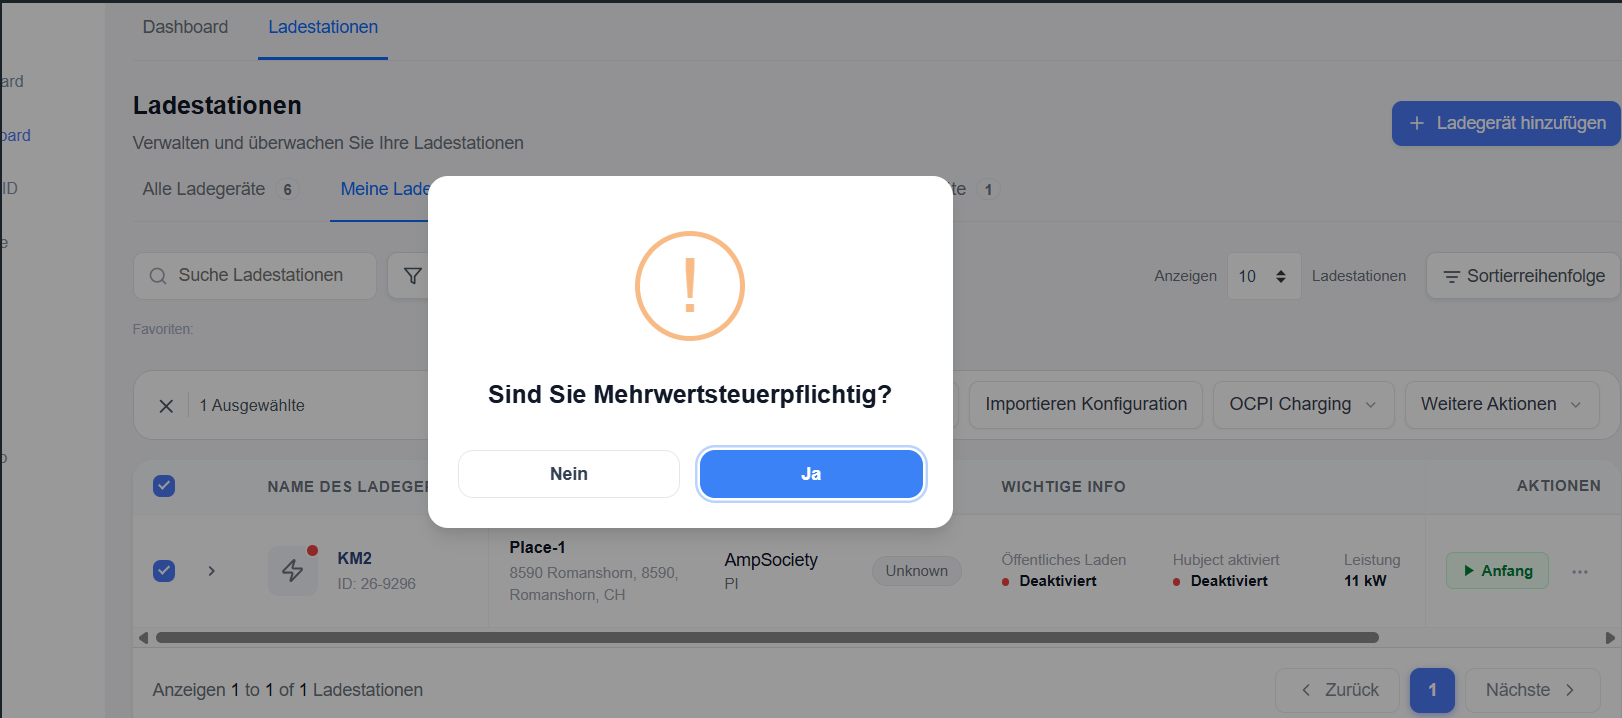
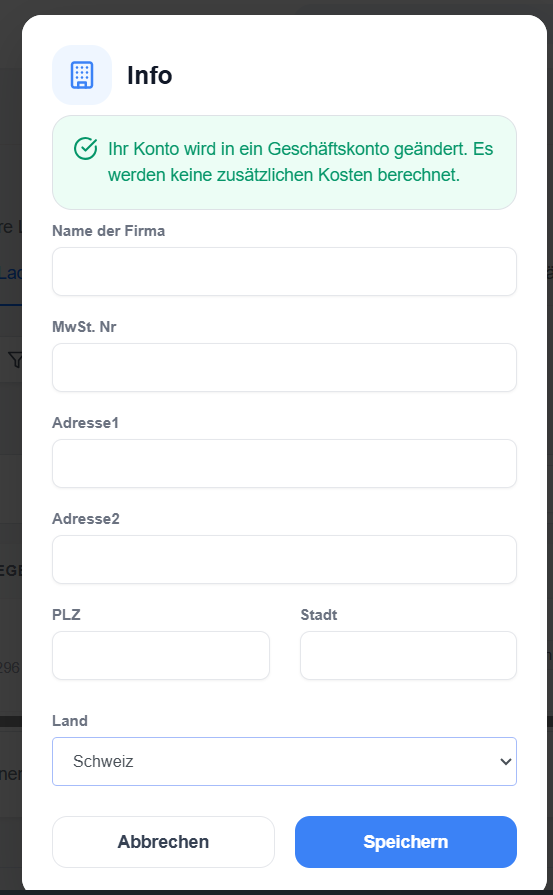
- Click ‘Yes’
→ A form will open in which you must enter the following:- Company name
- VAT number
- Address (Address 1, Address 2, postcode, town/city, country)
This information will be saved for future use.
- Click on “No”
→ A pop-up window will open in which you must enter the following:- Telephone number (hotline)
- Email
This information will also be stored for future use.
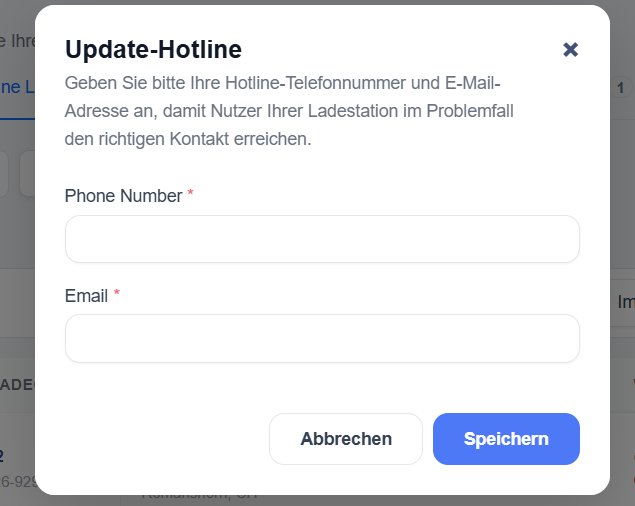
Note: The pop-up window for company name/VAT number or hotline only appears if this information has not already been entered.
Assign public charging profile
Once the details have been saved, the “Assign charging profile” dialogue box will open.
- Select the public charging profile for the charging point (you can also apply the same profile to several selected charging points).
- Click ‘Continue’.
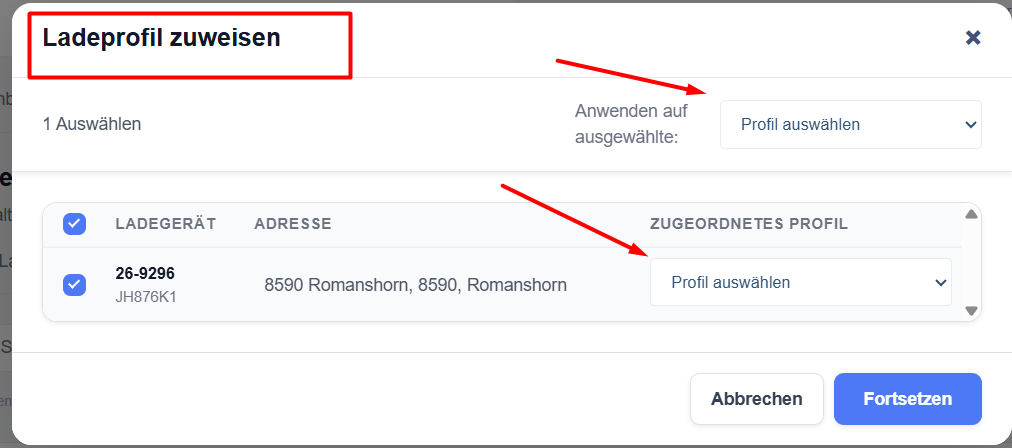
The profile defines the pricing structure that applies exclusively to public charging.
Option 2 – Enable via the ‘Charger Details’ page
- Open the relevant charging point.
- In the ‘Actions’ section on the right-hand side, toggle the ‘Public Charging’ switch to ‘On’.
- The same procedure as above then follows:
- Question regarding VAT liability (Yes / No)
- Company details/VAT information or helpline details (if not already saved)
- Assignment of a public charging profile
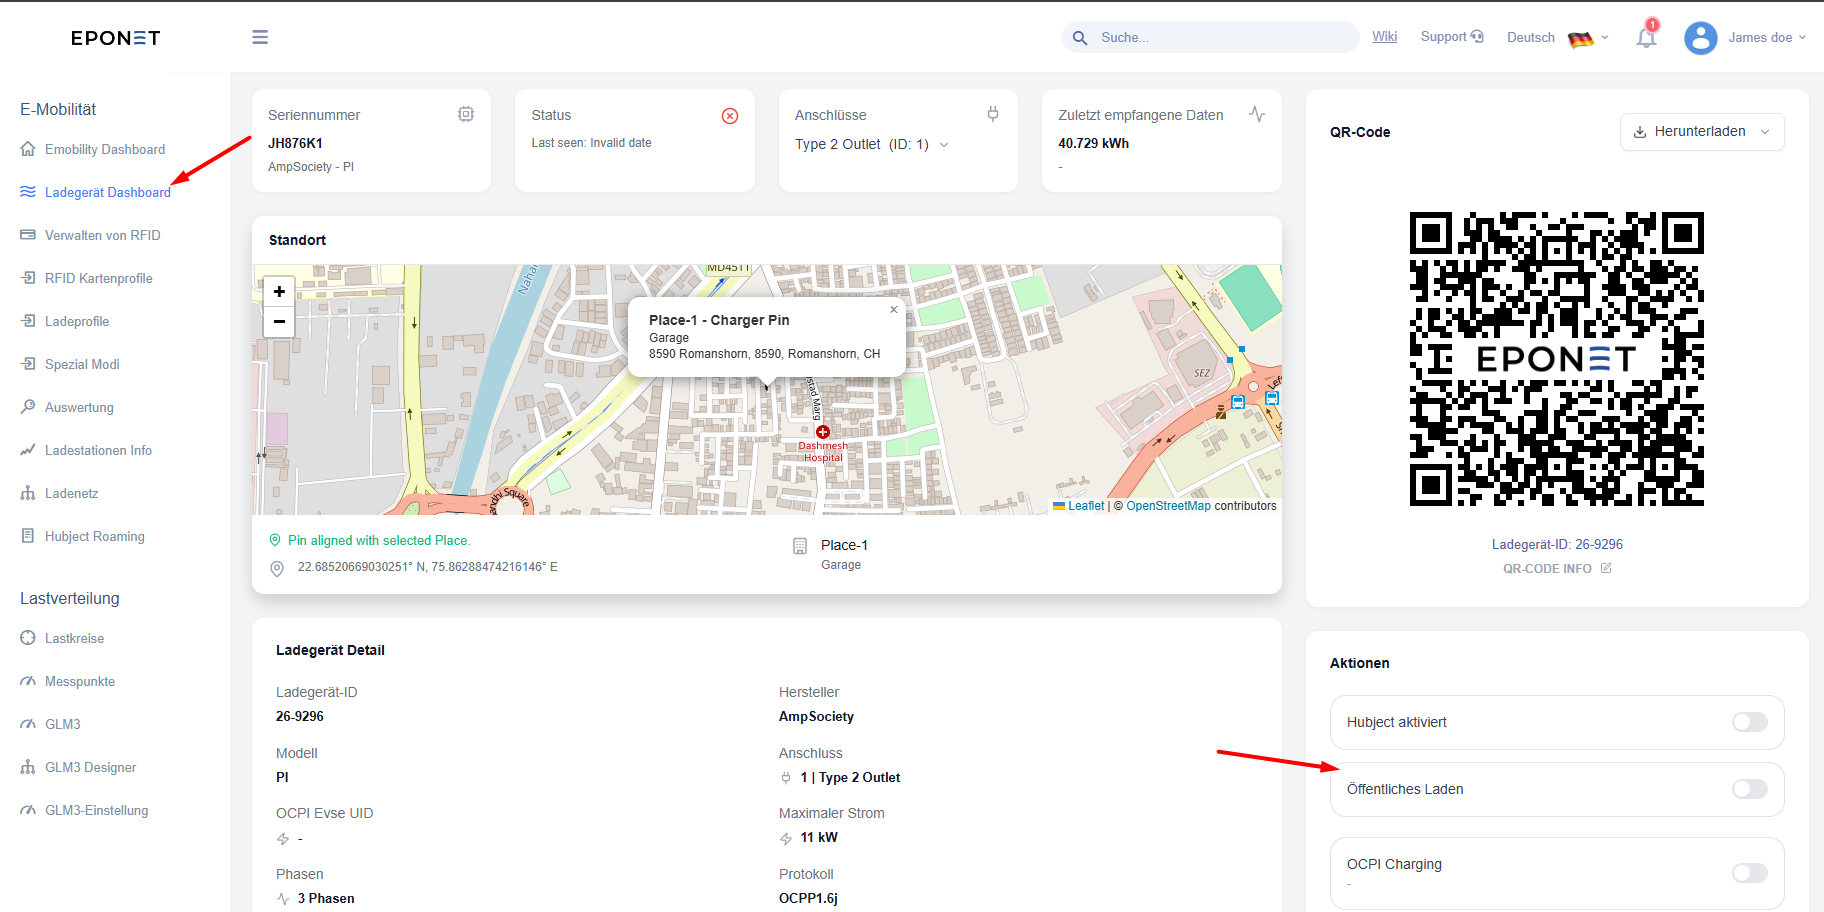
Once ‘Public Charging’ has been activated
- In the charging point list, the status under ‘Public Charging’ changes to ‘activated’ (green).
- On the charging station’s details page, the ‘Public Charging’ toggle is enabled.
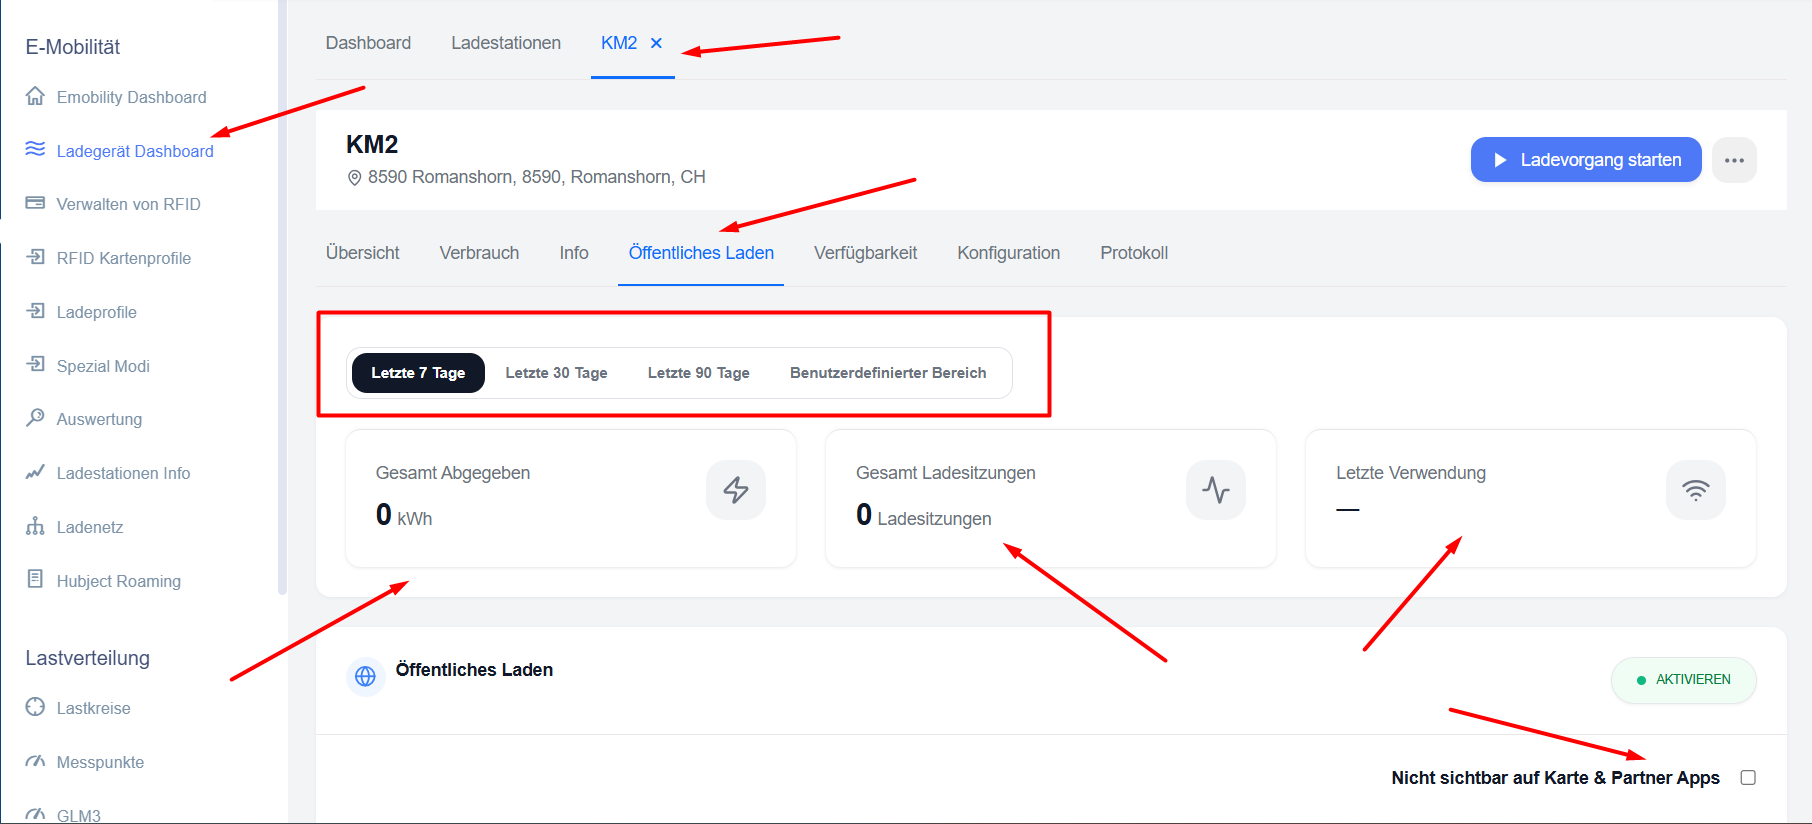
- A new ‘Public Charging’ tab appears in the charging point details.
What you can do on the ‘Public Charging’ tab
- View usage statistics for:
- the last 7 days
- the last 30 days
- the last 90 days
- Custom time period
- See:
- Total energy supplied (total energy supplied in kWh)
- Total number of charging sessions
- Last usage
Select profile
You can view the currently assigned public profile or change it at any time using the drop-down menu.
Once you have selected a new profile, click ‘Save’ at the bottom to apply the change.
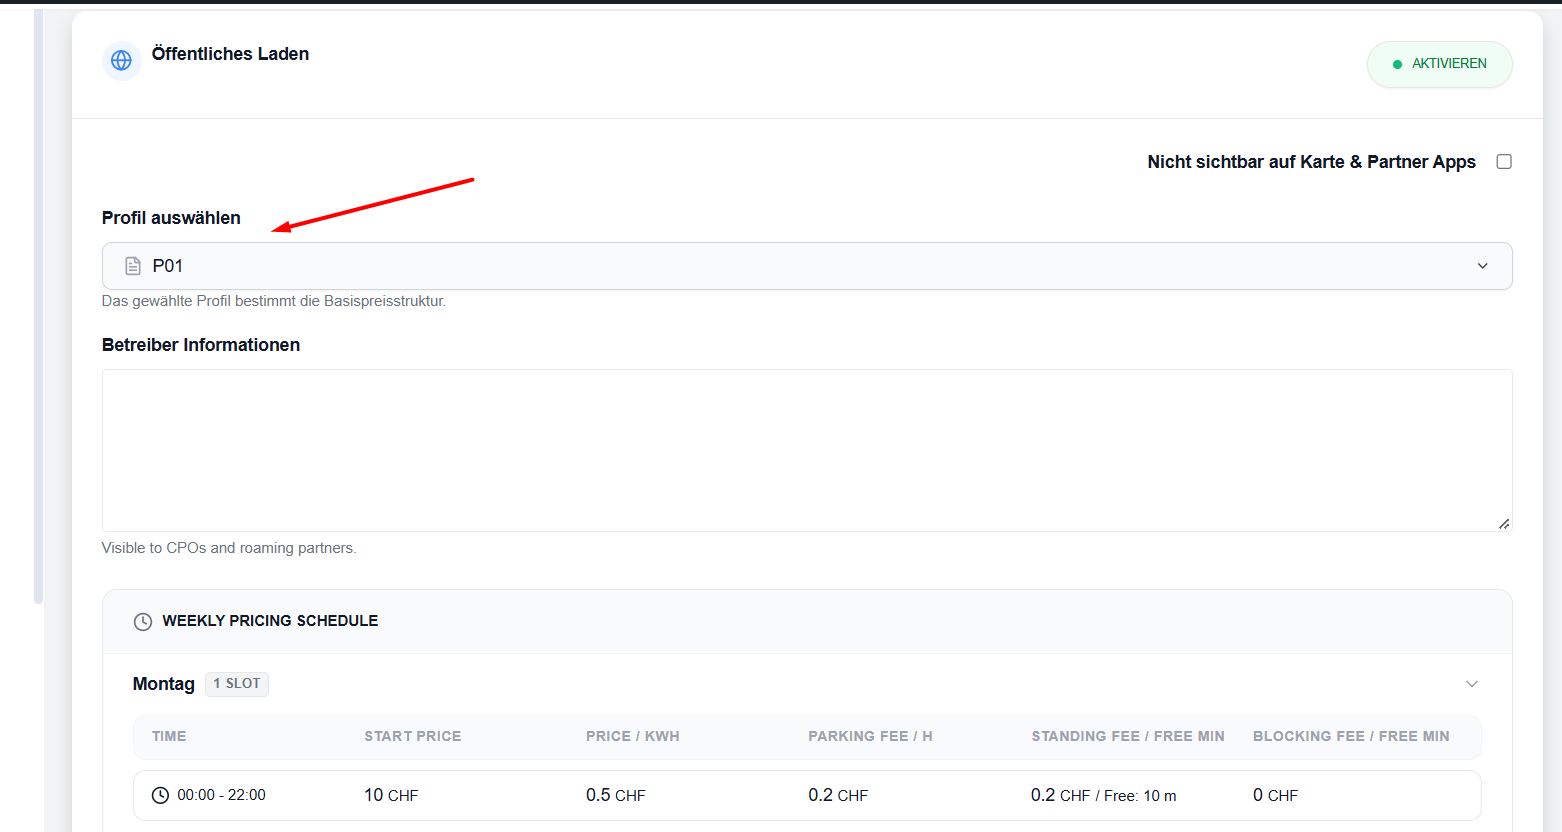
The selected profile determines the basic pricing structure (start-up charge, price per kWh, parking fee, standing charge, blocking fee, etc.) used for public charging sessions.
‘Not visible on map & partner apps’ tick box (default = disabled) – If you tick this box, the charging point will not be visible on the public map or in partner apps (except to the owner and invited users).
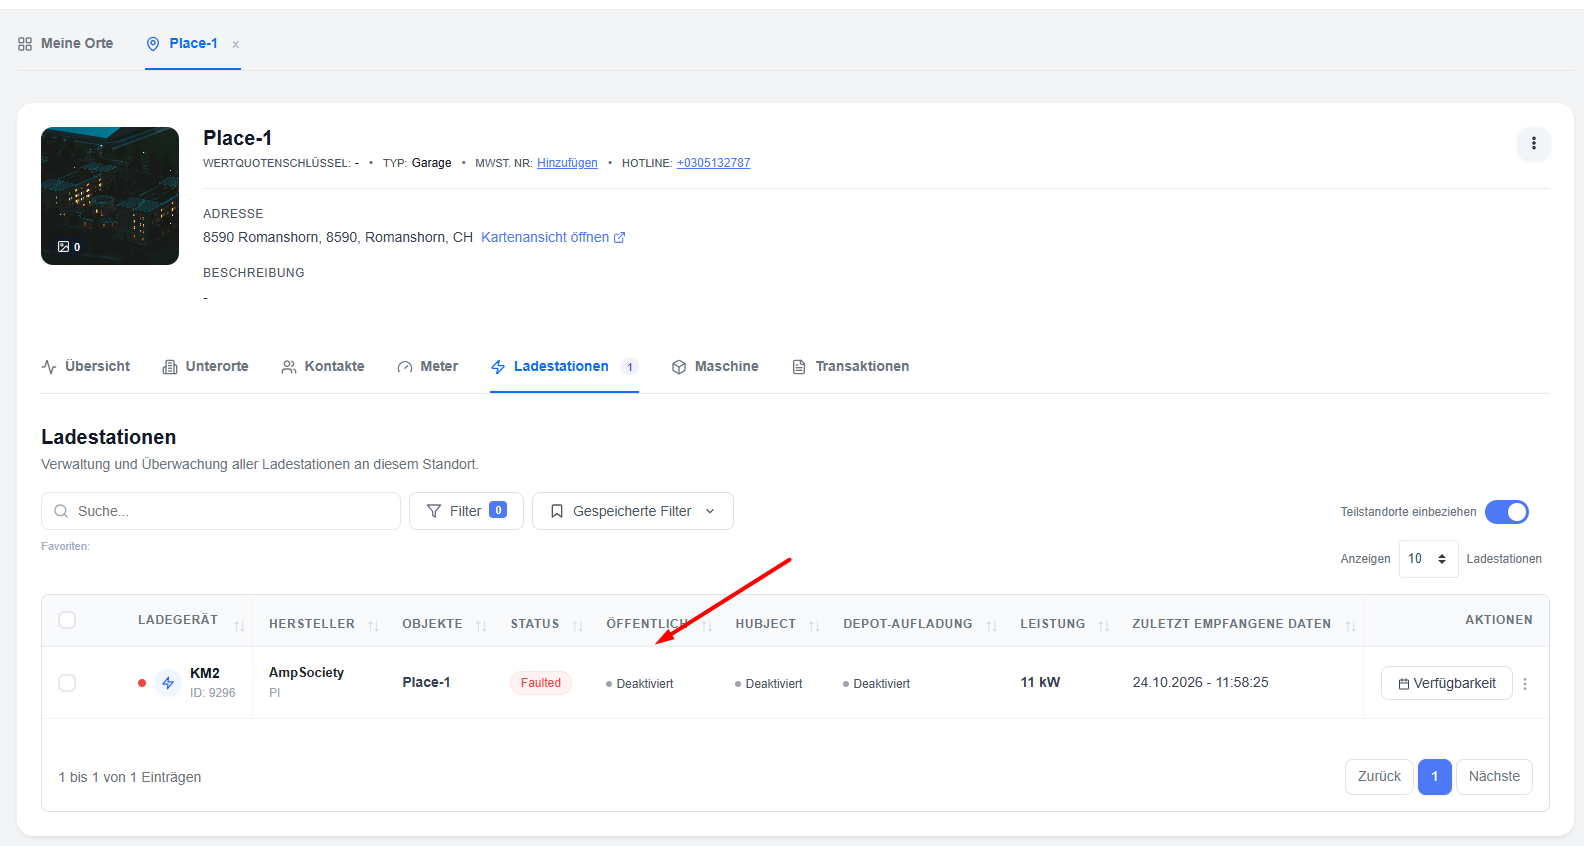
Option 3 – Activate via a property
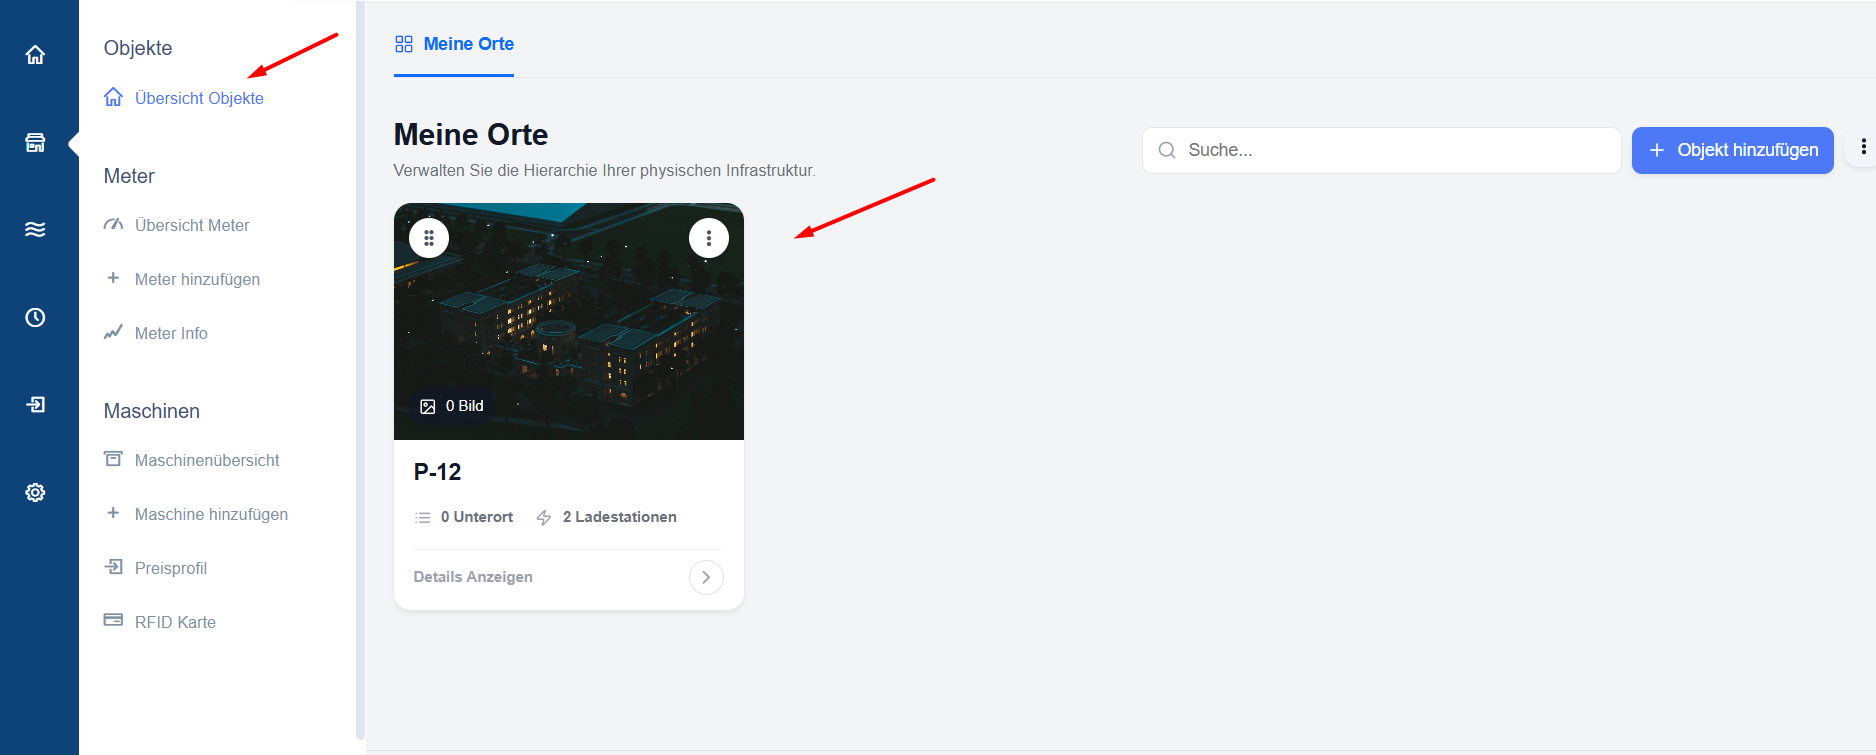
- Go to ‘Properties’ → ‘Property Overview’ (My Locations).
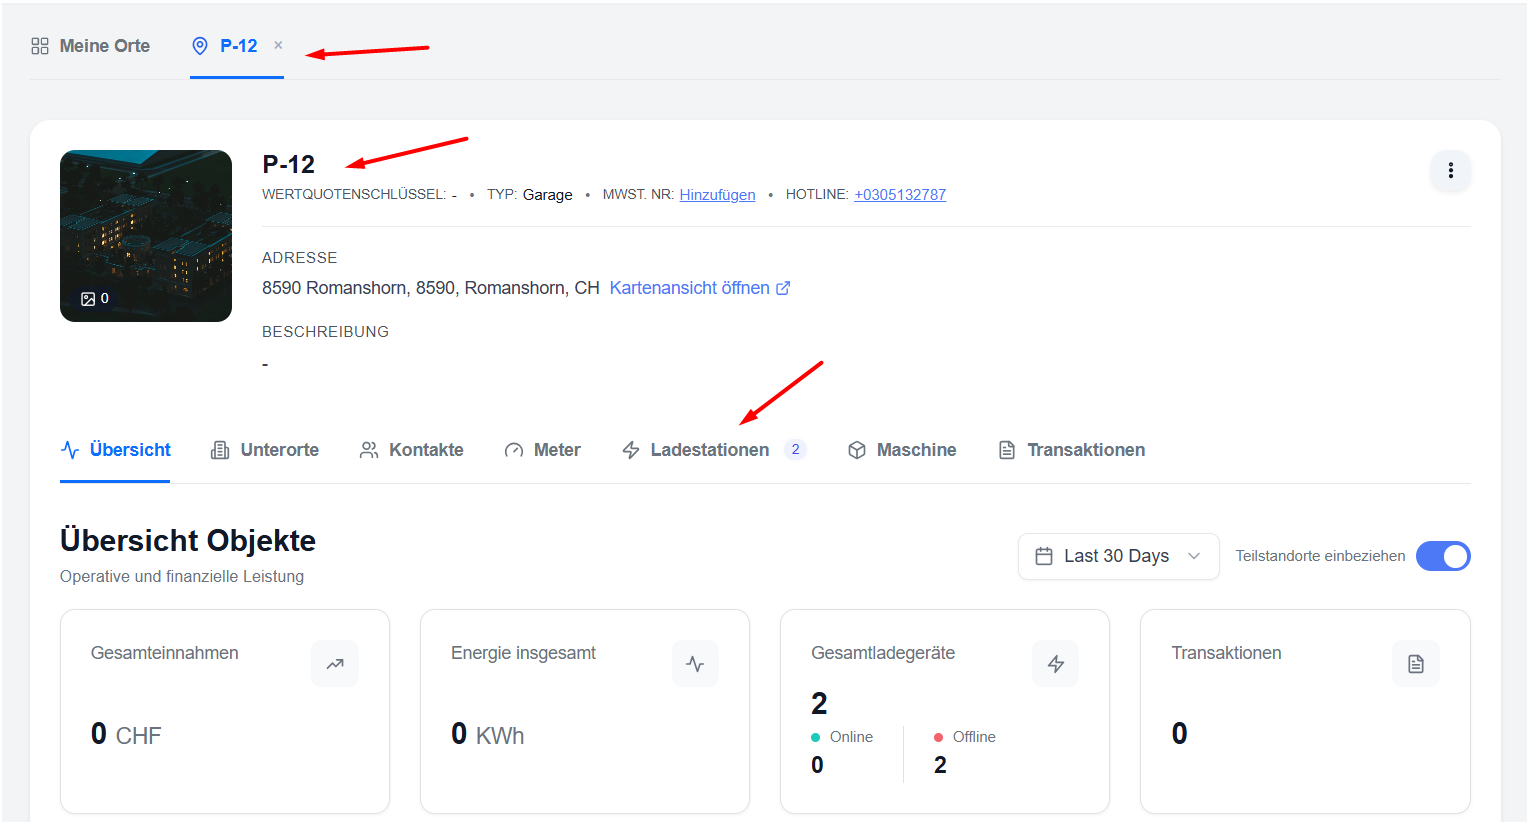
- Click on the location where the charging point is situated.
- Open the ‘Charging Points’ tab.
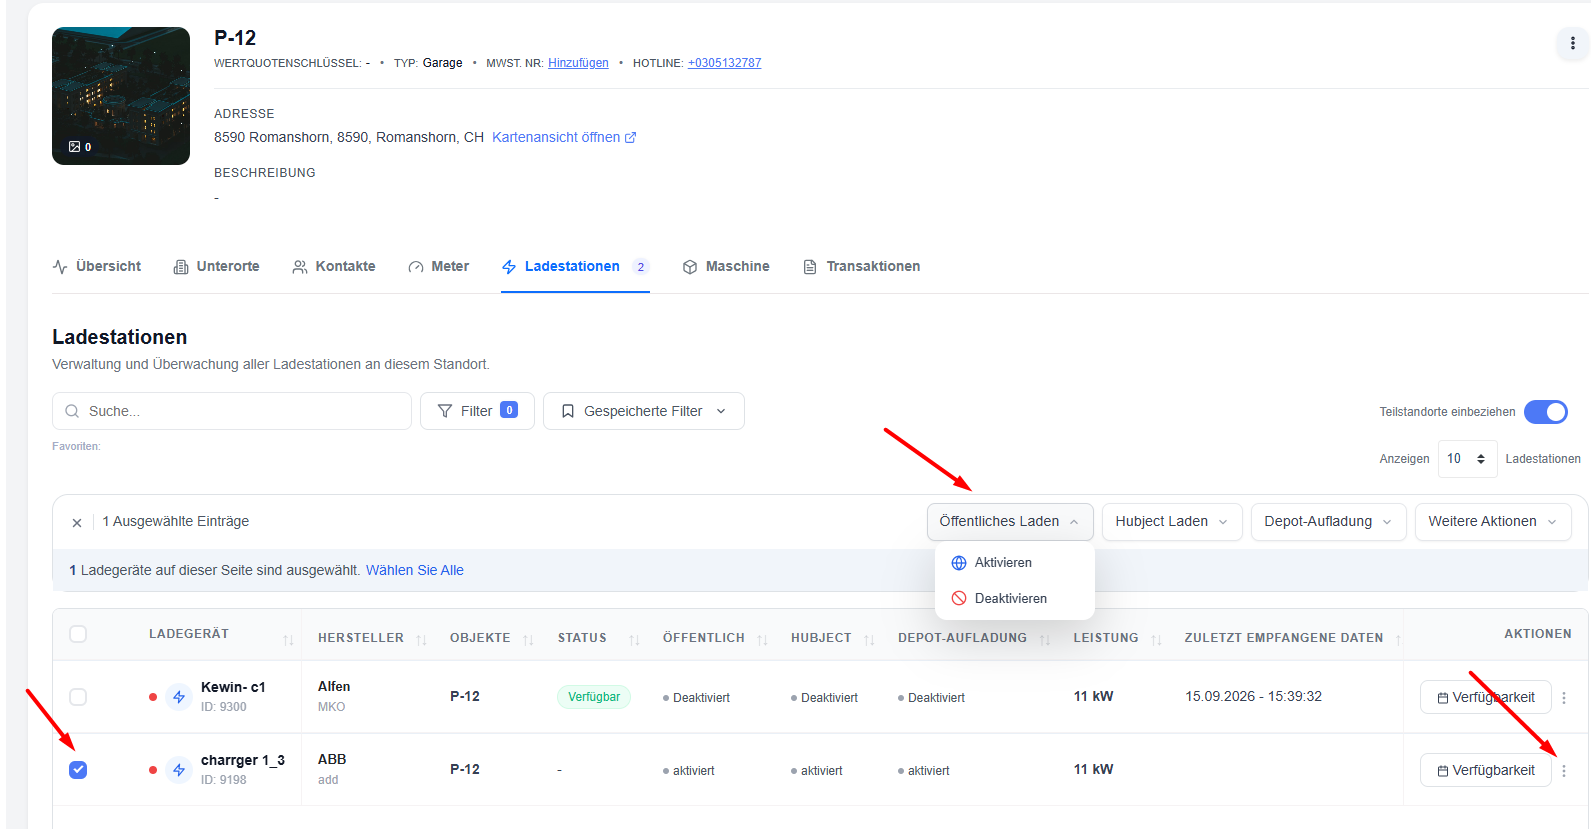
- Select the charging station(s) you wish to activate.
- Click on ‘Public Charging’ → ‘Activate’.
Alternative method within the location:
- Click on the three-dot menu (⋯) to the right of a charging point.
- Select ‘Public Charging’.
- Confirm the action.
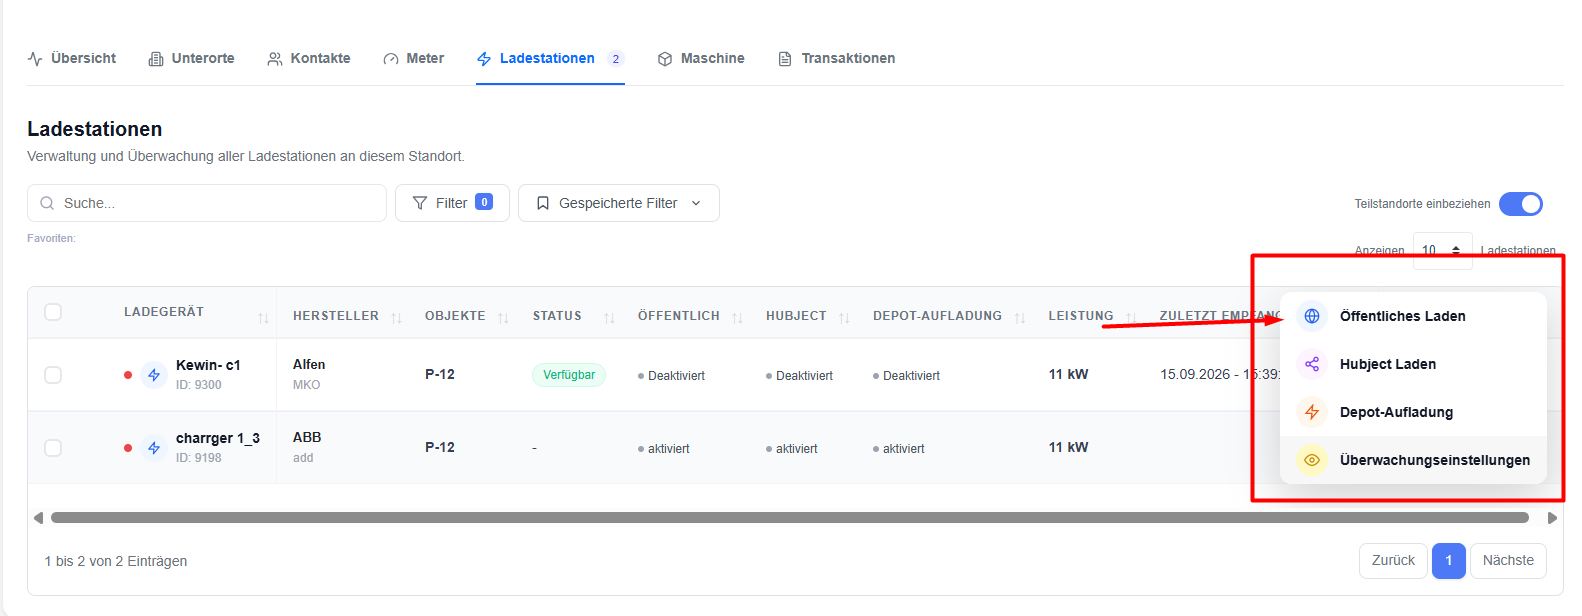
What happens after you click on ‘Activate’?
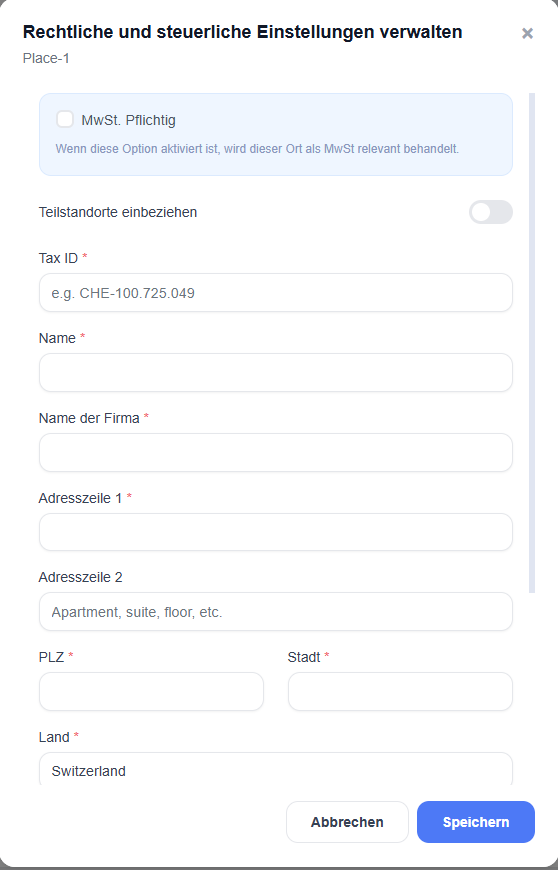
A pop-up window will appear asking about VAT liability: ‘Subject to VAT’ (or ‘Are you liable for VAT?’).
- Click on ‘Yes
’.The following fields will be displayed:
- “Subject to VAT” tick box
(if ticked, the location will be treated as relevant for VAT purposes) - ‘Include sub-locations’
button: If this button is enabled, the tax and legal settings you have entered will also apply to all sub-locations (sub-sites) belonging to this location.
If it is disabled, the settings will only apply to the current location. - Tax ID (e.g. CHE-100.725.049)
- Name
- Company name
- Address line 1
- Address line 2 (optional)
- Postcode and town
- Country
- Language (preferred language for emails and push notifications)
- Notes (optional)
Fill in the required fields and click ‘Save’.
- “Subject to VAT” tick box
- Click ‘No’
→ Enter the helpline telephone number and email address.
This information will also be saved for future use.
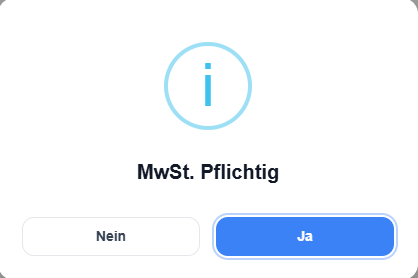
Note: This pop-up window only appears if the tax or hotline details have not yet been entered.
Once the details have been saved, the ‘Assign Charging Profile’ dialogue box opens.
- Select the public charging profile to be used for this charger.
- Click ‘Continue’.
The selected profile determines the pricing structure, which applies exclusively to public charging sessions.
Once ‘Public Charging’ has been activated
- the status in the ‘PUBLIC’ column in the charger list (both in the main ‘Charging Stations’ view and within a location) changes to ‘enabled’.
Disabling public charging
You can deactivate public charging in the same three places:
- In the charging station list
- On the charging station’s details page
- Within a location (property)
Steps:
- Select the charging point(s).
- Click on ‘Public charging’ → ‘Deactivate’
(or toggle the ‘Public charging’ switch to ‘Off’ on the charging point details page). - A confirmation window will appear.
- Click ‘Yes
’.
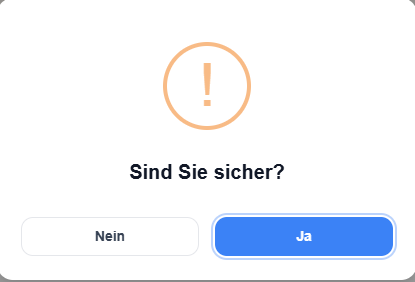
After deactivation:
- The status in the ‘PUBLIC’ column will change back to ‘Disabled’.
- The toggle on the charging point details page is switched off.
- The ‘Public Charging’ tab is removed from the charging point details.