
List of chargers & Add Chargers
Description:
Layout and tabs on the Charging Stations page
The ‘Charging Stations’ page is accessed via the tab in the top navigation bar. The page title is ‘Charging Stations’ with the subtitle ‘Manage and monitor your charging stations’. In the top right-hand corner is the ‘+ Add charger’ button.
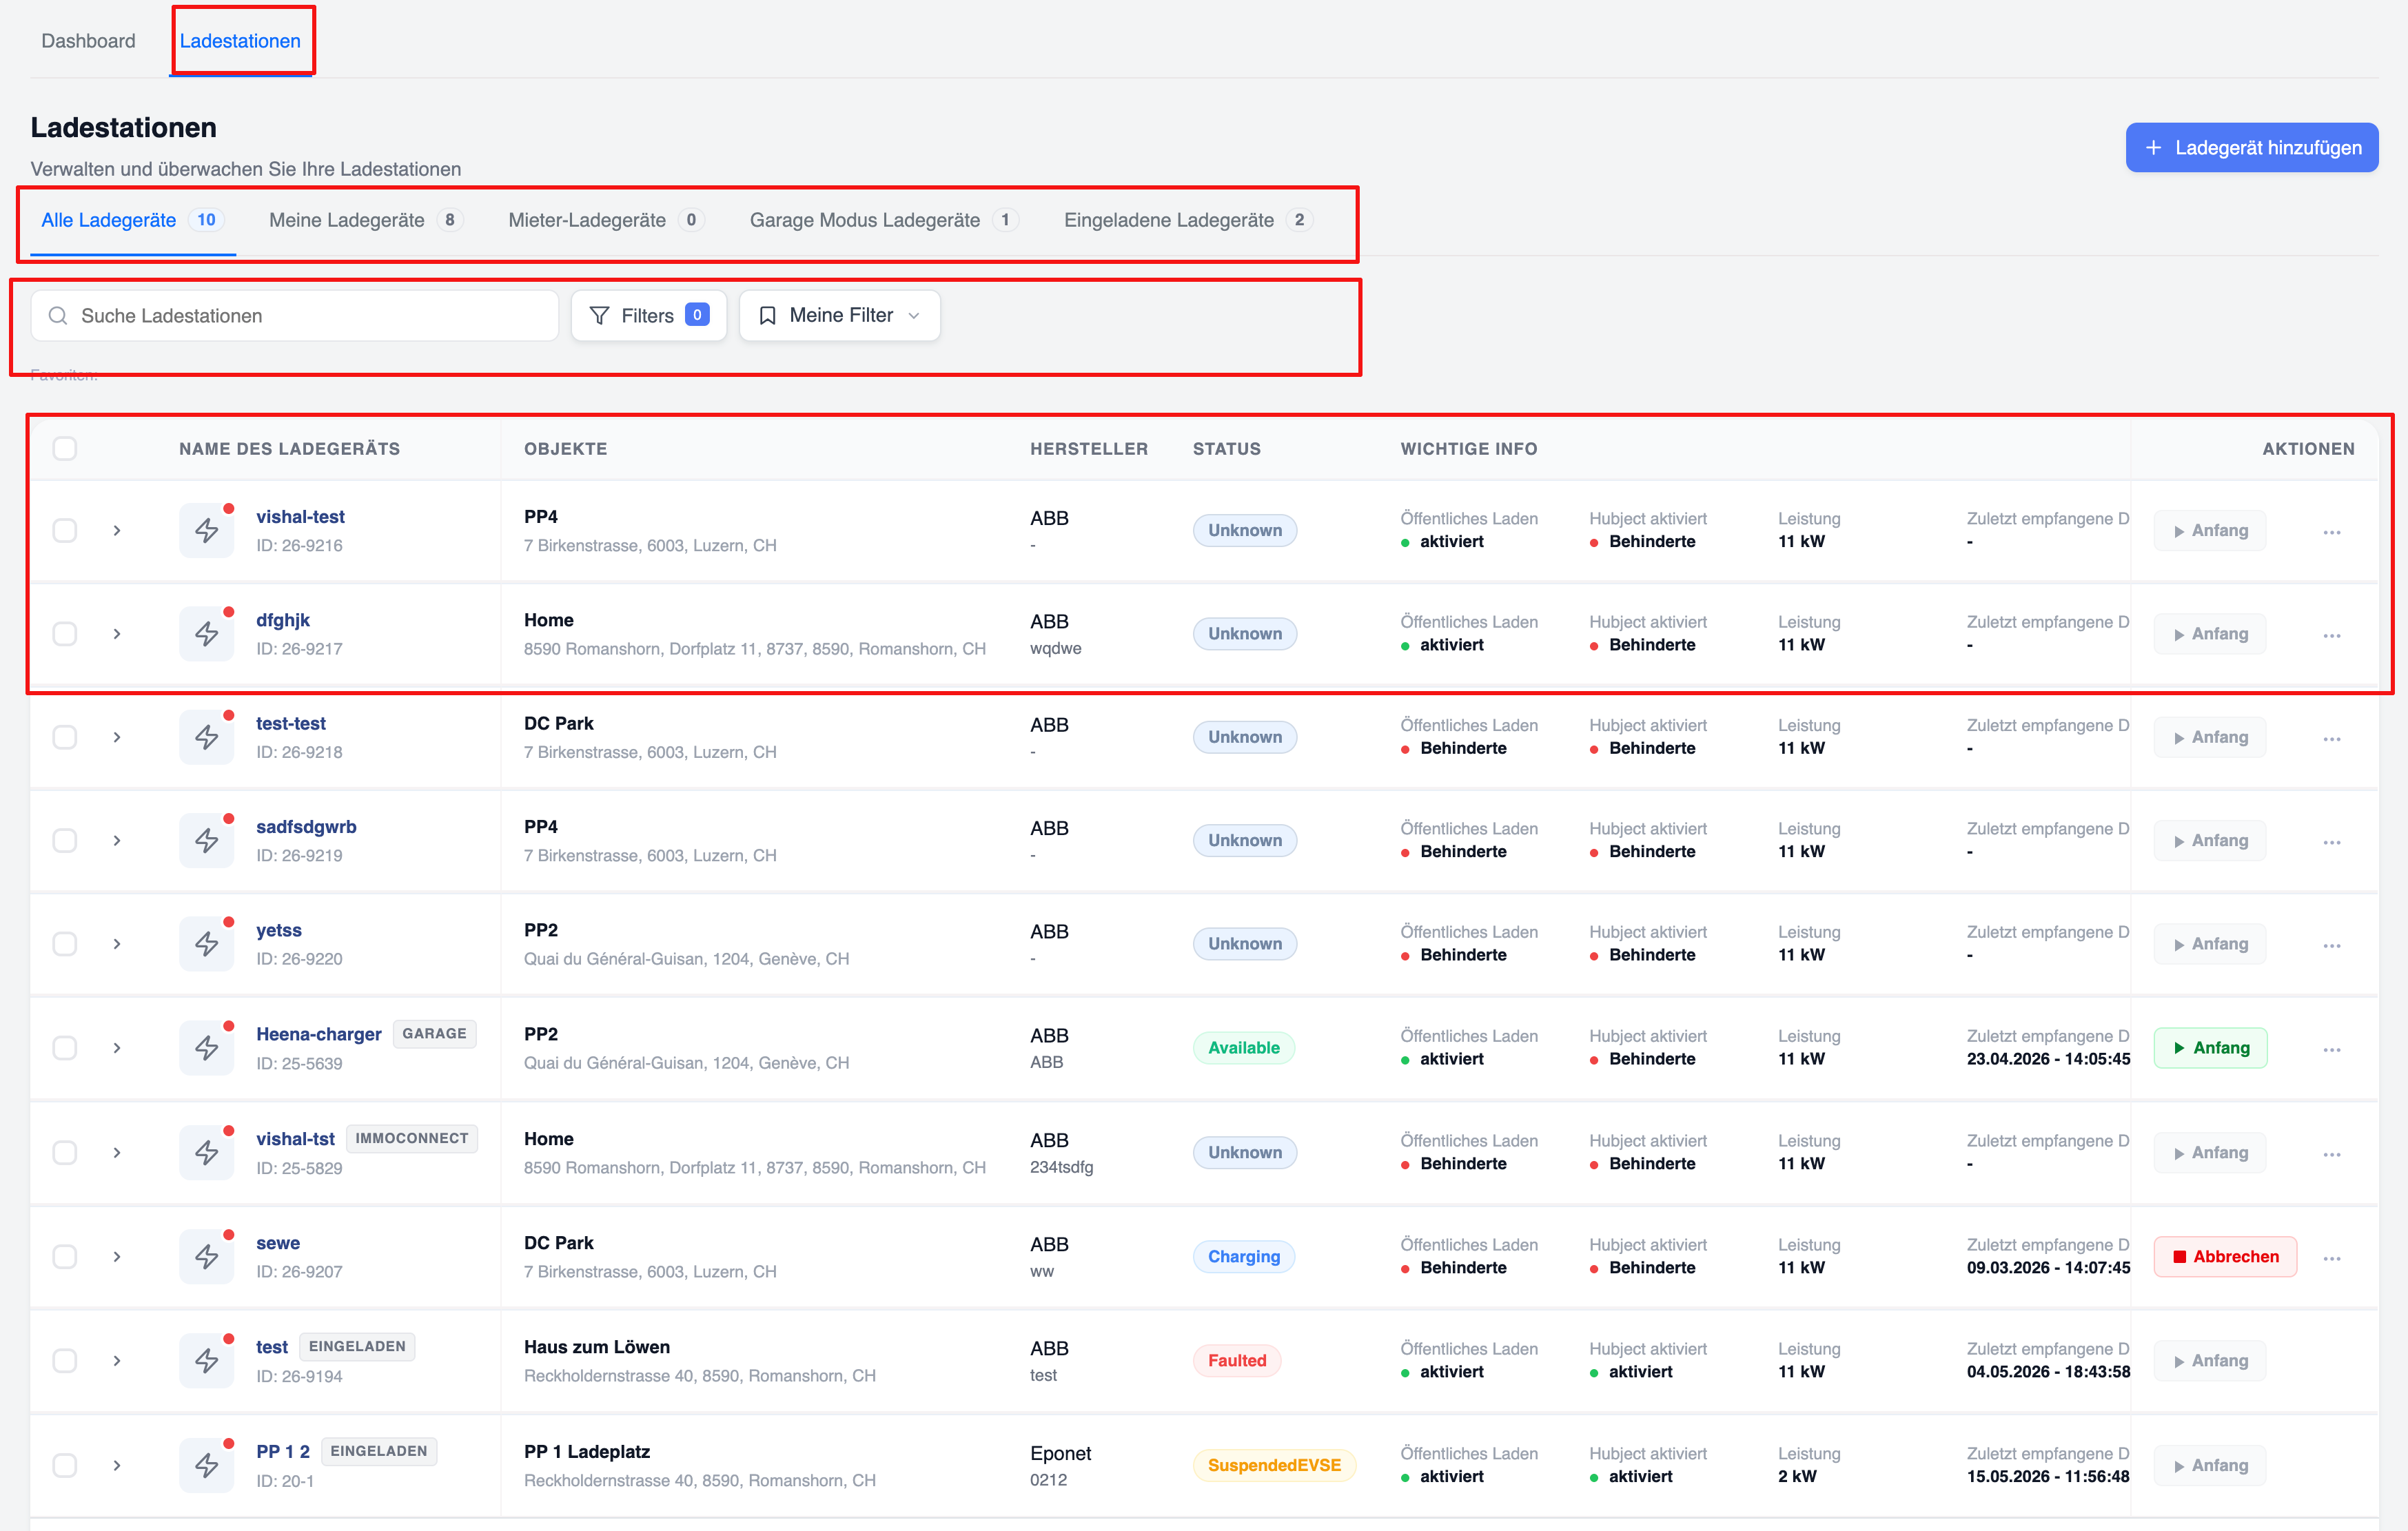
The list is divided into tabs:
- All chargers — Number displayed (e.g. 8)
- My chargers — e.g. 8
- ImmoConnect — e.g. 1
- Tenant chargers — e.g. 0
- Garage Mode chargers — e.g. 2
- Invited chargers — e.g. 0
Search and filter bar
A search bar labelled “Search for charging stations” is available. Next to it is a “Filter” button that displays the number of active filters. Saved filter presets can be accessed via the “My Filters” drop-down menu. The “Favourites” section appears below the search bar.
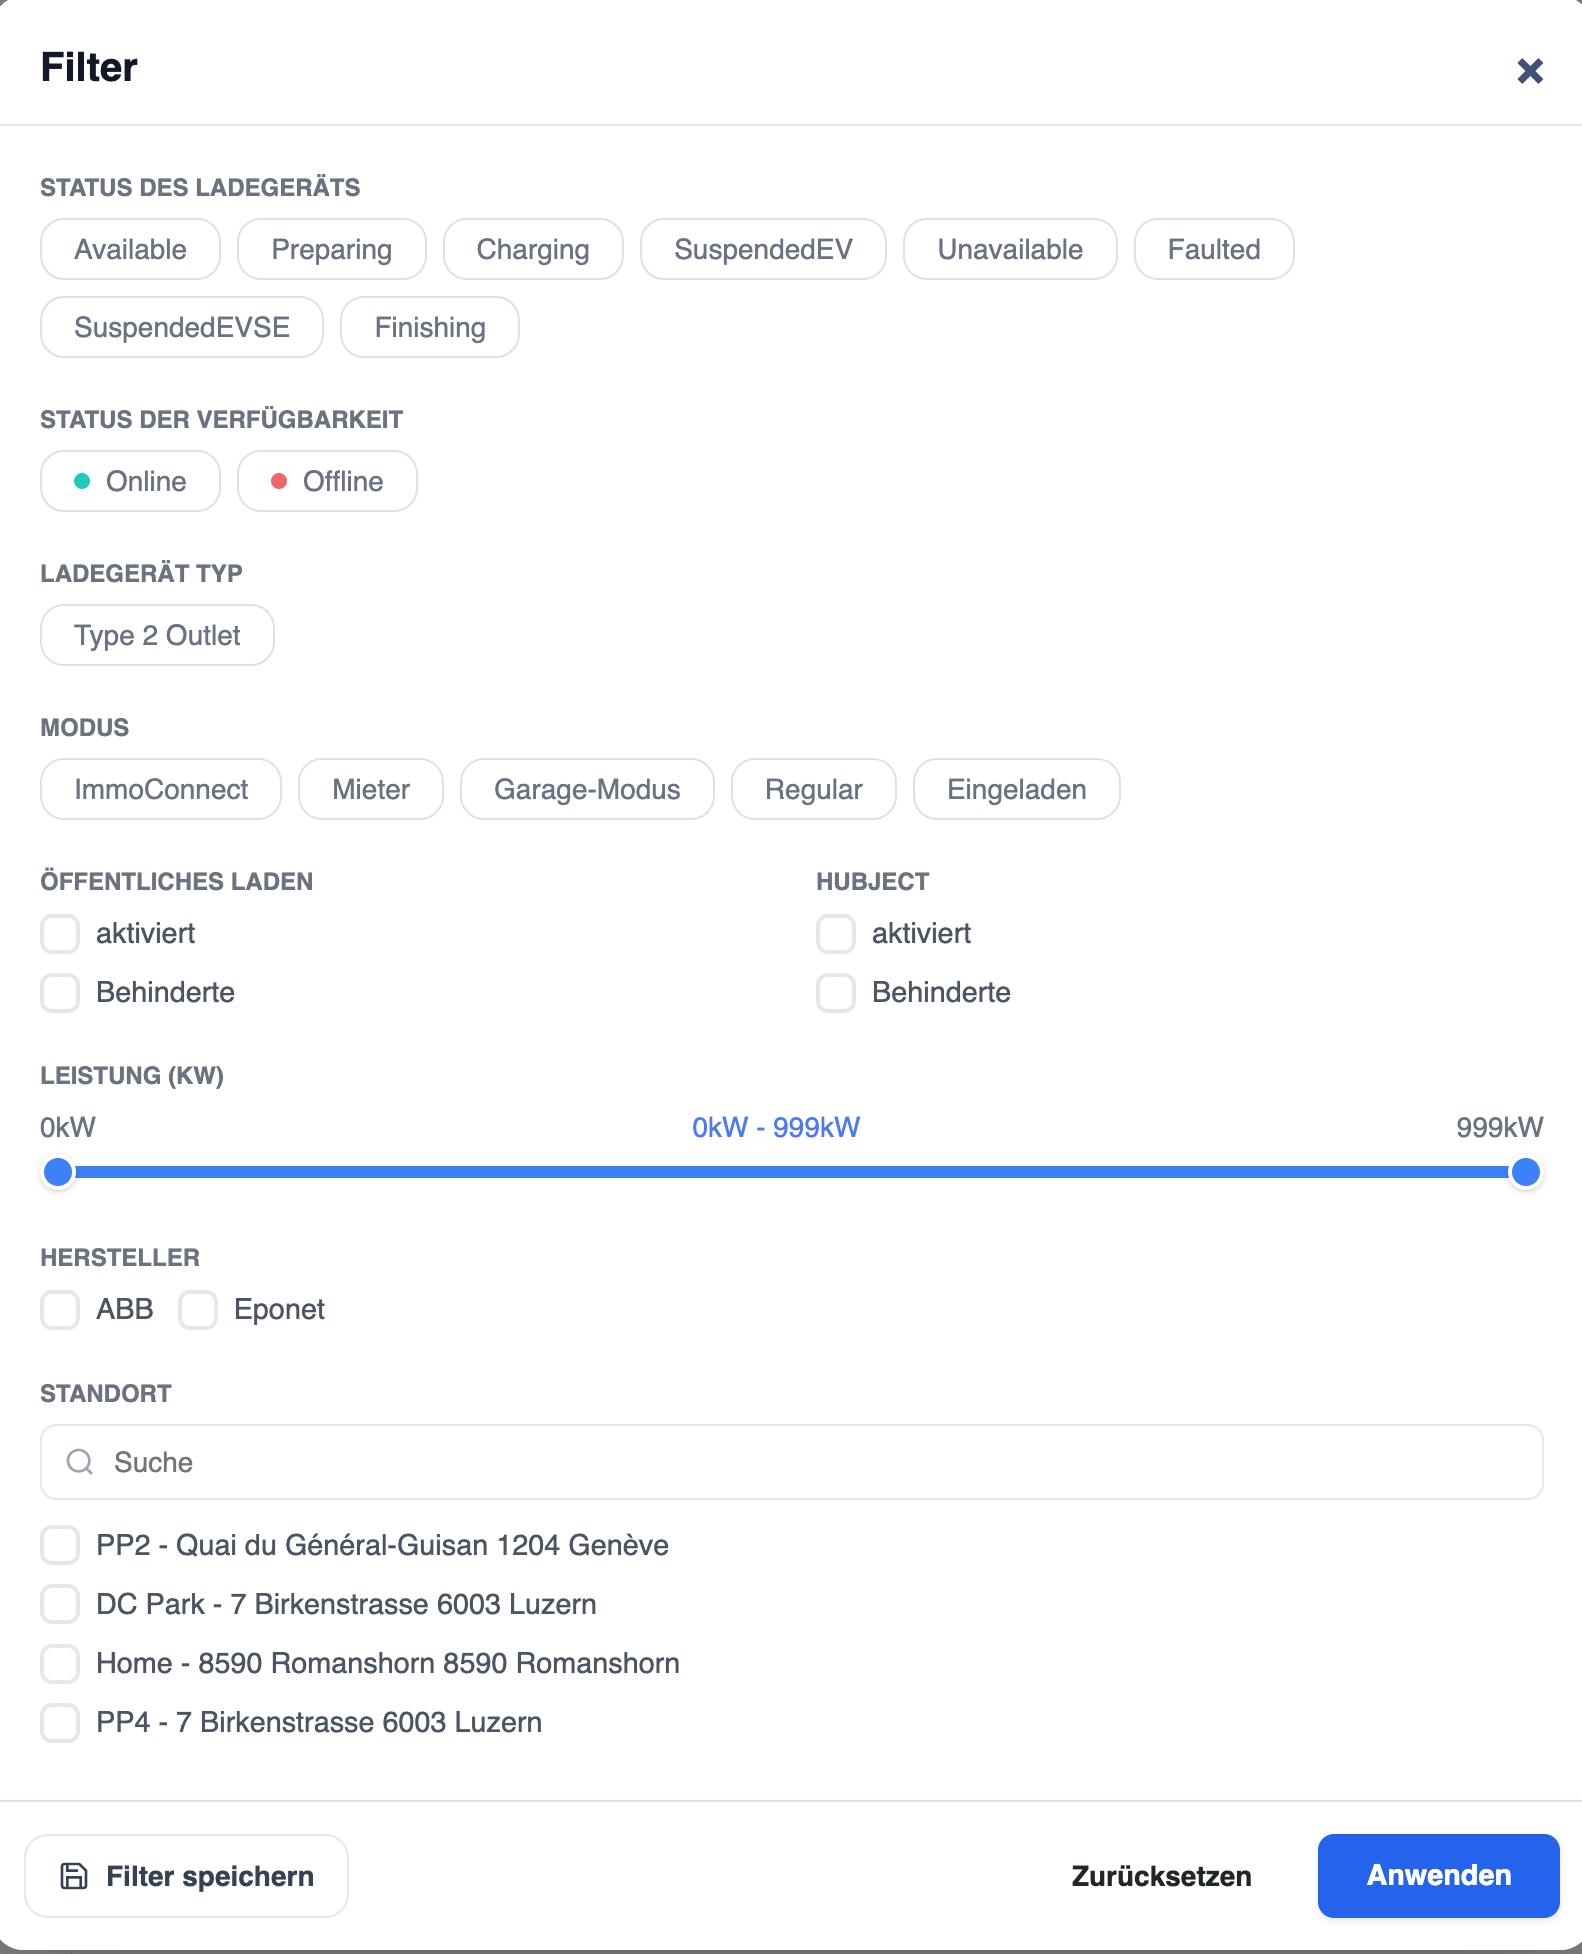
Opening the filter window
Click on the “Filter” button in the search bar area. A modal/drawer titled “Filter” opens, featuring a close button (×). At the bottom of the filter window are three actions: “Save filter”, “Reset” and “Apply” (blue button).
Filter: Charger status
Filter chargers by the status of their OCPP connection. Available status options (toggle to select):
- Available, In preparation, Charging in progress, EV charging interrupted, Unavailable, Error, EVSE charging interrupted, Completed
Filter: Availability status, charger type and mode
- Availability status: Online (green dot), Offline (red dot)
- Charger Type: Type 2 socket
- Mode: ImmoConnect, Tenant, Garage mode, Normal, Charged
Filter: Public Charging, Hubject, Power & Manufacturer
- Public Charging: Checkbox – active, deactivated
- Hubject: Checkbox – active, deactivated
- Power (kW): Slider from 0 kW to 999 kW
- Manufacturer: Checkbox – ABB, Eponet, Mennekes
Filter: Location
A location filter with a search field and a checkbox list of available locations. Example locations: PP2- 8591 Romanshorn, PP1 - gommiswald 8737 Gommiswald. Saving a filter set saves it under ‘My Filters’ for reuse.
Columns in the charger table
Each row in the charger list displays the following columns:
- Checkbox (for bulk selection)
- Expand arrow (to view details)
- Charger icon with online/offline indicator (green = online, red = offline)
- CHARGER NAME — Charger name, mode icon (e.g. GARAGE, IMMOCONNECT) and ID
- OBJECTS — Location/object name and address
- MANUFACTURER — Manufacturer (e.g. ABB, Eponet, Mennekes) and model
- STATUS — Current OCPP status icon (Available, Charging in progress, Unknown, etc.)
- IMPORTANT INFO — Important information: ‘Public Charging’ status, ‘Hubject activated’ status, power (in kW), most recently received data (with timestamp)
- ACTIONS — Action button (Start in green, Cancel in red) and a three-dot menu
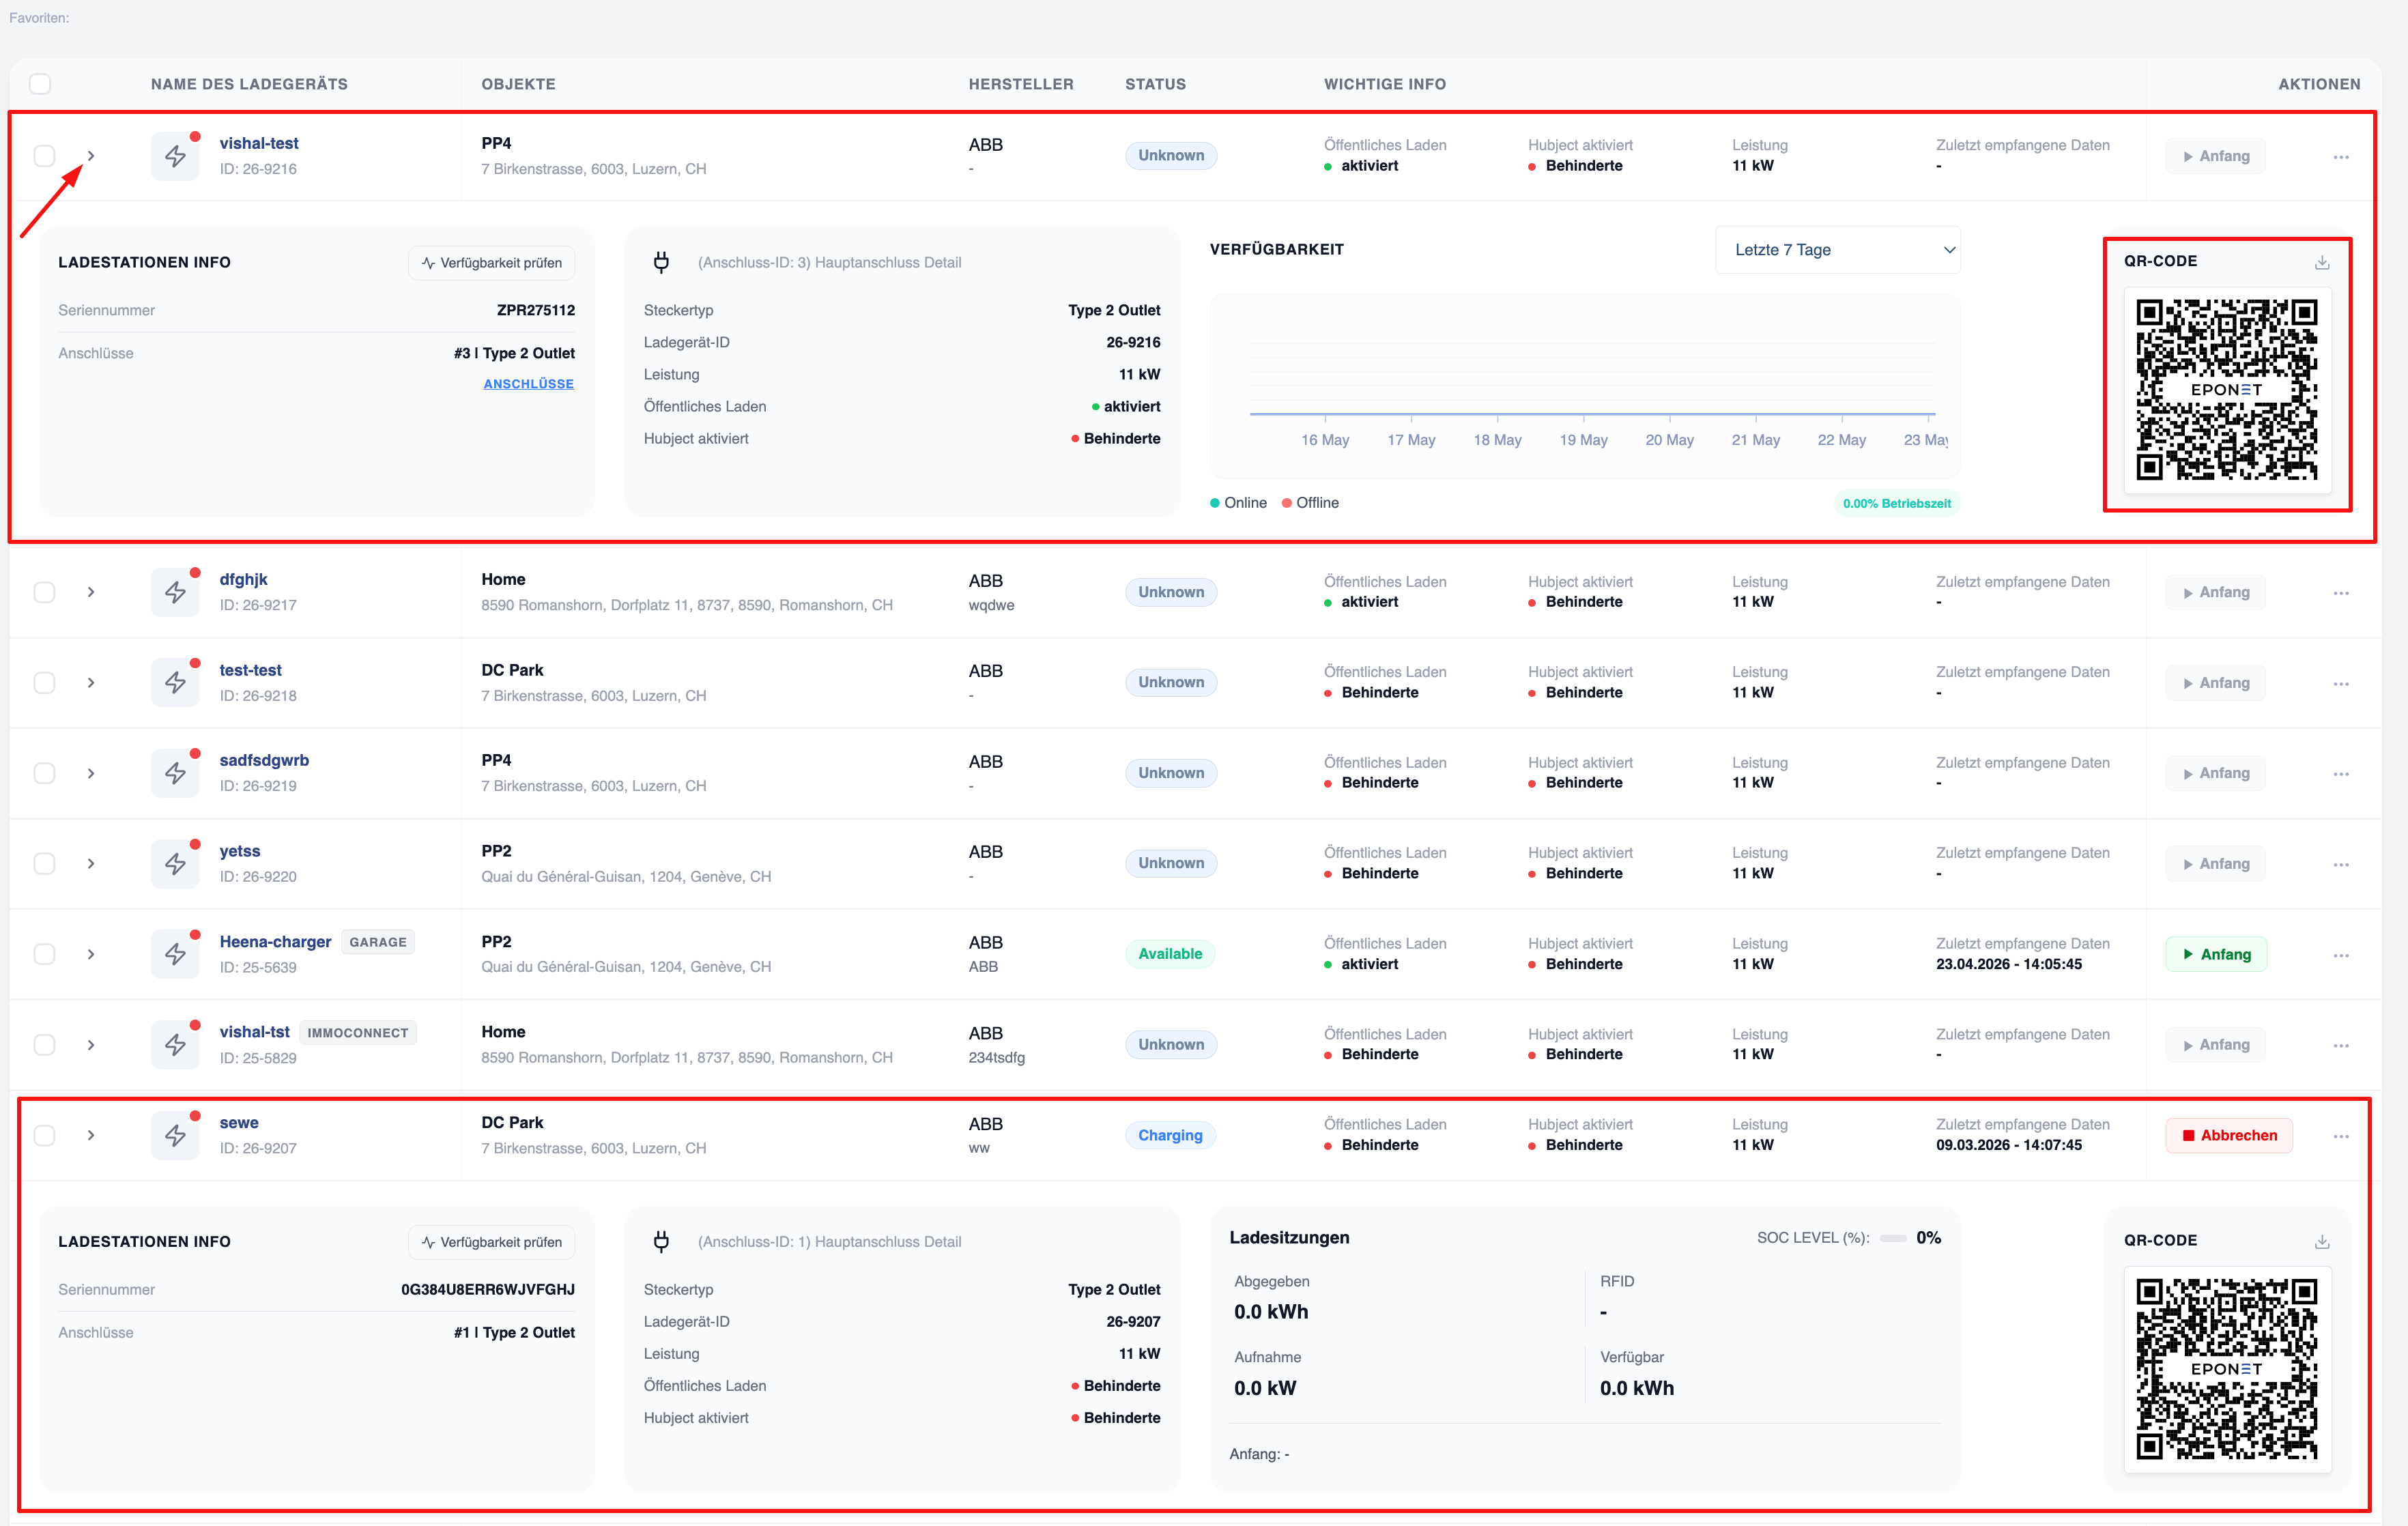
Inline row hiding
Clicking the expand arrow in a charging point row opens an inline details window without leaving the page. The expanded view shows two sections:
- Top expansion (inactive charging station): Charging station info (serial number, connections), ‘Check availability’ link, connection details, availability chart (last 7 days with online/offline timeline) and QR code thumbnail.
- Lower section (active/charging charging station): Charging station info, connection details, charging sessions with Output (kWh delivered), Input (kW consumed), Available (kW available), RFID, SOC level (%) and QR code.
Pagination
Add Chargers :
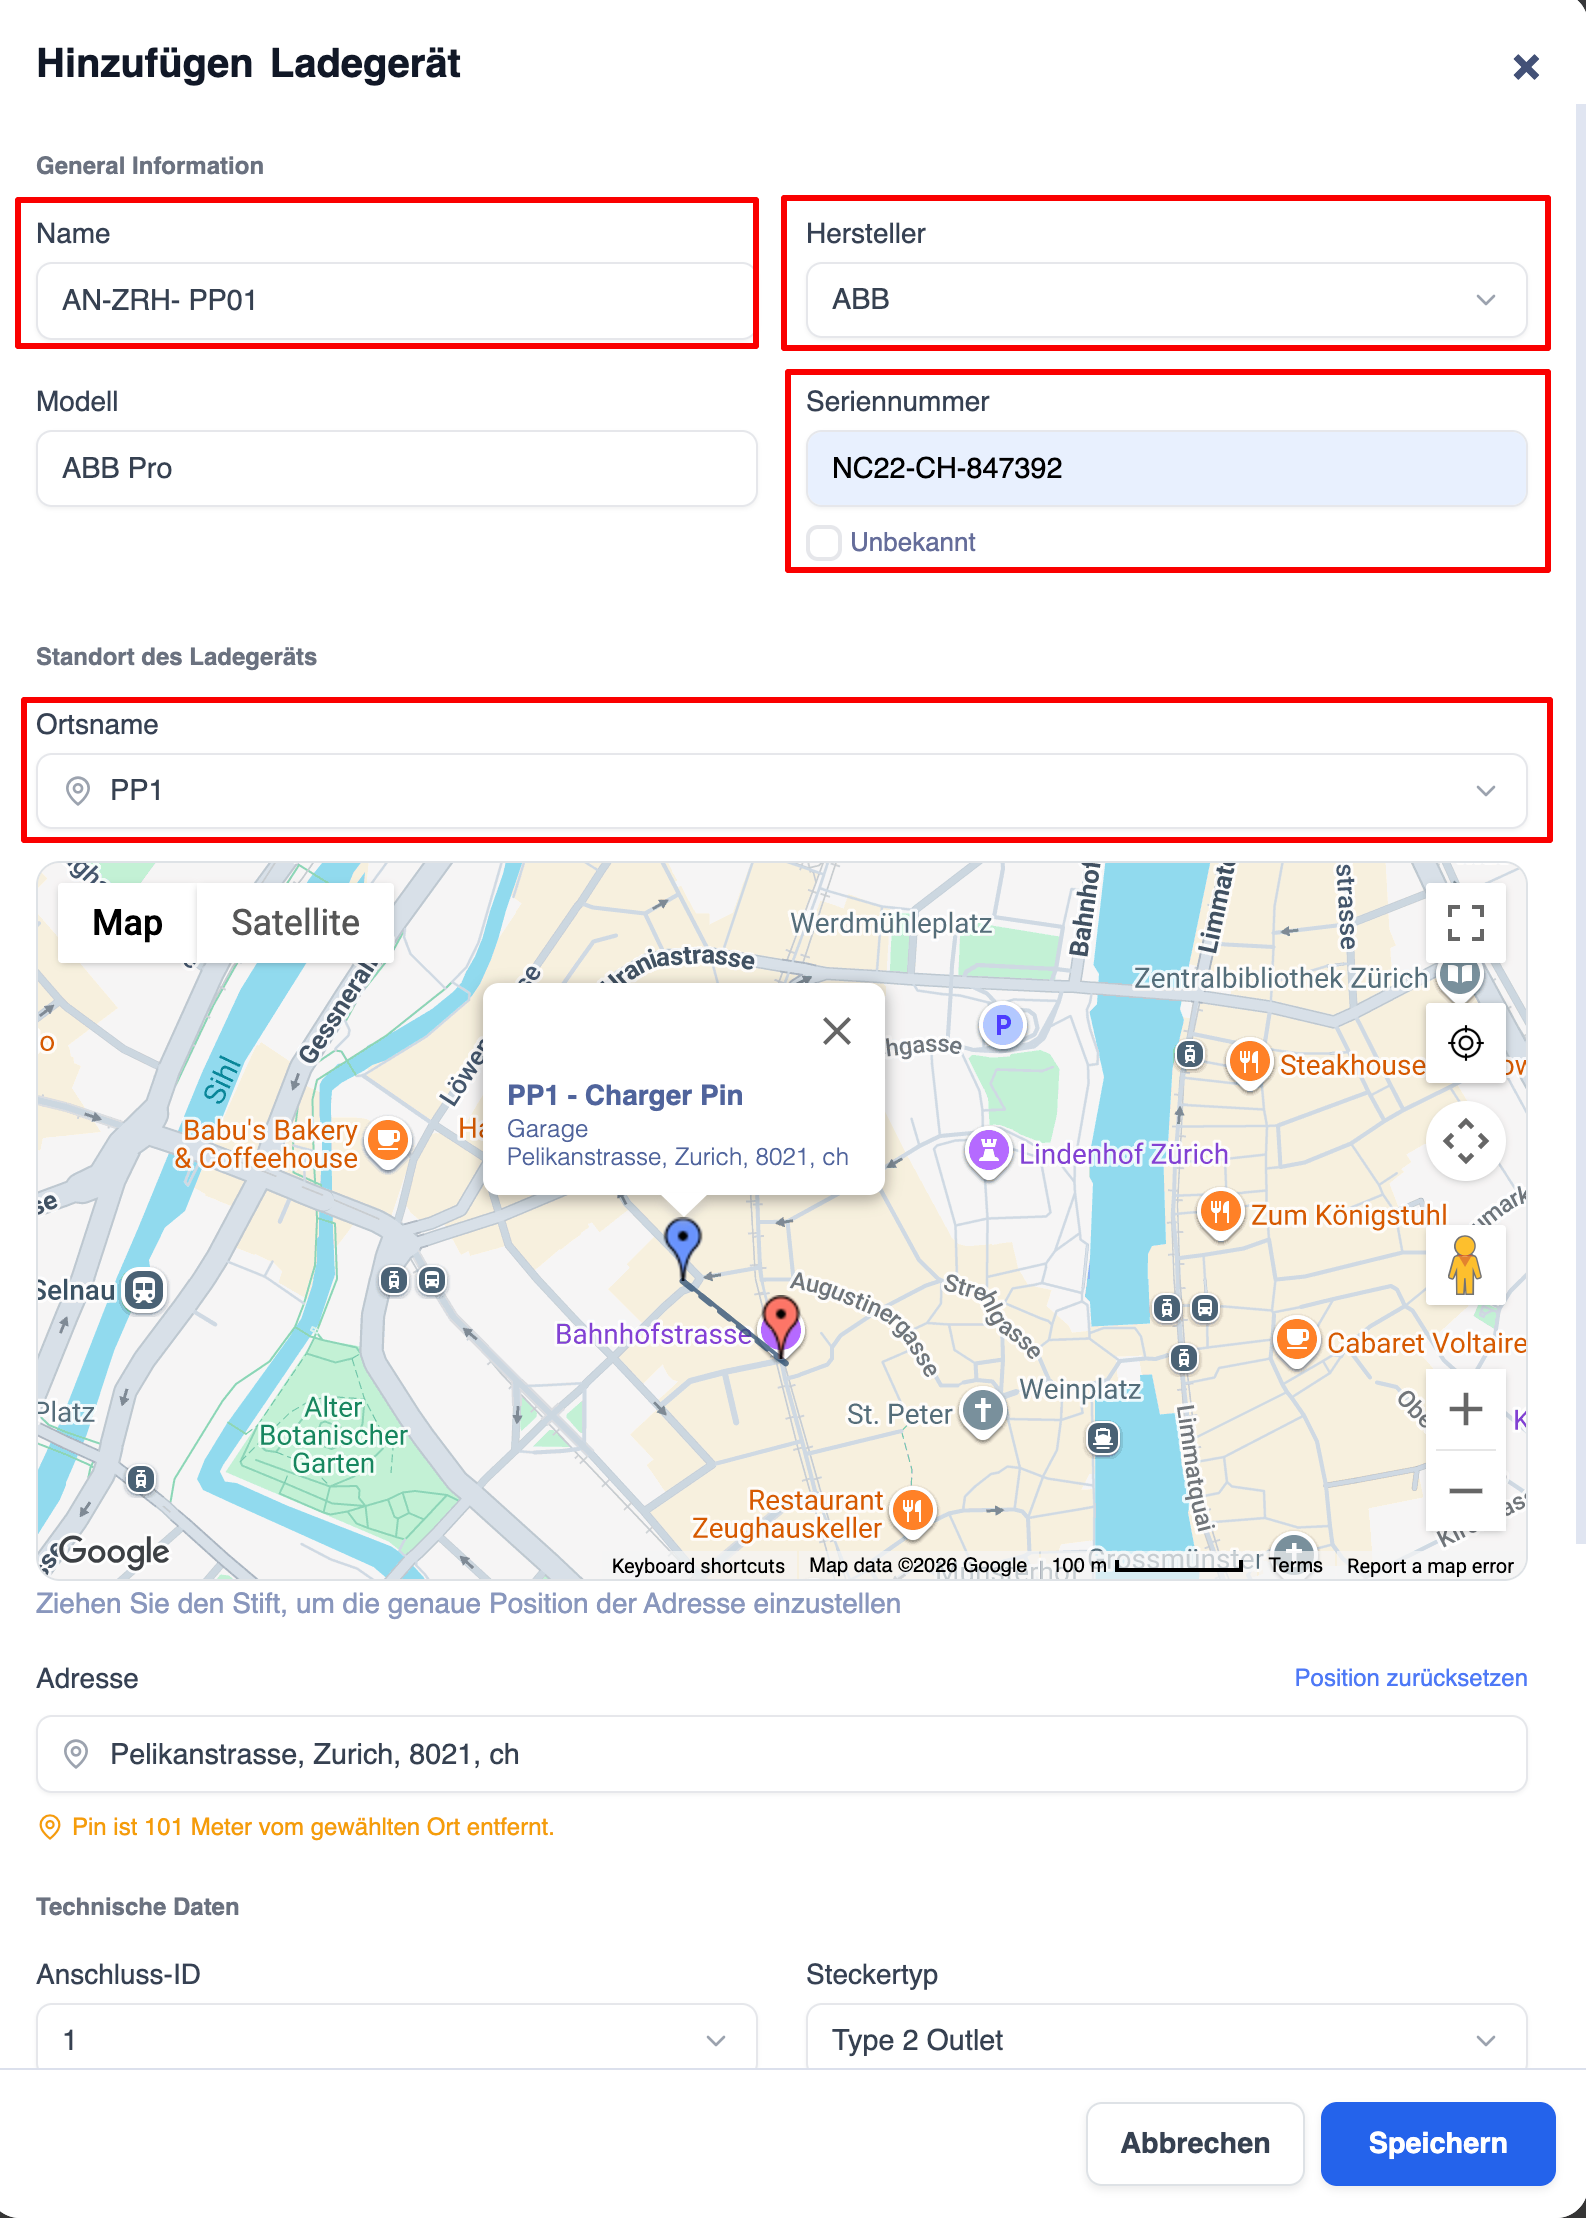
The Add Charger function allows users to register new charging stations (Ladegeräte) in the Emobility Dashboard.
How to Access
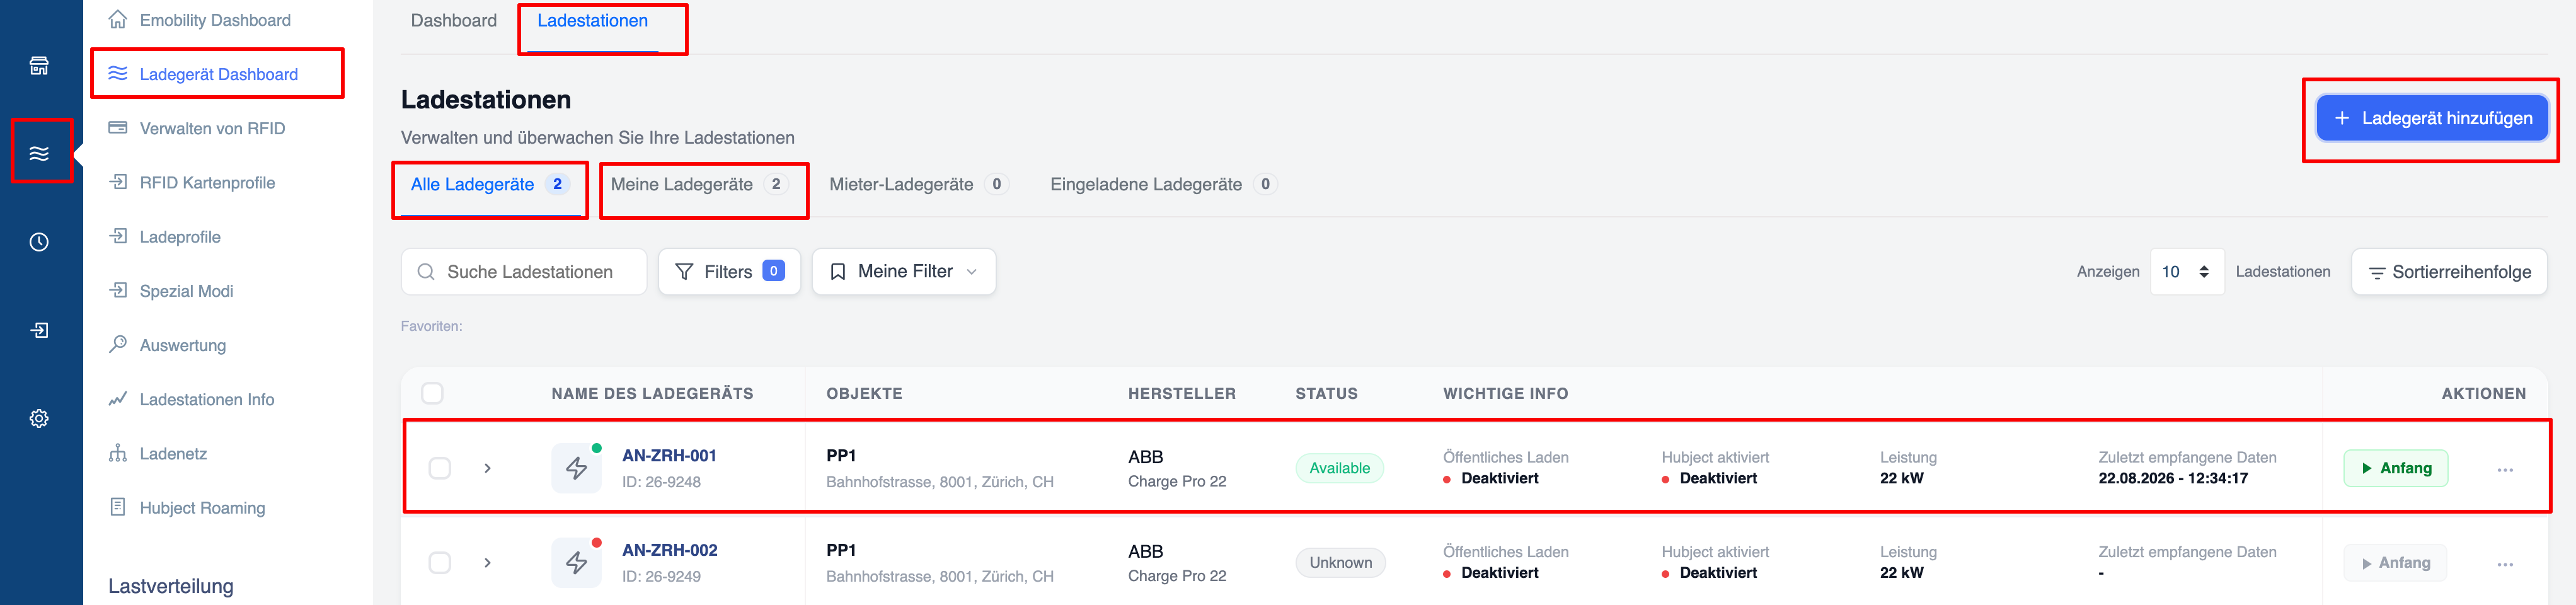
- Go to Ladestationen in the top navigation.
- Click the blue + Ladegerät hinzufügen button in the top-right corner.
A modal form opens with the following sections:
General Information
- Name – Unique identifier (e.g. AN-ZRH-PP01)
- Hersteller – Manufacturer (dropdown, e.g. ABB, ABL, Alpitronic)
- Modell – Model name
- Seriennummer – Serial number
Standort des Ladegeräts
- Ortsname – Select or search for the location (e.g. PP1)
- Interactive map to place the exact pin
- Address field auto-fills (e.g. Pelikanstrasse, Zurich, 8021, CH)
- Warning shown if the pin is more than 100 m from the selected location
Technische Daten
- Anschluss-ID – Connector ID
- Steckertyp – Connector type (e.g. Type 2 Outlet)
Click Speichern to save or Abbrechen to cancel.
After Saving
The new charger appears in the Alle Ladegeräte / Meine Ladegeräte list with status, power, last data received, and action buttons.
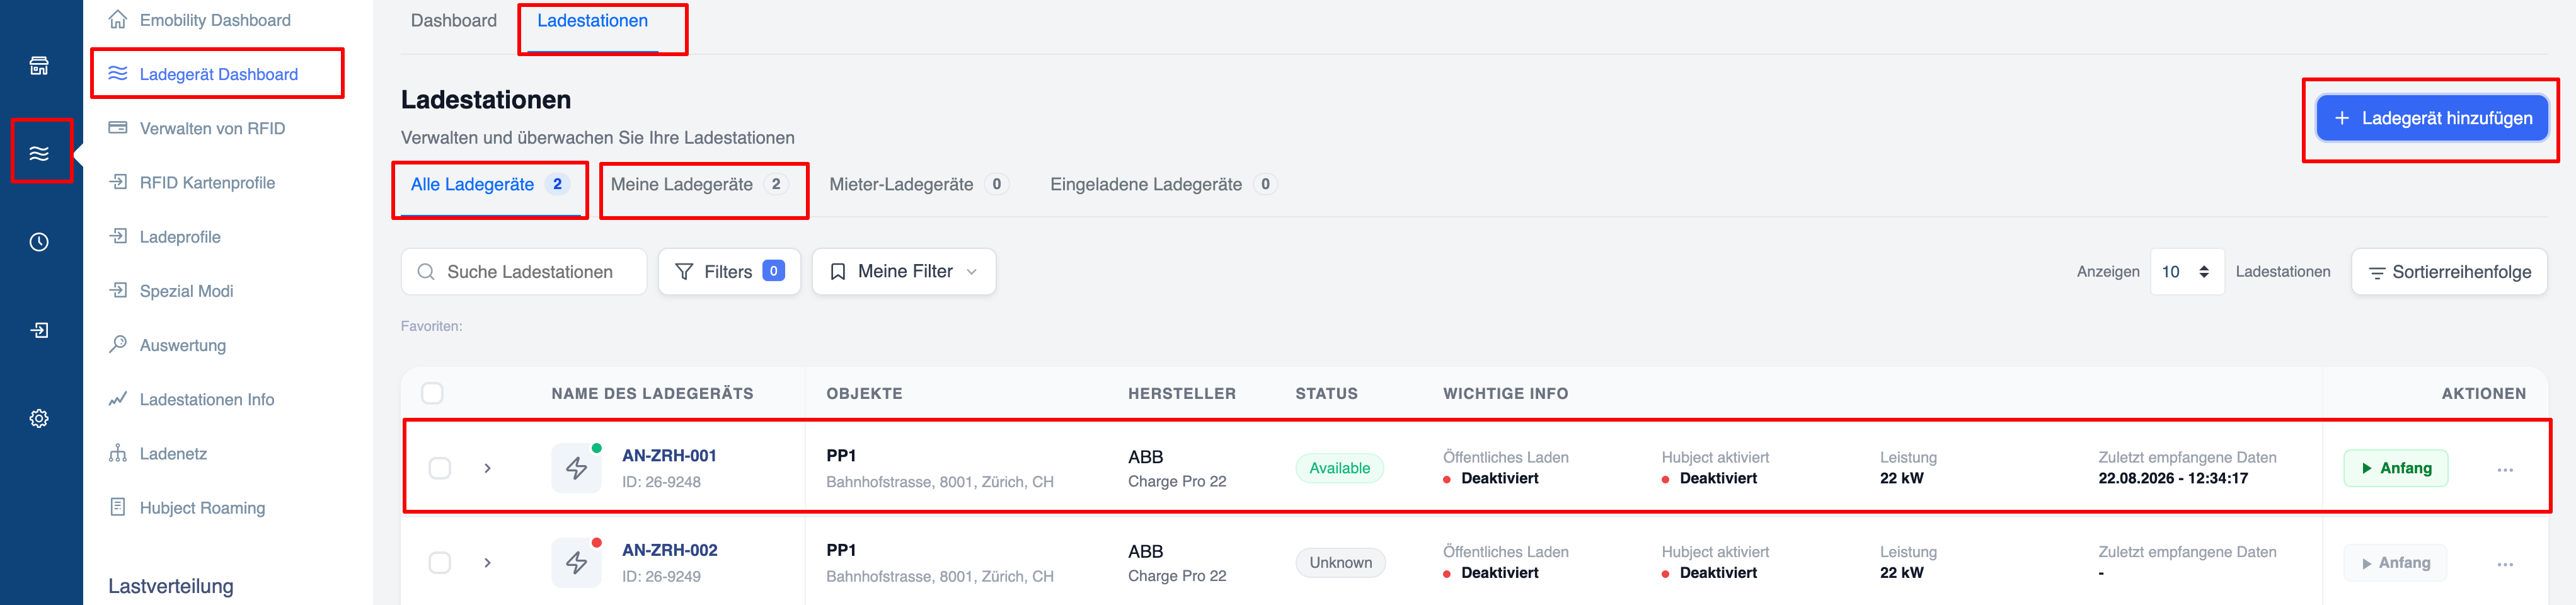
Tip: To test whether the charging station has been successfully integrated into the portal, press "Charger overview". Here you can now select your charging station and the last connection should now be displayed under "Last received data". If you see data that is a few minutes old here, the integration has been successful.
After a short time, the charging station should show the successful online status with the green icon. If a charging station is offline for a certain period of time, the icon will change to red.