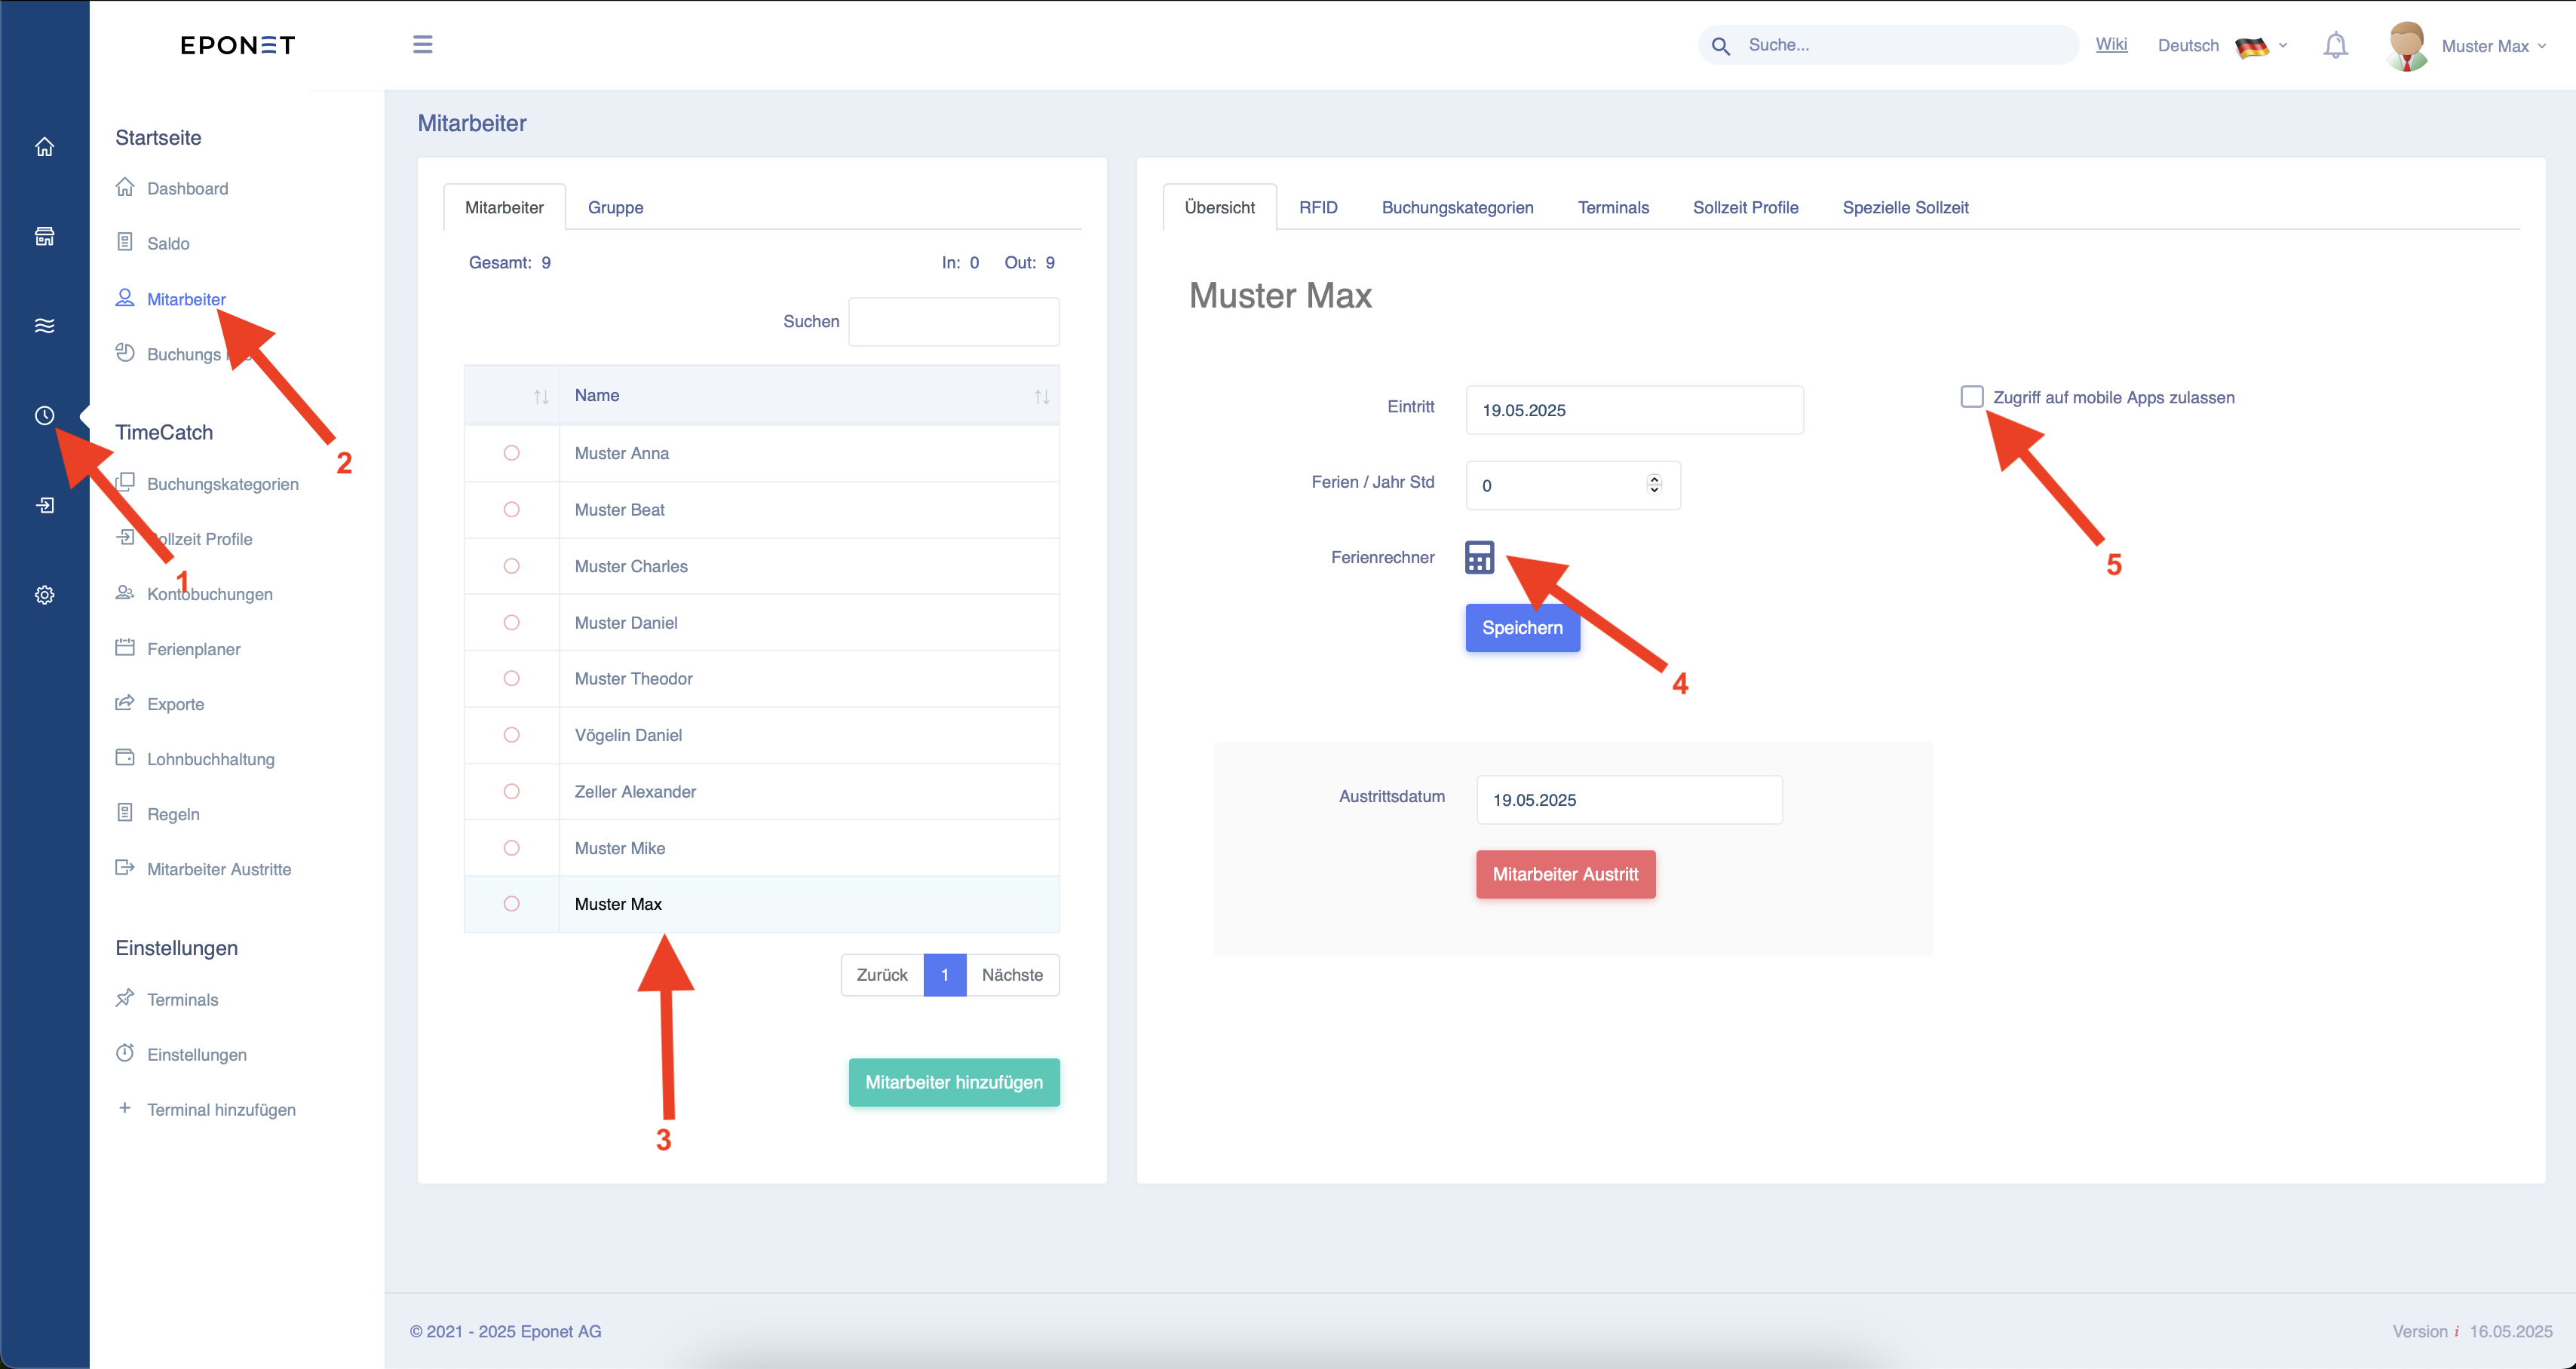
5. setting up an employee
To get to the right page, please follow arrows 1 and 2.
Here you can now select an employee from the list at arrow 3 and then edit them.
At arrow 5, you have the option of granting the employee access to the mobile app on their mobile phone.
You can set the start date and manually set the holiday entitlement in hours that the employee has available. Alternatively, you can also use the holiday calculator at arrow 4.
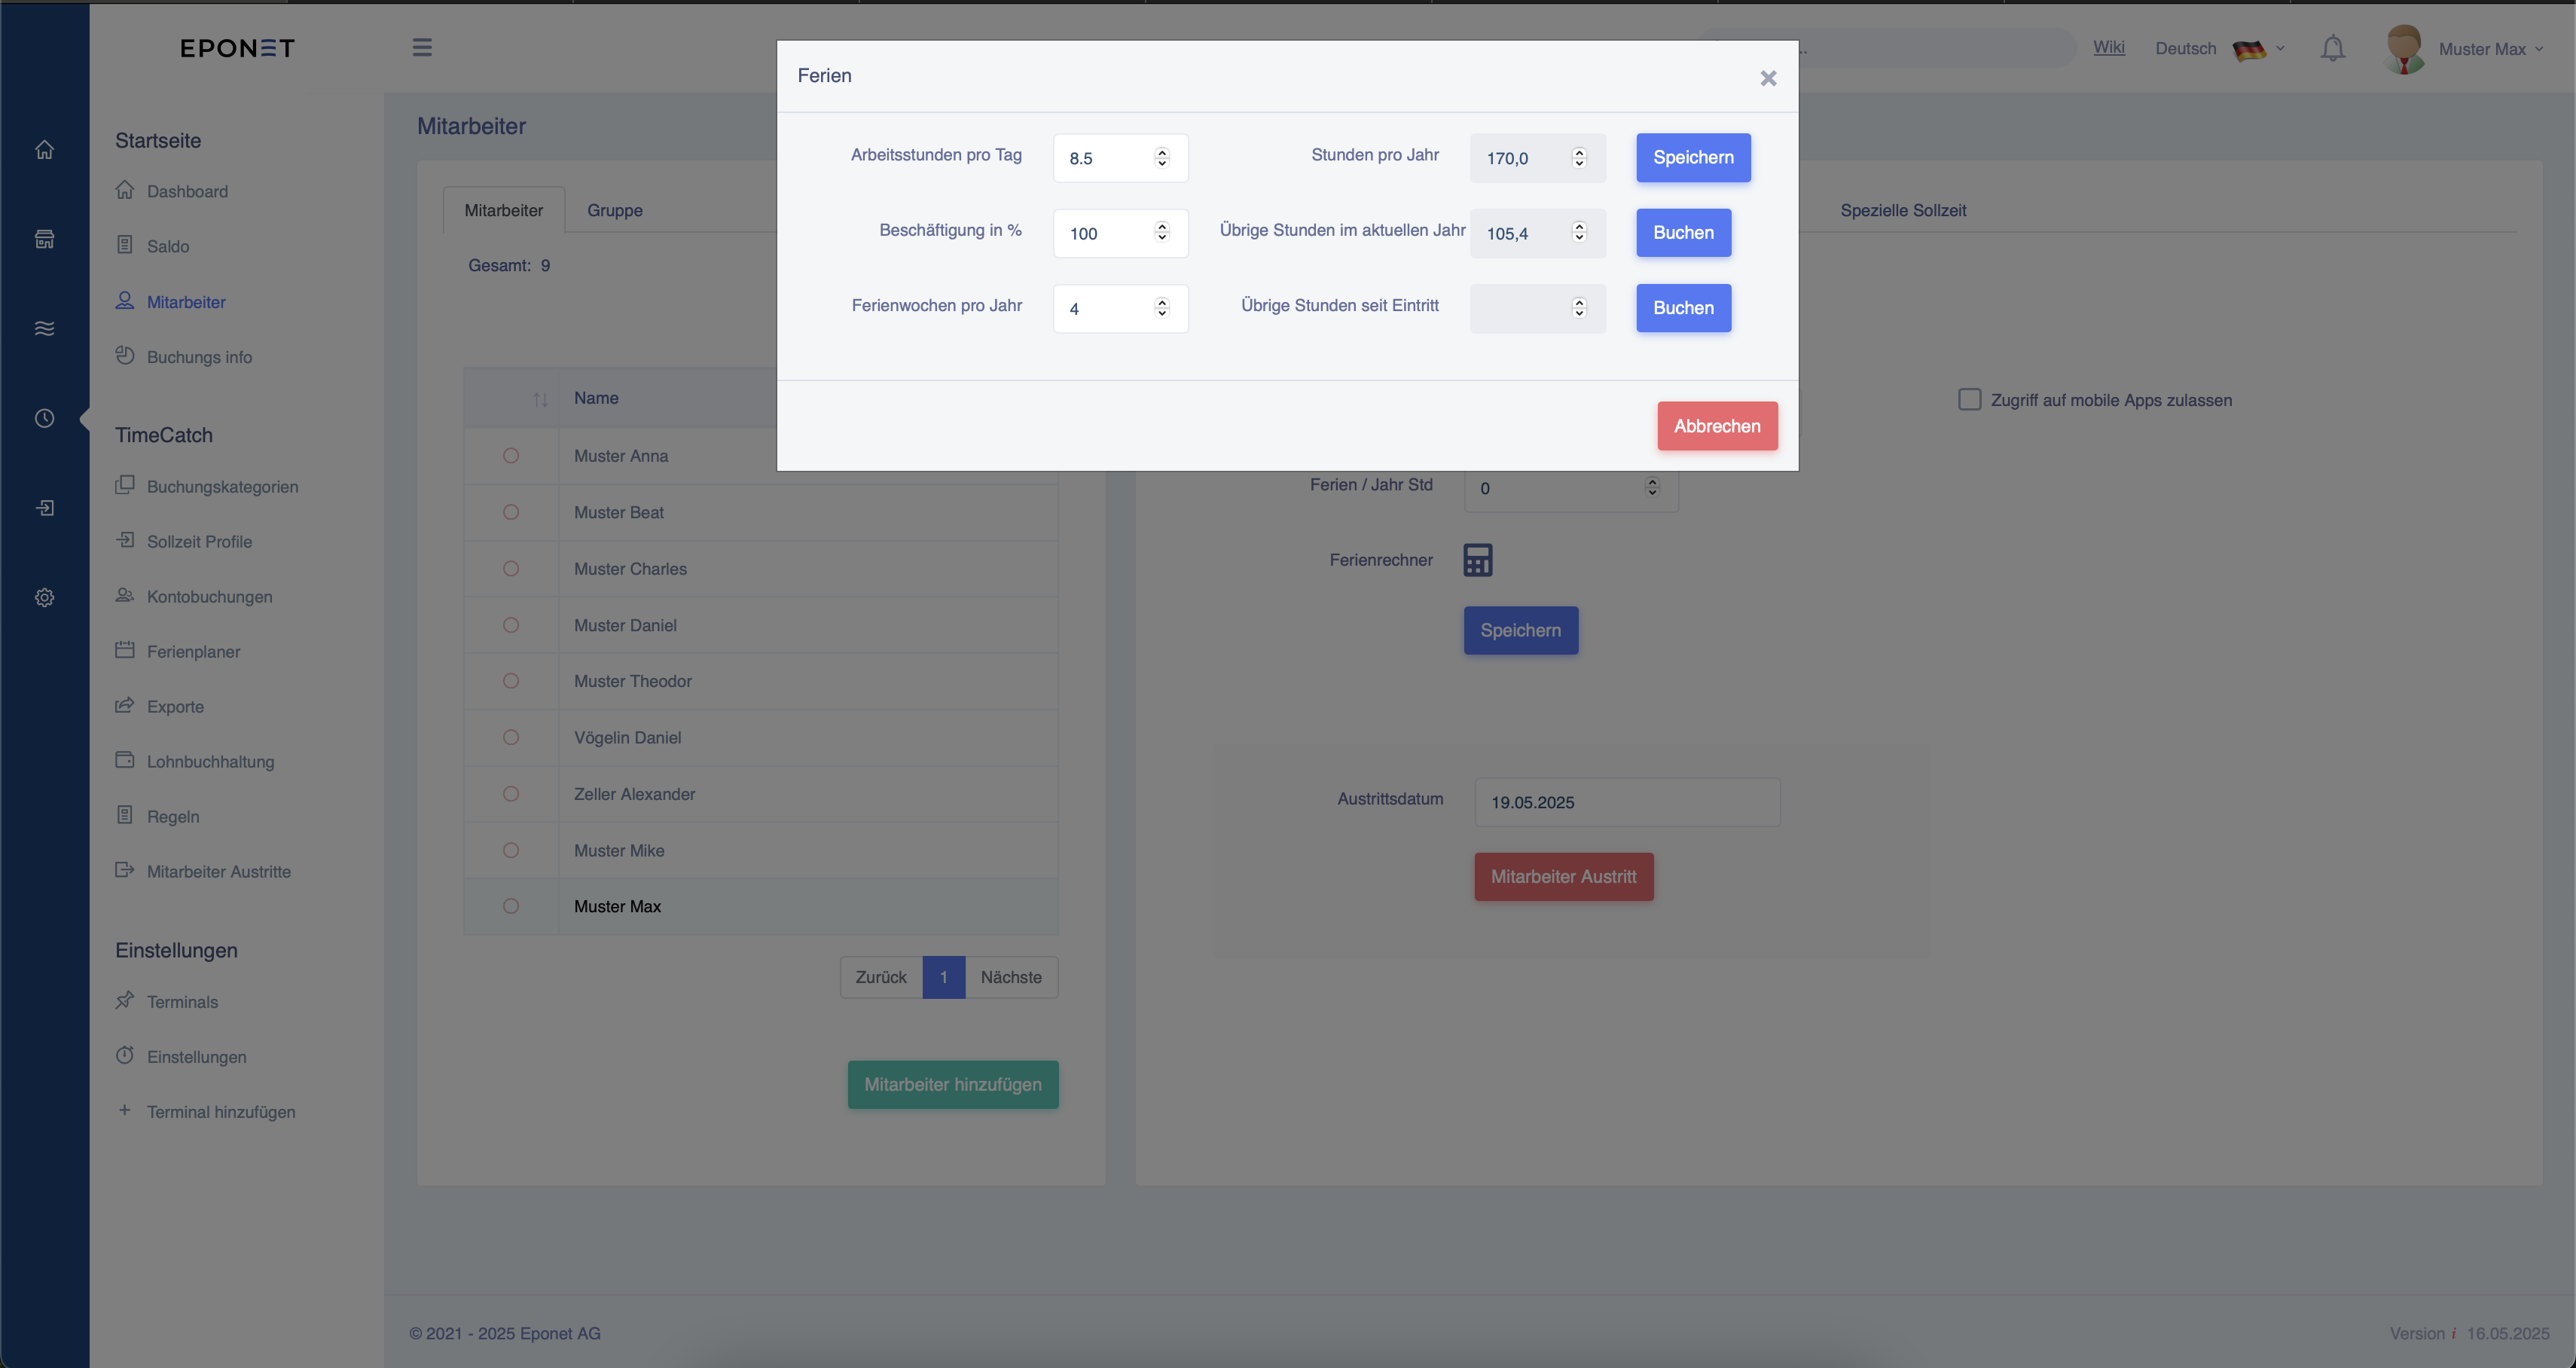
If you want to use the holiday calculator, you can enter the employee's working hours per day, the degree of employment and the holiday weeks per year.
The system will now automatically calculate the holiday hours per year and the remaining holidays that are still available for this year. You
can apply both values directly to the employee by clicking on Save or Book.
Then close the window by clicking on the X in the top right-hand corner.
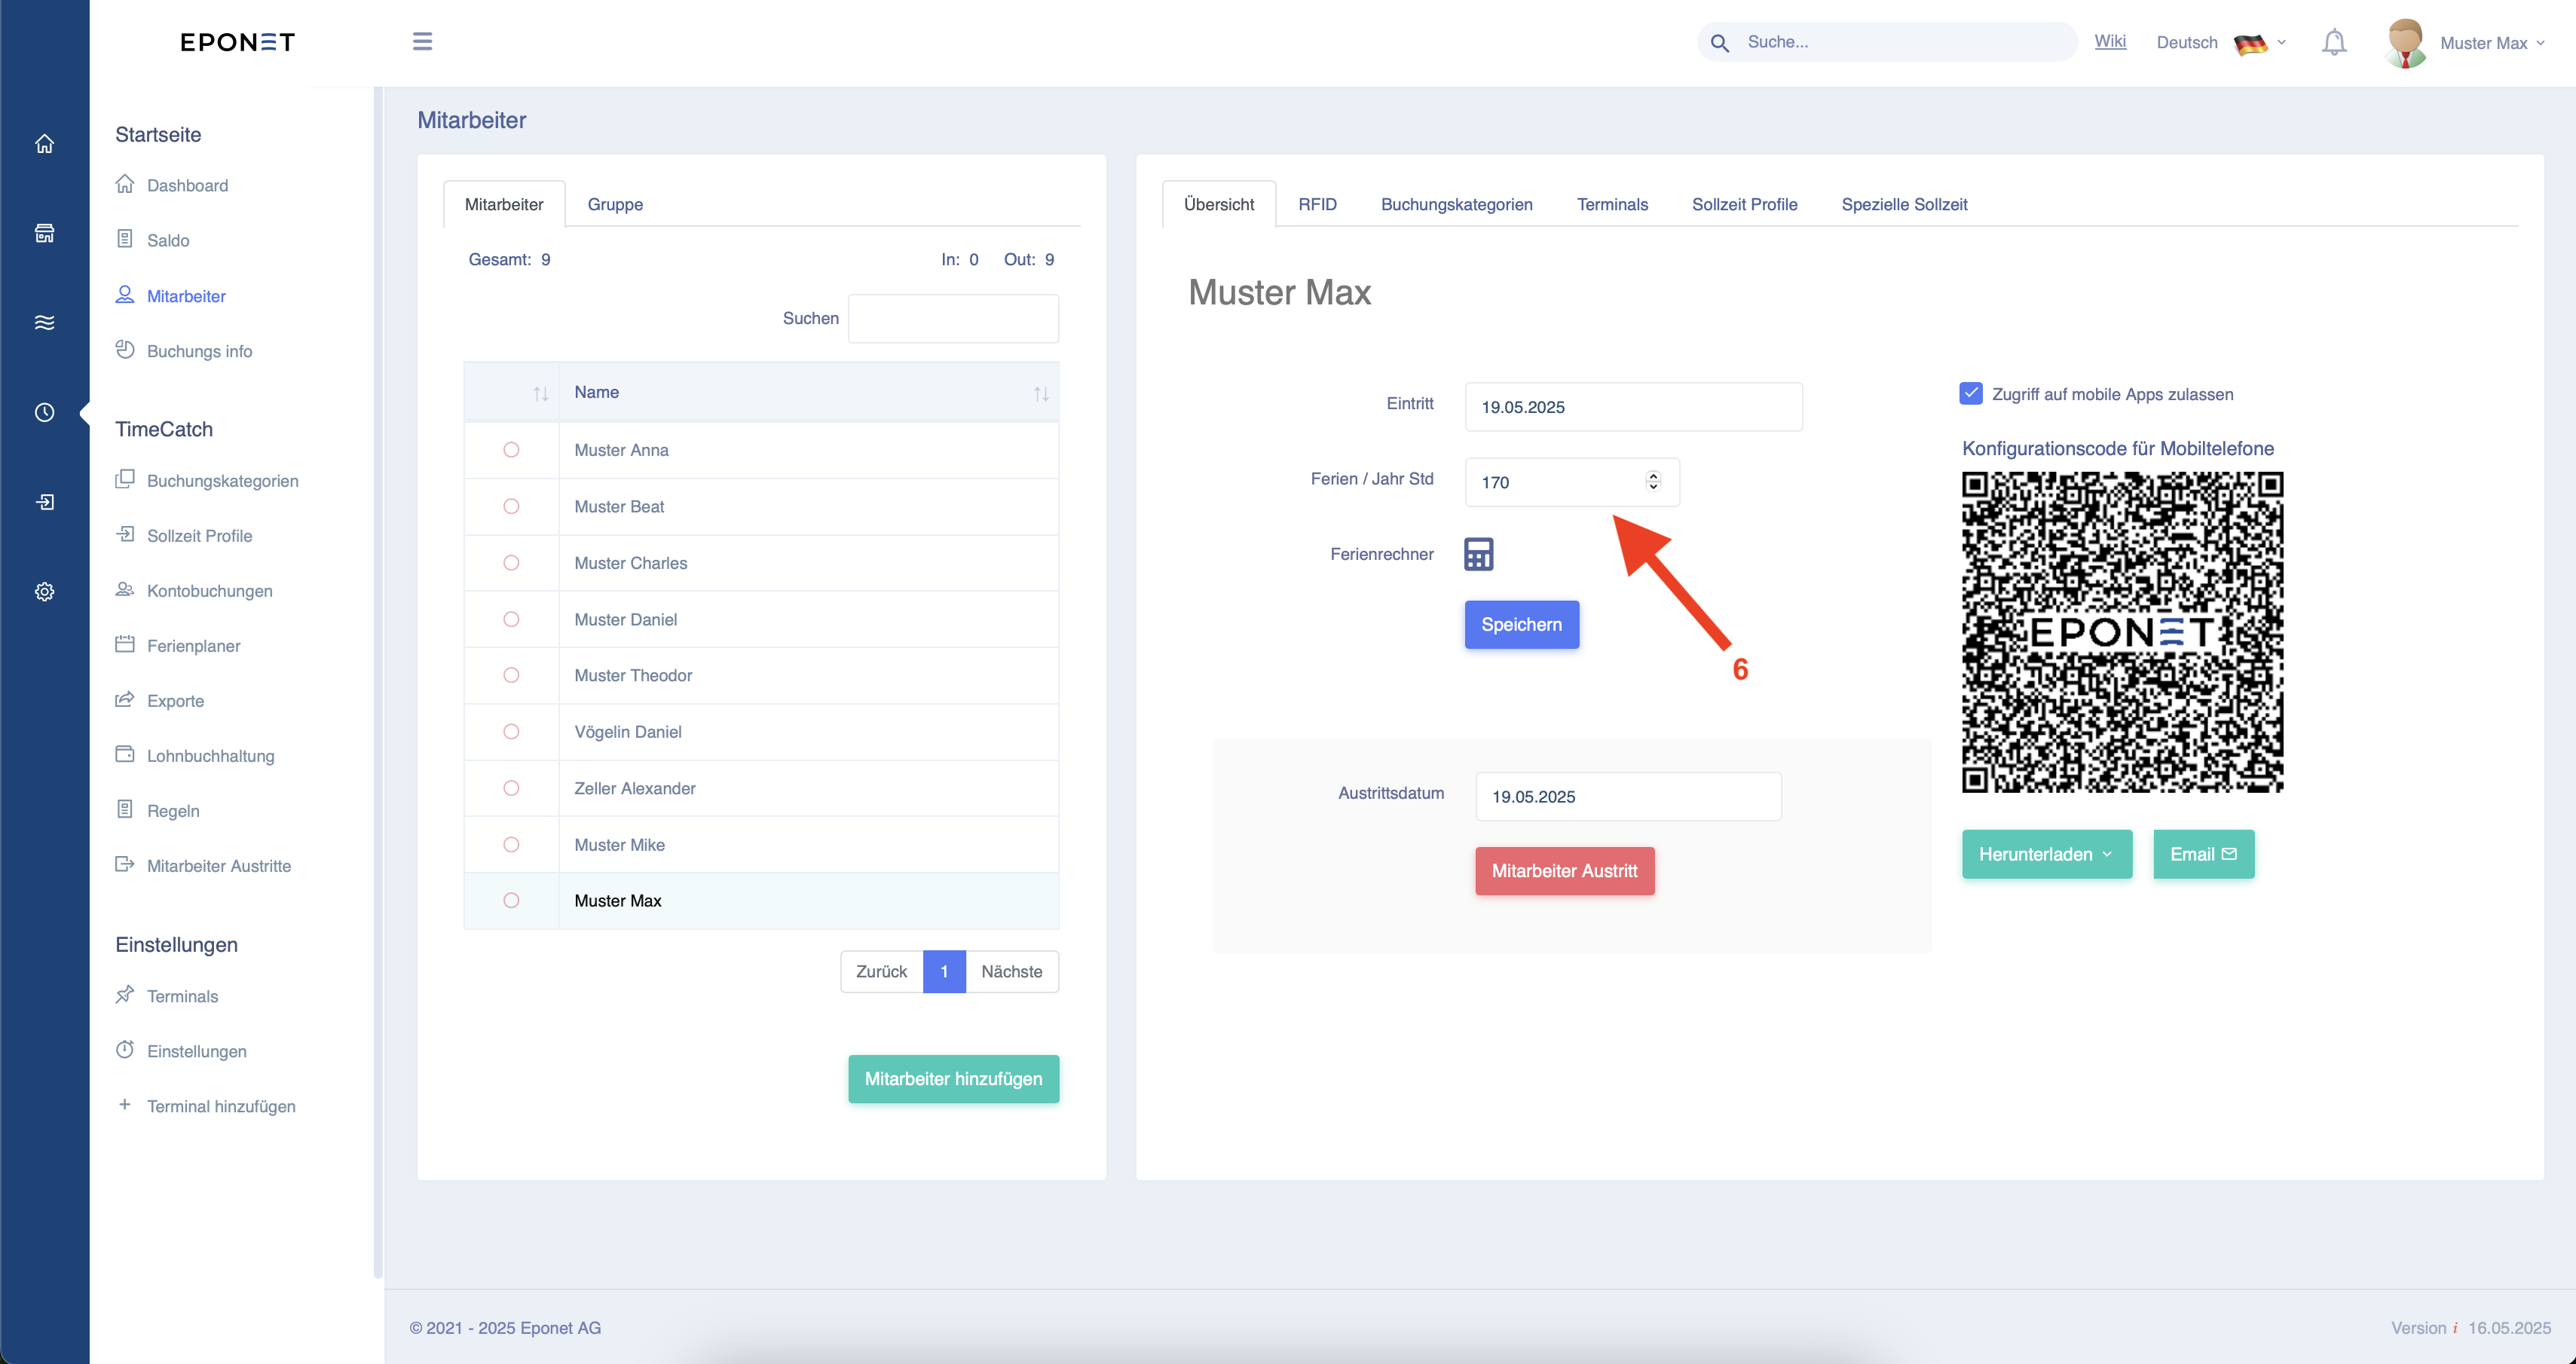
The hours have now been automatically applied, as shown in arrow 6, and will be automatically credited to the employee in the new year.
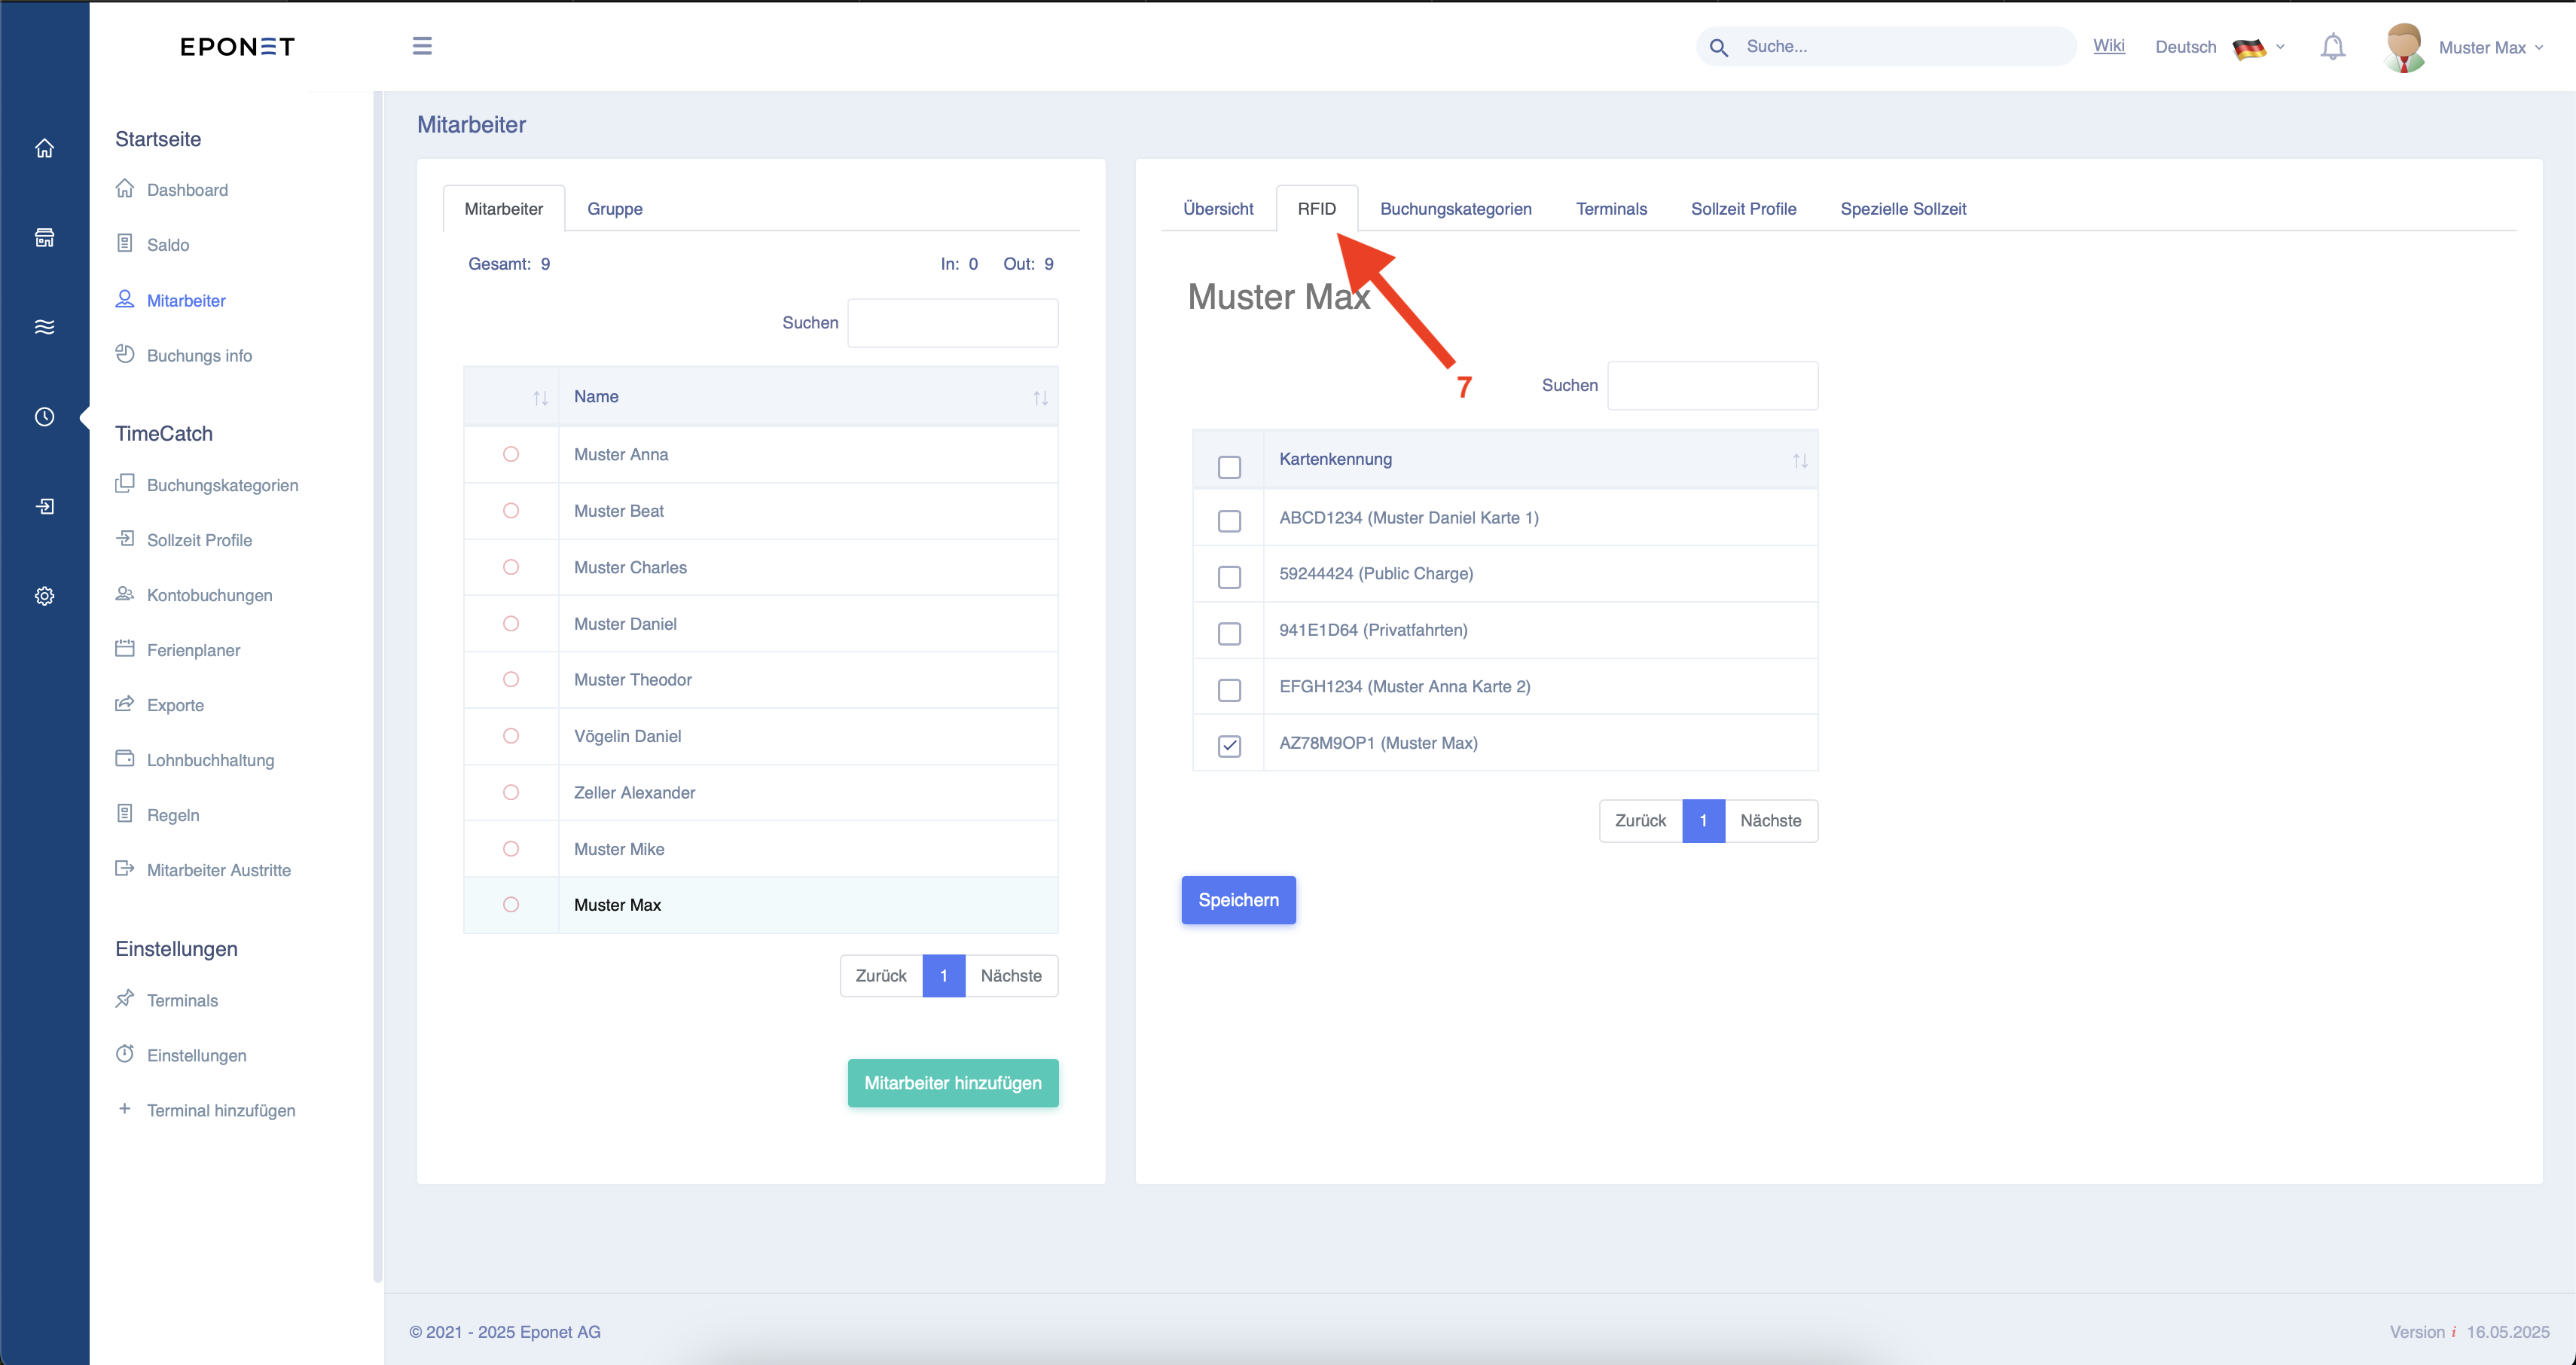
Now you can assign a previously created RFID card to the employee by clicking on the "RFID" field at arrow 7, which they can then use to clock in at the terminals. If you have not yet entered an RFID card, you can find instructions on how to do so here. To do
this, select the appropriate card from the list and then click on "Save".
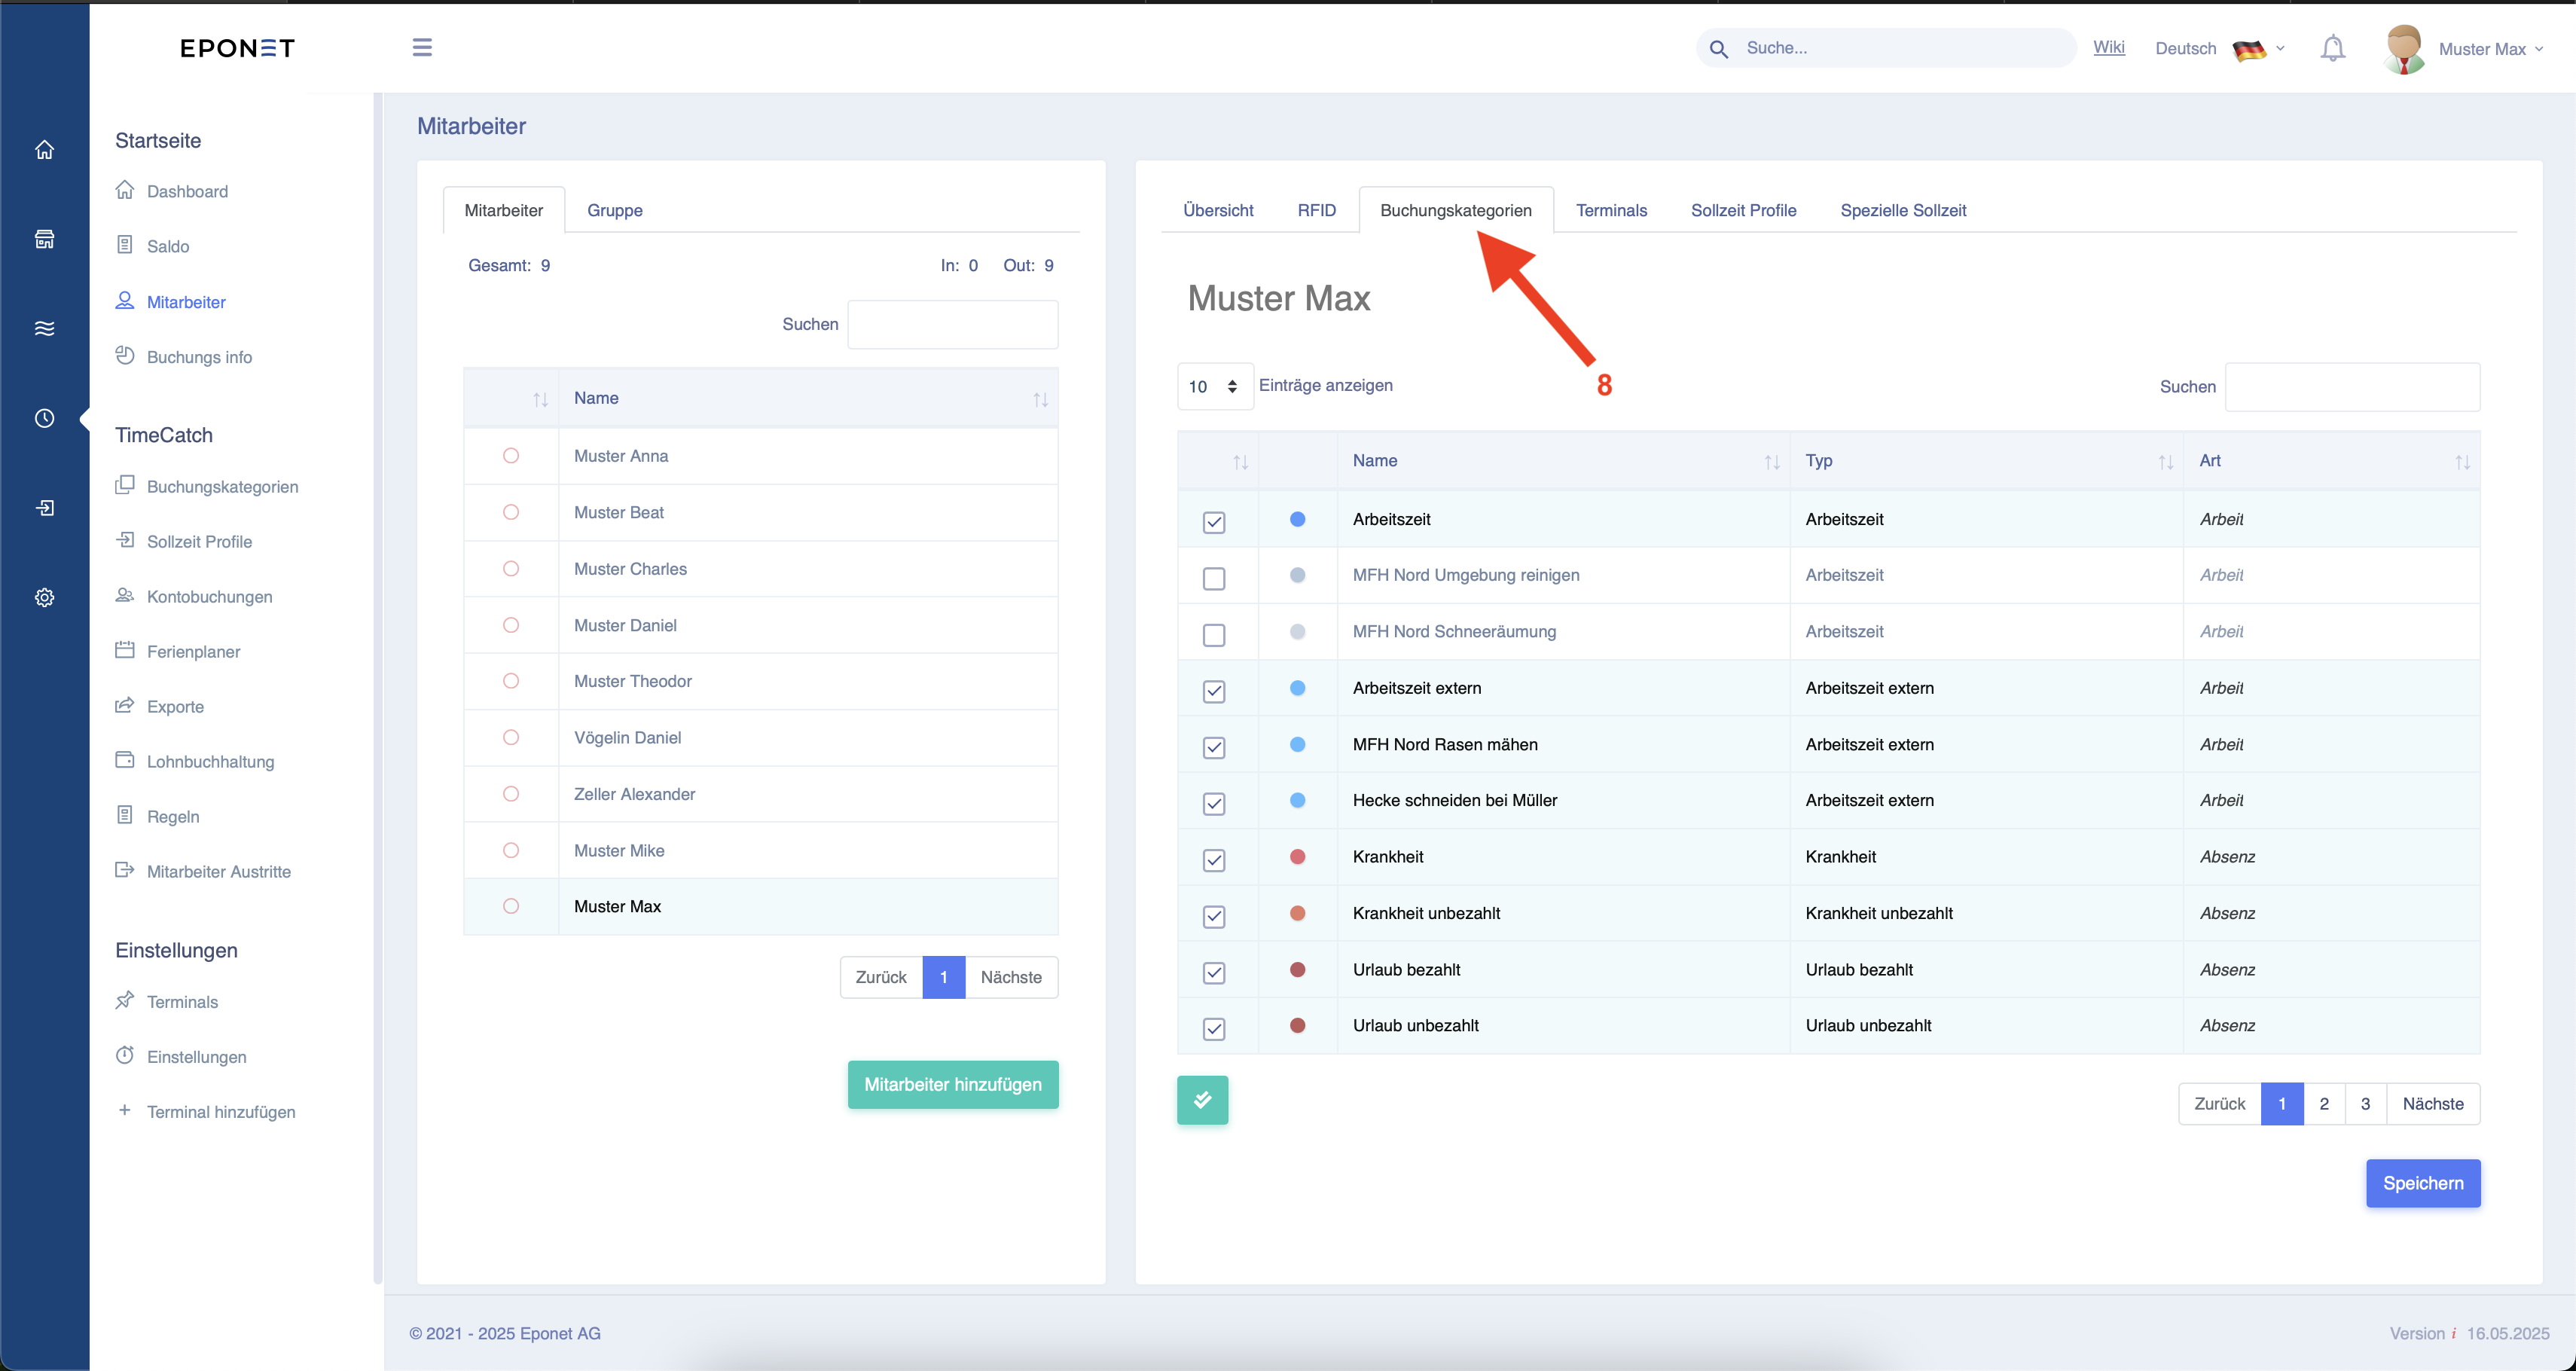
Under "Booking categories" at arrow 8, you can assign or remove special booking categories for the employee. You can
confirm this by clicking on "Save".
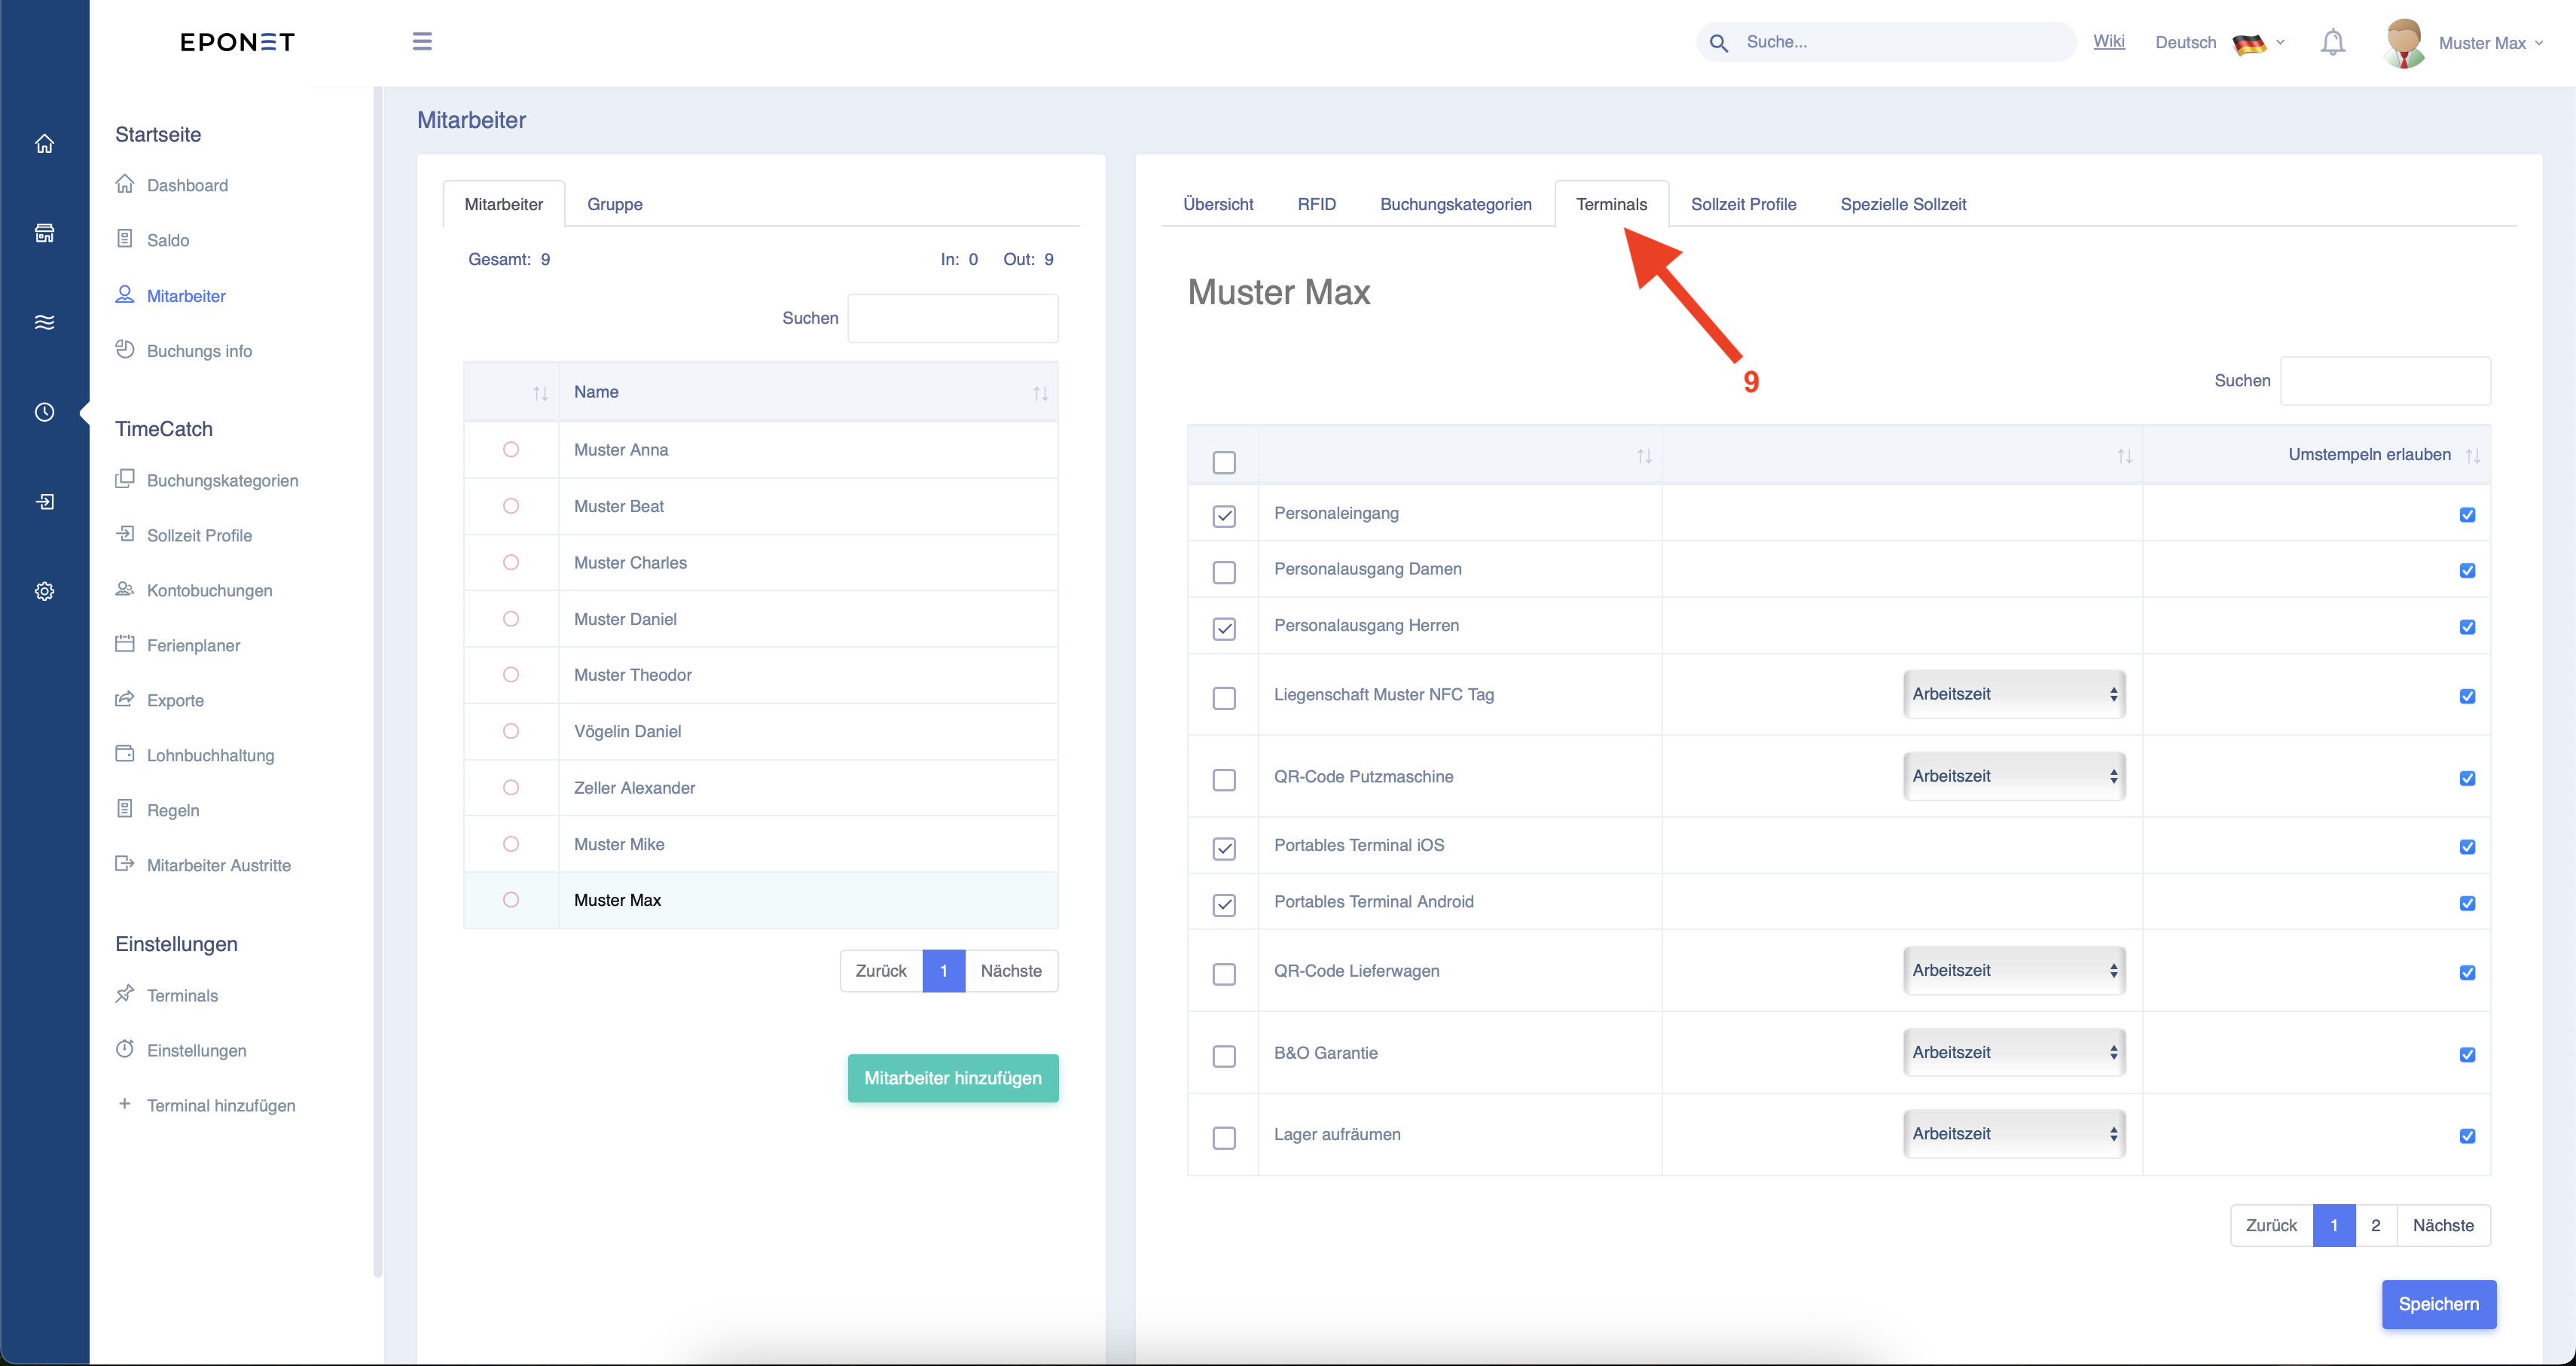
Under "Terminals" at arrow 9, you can give the employee permissions for which terminals they can clock in on.
If a mobile phone is to be used for clocking in, the check box must be ticked as shown in arrow 5 above, and "Portable Terminal iOS" or "Portable Terminal Android" must be ticked here under Terminals.
Under "Target time profiles" at arrow 10, you can now select a previously created target time profile and assign it a start date from which it is valid. You can also enter an end date for when it should be valid until. If the field is left blank, the profile will never end. Confirm
this at the end by clicking on Save.

The employee is now fully configured and can start clocking in.