Detailed view of the charger
Description: A detailed overview of the individual charger’s details page – tabs, sections and available actions.
Header and navigation tabs on the details page
Clicking on a charger name opens its details page. The header shows: the name of the charger (e.g. ‘Heena charger’), the mode icon (e.g. GARAGE) and the location address. A back arrow takes you back to the list. The top right-hand corner displays: the blue “▶ Start charging” button and a three-dot menu for further actions.
- Overview
- Consumption
- Info
- Availability
- Configuration
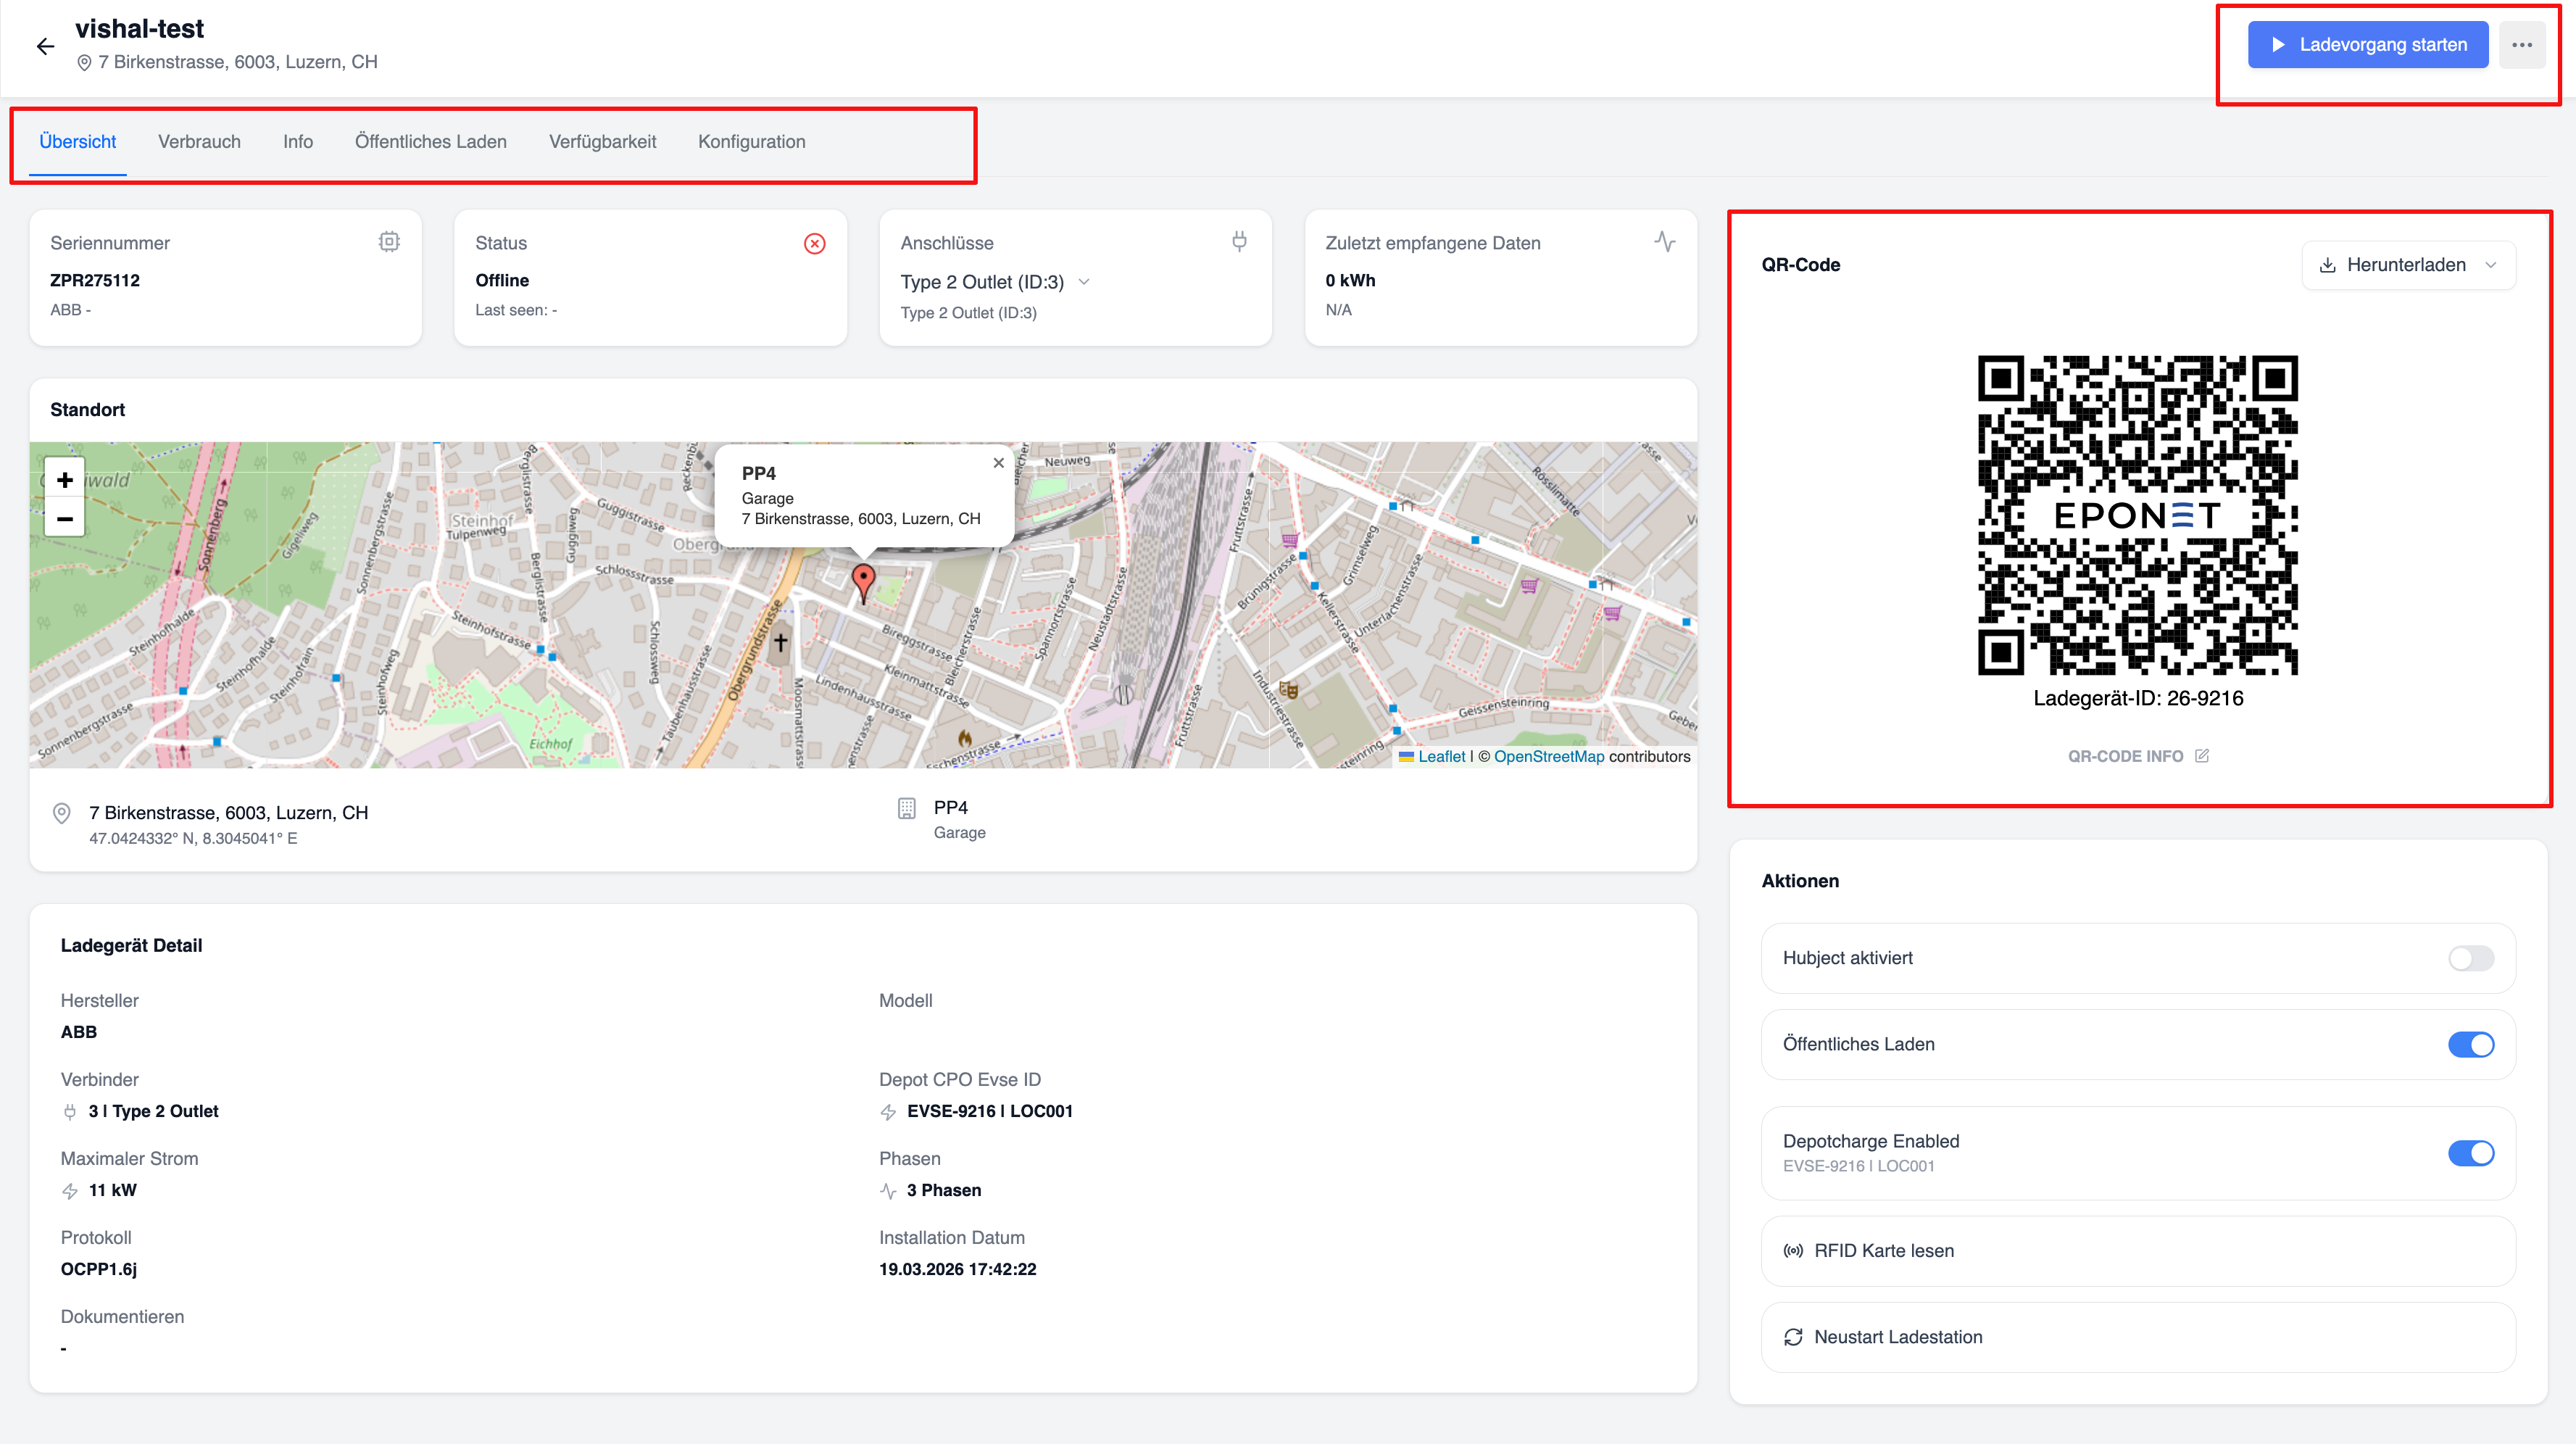
‘Overview’ tab: Status cards
Four status cards are displayed at the top of the “Overview” tab:
- Serial number: e.g. PPL-67242, Manufacturer (ABB – ABB)
- Status: e.g. Offline, timestamp of the last reading
- Connections: Connection type with drop-down menu (e.g. AC Type 2 (ID:1))
- Last data received: Energy (kWh) and timestamp
"Overview" tab: Location map
The “Location” section displays an interactive map (OpenStreetMap/Leaflet) with a marker at the charging station’s location. A pop-up shows the property name, type (car park) and address. Below the map: GPS coordinates, property name and car park type.
"Overview" tab: Charger details
The ‘Charger Details’ section lists the technical specifications:
- Manufacturer: ABB
- Model: ABB
- Connection: 1 Type 2 socket
- Depot CPO EVSE ID: CHEPOED0005639 | LOC001
- Maximum power: 11 kW
- Phases: 3-phase
- Protocol: OCPP1.6j
- Installation date: 16/09/2025 10:14:25
- Documents: Thumbnails of uploaded documents
‘Overview’ tab: QR code & action field
On the right-hand side of the “Overview” tab:
- ‘QR Code’ section: Displays an image of the charger’s QR code with a ‘Download’ drop-down menu. The charger ID is displayed below the QR code. An external link ‘QR CODE INFO’ is available.
- ‘Actions’ section: Toggle switches and action buttons:
- Hubject enabled (toggle switch)
- Public Charging (toggle switch)
- Depotcharge enabled with EVSE ID (toggle switch, displayed in blue when enabled)
- Read RFID card (action button)
- Restart charging station (action button)
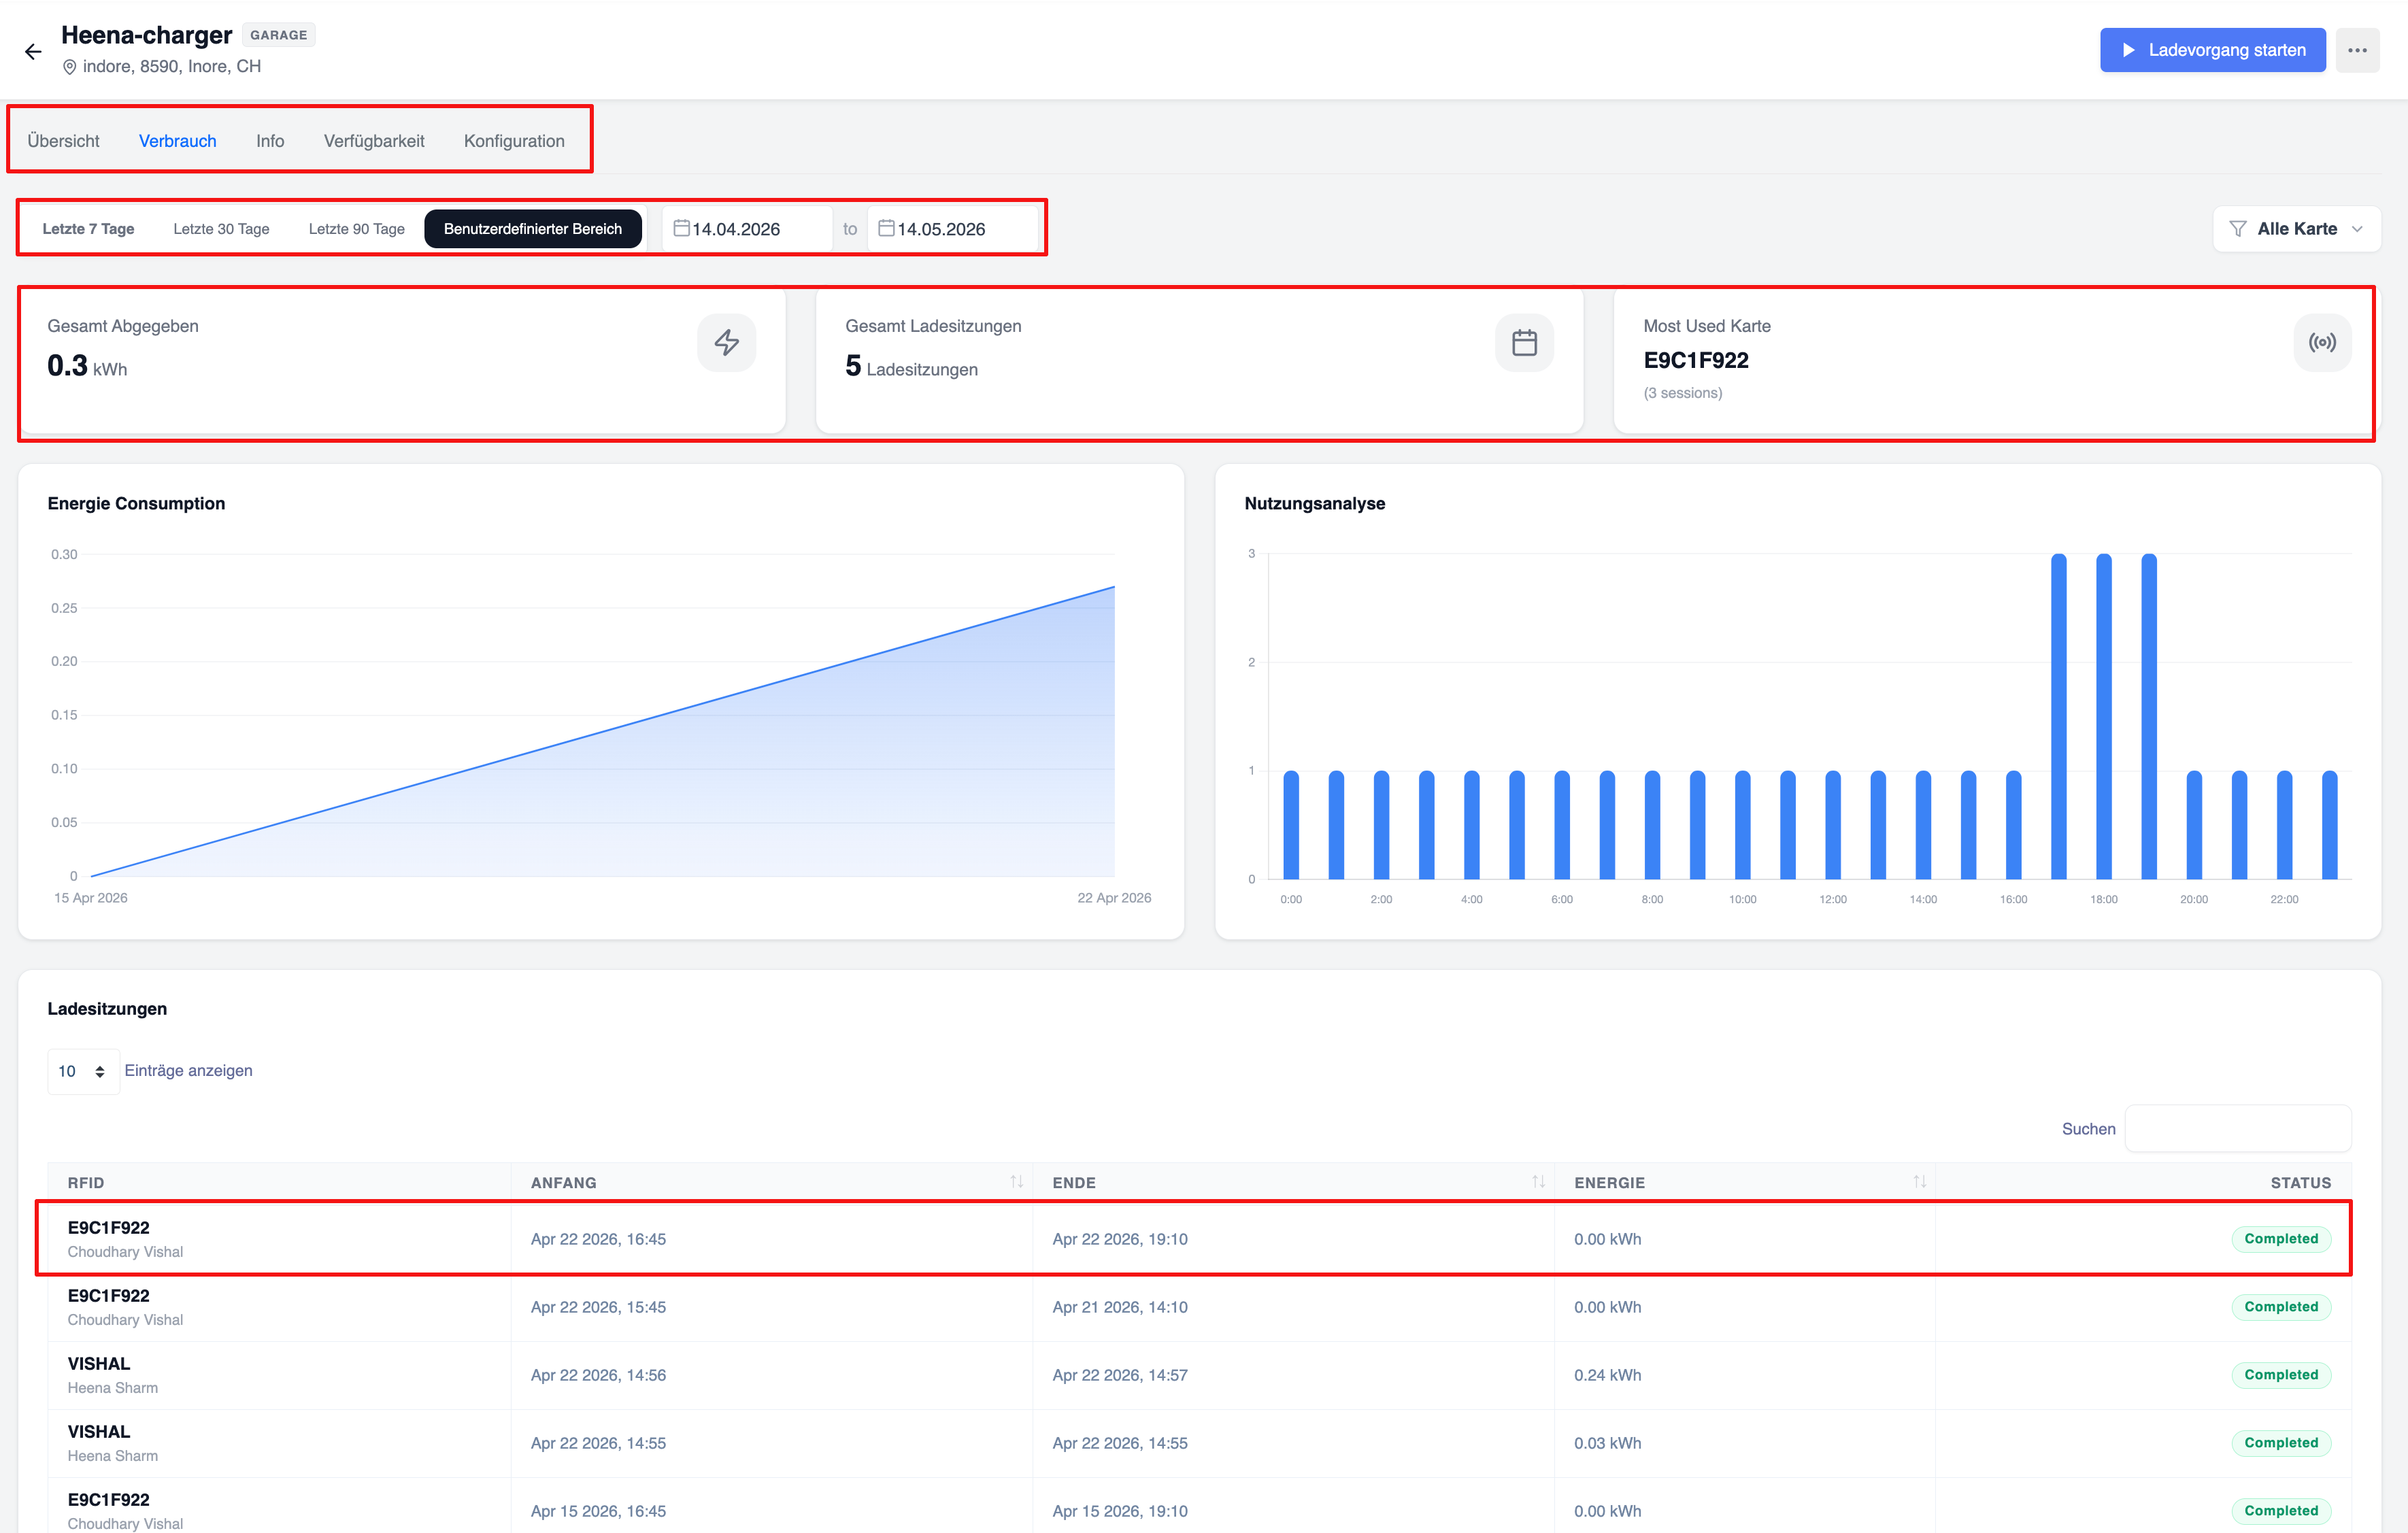
“Usage” tab
The ‘Usage’ tab provides usage analytics for the individual charging station. Time range selection at the top: Last 7 days, Last 30 days, Last 90 days, Custom range with date selection. An ‘All cards’ filter is available.
Three summary cards:
- Total energy supplied: e.g. 0.3 kWh
- Total charging sessions: e.g. 5 sessions
- Most frequently used card: RFID card ID and number of sessions
Two charts: Energy consumption (area/line chart over time) and usage analysis (bar chart by time of day).
A ‘Charging Sessions’ table at the bottom shows: RFID (card ID and user name), Start (start time), End (end time), Energy (energy supplied in kWh), Status (e.g. Completed). Option to select entries per page and search function available.
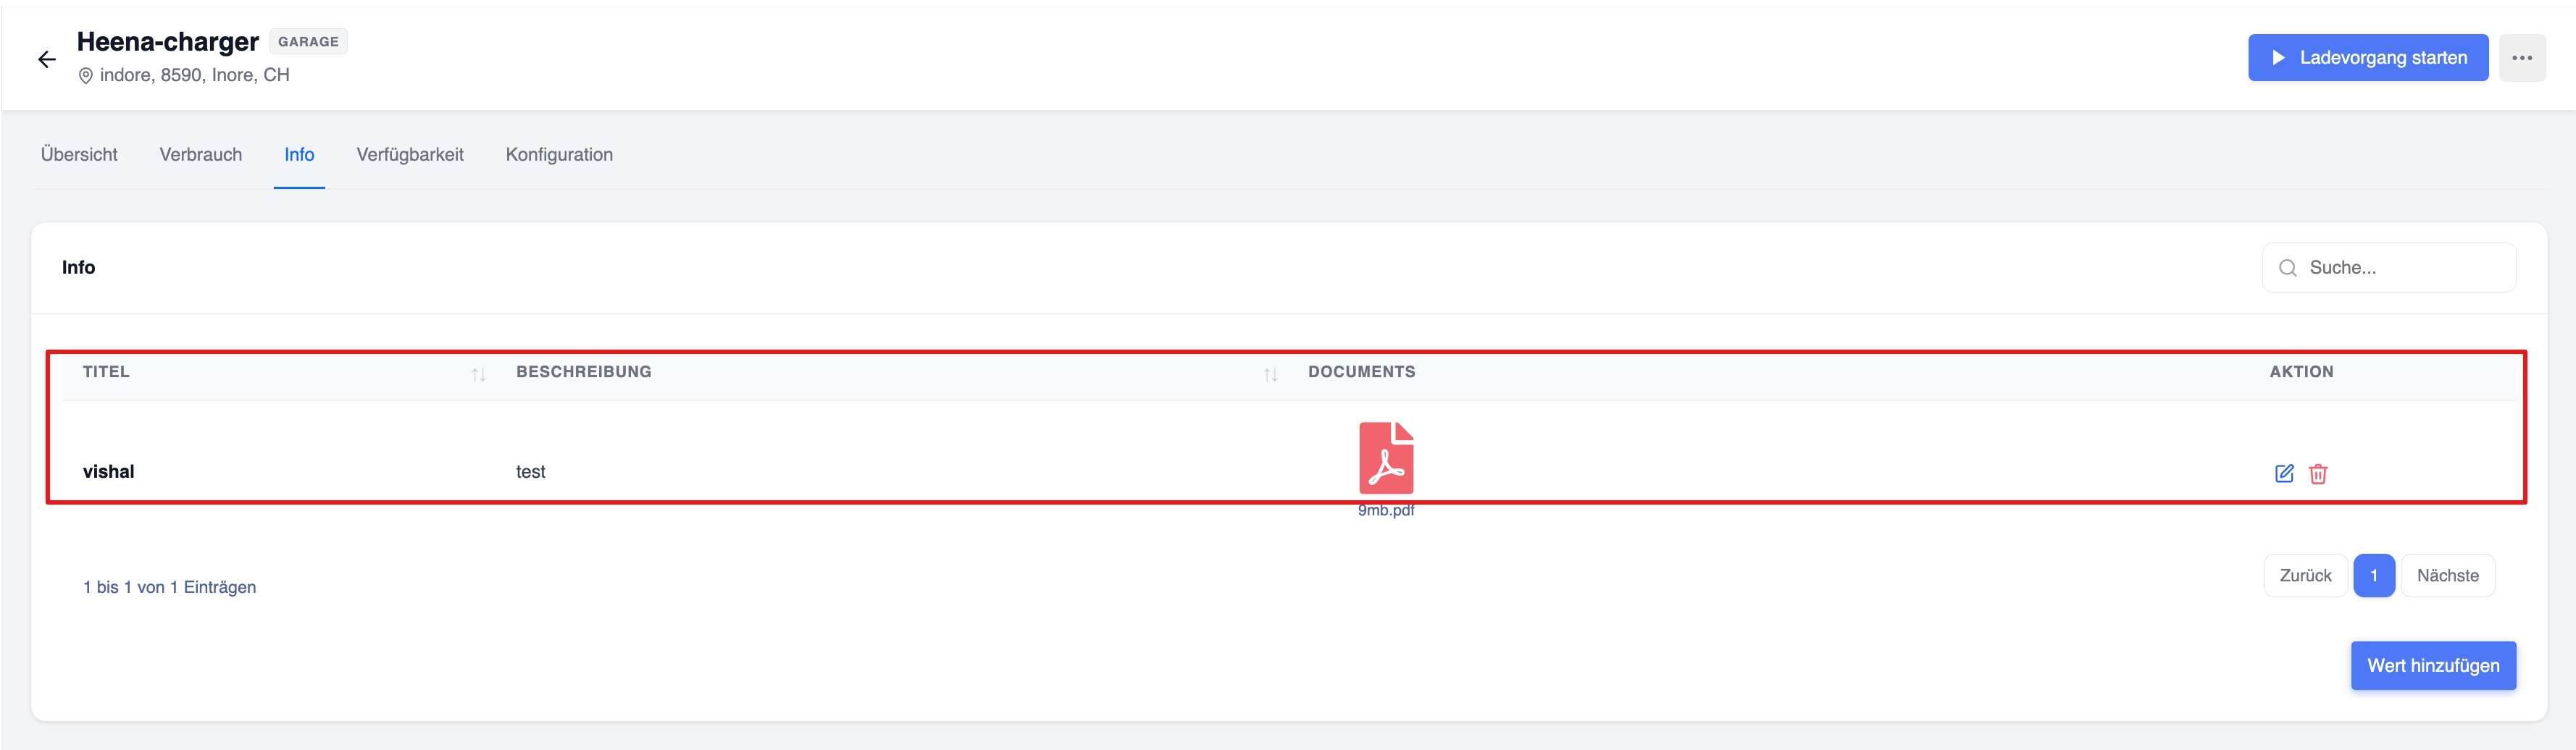
“Info” tab
The ‘Info’ tab contains document attachments for the charger. Columns: Title, Description, Documents (PDF/file attachment), Action (icons for edit/delete). At the bottom right is the ‘Add value’ button for uploading new documents. A search function is available at the top right.
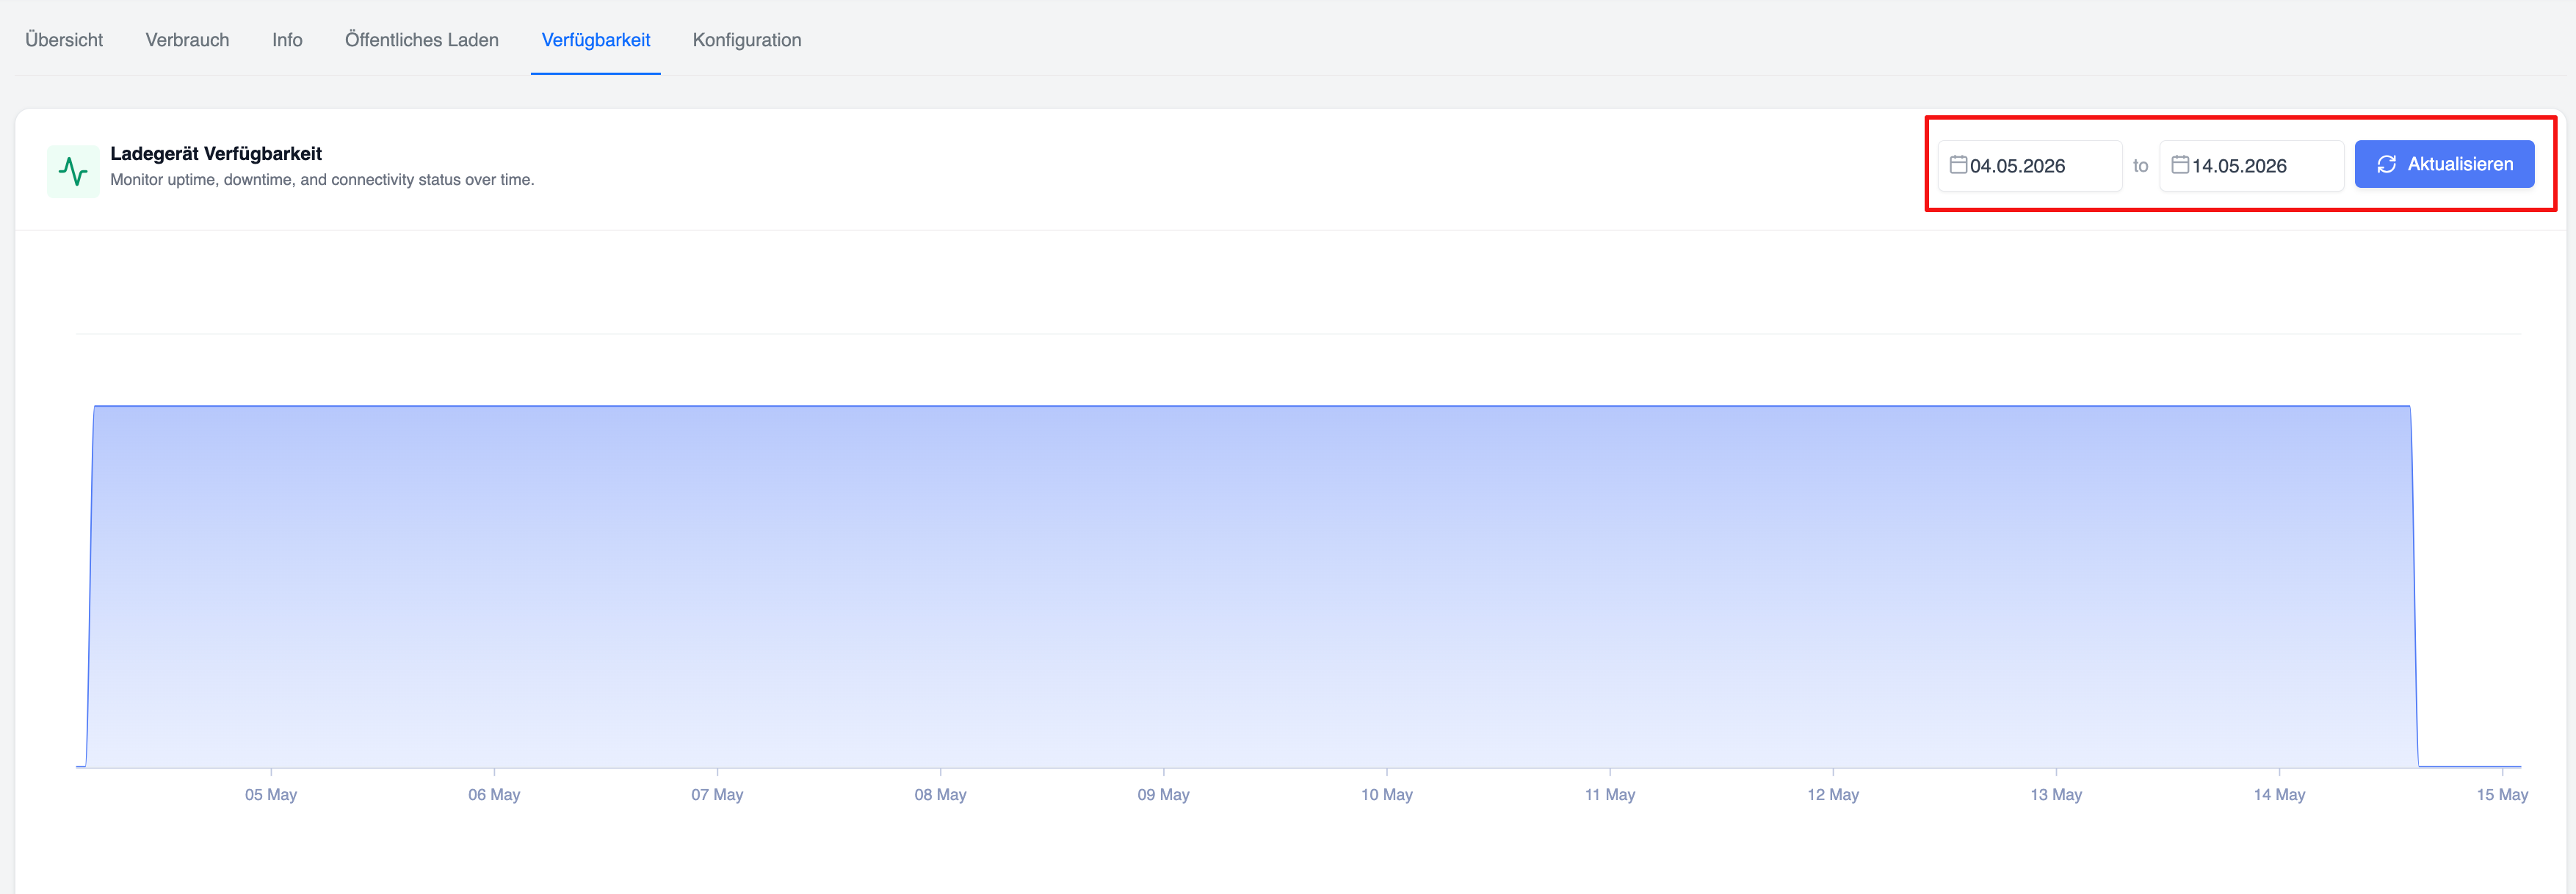
"Availability" tab
The ‘Availability’ tab displays a full-width chart showing charger availability with the subtitle: ‘Monitor uptime, downtime and connection status over time.’ In the top right-hand corner there is a date selector (from/to) and a blue ‘Refresh’ button. The chart displays uptime as a filled area chart over the selected period (e.g. 04/05/2026 to 14/05/2026), showing the periods with an online/offline connection.
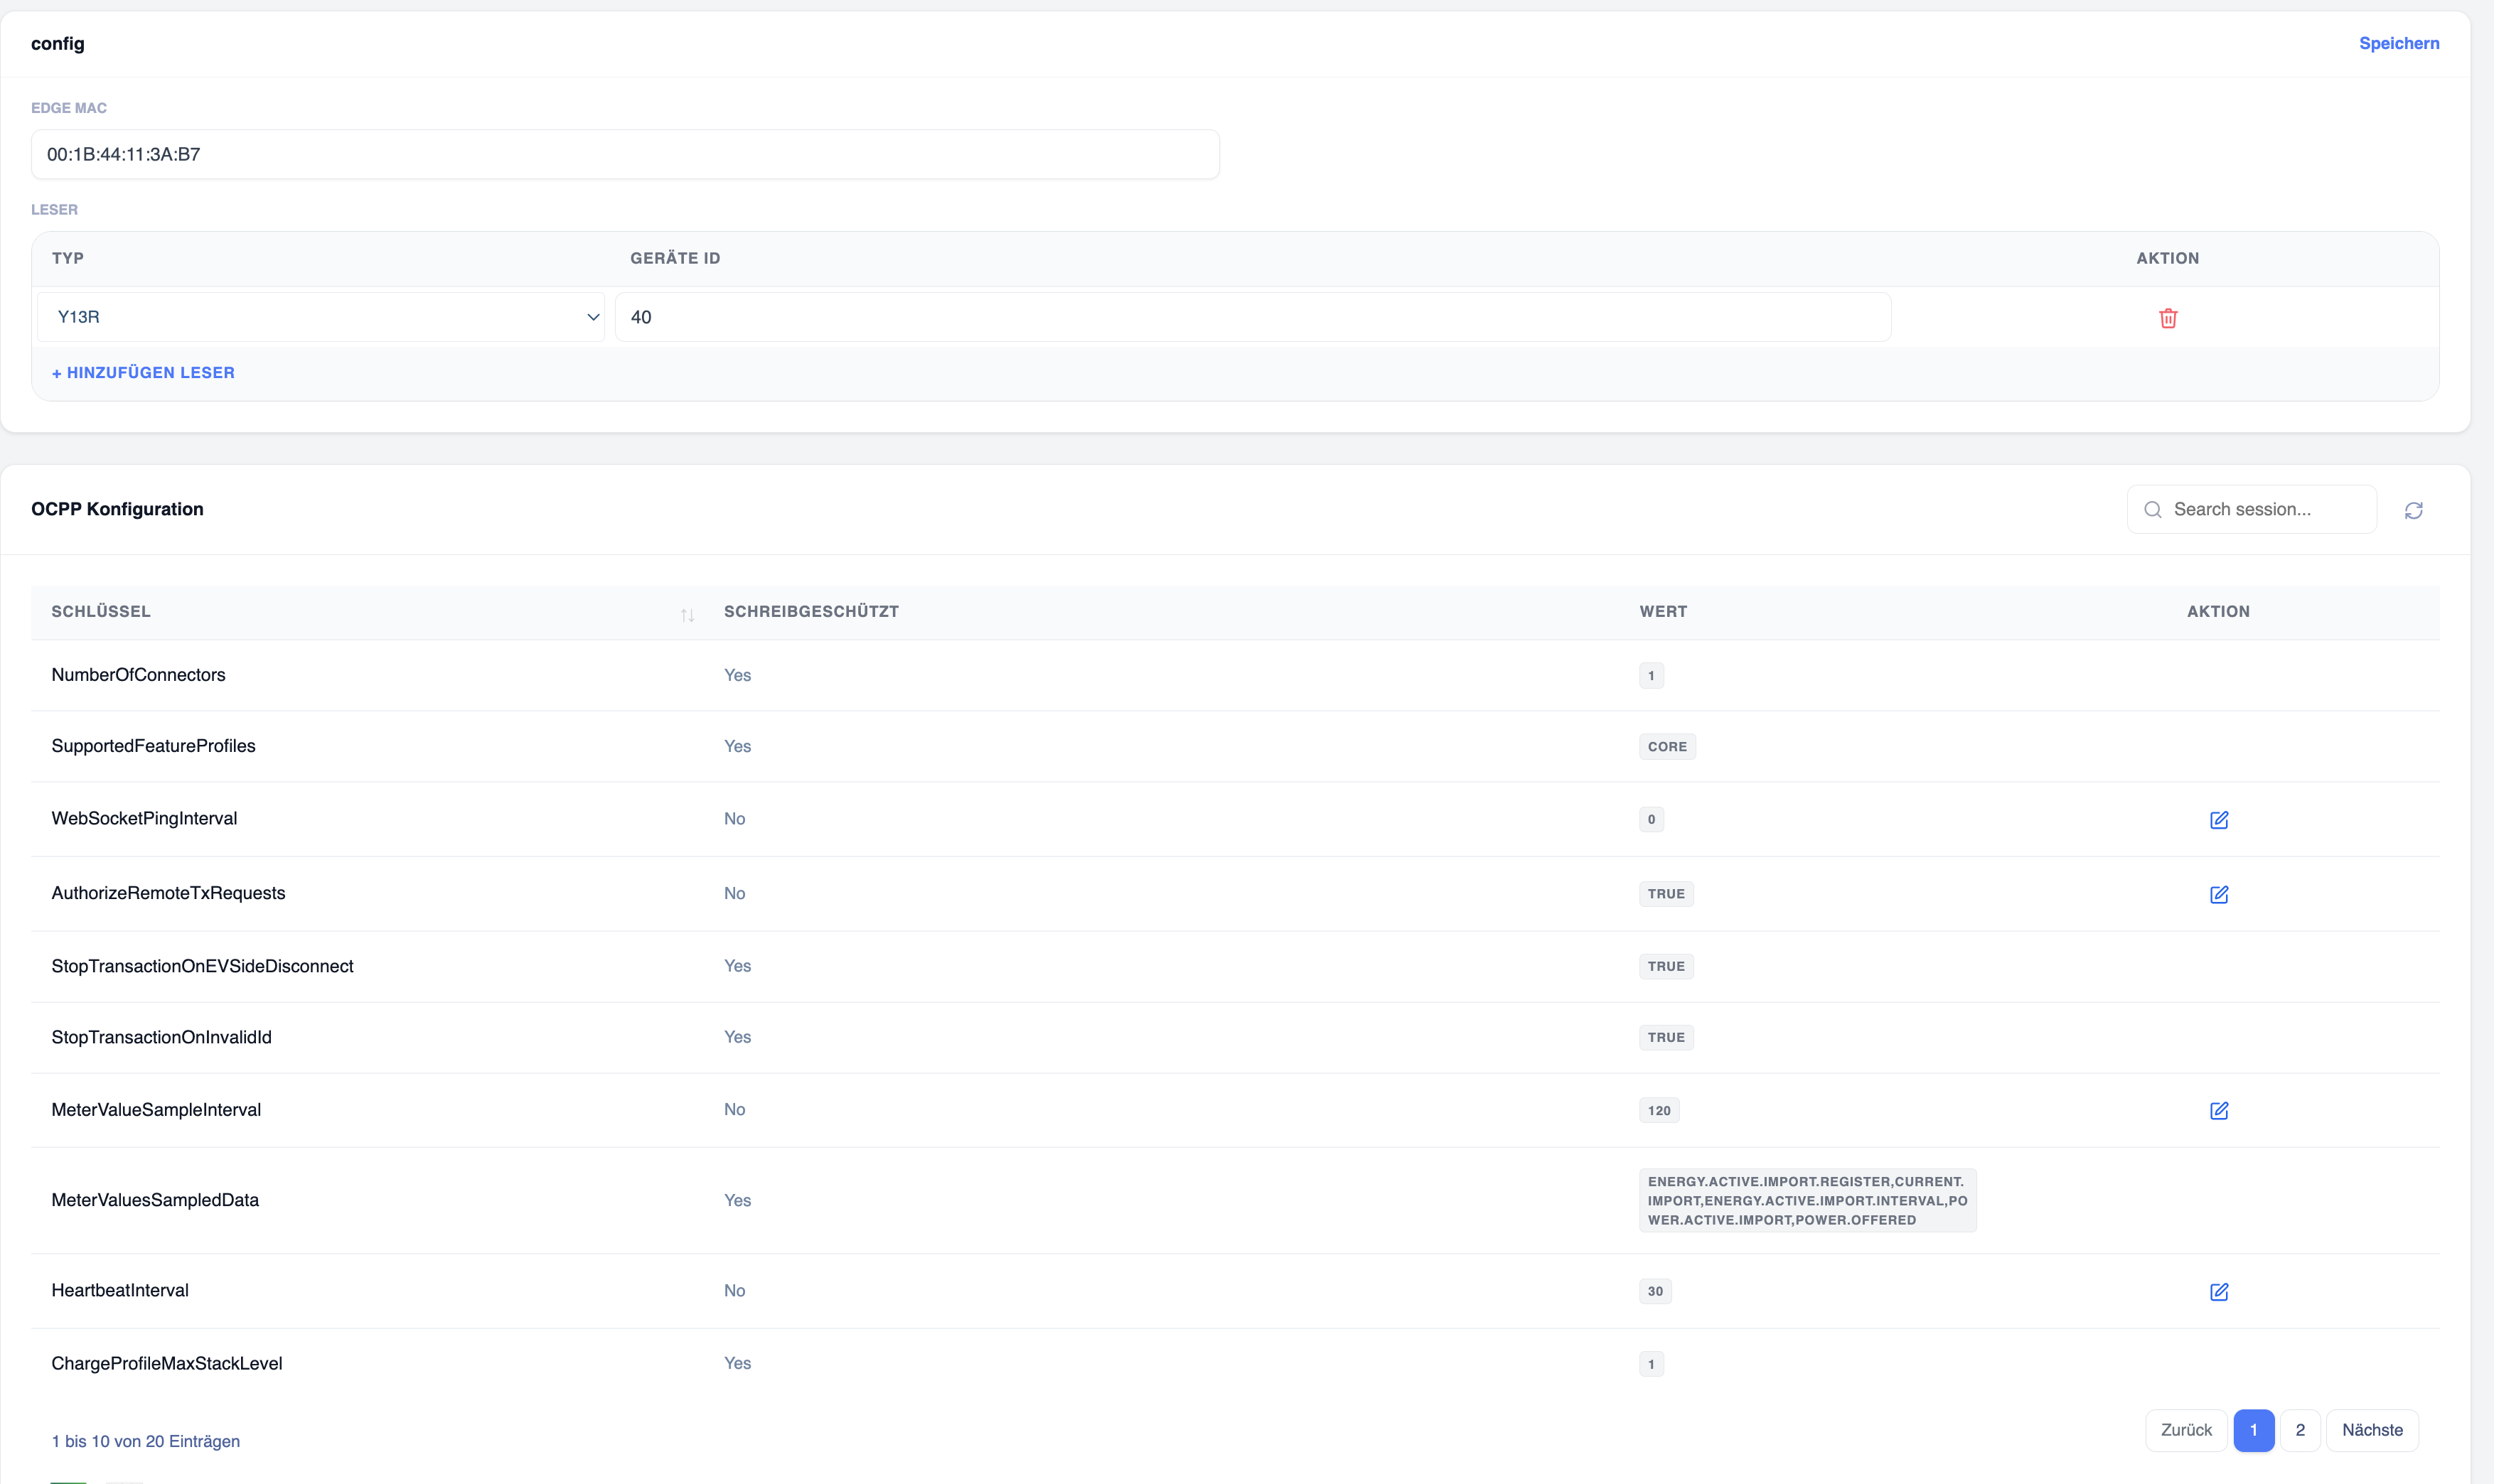
"Configuration" tab
The “Configuration” tab is divided into two sections:
1. Configuration (Edge/Reader configuration):
- Edge MAC: Input field displaying the device’s MAC address (e.g. 00:1B:44:11:3A:B7)
- Reader table: Columns – Type, Device ID, Action (Delete). A row displays, for example, Y13R / Device ID 40. Further readers can be added via the “+ Add reader” link.
2. OCPP configuration: A searchable table of OCPP configuration keys with the following columns: Key, Read-only (Yes/No), Value, Action (edit icon for editable keys). Example keys: NumberOfConnectors (1), SupportedFeatureProfiles (CORE), WebSocketPingInterval (0), AuthorizeRemoteTxRequests (TRUE), StopTransactionOnEVSideDisconnect (TRUE), StopTransactionOnInvalidId (TRUE), MeterValueSampleInterval (120), MeterValuesSampledData (Energy Types), HeartbeatInterval (30), ChargeProfileMaxStackLevel (1). The pagination displays ‘1 to 10 of 20 entries’. There is a ‘Save’ button in the top right-hand corner. Next to the search bar is a refresh icon.