Create a new location/sub-location
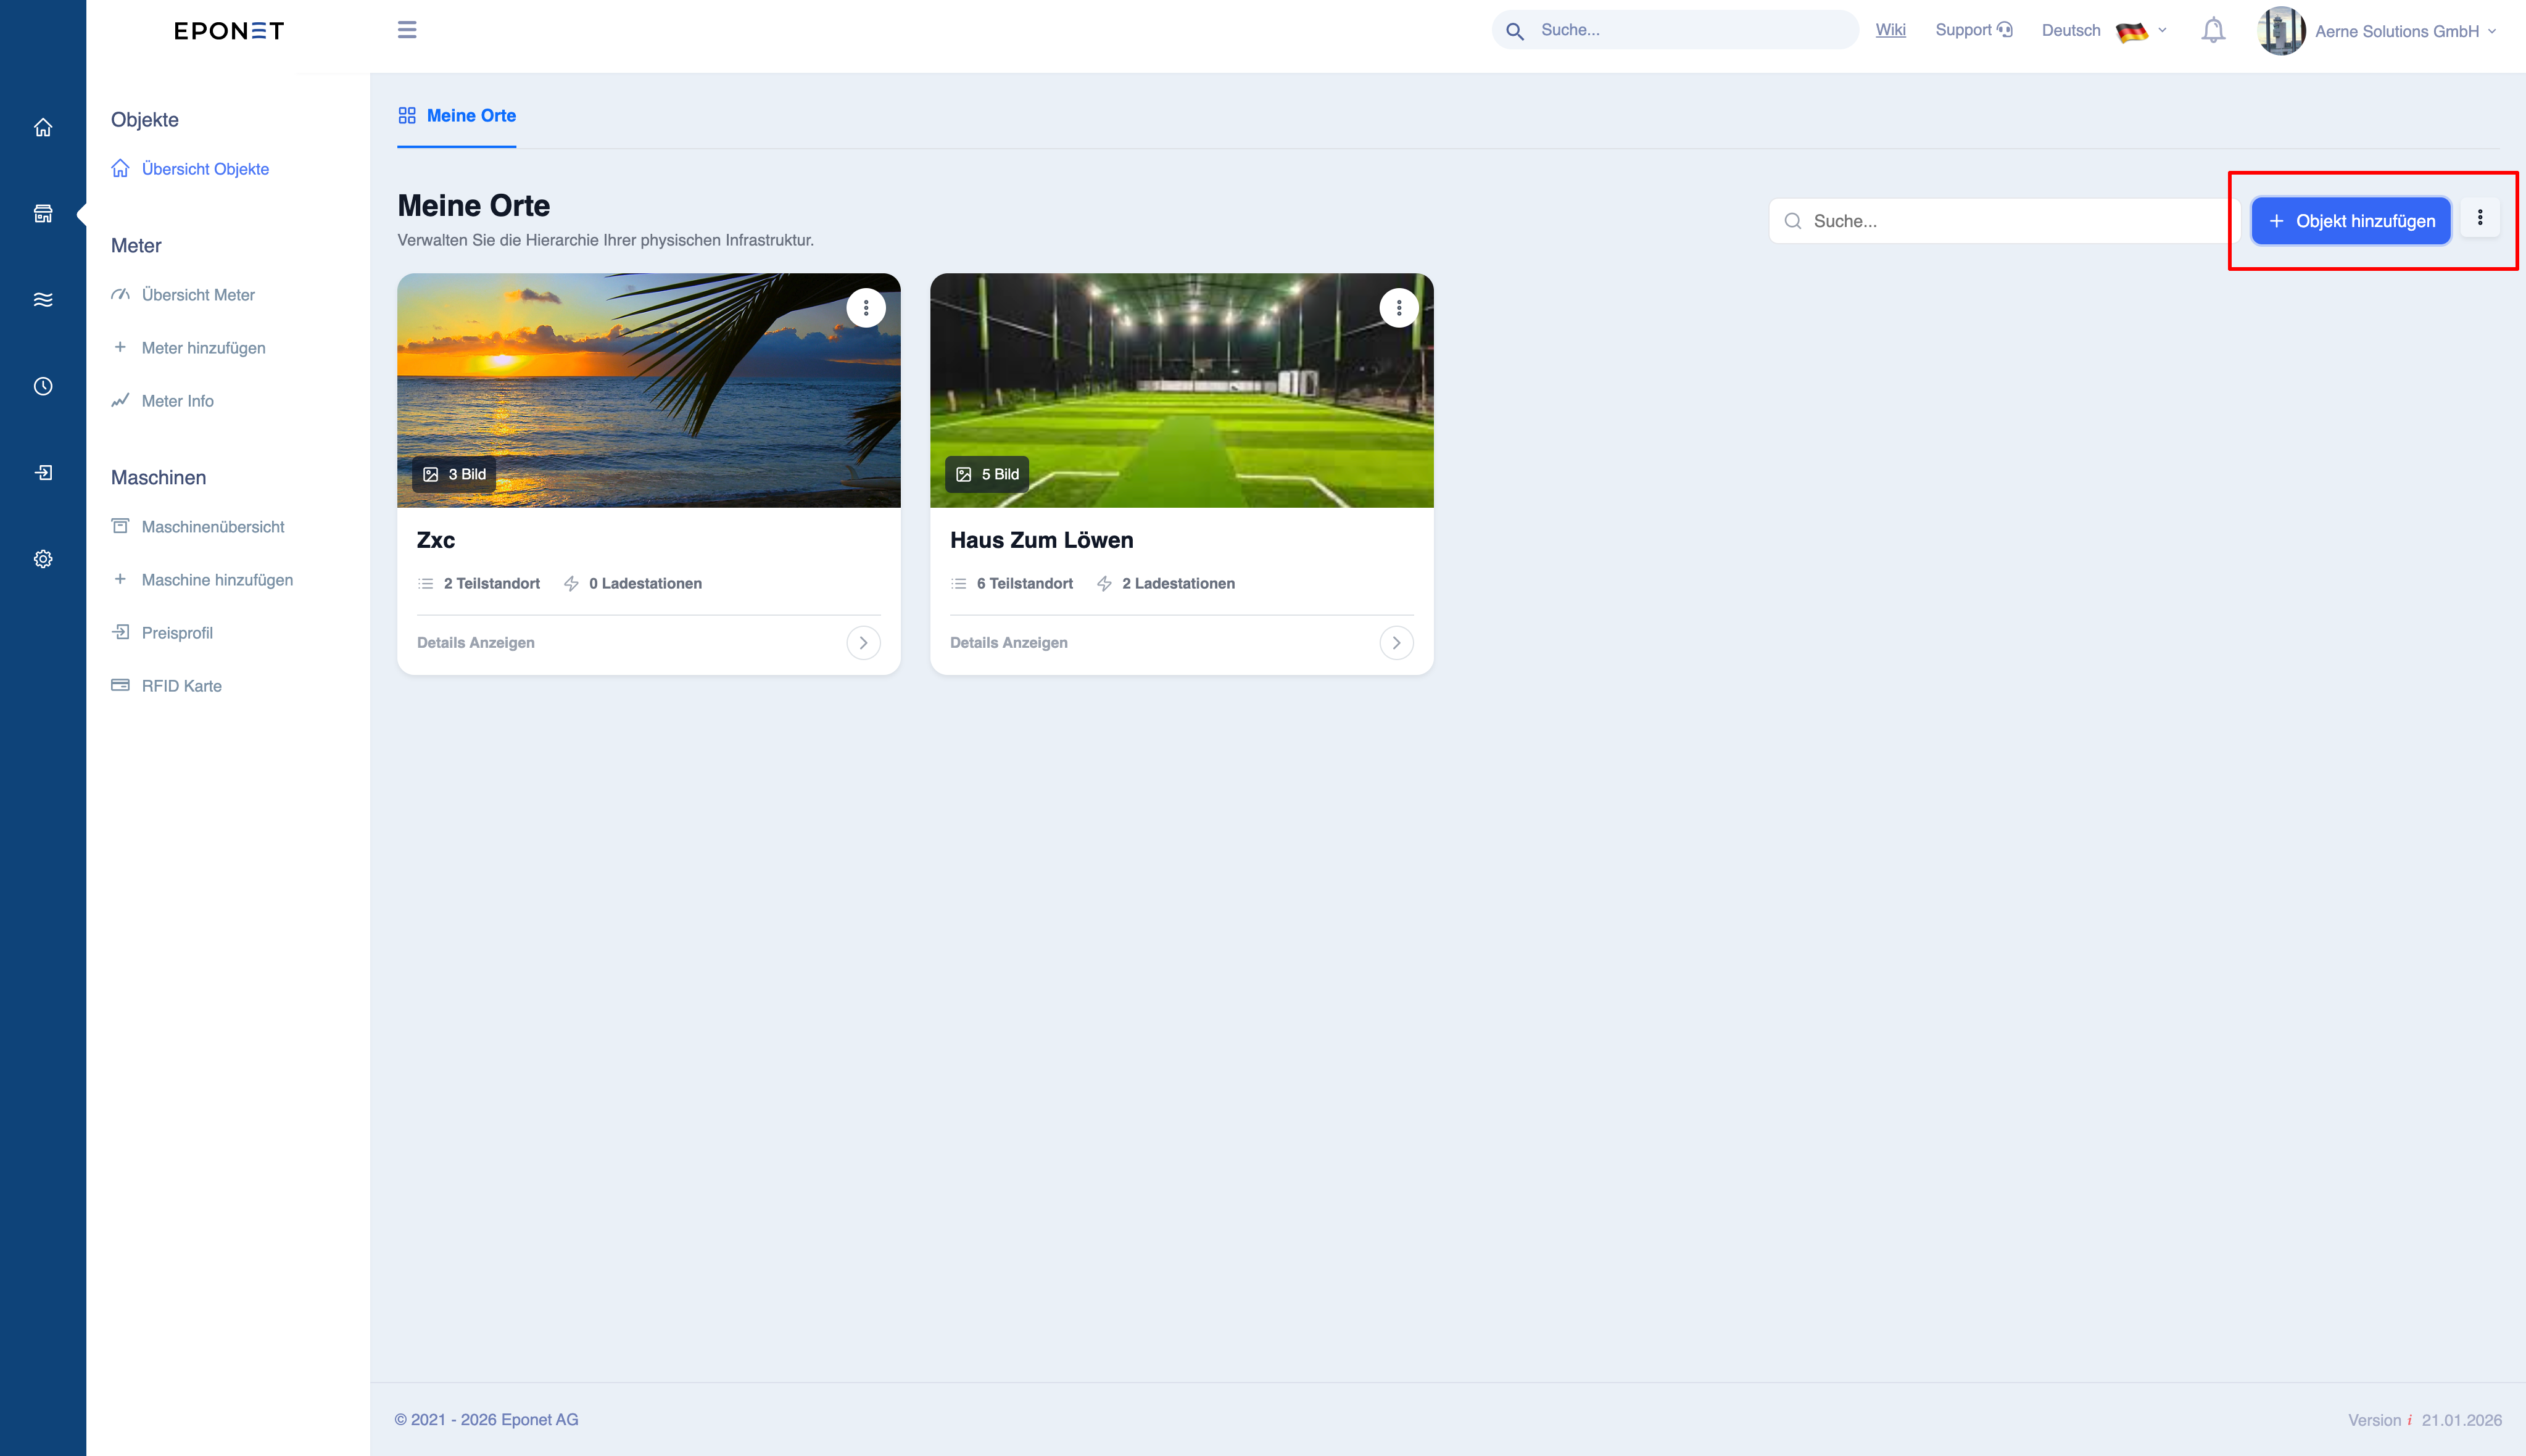
Add a place:
When should a location be created?
- A new location or building is added
- A new charging point is added
- An existing location needs to be organised
Steps for creating a location
- Click on ‘+ Add location’
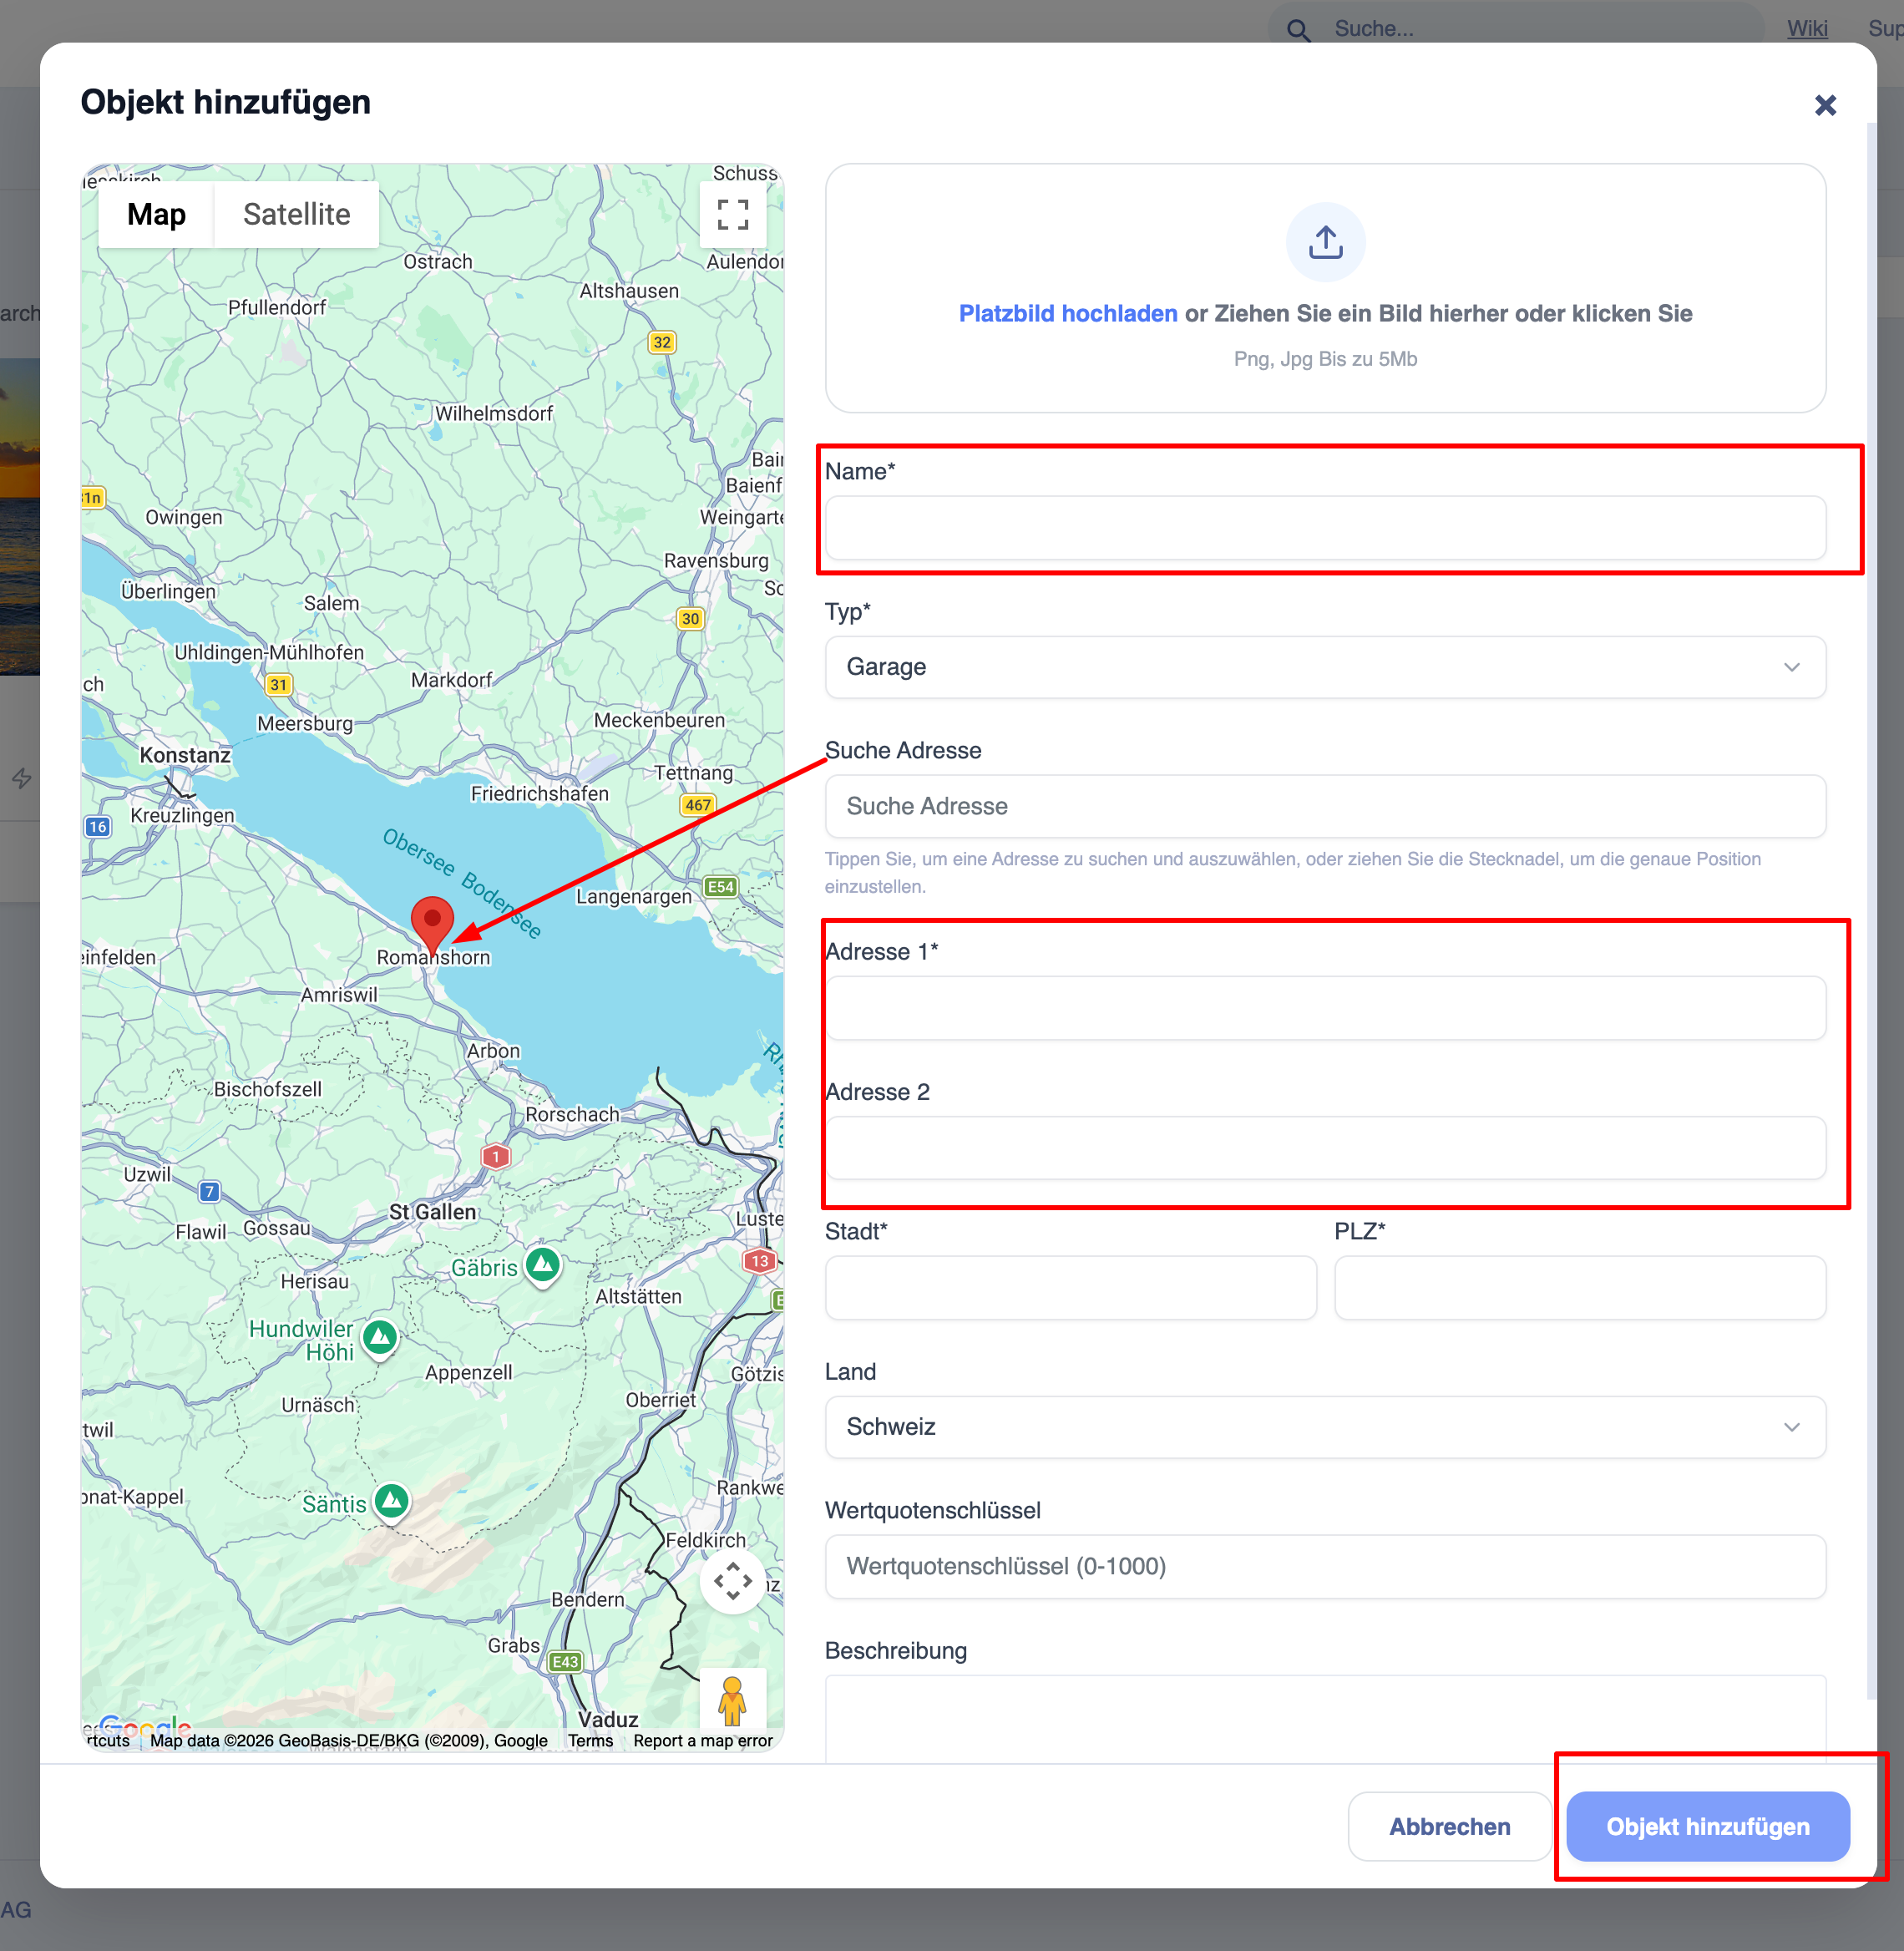
- Enter the required information:
- Name (must be unique and clear)
- Type (e.g. building, garage, etc.)
- Address
- Town
- Postcode
- (optional)
- Upload image
- Select location on the map
- Add description
- Click on ‘Add location’ to save
Incorrect addresses or names can lead to confusion when reporting and mapping.
Best practices
- Use consistent naming conventions (e.g. city – town name)
- Ensure the address is correct
- Keep the naming simple and unambiguous
What happens after creation
- The place is displayed in the list
- You can:
- Add sub-locations
- Assign devices
- Add contacts
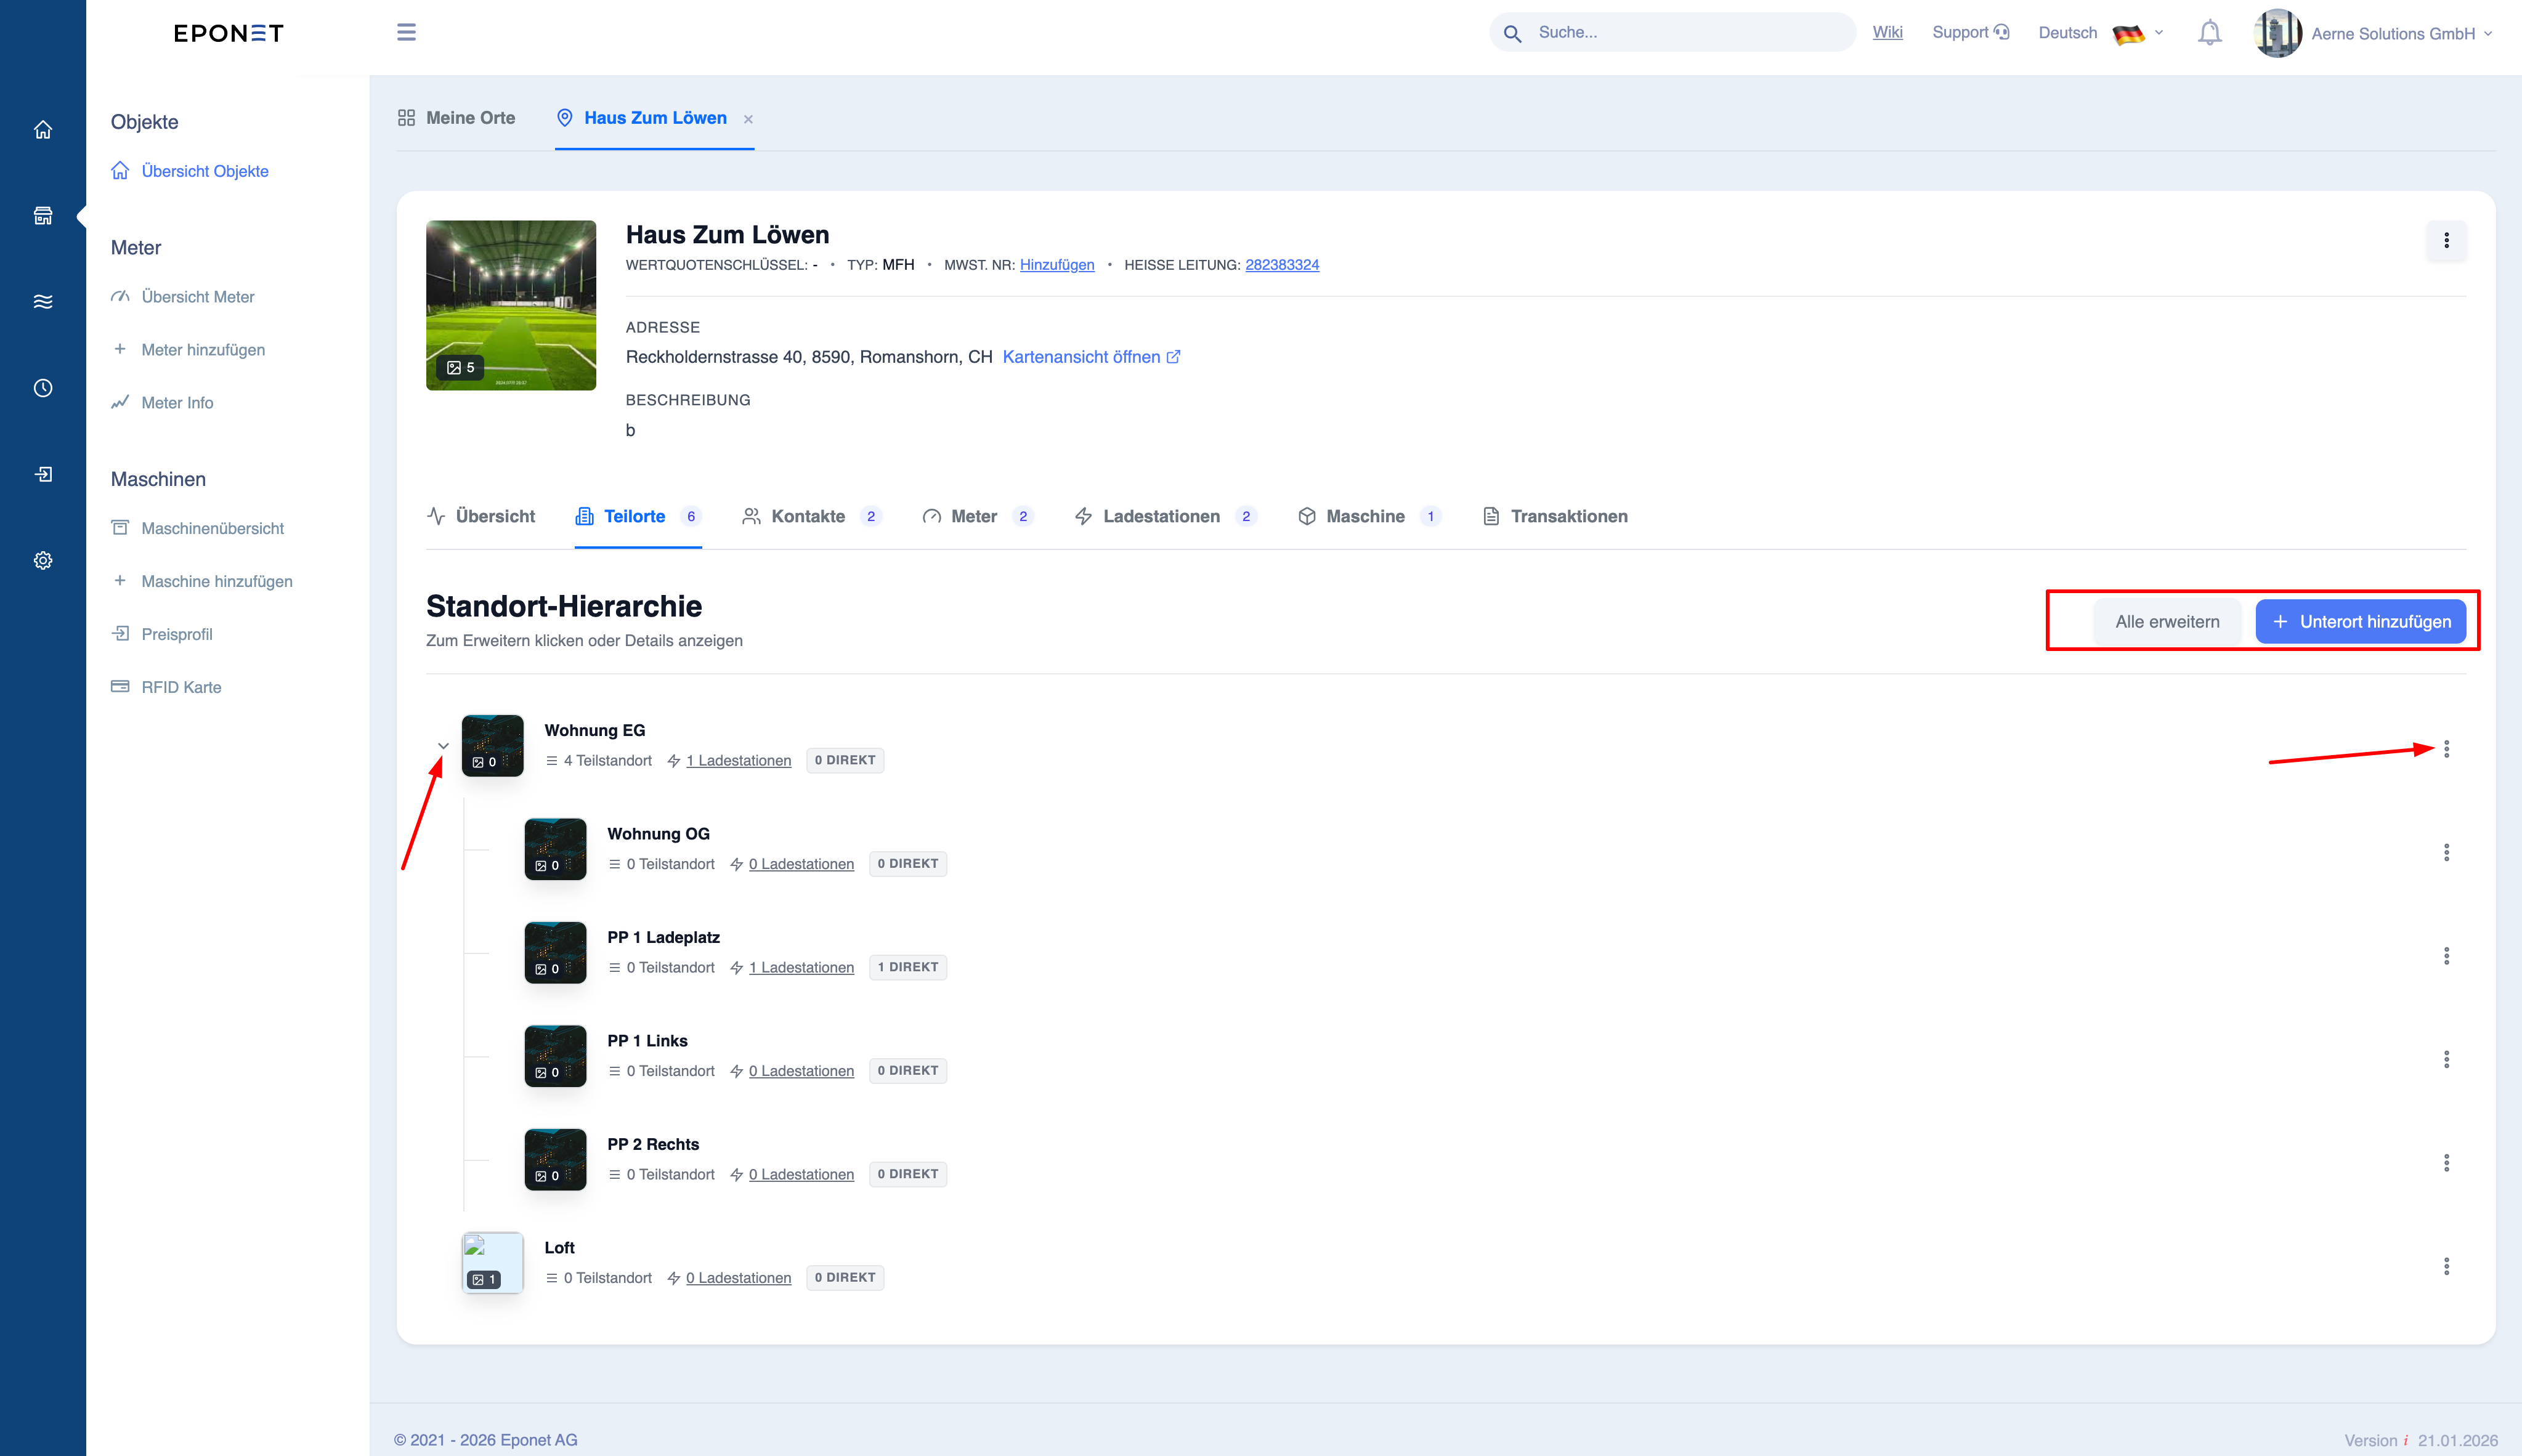
Manage the location hierarchy (sub-locations)
Purpose
Sub-locations allow you to organise locations within a structured hierarchy.
Example structure
- Main location
- Building A
- Floor 1
- Floor 2
- Car park
- Building A
Administration office
- Open location
- Switch to the ‘Sub-locations’ tab
Available actions
- Show hierarchy
- Expand/collapse structure
- Add new sub-location
- Move sub-locations
Why hierarchies are important
- Enables better segmentation of reporting
- Helps with the management of large assets
- Keeps the system organised
A hierarchy enables better segmentation of data and improves the accuracy of reporting.
Important behaviour
- Data from sub-locations is included in the parent location if the toggle function is activated in the location overview
- Devices assigned to sub-locations are rolled up to the parent location
Best practices
- Avoid unnecessarily deep levels
- Keep the structure logical
- Use clear naming conventions