
Add/Remove Charging station, Meter & RFID
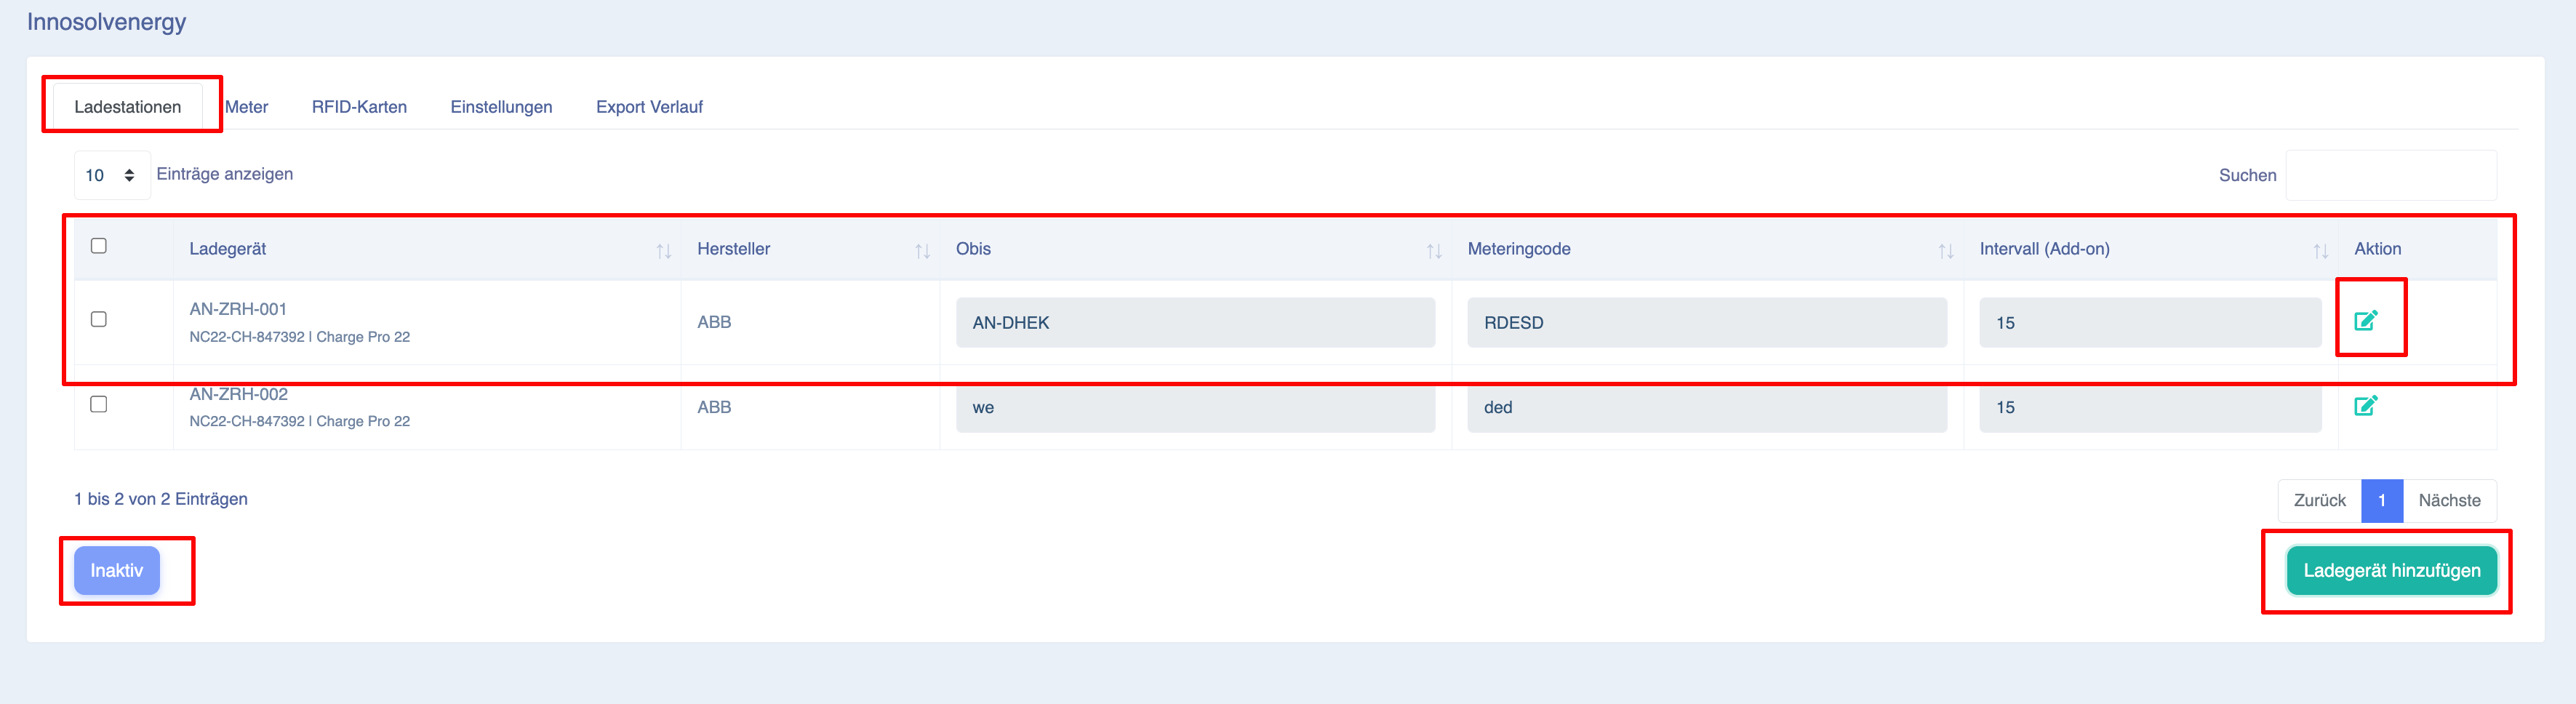
To add a new charging station, navigate to the Chargers tab and click on the Add Charger button.

A pop-up window will display all available charging stations. Select the desired charging station from the list.
Once a station is selected, the OBIS and Metering Code fields will become enabled. These fields are mandatory and must be filled in to proceed.
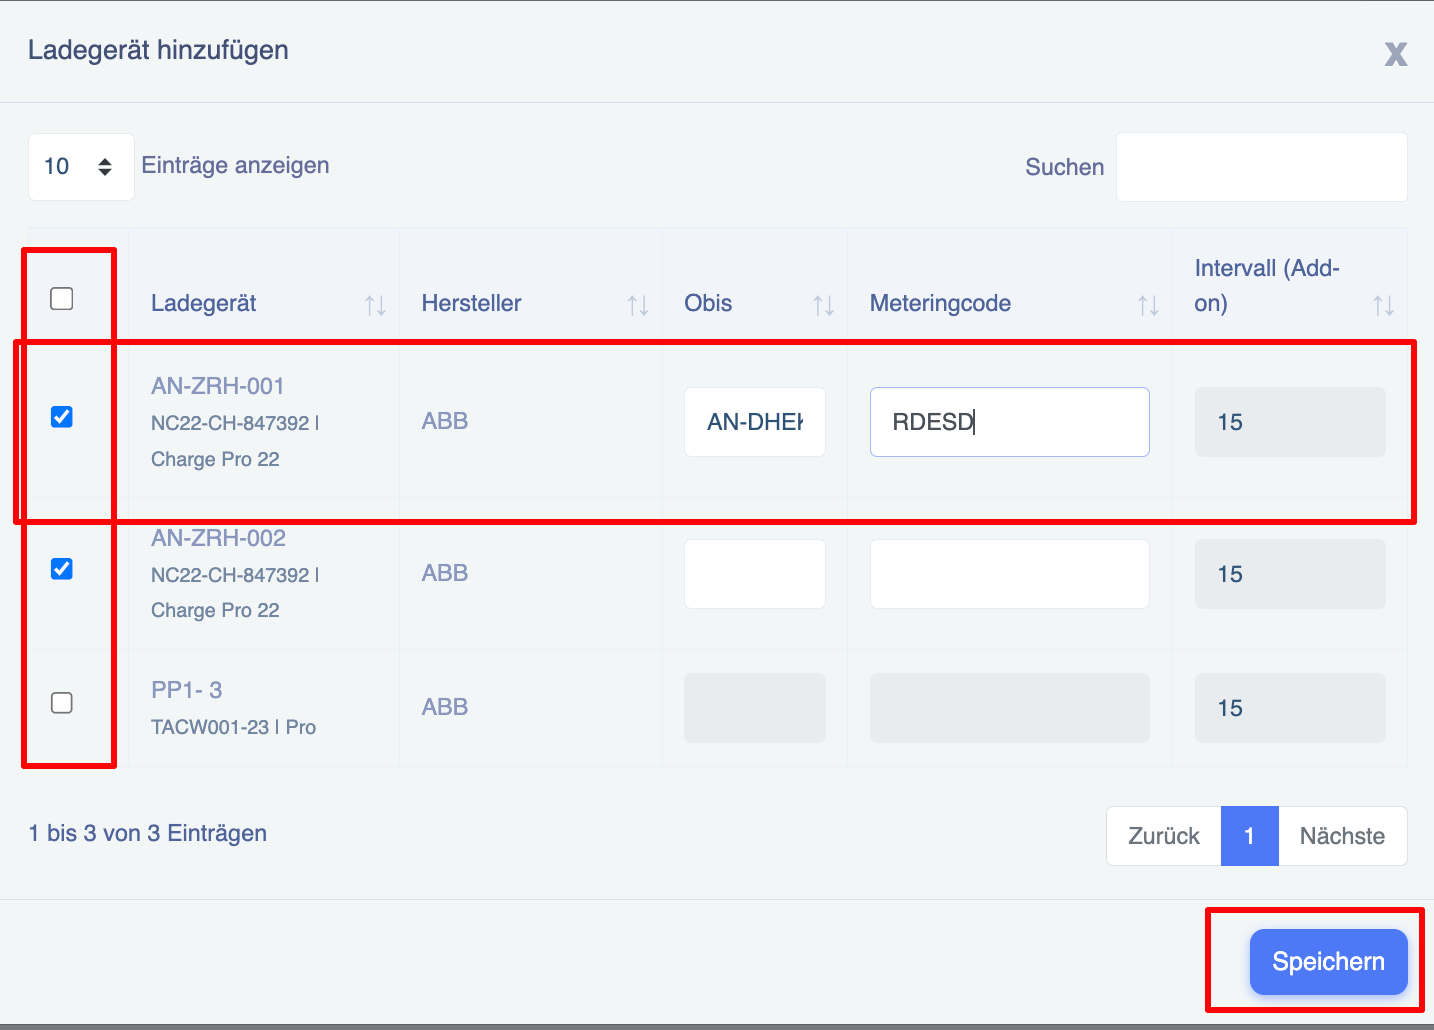
After entering the required details, click on the Save button. The charging station will be added successfully and will appear in the list. You can now generate and export reports for this charging station.
.
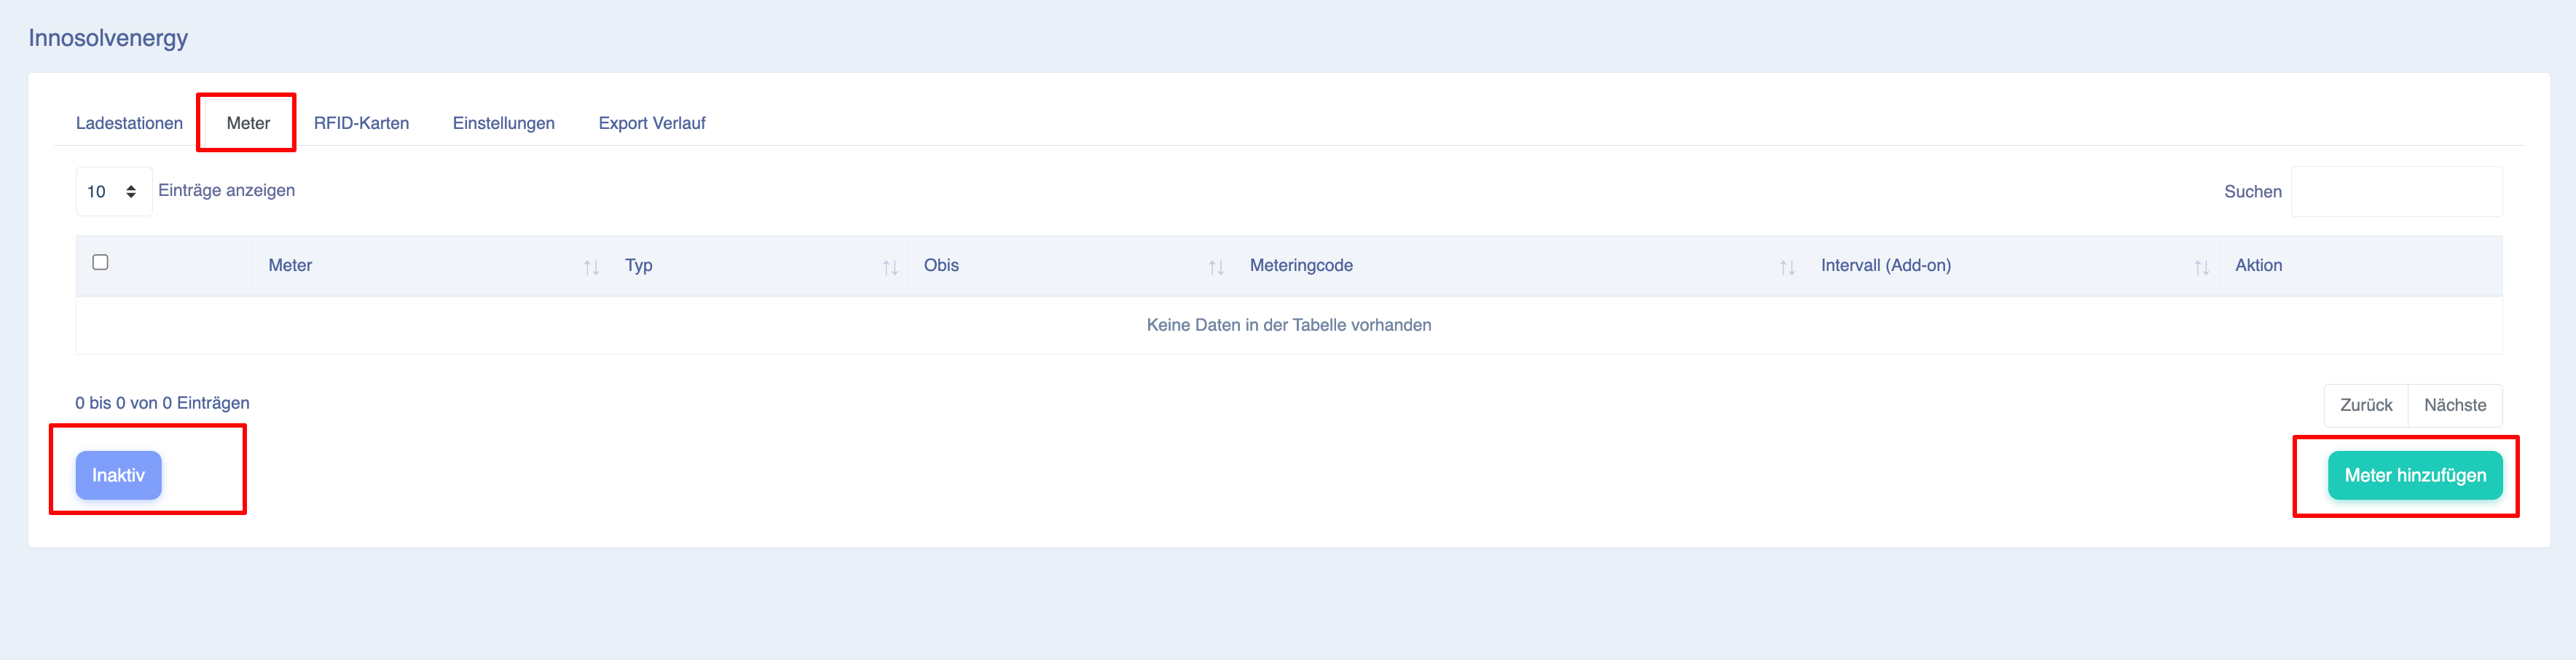
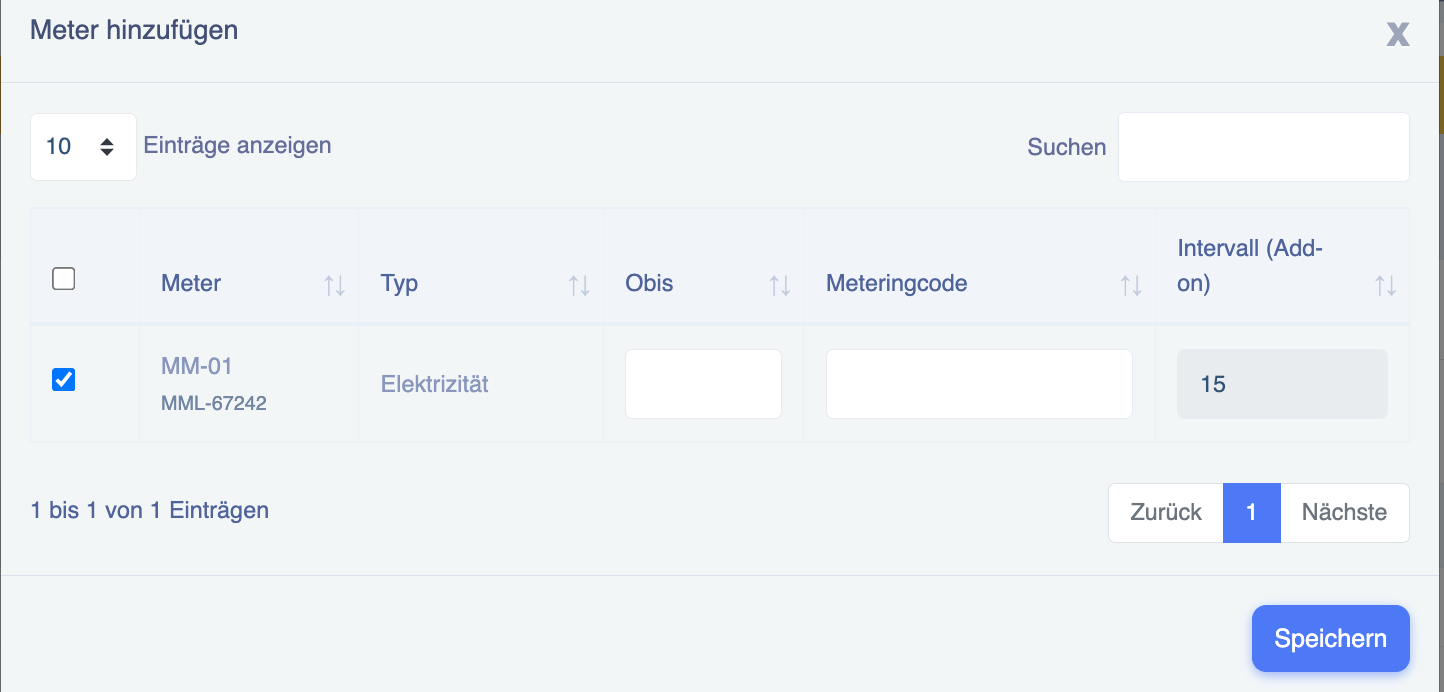
The process for adding a Meter is identical to adding a charging station. Navigate to the Meter section, select the meter, provide the required details, and save the configuration.
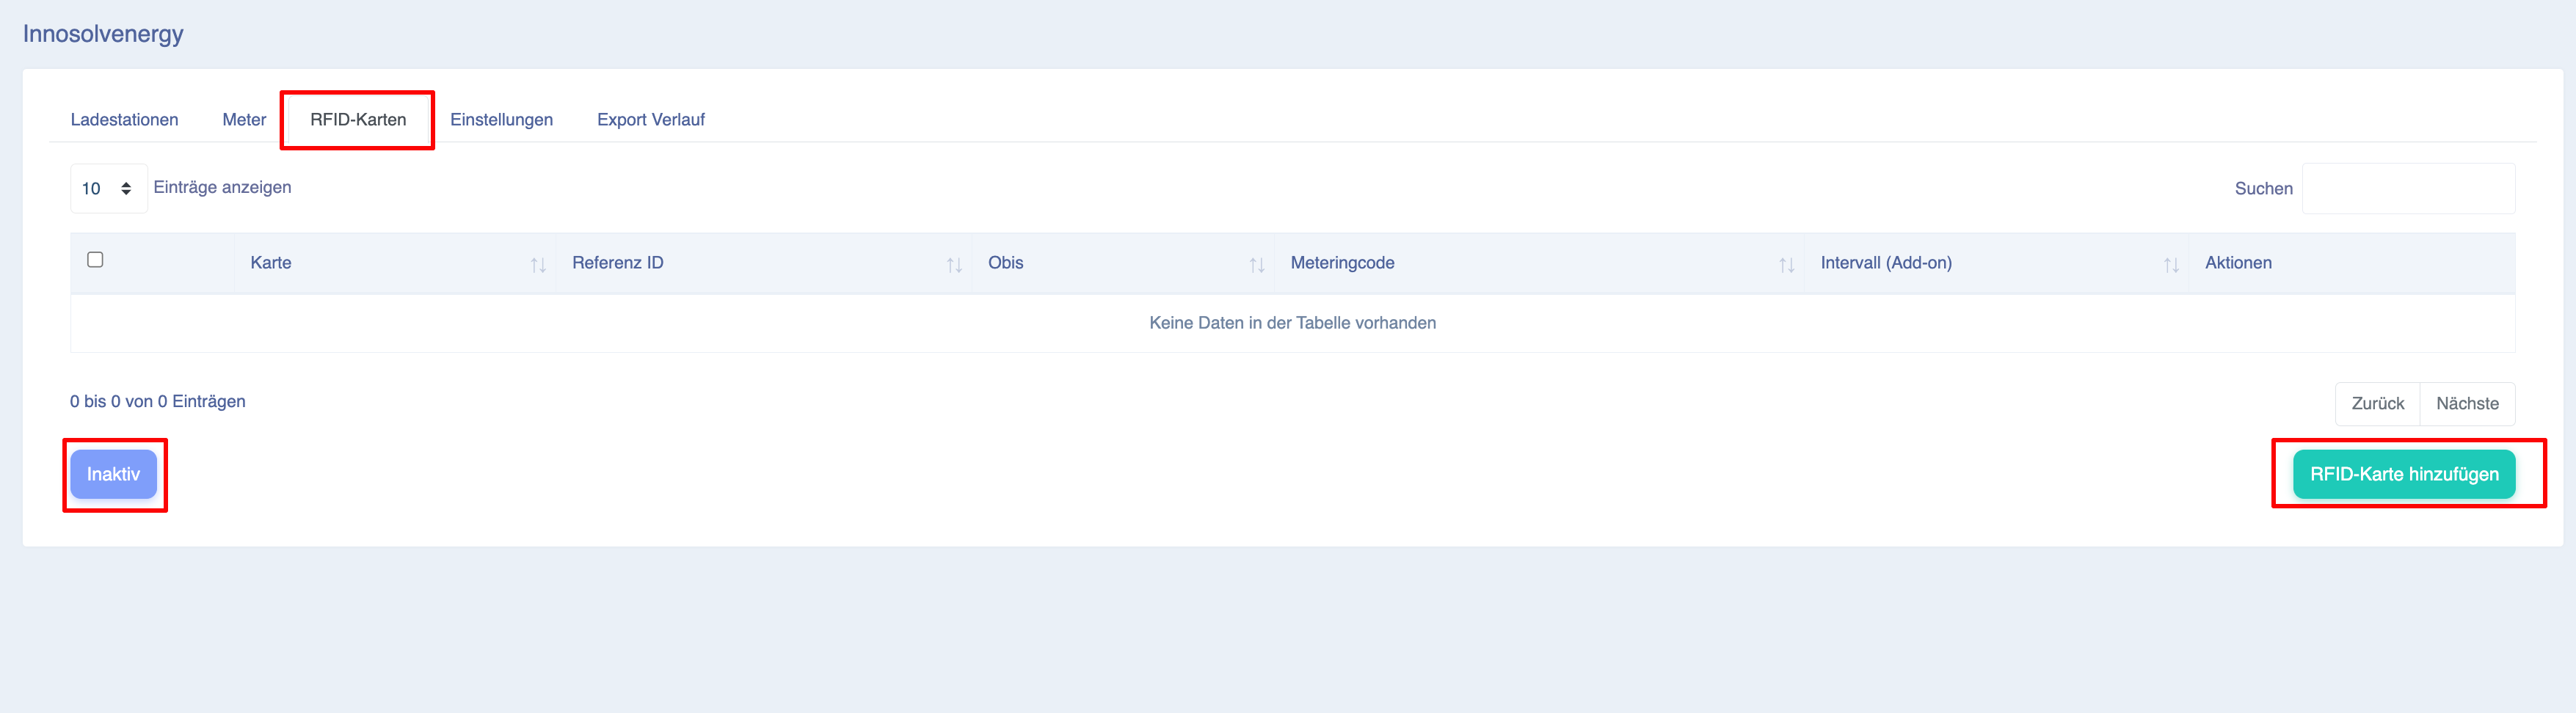
Similarly, to add an RFID card, follow the same process: select the RFID, enter the required information, and save.
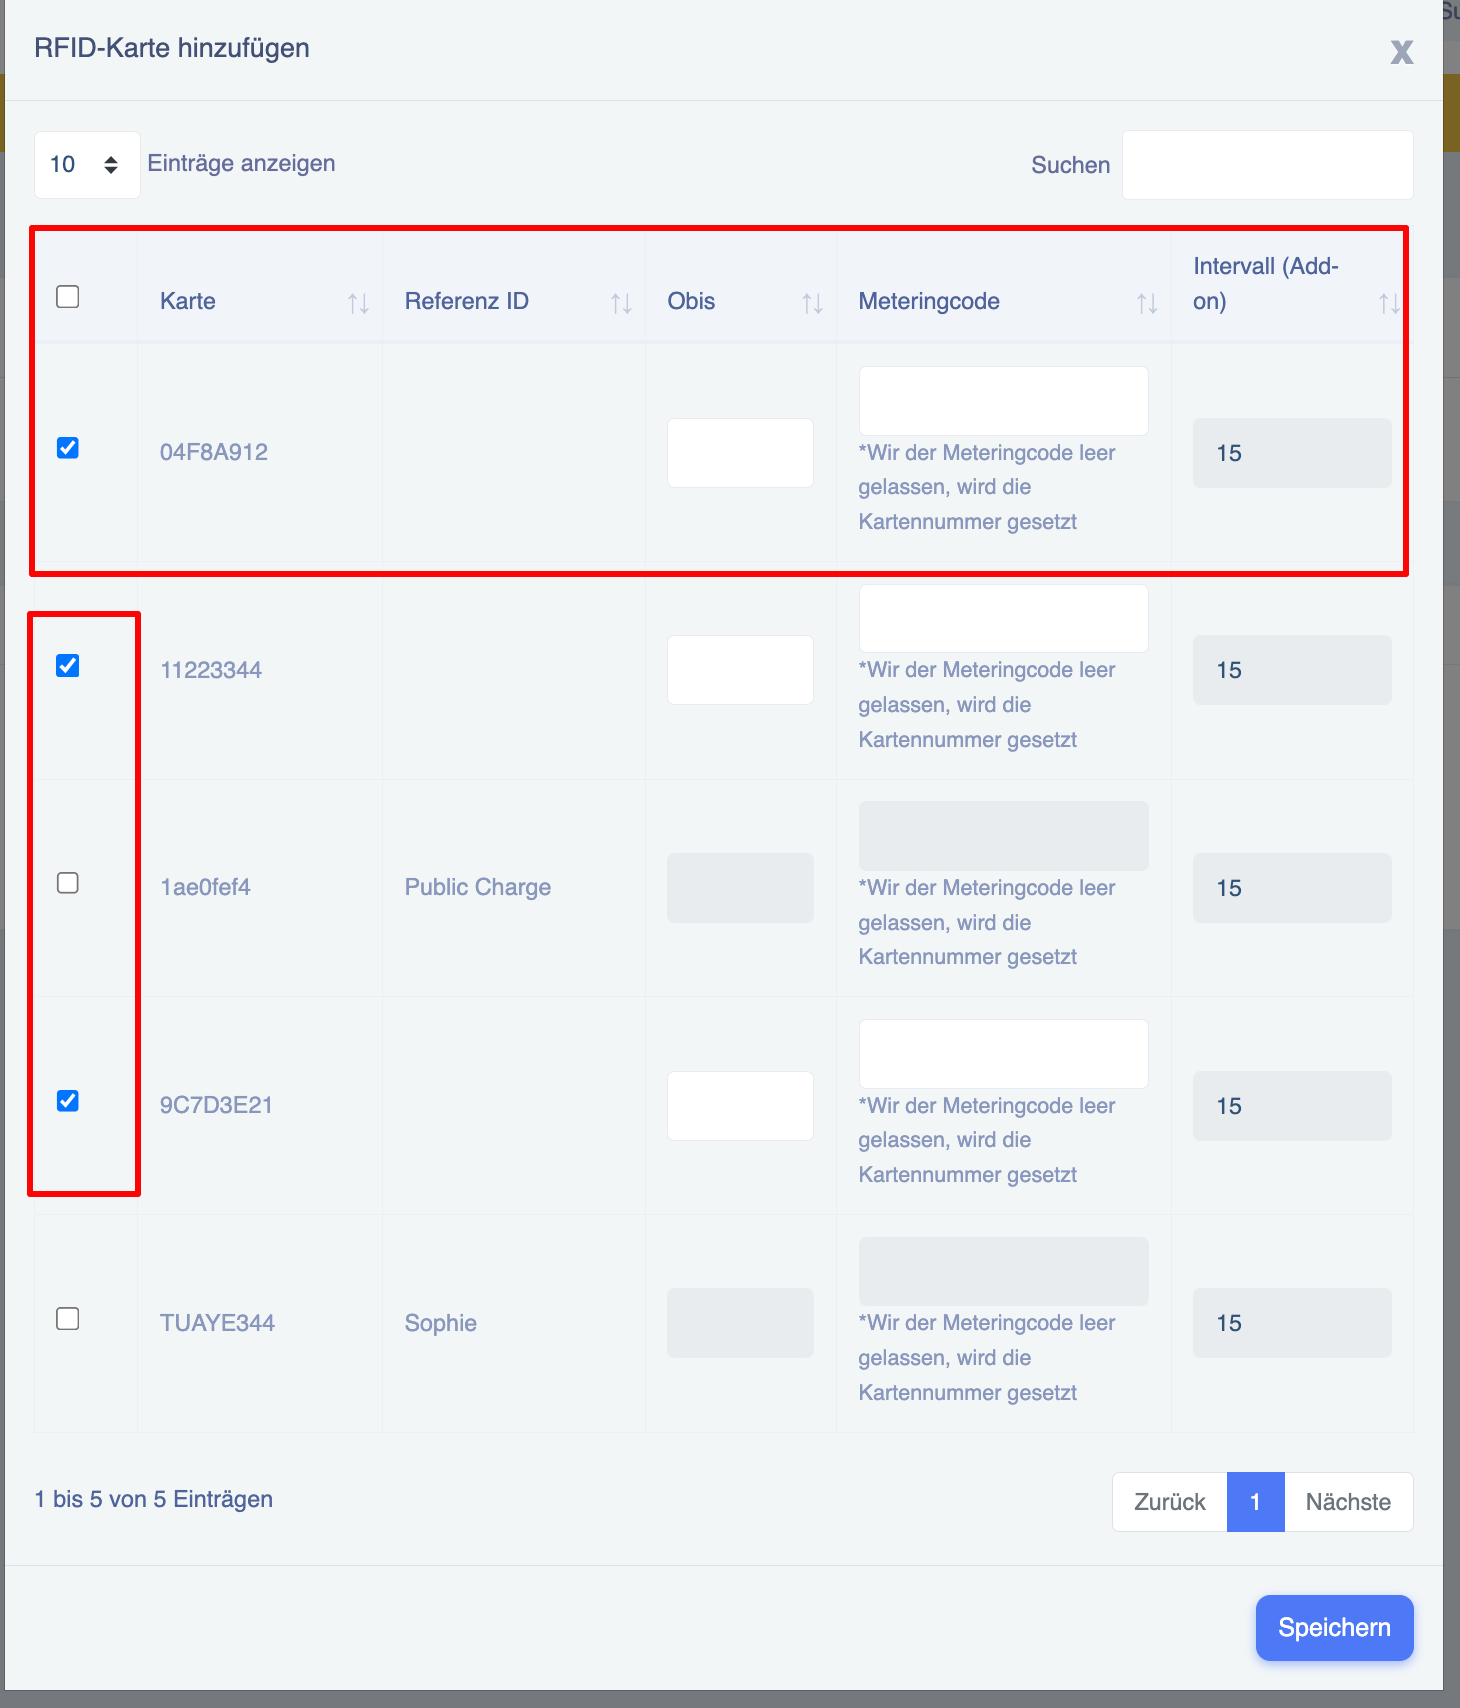
Note: The export interval is default set to 15 minutes for all charging stations, meters, and RFID devices. This interval cannot be modified and is used when generating or exporting CSV reports.